Advertisement
Quick Links
Advertisement

Summary of Contents for NCR 7358-K200
- Page 1 Kit Instructions Credit/Debit Refresh 7358-K200 Issue A...
- Page 2 NCR, therefore, reserves the right to change specifications without prior notice. All features, functions, and operations described herein may not be marketed by NCR in all parts of the world. In some instances, photographs are of equipment prototypes. Therefore, before using this document, consult with your NCR representative or NCR office for information that is applicable and current.
-
Page 3: Revision Record
Revision Record Issue Date Remarks Sep 2021 First Issue... -
Page 5: Kit Contents
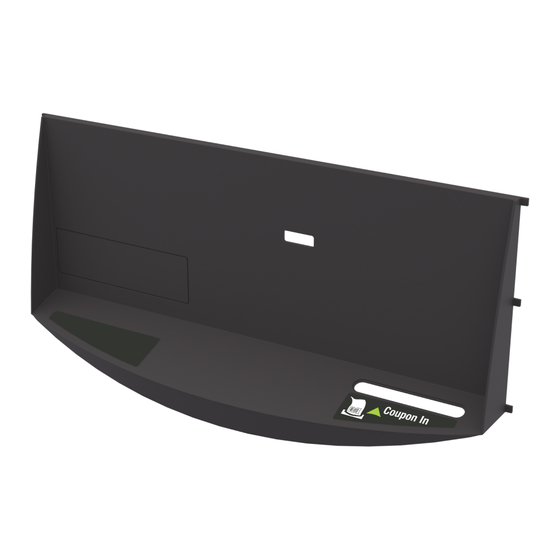
Credit/Debit Refresh This publication provides the steps for converting an NCR FastLane SelfServ™ Checkout (7358) Full Function configuration to a Credit/Debit Only configuration. Kit Contents Part Number Description 497-0531781 7358-K200 Credit/Debit Refresh Kit 497-0468542 Fascia - Credit/Debit 497-0458817 Fascia -Insert Blank - Credit/Debit 006-8613802 Screw - Plastite - Phillips Pan Hd - #4X0.187 Lg. -
Page 6: Required Tools
Credit/Debit Refresh Required Tools The following tools are required for removing and installing the 7358-K200 Credit/Debit Refresh. • #2 screwdriver • 9 mm socket • Snips • 2.5 mm Allen wrench Note: Use a magnetized screwdriver to easily handle the screws. -
Page 7: Installation Procedures
Credit/Debit Refresh Installation Procedures To install the the 7358-K200 Credit/Debit Refresh kit, follow these steps: 1. Open the Core Door. For more information, refer to Opening the Core Door page 10. 2. Disconnect and remove the GSR50 Note Recycler (Fujitsu) from the SelfServ Checkout unit. - Page 8 Credit/Debit Refresh 4. Remove ten (10) 8-32 pan head screws to uninstall the plastic fascia from the Core Door, as shown in the image below. 5. Remove the Proximity sensor. For more information, refer to Removing the Proximity Sensor assembly on page 16.
- Page 9 Credit/Debit Refresh b. Remove three (3) screws from the back of the Core Door, as shown in the image below. 7. Remove the following components from the Recycling Fascia. • Coin Entry LED • Coin Exit LED • Coupon Sensor LED •...
- Page 10 Credit/Debit Refresh 8. Do the following: • Install the Credit/Debit Blanking Plate to the Credit/Debit Fascia and secure using four (4) plastite screws. • Install the Proximity Sensor Clear Mount to the Credit/Debit Fascia and secure using two (2) screws. •...
- Page 11 Credit/Debit Refresh • Install the Coupon Slot to the Credit/Debit Fascia, as shown in the image below. 9. Install the Credit/Debit Fascia on the Core Door using three (3) screws.
- Page 12 Credit/Debit Refresh 10. Install the plastic fascia on the Core Door using ten (10) 8-32 pan head screws. 11. Install the Bumper to the plastic fascia by doing the following: a. Insert three clear zinc bumper spacers into each hole on the plastic door fascia. b.
- Page 13 Credit/Debit Refresh 12. Attach labels on the Credit/Debit Fascia, as shown in the image below.
- Page 14 Credit/Debit Refresh Opening the Core Door To open the Core Door, follow these steps: 1. Use the finger access on the small door to access the door locks, as shown below: 2. In the middle keyhole, insert a key.
- Page 15 Credit/Debit Refresh 3. In the Door Latch Handle keyhole, insert a key and then turn it counterclockwise. 4. Turn the Door Latch Handle upward and then pull to open the Core Door.
- Page 16 Credit/Debit Refresh Disconnecting and removing the GSR50 Note Recycler (Fujitsu) To disconnect and remove the GSR50 Note Recycler (Fujitsu) from the SelfServ Checkout unit, follow these steps: Caution: Ensure that the GSR50 Note Recycler (Fujitsu) is empty to reduce the weight before it is removed from the drawer slides.
- Page 17 Credit/Debit Refresh 2. From the back of the GSR50 Note Recycler (Fujitsu), do the following: a. Remove the cables from a zip tie or saddle clamp. b. Disconnect the power and data cables from the GSR50 Note Recycler (Fujitsu). 3. Remove screws (2 on each side) that secure the GSR50 Note Recycler (Fujitsu) to the drawer slides.
- Page 18 Credit/Debit Refresh Caution: Ensure that the GSR50 Note Recycler (Fujitsu) is empty to reduce the weight before it is removed from the drawer slides. 5. Remove the power and data cables from the cable guide. 6. Disconnect the cable guide from the drawer slide using a 2.5 mm Allen wrench, as shown in the image below.
- Page 19 Credit/Debit Refresh 7. Disconnect the cable guide from the back of the Core Cabinet using a 9 mm socket. 8. Do the following: a. Place the GSR50 Note Recycler (Fujitsu) inside the Core Cabinet Door. b. Place the cable linkage and cables on top of the GSR50 Note Recycler (Fujitsu), as shown in the image below.
- Page 20 Credit/Debit Refresh Removing the Proximity Sensor assembly To remove the Proximity Sensor assembly from the Recycling Fascia, follow these steps: 1. Remove two screws to detach the Proximity Sensor board assembly from the clear mount. 2. Disconnect the cable from the Proximity Sensor assembly.
- Page 21 Credit/Debit Refresh 3. Remove two screws to detach the Proximity Sensor clear mount from the Recycling Fascia.


Need help?
Do you have a question about the 7358-K200 and is the answer not in the manual?
Questions and answers