Table of Contents
Advertisement
Quick Links
INSTALLATION MANUAL
Energy Storage
System
Please read this manual carefully before installing
your
set,
and retain it for future reference.
LGE ESS Home 6 (RA600K11A00 / RA600K07A00)
LGE ESS Home 4.6 (RA460K11A00 / RA460K07A00)
LGE ESS Home 3.68 (RA368K11A00 / RA368K07A00)
https://www.lg.com/global/business/ess/business-resources/download
* M F L 7 2 0 8 6 7 0 1 *
R e v . 0 0 _ 0 1 0 2 2 4
Copyright ©
2023 - 2024
LG Electronics Inc. All Rights Reserved.
Advertisement
Table of Contents

Related Manuals for LG LGE ESS Home 6


Summary of Contents for LG LGE ESS Home 6
- Page 1 Please read this manual carefully before installing your set, and retain it for future reference. LGE ESS Home 6 (RA600K11A00 / RA600K07A00) LGE ESS Home 4.6 (RA460K11A00 / RA460K07A00) LGE ESS Home 3.68 (RA368K11A00 / RA368K07A00) https://www.lg.com/global/business/ess/business-resources/download * M F L 7 2 0 8 6 7 0 1 * R e v .
-
Page 2: Getting Started
Getting Started Important Safety Instructions IMPORTANT: THIS PRODUCT SHOULD NOT BE USED FOR ANY PURPOSE OTHER THAN THE PURPOSE DESCRIBED IN THIS INSTALLATION MANUAL. Indicates a hazardous situation that will result in DANGER death or serious injury if the instructions are not followed. - Page 3 Getting Started y Keep the unit away from moisture or liquid. Do not touch or use the product if liquids have been spilled on it. y This product has been certified IP56 and can be installed indoors as well as outdoors. However, if installed outdoors, do not allow the product to be exposed to direct sunlight or water sources, as they may cause: −...
- Page 4 LG ESS system is not intended for use as a primary or backup power source for life-support systems, other medical equipment, or any other use where product failure could lead to injury, loss of life, or catastrophic property damage.
- Page 5 Getting Started Indicates a situation where damage or injury could CAUTION occur. If it is not avoided, minor injury and/or damage to property may result. y This product is intended for residential use only and should not be used for commercial or industrial purposes.
- Page 6 Getting Started y Connect the DC+ and DC- cables to the correct DC+ and DC- terminals on the product. y Danger of damaging the PCS by overload. Only connect the proper wire to the DC terminal block. Refer to the Connection Diagram for details. y Do not step on the product or the product package.
- Page 7 For stable operation and periodic system updates of the product, LG Electronics strongly recommends that the user register with EnerVu and stay connected. y LG ESS is under continuous development and its firmware is updated at regular intervals. To ensure that the product works properly, LG ESS must be updated with the latest firmware.
-
Page 8: Thinq Registration Guide
Ensure there is a reliable internet source around you to connect "LGE ESS". Download the ThinQ mobile app on your iOS/Android device to configure the system. thinq LG ThinQ LG ThinQ Create an account to log in to the ThinQ App. With this app, you can monitor the status of installed devices. - Page 9 Getting Started Connecting your LG ESS to the LG ThinQ app In the ThinQ app > Click “Add a Device” > “Scan QR” or "Select Device" > “ESS Home” and then agree to “Terms & Conditions” Scan QR ESS Home...
- Page 10 Getting Started To enable the Soft AP, please press and hold for more than 3 seconds. POWER START (6s) SOFT AP (3s) Keep your mobile phone close to the ESS Home (H/W) so that they connect. Once connected , open the ESS Home screen on the ThinQ app for energy flow, energy monitoring, and settings.
-
Page 11: Table Of Contents
Table of Contents Table of Contents Getting Started Important Safety Instructions ............. . . 2 ThinQ Registration Guide. - Page 12 Installing the 'LG EnerVu Plus' App . . . . . . . . . . . . . . . . .
- Page 13 Table of Contents Appendix Maintenance ................137 Cleaning the Product .
-
Page 14: Product Features
DC-Coupled ESS LG ESS is a product designed to integrate a grid-connected inverter and battery in one enclosure. This product is a DC-Coupled type and is directly connected to the household power grid. - Page 15 Getting Started Symbols used on Labels Label Symbol Description Photovoltaic Power Input Single phase two-wire alternating current conductor The product is protected from dust allowing only limited IP56 ingress, and is able to withstand high-pressure water jets from all directions. This product should not be disposed of with other household waste.
- Page 16 Getting Started Symbols used on Labels Symbol Description Caution: risk of electric shock No open flame, open ignition source, or smoking Wear protective glasses when working on the battery unit. Install this product out of reach of children. Observe precautions when handling corrosive substances. Observe precautions when handling explosive materials.
- Page 17 Getting Started Abbreviations in this Manual Abbreviation Designation Explanation Energy Storage System Inverter system that stores energy into a battery and uses HOME 6 Battery integrated PCS (All-In-One unit) HOME 4.6 HOME 3.68 Power Conditioning A device intended to convert DC electricity generated from System the PV system to AC electricity and feed it to household appliances.
- Page 18 Getting Started Additional Components for Installation Applied to Additional Components Wall mounting y Stainless steel screws with a diameter of 6 mm - 8mm y Anchors PV connections y Lead wires with a cross-sectional area 4 mm - 6 mm Grid connections y Lead wires with a cross-sectional area 4 mm or thicker...
-
Page 19: Wiring Reference
Getting Started Wiring Reference 9 8 7 6 5 4 3 2 1 Function No & Terminal Recommended Wire Color Wire Gauge 1 RS485_A Orange-White (CAT5 UTP or better) or signal cable 24 – 16 AWG Meter 2 RS485_B Orange (CAT5 UTP or better) or signal cable 24 –... - Page 20 Getting Started Function No & Terminal Recommended Wire Color Wire Gauge 3 ATS_K3 Green-White (CAT5 UTP or better) 24 – 22 AWG 4 ATS_K14 Blue (CAT5 UTP or better) 24 – 22 AWG 6 ATS_EN Green (CAT5 UTP or better) 24 –...
- Page 21 Getting Started Required Tools Insulated gloves (Class 0 :1,000 AC Safety glasses Protective footwear /1500 DC-Red recommended) Screw driver 200mm magnet bit Torque wrench with Phillips (5 mm) holder Drill and drill bit hex socket M6 (For battery module Flat head M5, M8 assembly) (6, 5, 4, 2 mm)
-
Page 22: Unpacking
Getting Started Unpacking Contents of this Product Product (1EA) Wall bracket (2EA) Accessory Components of this Product Energy meter / AWHP plug (2EA) Communication connector (1EA) Quick Installation Guide & Mount Hole Guide Power cable harness (1EA) Communication cable harness M6 nut (10EA) (1EA) Cable gland single hole (2EA) -
Page 23: Unpacking
Getting Started Unpacking WARNING y When working on this product, at least two people are needed for safe installation and moving. y This product is heavy. Wear appropriate personal protective equipment (such as gloves and protective footwear) when handling the unit. Only a sufficient number of trained movers should lift the product. -
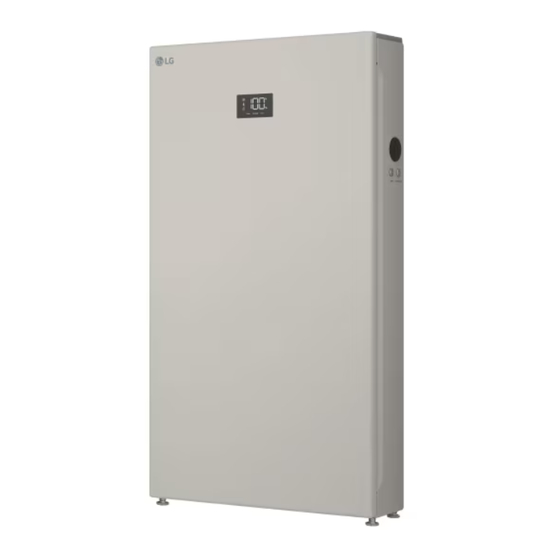
Page 24: Name Of Each Part
Getting Started Name of Each Part Front and Rear POWER START (6s) SOFT AP (3s) <Front> <Rear> LED Indicators Front Cover Cable Gland Hole Height Leveling Adjustable Leg DC Switch Ventilation Openings SOFT AP (3s) Button Bracket Connected Parts (Momentary type, press and hold for 3 seconds) START (6s) Button WLAN Antenna Cover (Momentary type, press and hold for 6 seconds) -
Page 25: Led Indicators
Getting Started LED Indicators Status and Indications Red Blink Green + Error Code (PV) Generating Not Generating PMS Fault Red Blink Green + Error Code (Grid) Normal Abnormal PCS Fault Red Blink Green Green Blink + Error Code (Gateway) Connected Not Connected Battery Fault Soft AP on... -
Page 26: Installation
Installation Plan the Installation 1. Select Installation Location y Select an appropriate installation location for the safe use of the product. y For guidance on the selection of a proper environment, see “Installation location. ” y This product must be installed on the floor and placed against a wall for support due to its heavy weight. y Choose a leveled floor and wall capable of supporting the full weight of the product. -
Page 27: Installation Location
Installation Installation Location Before installing the product, select an appropriate installation location for the safe use of the product. The product has been certified IP56 and can be installed outdoors as well as indoors. However, if installed outdoors, do not allow the product to be exposed to water sources or continuously exposed to sunlight or other conditions that result in a consistent operating temperature below -10 ˚C or exceeding 45 ˚C. - Page 28 Installation y This product is designed to be installed on the floor and placed against a wall for support. Do not install this product laying on its side. y This product must be installed on a leveled floor and the surface must be able to support the weight of the product.
- Page 29 Installation y Do not install this product in places or environments subject to the heavy build-up of dust. y Do not block the air ventilation openings needed for cooling. y When cleaning the air duct, shut off all of the systems. y This product generates some noise at times and should not be installed close to living or sleeping areas.
-
Page 30: Minimum Clearance
Installation Minimum Clearance This product must be installed with minimum clearance on the left, right, top, bottom and front of the product as shown in the figure. Make sure to keep at least a 305 mm distance between each product and between the product and other devices. -
Page 31: Floor Standing Wall Support
Installation Floor Standing Wall Support The product must be installed on the floor and placed against a wall for support due to its heavy weight. The proper conditions described in “Installation Location” must be considered. Be sure to follow the instructions exactly. - Page 32 Installation INFO y The following images are for reference. For safe installation, the installers must assess whether additional fixing is required. Place the wall bracket on a wall which meets every installation condition and clearance requirement. Indicate the positions to drill using a pencil or other writing utensil, drilling holes in the indicated positions.
- Page 33 Installation WARNING y The unit must be installed on the floor due to its the heavy weight. Wall support is only for supporting purposes. y If installation is difficult due to a stem wall, reinforce the wall or floor to ensure proper installation. y Be sure the floor is hard enough to support the weight of product.
-
Page 34: Installing Components
Installation Installing Components Remove the screws on the right side and open the front cover of the product (Hex socket: M8). ×5 Before starting the wiring, make sure the circuit breaker and the DC Switch is OFF. - Page 35 Installation Find the product label on the right side of the product and mark the checkbox of the applicable items using an oil-based autograph pen (black). CAUTION y Use a magnetic wrench for nut removal. y Be careful to avoid injury when disassembling and assembling the battery packs. The battery packs are very heavy.
- Page 36 Installation Stack the remaining battery modules inside the enclosure and fix them with the supplied M6 nuts, referring to previous step. Each battery module need 4 M6 nuts. Nut assembling positions are indicated in the figure. The total number of battery modules may differ depending on your model. Remove the protective covers on the power connector of the battery modules.
- Page 37 Installation WARNING y When attaching the battery power cable and the battery communication cable, connect the cables until you hear a “click” and make sure that the connectors do not detech easily when you pull on them lightly. y When attaching the battery power cable, make sure the long black cable is on the right side and not crossing over.
- Page 38 Installation WARNING y Before making a connection on this product, make sure that the battery circuit breaker is OFF. If the circuit breaker is ON, death or serious injury may occur due to electric shock. y High voltage is energized through the internal battery module and wiring. Special care must be taken when working on all wire connections.
-
Page 39: Connections
Installation Connections Connection Overview WARNING y When the photovoltaic array is exposed to light, it supplies a DC voltage to the product. y Before starting the electrical cable connections or open the door, turn off the AC circuit breaker, PV switch, and DC circuit breaker of the battery. (In case of reinstallation, turn them off and wait at least 10-minutes for the complete discharge within this product.) y Electrical shock hazard. -
Page 40: Connection Diagram
Installation CAUTION y The electrical installation of this product must only be performed by electricians or technicians qualified to install this product. y When removing the cover, make sure not to damage the connection components. y After connecting the normal and backup load to the corresponding ATS terminals, check if electricity is supplied properly and whether the grid status is live or out. -
Page 41: Grid Connections
Installation Grid Connections To use or sell the generated energy through a grid connection, you should connect this product to a grid. This product converts DC electricity generated from the PV array to AC electricity. The generated energy can be sold to electric utilities or used for household appliances. - Page 42 Installation Insert the AC (Grid) cable through the upper cable gland to the right side of the unit. Pass the AC cable through the cable gland, rubber seal and housing as shown in the figure. Strip off the 3-conductor power wires from at the AC (Grid) as shown in the figure. Power wires with a cross-sectional area 4 mm - 6 mm Not using the PE equipotential point at the AC output port: two-core (L and N).
- Page 43 Installation CAUTION y Make sure that the AC power grounding wire is longer than the main power wires so that it is not pulled before the main power wire when it is pulled from the outside. Assemble the wire-end ferrules and the ring terminal on each wire. Insert the ring terminal into grounding wire and crimp the ring terminal using crimping tool.
- Page 44 Installation Connect the grounding wire (PE) with the M4 screw included in the accessory package. (1.5 ± 0.2 N.m Torque) Insert the remaining wire-ends into the corresponding ferrule-hole in the grid terminal Rotate the cable gland to tighten the gland hole. CAUTION y Make sure the cables are not moving after tightening the cable gland.
-
Page 45: Backup Light
Installation Backup Light It is a socket that is only supplied in case of grid outage based on the currently available battery. The switch happens automatically via the inverter and doesn’t require any additional grid separation components (ATS Box). Backup Light is for emergency load. It can support up to 3kW in a single phase. Grid PV Array... - Page 46 Installation Insert the AC (Backup Light) cable through the second cable gland from the top Pass the cable through the cable gland, rubber seal and housing as shown in the figure. Strip off the 2-conductor power wires at the AC (Backup Light) as shown in the figure. Power wires with the cross-sectional area 4 mm - 6 mm L (Brown)
- Page 47 Installation Assemble the wire end ferrules on each wire. And crimp the ferrule ends using the crimping tool. Wire-end Ferrules 15 mm Crimp the ferrule ends using crimping tool...
- Page 48 Installation Insert the wire-ends into the corresponding ferrule-hole in the Backup Light terminal Rotate the cable gland to tighten the gland hole. CAUTION y Make sure the cables are not moving after tightening the cable gland. Otherwise, the IP56 grade cannot be maintained.
- Page 49 Installation INFO y An additional grounding cable has to be executed to the Backup Light. y Because the ground connection for the backup operation can be different depending on the environment, check with an expert. Strip off both sides of the wire as shown in the figure. Ground the wire for the Backup Light with a cross-sectional area of 4 mm - 6 mm 15 mm...
-
Page 50: Additional Grounding
Installation Additional grounding Connect the additional grounding wire (PE) to the additional grounding connector if required. To connect the additional grounding wire through the hole in the cable-gland for INTERFACE LINE. -
Page 51: Pv Array Connections
Installation PV Array Connections You can connect up to two PV arrays on this product. WARNING y Make sure the AC circuit breaker, PV switch, and DC circuit breaker of the battery are disconnected before starting electrical cable connections. CAUTION y Before connecting a PV array, make sure that the open circuit voltage of the PV array is less than 600 V. - Page 52 Installation PV1 / PV2 Connection Connect the DC cables of a PV array to PV1 & 2 connectors on this product. PV array 1 PV array 2 To connect the PV cable, separate the cable gland as shown in the figure and pass the PV cable through.
- Page 53 Installation Strip off the 2-conductor power wires at the PV module as shown in the figure. Power wires with a cross-sectional area of 4 mm - 6 mm PV1 + PV2 + PV1 - PV2 - 15 mm 15 mm Assemble the wire end ferrules on each wire.
- Page 54 Installation Connect to +/- of the PV1 and PV2 terminals. Assemble the supplied cable glands to the right side of the PV power wire. Rotate the cable gland to tighten the gland hole. CAUTION y Make sure the cables are not moving after tightening the cable gland. Otherwise, the IP56 grade cannot be maintained.
- Page 55 Installation WARNING y Do not mismatch the connection of the electric poles + to - and - to + when installing. Otherwise, this may cause electric shock or the product may become permanently damaged. y PV+ and PV- cables from one PV array must be connected to the same PV connector number. (PV1+ and PV1-, PV2+ and PV2-) A mismatched connection may cause electric shock or the product may become permanently damaged.
-
Page 56: Energy Meter, Heat Pump, And Internet Connection
Installation Energy meter, heat pump, and internet connection The energy meter connection is required to get information about the energy flow. The energy meter for this product is not included with this product package. Before connecting the energy meter to this product, install the energy meter. - Page 57 Installation INFO y Compatible energy meter brand and model names are listed in ‘Energy Meter Compatibility. ’ y The numbers described in the figure are the port numbers for the Eastron energy meter connection. Heat Pump Connection Strip three wires of the heat pump cable and insert the stripped wire-ends in the corresponding wire hole in the plug.
- Page 58 Installation Internet Connection Insert an ethernet cable with an RJ-45 plug to the ethernet port at the front of the product as shown in the figure. Energy Meter and LAN Connection Diagram Internet Router Internet (Hotspot) Disconnec on Bi-Direc onal Energy Meter Grid Switch...
-
Page 59: Ats Connection (If Capable)
Installation ATS Connection (if capable) Using CAT5 (or better) cable, make an RJ45 connector, referring to the figure below, and connect to the ATS. Make sure the AC circuit breaker, PV switch, and DC circuit breaker of the battery are disconnected before starting electrical cable connections. -
Page 60: Spi(Italy Only) / Ripple Control Connection (If Capable)
Installation SPI(Italy only) / Ripple Control Connection (if capable) Using CAT5 (or better) cable, make an RJ45 connector, referring to the figure below, and connect to the SPI(Italy only) / Ripple Control Receiver. Make sure the AC circuit breaker, PV switch, and DC circuit breaker of the battery are disconnected before starting electrical cable connections. - Page 61 Installation Ripple Control External Signal K4 (0 %) Local Command K3 (30 % ) Trip Signal K2 (60 %) K1 (100 %) Ext. VDD DC +12 V...
-
Page 62: Installation Completion
Installation Installation Completion CAUTION y High voltage is energized through the internal battery modules and wiring. Special care must be taken. Switch the battery circuit breaker on this product to the ON position and close the door. When closing the door, make sure the front cover is securely fitted to the gasket for a secured waterproof seal. - Page 63 Installation CAUTION y Make sure the door is correctly closed and all bolts are fastened. Otherwise, IP56 grade cannot be maintained. Fasten the screws on the right side of the product. (2.45 N.m torque, Hex socket : M8) ×5 Switch the grid’ s main circuit breaker to the ON position and wait until the Grid icon signals that complete power is on.
- Page 64 Installation Press the POWER button and press and hold the START (6s) button for at least 6 seconds until you hear a "click." If the SoC level is shown on the LED display of the product, the booting process has been completed normally.
-
Page 65: Backup Load Connection
Installation Backup Load Connection Max. load available during backup operation * This function is applicable only with a qualified ATS box. Installed PCS (ATS) 3.68 kW 4.6 kW 6 kW 11 H 3.68 kW 4.6 kW 5.6 kW Maximum usable home load capacity in backup operation 3.68 kW Installed PCS (Backup Light) -
Page 66: Installer Settings
LG ESS must be updated with the latest firmware. y Malfunctions that can be traced back to the use of outdated firmware are not covered by LG Electronics’ product warranty. The automatic firmware update takes place when LG ESS is registered to EnerVu Plus (strongly recommended) and connected to the internet. -
Page 67: Connecting To A Mobile Device
Connecting to a Mobile Device To connect the system to a mobile device, the LG EnerVu Plus mobile application must be installed on your mobile device. Search and download the ‘LG EnerVu Plus’ application from the Apple App store or Google Play store. - Page 68 Settings Press and hold the wireless connection button on the system for 3 seconds until a melody sounds. On your mobile device, tap [OK] to go to the next step. INFO y If a connection has not been established after 10 minutes, the Network LED light will turn green or red and the WLAN signal will be disabled.
- Page 69 Android : If the connection is successful, run the [LG EnerVu Plus] app to display the main screen as shown in the figure. iOS : If the connection is successful, run the [LG EnerVu Plus] app to display the main screen as shown in the figure.
-
Page 70: Entering The [Setup] Screen
Settings Entering the [Setup] Screen [Setup] To enter [Setup] on your mobile device, follow the instructions described below. Tap [Setup] on the main screen to display the password input screen. [Setup] First time When entering the [Setup] screen for the first time, you must set an installer password. -
Page 71: Country
Settings Country [Country] Select country, grid code, and time zone. -
Page 72: Network
Settings Network [Network] You can view the current connection type and IP information. The default network connection type is set to [Wired]. To set up a wireless connection, select the connection type as [Wireless]. To check if communication with the cloud is working properly, click the [Test] button and check the OK message. -
Page 73: Wired Network
Settings Wired Network When the [Connection Type] option in the [Connection Status] is set to [Wired]. Wired connection options are displayed. If the connection is successful, [Internet Connected] is displayed on the screen. If the [IP Settings] option in [Wired Settings] is set to [Auto], this product will be automatically assigned an IP address from the local area network (LAN) via the wired connection. -
Page 74: Wireless Network
Settings Wireless Network When the [Connection Type] option in the [Connection Status] is set to [Wireless]. Wireless connection options are displayed. Tap the [SSID] fleld to display the SSID list. Select the SSID which your ESS is connected to and then tap [CONFIRM]. Select the encryption type from the [Encryption] option. -
Page 75: Firmware Update
Settings Firmware Update [Firmware Update] This product must be upgraded to the latest firmware prior to setup. Upgrade methods are provided as local or server options. [Update Method > Local] Press [SCAN] to retrieve the information. The device version and local version of the system firmware are displayed. - Page 76 Settings [Update Method > Network] Press [Log In]. Input Installer account id and password. Press [Sign In].
- Page 77 Settings Then [Update Method] is changed to [Network] automatically. If [Log In] fails, [Update Method] cannot be changed to [Network].
- Page 78 Settings [Update Method > Network] Press [SCAN] to retrieve the information. The device version and server version of the system firmware are displayed. Press [Update] to start the firmware update.
-
Page 79: Meter
Settings Meter [Meter] Press the [Start Auto] button to collect the connected energy meter information and set all the option values automatically. - Page 80 Settings [PV] Input PV brand name. Input PV capacity, azimuth, and tilt for PV 1. Input PV capacity, azimuth, and tilt for PV 2.
-
Page 81: Pcs
Settings [PCS] [Feed in limitation] and [Installation Date] options can be changed manually. Set the options as described below. Select the current value. The input menu appears on the screen. Input the desired value. Select [Save] to complete the settings. Tap [Grid] to show more settings options for the PCS. -
Page 82: Battery
Settings Battery [Battery] You can change the [Use Batteries] settings. Tap the switch to set battery use [On] or [Off]. If the setting is set to [Off], generated energy will not charge the connected battery. [Winter Mode SoC], [Backup mode], [Battery Installation Date], and [Reserved SoC] can be set manually. -
Page 83: Ev Charger
[EV Charger] [Precondition] This product and EVC can be connected through LAN. To install the EV Charger with LGE ESS, the LG ESS and EV Charger must be connected to the same network. Installation y Press the [Installation] toggle button to connect the EV Charger. - Page 84 Settings [Configuration > Charging Settings] Charge Immediately y Charging immediately begins using all available energy sources. Scheduled Charge y You can set the desired time on weekdays or weekends, and charging begins using all available sources during the set time. y If [Charge with Excess Solar between Schedules] is enabled, charging is performed if Excess Solar is present outside of the set time.
- Page 85 Settings [Configuration > Require Authentication for Each Charge] If the toggle button is enabled, an authentication process is required. Authentication is possible with the [Authentication] toggle button or RFID registered on the EV Charger. *When the toggle button is disabled, charging occurs immediately without authentication.
-
Page 86: Air-To-Water Heat Pump
Settings Air-to-Water Heat Pump [Air-to-Water Heat Pump] [Precondition] Home6 and AWHP can be connected through RS485. To install the AWHP, Home6 and AWHP must be connected with twisted wire. Installation y Press the [Installation] toggle button to connect to an AWHP. y It automatically locates and connects to an AWHP, and when the connection is complete, the state icon changes to Connected and the toggle button... - Page 87 If no AWHP device is connected then a notice will pop [Air-to-Water Heat Pump > Protocol] This product supports two types of AWHP: LG Modbus and DIGITAL INPUT (SG Ready), and they are automatically detected and connected by tapping the...
- Page 88 Settings [Air-to-Water Heat Pump] LG Modbus : There are ON Commend, ON Recommended, Energy Saving, Super Energy Saving, and Normal modes;additionally, Battery SoC, Surplus Power, and Wait Time can be set.
- Page 89 Settings DIGITAL INPUT (SG Ready) : There are SG4 (ON Commend), SC3 (ON Recommended), and Normal; additionally, Battery SoC, Surplus Power, and Wait Time can be set.
-
Page 90: Commissioning Test
Settings Commissioning Test [Commissioning Test] You should perform 4 operating tests. To start the test, tap [ALL] to start all the operating test automatically. You can also run tests separately by tapping [START] on each test. It is recommended to run all the tests at once using the [ALL] button rather than running the tests separately. -
Page 91: Cei 0-21 (Italy Only)
Settings CEI 0-21 (Italy Only) [SPI Self-Test] Inverters of ≤ 10 kW supplied to the electrical grid according to Italian CEI 0-21 must perform a self-test. During the self-test, the inverter checks the response time for overvoltage, undervoltage, overfrequency, and underfrequency. - Page 92 Settings Enter Self-Test Password (000006) Select test items (ALL) Perform 8 items sequentially by pressing the ALL button, or Items can be tested individually by pressing the START button. y Items : overvoltage 2, overvoltage 1, undervoltage 2, undervoltage 1, overfrequency 2, overfrequency 1, underfrequency 2, underfrequency 1...
- Page 93 Settings Progress and Stop y Indicates that the selected test item is being tested. y The item test can be interrupted with the Stop button. Individual Progress and Stop y Indicates that the selected test item is being tested. y The item test can be interrupted with the Stop button.
- Page 94 Settings [Result SPI Self-Test] Example Voltage y Items: overvoltage 2, overvoltage 1, undervoltage 2, undervoltage 1 Frequency y Items: overfrequency 2, overfrequency 1, underfrequency 2, underfrequency 1...
- Page 95 Settings [Report] When all items are tested and the result is successful, a Report button appears in the upper right corner. A login procedure is required to report the test results to the EnerVu server. If you press the Report button, you can sign in with your installer account.
- Page 96 Settings When you press the Report button after successfully logging in, the self-test results are reported to the server.
-
Page 97: Summary
Settings Summary [Summary] This is the last section of the settings. Before operating the system, check all of the settings on the [Summary] display. -
Page 98: Entering The [Installer Settings] Screen
Settings Entering the [Installer Settings] screen To enter the [Installer Settings] menu on your mobile device, follow the instructions described below. Tap [ ] on the main screen. The [Settings] screen appears. Tap the [Installer Settings] option to display the password input screen. Enter the installer password and tap [OK] to enter the [Installer Settings] screen. -
Page 99: Installer Settings
Settings Installer Settings [PV/Meter] Settings You can check the PV and meter information. Tap [PV/Meter] in [Installer Settings]. PV and energy meter information is displayed. [PV], [PV1], [PV2] Input PV brand name. Input PV Capacity, azimuth, and tilt for PV 1. Input PV capacity, azimuth, and tilt for PV 2. - Page 100 Settings [PCS] Settings You can set or check the PCS settings and status. Select [PCS] on [Installer Settings]. PCS information is displayed. [PCS] All the settings options and values for PCS information are displayed. [Battery Only Mode], [Feed in limitation], and [Installation Date] options can be changed manually.
- Page 101 Settings [Network] Settings Select [Network] in [Installer Settings]. The current status of the network connection is displayed. If you want to connect the EnerVu server, tap [Web server data upload] to change to [On]. Tap [Web server data upload] again to turn off the option. [On] : The energy data of the system is saved and uploaded to the server once every minute.
- Page 102 Settings Wireless Network Settings When the [Connection Type] option in the [Connection Status] is set to [Wireless]. Wireless connection options are displayed. Tap the [SSID] field to display the SSID list. Select the SSID which your ESS is connected to and then tap [CONFIRM]. Select the encryption type on the [Encryption] option.
- Page 103 Settings INFO y Notes on Internet Connection: − Many network connection problems during setup can often be fixed by resetting the router or modem. After connecting the product to the home network, quickly power off and/or disconnect the power cable of the home network router or cable modem. Then power on and/ or connect the power cable again.
- Page 104 Settings [Commissioning Test] Settings This is the last section of mandatory settings . Before operating this product, an [Operating Test] must be done to check whether all the systems are ready to run . If the [Operating Test] is not run, this product will not work .
- Page 105 Settings [Battery] Settings Select [Battery] on [Installer Settings]. The battery information is displayed. You can change the [Use Batteries] settings. Tap the switch to set it [On] or [Off]. If the setting is set to [Off], generated energy will not charge the connected battery. You can change the [Battery Multi Use] Settings.
- Page 106 Settings [System Log] You can see the list of mode changes, system errors, and the system warning log. Refer to ‘Error Codes and Messages’ for more information about error codes, messages, and solutions. Tap [System Log] on [Installer Settings]. This displays a list of all notices that have occurred over certain period.
- Page 107 Settings [External Device] Settings Select [External Device] on [Installler Settings] to [Remote Control], [Ripple Control], [Air-to-Water Heat Pump], and [EV charger] options. [Remote Control] You can Select HEMS (VPP) mode. Then ESS is controlled by a VPP provider. When you select remote mode, you can see that it operates in remote mode on the home screen.
- Page 108 Settings [Ripple Control] You can enable Ripple Control. Then ESS Rated Output power is controlled by a Ripple Control Receiver. When you enable Ripple Control, you can see that it operates in Ripple Control on the home screen. [Air-to-Water Heat Pump] [EV Charger] For Air-to-Water Heat Pump and EV Charger, please refer to the Setup Wizard Page.
- Page 109 Settings [Other function] Settings Select [Other Function] on [Installer Settings] for [Reboot], [Password Change], [Factory Reset], and [Dump Log] options. [Reboot] Select [Reboot] to reboot the system. [Password Change] Select [Password Change] on [Installer Settings]. The [Change Password] menu is displayed. Enter the new password in the [New Password] and [Password Check] field.
-
Page 110: About The Main Screen
Settings About the Main Screen The main screen displays and indicates the current ESS status in the ESS status menu area. And you can check several settings and information in the ESS setting menu and ESS Information menu areas. EnerVu web page link ESS Setting Menu y Language y Battery... -
Page 111: Ess Status Menu
Settings ESS Status Menu The main screen displays and indicates the current ESS status briefly. When you select an area indicated above, it displays detailed information. INFO y The displayed values are not exact values. The values may differ from actual values. y Please turn on the AP again, if there is a problem during connection with the AP. - Page 112 Settings Displays details about the system status. When an has error occurred, the error code, time, and date are displayed on the list. Displays the operation mode of the system. The Operation modes are displayed on the list. If you select Time of Use, you can input more details. Please press [ ] button.
- Page 113 Settings [Time of Use] Settings 1. Season and pricing You can change seasons and prices. Under the Season button, you will see the selected month. Tap this to change the month of the season. Tap this to change the pricing. Please see the next page for detailed information.
- Page 114 Settings Displays the season corresponding to the month. Change and save the season. Enter the price for each period, and press the SAVE button.
- Page 115 Settings 2. Edit and Add Period You can edit and add periods. Tap this to edit the periods. Tap this to add the periods. Please see the next page for detailed information.
- Page 116 Settings Change the period and time to save it.
- Page 117 Settings [ESS Info] Displays the current PV power generation and battery status. Displays the generating status of the connected PV briefly. The status values are the sum of PV1 and PV2. Brand : PV Manufacturer (Default : LGE) System Capacity : PV capability DC Power : Current PV power DC Voltage : Current PV voltage DC Current : Current PV electric current...
- Page 118 Settings INFO y Energy Level is displayed only when the EV Charger and AWHP are installed and the monitoring option is enabled. Displays the charging and discharging status of the battery briefly. Battery Status : Charging / Discharging / Standby Battery SoC : Current SoC (state of charge) level Winter Mode : Shows winter mode status.
- Page 119 Tap the switch to start or stop system operation. [Energy level] Display ESS Energy Level. *Energy Level is displayed only when AWHP is installed and the monitoring option is enabled. **Depending on the protocol, the levels are as follows. [Protocol]LG MODBUS [Protocol]DIGITAL INPUT...
- Page 120 Settings System Information Displays system information of this ESS. You can check the information of the PCS, battery, and network status. Scroll up or down to display next or previous information.
-
Page 121: Ess Settings Menu
Settings ESS Settings Menu You can adjust the general settings of the system. Select [main screen] > [ ] to display the [Settings] screen. Language Select [ ] > [Language] to display the language selection screen. [System Operating] Select the desired language. - Page 122 Settings Battery Select [ ] > [Battery] to display the battery settings screen. [Winter mode] Tap this switch to select [Enable] or [Disable]. The minimum SoC level for winter mode can only be changed by the installer. [Winter Mode Period] Tap the current value to display the settings menu.
- Page 123 Settings Energy Device Select [ ] > [Energy Device] to display the Energy Device screen. [EV] Tap this switch to select [On] or [Off]. If the ‘EV Charger’ is not installed, a notice will pop up. Set the option to [On] to enable EV monitoring. [EV Charger Settings] You can set the EV Charge Configuration and monitor the EV Charger Status.
- Page 124 Settings CEI 0-21 Select [ ] > [CEI 0-21] to display the CEI 0-21. [SPI Self-Test] SPI Mode set Internal mode Enter Self-Test Password (000006) Press the All button Please refer to the setup CEI 0-21 Guide for detailed information.
-
Page 125: Quick Install Guide
In addition to the source code, all referred license terms, warranty disclaimers, and copyright notices are available for download. LG Electronics will also provide open source code via CD-ROM for a charge that covers the cost of distribution (such as media, shipping, and handling) upon email request to opensource@lge.com. -
Page 126: Troubleshooting
Troubleshooting Error Codes and Messages PCS Error Codes y Do not leave the ESS in the fault standby state for a long time because battery discharge may occur. y If battery fault occurs immediately after starting the PCS, it means battery failure. Check the battery SoC as well as voltage and fault information, and turn off the power of the ESS until service action is taken. - Page 127 Troubleshooting Code Message Description Solution P221 Grid Underfrequency The frequency level of the grid is Automatically restart after lower than the lower limit grid frequency is normal P222 Grid Frequency Change The amount of frequency change is Automatically restart after higher than the limit grid frequency is normal P225 Residual Current...
- Page 128 Troubleshooting Code Message Description Solution P421 PV Overcurrent (PV2) The current level of the PV2 is higher than Automatically restart after the limit PV2 current is normal P430 PV Overcurrent Instant The current level of the PV1 suddenly Automatically restart after (PV1) spikes above the limit PV1 current is normal...
- Page 129 Troubleshooting Code Message Description Solution P632 Inverter Bottom Over The inverter (Bottom) temperature is Automatically restart after Temperature higher than the limit INV bottom temp is normal P651 Battery Top Over The BAT converter (Top) temperature is Automatically restart after Temperature higher than the limit BAT Converter top temp is...
- Page 130 Troubleshooting Code Message Description Solution P752 Safety Function Error in performing safety functions Automatically restart after Operation Fault safety function operation is normal P753 Micom State Fault Micom status abnormality detected Automatically restart after MICOM state is normal P760 SRD Parameter Fault A Grid SRD Parameter setting error occurs Automatically restart after detecting fault P765 Relay Power Off Fault...
-
Page 131: Battery Error Code
Troubleshooting Battery Error Code Code Message Description Solution B678 Discharge Over The discharge temperature level is higher Automatically released Temperature Warning than the limit after warning condition is cleared B679 Discharge Under The discharge temperature level is lower Automatically released Temperature Warning than the lower limit after warning condition is... - Page 132 Troubleshooting Code Message Description Solution B695 Over Charge Power Limit The Charge Power level is higher than the Automatically released Warning limit after warning condition is cleared B701 Safety CRC Check Error A warning about the safety memory range Automatically released CRC data after warning condition is cleared...
- Page 133 Troubleshooting Code Message Description Solution B723 Atmosphere Charge Over The Charge Atmosphere temperature Automatically restart after Temperature Fault 1 level is higher than the limit fault condition is cleared B724 Atmosphere Charge Under The Charge Atmosphere temperature Automatically restart after Temperature Fault 1 level is lower than the lower limit fault condition is cleared...
- Page 134 Troubleshooting Code Message Description Solution B755 Atmosphere Charge Over The Charge Atmosphere temperature Contact service center Temperature Fault 2 level is higher than the limit B756 Atmosphere Charge Under The Charge Atmosphere temperature Contact service center Temperature Fault 2 level is lower than the limit B762 Relay Operation Fault 2 A battery power supply relay operation Contact service center...
-
Page 135: Pms Battery Error Code
Troubleshooting Code Message Description Solution B788 FPU Register Error FPU Register Error Automatically restart after detecting fault B789 VCU Register Error VCU Register Error Automatically restart after detecting fault B790 PIE RAM Error PIE RAM Error Automatically restart after detecting fault B791 PIE Handler Error PIE Handler Error Automatically restart after... - Page 136 Troubleshooting If you have technical problems or questions, contact the installation company or LG Electronics. Installation Company Address : Tel : ESS Service Contact Point LG Electronics Italy, Tel : +39 02 81485454 Via Aldo Rossi 4 - 20149 Milan, Italy E-Mail: https://www.lg.com/it/supporto/email...
-
Page 137: Maintenance
Appendix Maintenance Cleaning the Product Wipe off the outside of the product with a soft towel soaked in lukewarm water, and then dry it with a clean hand towel so that dirt will not accumulate when using a neutral detergent. When cleaning the outside of the product, do not apply a rough brush, toothpaste, or flammable materials. -
Page 138: Disposal Of Your Old Appliance
3. You can take your appliance either to the shop where you purchased the product, or contact your local government waste office for details of your nearest authorised WEEE collection point. For the most up to date information for your country please see www.lg.com/global/ recycling. -
Page 139: Specifications
2) Charging and discharging may take longer depending on the ambient temperature and SoC. The specified value relates to the consumption of the entire system. The available capacity to supply the loads depends on the operating behavior of the overall system, the protection against depth charging, the installation location, and the age of the LG ESS battery. - Page 140 The available capacity to supply the loads depends on the operating behavior of the overall system, the protection against depth charging, the installation location, and the age of the LG ESS battery. * The capacity may decrease as the battery ages.
-
Page 141: Open Source Software Notice Information
LG Electronics will also provide open source code to you on CD-ROM for a charge covering the cost of performing such distribution (such as the cost of media, shipping, and handling) upon email request to opensource@lge.com. - Page 142 If you are installing in a place sensitive to noise, please consult the installer. y Design and specifications are subject to change without notice. Contact office for compliance of this product: LG Electronics European Shared Service Center B. V Krijgsman 1, 1186 DM Amstelveen, The Netherlands www.lg.com/global/business/ess...
Need help?
Do you have a question about the LGE ESS Home 6 and is the answer not in the manual?
Questions and answers