Advertisement
Quick Links
092766 RevD
HLXPLCONTROL
Replacement Controller for OmniPL, OmniLogic
and OmniLogic Upgrade Kits
Installation Manual
Contents
Before You Begin........................1
OmniPL Replacement..................1
OmniLogic Replacement.............4
OmniLogic Upgrade Kit...............7
HLXPLCONTROL
Hayward Industries
1415 Vantage Park Dr., Suite 400
Charlotte, NC 28203
Phone: (908) 355-7995
www.hayward.com
USE ONLY HAYWARD GENUINE REPLACEMENT PARTS
Advertisement

Related Manuals for Hayward HLXPLCONTROL


Summary of Contents for Hayward HLXPLCONTROL
- Page 1 Replacement Controller for OmniPL, OmniLogic and OmniLogic Upgrade Kits Installation Manual Contents Before You Begin......1 OmniPL Replacement....1 OmniLogic Replacement.....4 OmniLogic Upgrade Kit....7 HLXPLCONTROL Hayward Industries 1415 Vantage Park Dr., Suite 400 Charlotte, NC 28203 Phone: (908) 355-7995 www.hayward.com USE ONLY HAYWARD GENUINE REPLACEMENT PARTS...
-
Page 2: Before You Begin
Before you Begin The HLXPLCONTROL is a replacement touchscreen Controller for all OmniPL Controls, OmniLogic Controls built after 2023 and can be used to upgrade OmniLogic Controls built before 2023 (re- quires purchase of HLXBRIDGEPCB sold separately). Note that this Controller replacement kit is NOT compatible with OmniHub Controls. - Page 3 Reverse steps 1-2 to install the new Controller. Then proceed to restore the saved backup. Old Style OmniPL (HLBP) OLD STYLE OmniPL Connect Controller here New Style OmniPL (HLP) NEW STYLE OmniPL Ethernet USE ONLY HAYWARD GENUINE REPLACEMENT PARTS USE ONLY HAYWARD GENUINE REPLACEMENT PARTS...
-
Page 4: Use Only Hayward Genuine Replacement Parts
2. Press the “OK” button and navigate to “Replace MSP”. 2 / 2 datalog Replace MSP Welcome to the Hayward Pool Controller Press OK to con gure your pool. SYSTEM con guration 3. Press “Restore Clone from USB” and then select the clone file from the list. The file will be named “Clone”... - Page 5 USB thumb drive. Wait Backup Con guration to USB Clone Controller to USB Clone was successfully created Internal Con guration Restore Clone from USB Backup SYSTEM CONFIGURATION Replace MSP backup USE ONLY HAYWARD GENUINE REPLACEMENT PARTS USE ONLY HAYWARD GENUINE REPLACEMENT PARTS...
- Page 6 Unfasten the existing Controller from its mounting surface. If the Control- ler is connected to the home's access point via Ethernet, remove the connection. Reverse steps 1-2 to install the new Controller. Controller 6 pin connector USE ONLY HAYWARD GENUINE REPLACEMENT PARTS...
- Page 7 2. Press the “OK” button and navigate to “Replace MSP”. 2 / 2 datalog Replace MSP Welcome to the Hayward Pool Controller Press OK to con gure your pool. SYSTEM con guration 3. Press “Restore Clone from USB” and then select the clone file from the list. The file will be named “Clone”...
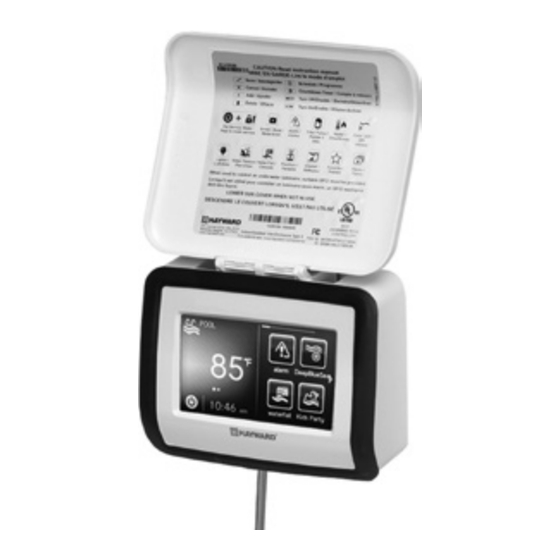
- Page 8 OmniLogic Controller Upgrade NOTE: This procedure is for OmniLogic units built BEFORE 2023. The HLXPLCONTROL is designed to upgrade an OmniLogic system to replace the existing Local Display with a more convenient remote touchscreen Controller. The Controller is weather resistant and contains a built-in WiFi radio for wireless internet connection.
- Page 9 HLXBRIDGEPCB Controller Bridge Board (sold separately) to fit. If an IOEXPAND expansion board is installed, the HLX-DSP-MOUNT modified scaffolding must be purchased and installed. USE ONLY HAYWARD GENUINE REPLACEMENT PARTS...
- Page 10 Secure the Bridge Board to the Main Board HLXBRIDGEPCB Controller Bridge Board using the standoff on the top right Connect the Bridge Board to the same connector that was previously used by the Local Display USE ONLY HAYWARD GENUINE REPLACEMENT PARTS...
- Page 11 Position the Controller cutouts over the screw and slide the unit downward. You may have to tighten or loosen the screws slightly to fully engage the screw heads to get a snug fit. 2.85” USE ONLY HAYWARD GENUINE REPLACEMENT PARTS...
- Page 12 IMPORTANT: Once the new Controller is connected, install the old Local Terminal onto the plastic scaffolding. The Local Terminal will not be plugged it. It will simply act as a plug to fill the hole in the USE ONLY HAYWARD GENUINE REPLACEMENT PARTS...
- Page 13 2. Press the “OK” button and navigate to “Replace MSP”. 2 / 2 datalog Replace MSP Welcome to the Hayward Pool Controller Press OK to con gure your pool. SYSTEM con guration 3. Press “Restore Clone from USB” and then select the clone file from the list. The file will be named “Clone”...
- Page 14 If a clone cannot be saved because your Controller is not operational, follow the instructions below to download the latest version of the configuration from the web. Note that these instructions will only work if the Omni Control had been connected to the internet and registered on the Hayward OmniLogic website.
- Page 15 USE ONLY HAYWARD GENUINE REPLACEMENT PARTS...
- Page 16 Hayward Industries, Inc. © 2024 Hayward Industries, Inc. All other trademarks not owned by Hayward are the property of their respective owners. Hayward is not in any way affiliated with or endorsed by those third parties. For patent information, refer to www.hayward.com/patents.
Need help?
Do you have a question about the HLXPLCONTROL and is the answer not in the manual?
Questions and answers