Table of Contents
Advertisement
Quick Links
INSTALLATION INSTRUCTIONS
LIGHT BAR NOT INCLUDED
PRODUCT SAFETY & LEGAL DISCLAIMER
• This product requires cutting of the original bumper and fender liner. It is
recommended to seek profesional installation for installation. The installter
assumes all responsibility for installation and issues that may accur during
installation.
IMPORTANT READ ALL INSTRUCTIONS CAREFULLY BEFORE INSTALLING, FAILURE TO DO SO
•
MAY CAUSE PERSONAL INJURY OR DAMAGE TO PRODUCT AND/OR PROPERTY.
•
Review the product package and contents prior to beginning the installation. Take care when
opening the packaging and removing items. If a return is needed you will want to return the product in
its original packaging if possible.
•
This instruction guide is provided as a GENERAL installation guide, some vehicles vary dimensionally
and may require additional steps.
Test fit the product on the vehicle prior to any third party modifications and or finishing. The
•
manufacturer and/or distributors do not accept responsibility for third party charges, labor and or
third part replacement modifications. Some modifications may void the factory warranty.
Exercise due-diligence when installing this product. The manufacturer and distributors of this product
•
do not accept any responsibility for vehicle damage or personal injury resulting from the installation of
this product. Careless installation and operation can result in serious injury or equipment damage.
This product is for general off-road use. All liability for installation and use rests with the
•
owner/operator.
INSTALLER: Once installation is complete, please return this guide along with other documentation
•
included in this product back to the consumer for future reference. The manufacturer/distributors of
this product do not guarantee this particular version will be available at a later date.
REV.01
© 2016 Go Rhino Products. All rights reserved
www.gorhino.com
589 W. Apollo St., Brea, CA 92821
• Part Number
34389T
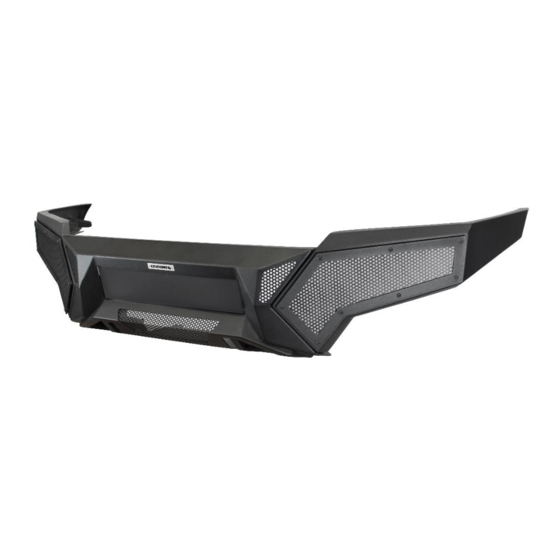
• Product Description:
Element Front Bumper Replacement
• Vehicle Application:
2016-2021 Toyota Tacoma
P: 888 427 4466
1
Advertisement
Table of Contents

Related Manuals for Go Rhino 34389T


Summary of Contents for Go Rhino 34389T
- Page 1 The manufacturer/distributors of this product do not guarantee this particular version will be available at a later date. © 2016 Go Rhino Products. All rights reserved www.gorhino.com 589 W. Apollo St., Brea, CA 92821 P: 888 427 4466 REV.01...
-
Page 2: Installation Instructions
•Factory sensors may read shackles or hooks protruding from the fairlead and or tow hooks. •All sensor testing is completed by Go Rhino Products and or third party testing labs on modified vehicles. •Sensor sensitivity, factory sensor housing, orientation, and operating conditions are all variables that will influence functionality of the sensors. -
Page 3: Tools Needed For Installation
M8x 1.25MM x 35MM Hex Bolt M8 Lock Washer M8 Flat Washer Go Rhino recommends you, the installer, read this installation instruction manual from front to back before installing the product. You may also click here to view an installation video or visit http://www.gorhino.com/Installation-Videos. - Page 4 Pull up & out the grill holders carefuly to the front, and then insert one hand between grill & frame, then remove grill holders (10 clips), then pull out the grill.(PICTURE 3) REV.01 © 2016 Go Rhino Products. All rights reserved...
- Page 5 In front half of lower cover, remove the screws from driver & passenger sides as show in pictures 4, 5, 6 & 7. Remove the down lower cover screw & all bottom deflector screws. (PICTURE 8) PICTURE 4 PICTURE 4 PICTURE 5 PICTURE 6 PICTURE 7 PICTURE 8 REV.01 © 2016 Go Rhino Products. All rights reserved...
- Page 6 Release enough of the plastic clips holding your fender flare on to be able to pull it back and out of your way. You may remove this flare completely if you desire, but it is not necessary. (PICTURES 11 &12) PICTURE 11 PICTURE 12 REV.01 © 2016 Go Rhino Products. All rights reserved © 2016 Go Rhino Products. All rights reserved...
- Page 7 Remove four front bumper lower screw. (PICTURES 13 & 14) and remove four securing clip from bumper as indicate. (PICTURES 14 & 15) With assistance remove the bumper from the vehicle as shown. PICTURE 14 PICTURE 13 PICTURE 14 PICTURE 15 REV.01 © 2016 Go Rhino Products. All rights reserved...
- Page 8 INSTALLATION INSTRUCTIONS Remove the six nutsof aluminium Bumper Reinforcement, and pull out the Bumper Reinforcement (PICTURES 18, 21 & 22) PICTURE 18 PICTURE 22 PICTURE 21 REV.01 © 2016 Go Rhino Products. All rights reserved...
- Page 9 If you removed the OEM bumper to perform the cut, you can reinstall the OEM bumper and grill now. Use painters tape to protect the finish Approximately 3 1/4” down REV.01 © 2016 Go Rhino Products. All rights reserved...
- Page 10 Use the supplied vinyl washers on the bolt plate studs to prevent them from falling side the frame horn. Repeat process for both sides. Paired bolt with wire guide REV.01 © 2016 Go Rhino Products. All rights reserved...
- Page 11 Fasten one 3/8” flat washer, one 3/8” lock washer, one 3/8” hex nut per carriage bolt. Leave finger tight for final adjustment. Repeat process for both sides. REV.01 © 2016 Go Rhino Products. All rights reserved...
- Page 12 (see image) and fasten the OEM body mount nut back in place. Leave finger tight to allow for final adjustment. For torque settings, please refer to your OEM repair manual. OEM body mount nut reinstalled REV.01 © 2016 Go Rhino Products. All rights reserved...
- Page 13 Use one 3/8” x 1 hex bolt, two 3/8” flat washer, one 3/8” lock washer and one 3/8 hex nut. Leave finger tight and repeat process for both sides. REV.01 © 2016 Go Rhino Products. All rights reserved...
- Page 14 Element bumpers. If you should find that the OEM bumper is making contact, Vertical slots evaluate where it and trim the OEM as needed. Adjustable wings ¼” – ½” space REV.01 © 2016 Go Rhino Products. All rights reserved...
- Page 15 INSTALLATION INSTRUCTIONS ***This task should be performed by an experienced installer and is NOT recommended to be installed without experience **** •This product requires cutting of the original bumper and fender liner. It is recommended to seek profesional installation for installation. The installter assumes all responsibility for installation and issues that may accur during installation.
- Page 16 Make a straight cut across so that the fender flare sits flush to the wings of the Element bumper. Use painters tape a guide. REV.01 © 2016 Go Rhino Products. All rights reserved...
-
Page 17: Backside View
¼”x ¾” button head bolts, ¼” washer, ¼” lock washer and ¼ nuts, and the license plate to the ( 2 ) elonged holes in lower mesh área. REV.01 © 2016 Go Rhino Products. All rights reserved... - Page 18 INSTALLATION INSTRUCTIONS Periodically check that the hardware is fasted. REV.01...
-
Page 19: Limited Warranty
This warranty covers the cost of the product only and does not include the cost of removal, installation, third party modifications or shipping of the product. In no event shall Go Rhino be liable to buyer or any third party for any damage or harm caused by the product or use thereof, regardless of weather such damages were foreseeable and whether or not Go Rhino has been advised of the possibility of such damages, not withstanding the failure of any agreed or other remedy of its essential purpose.
Need help?
Do you have a question about the 34389T and is the answer not in the manual?
Questions and answers