Advertisement
Table of Contents
QTY
PART DESCRIPTION
1
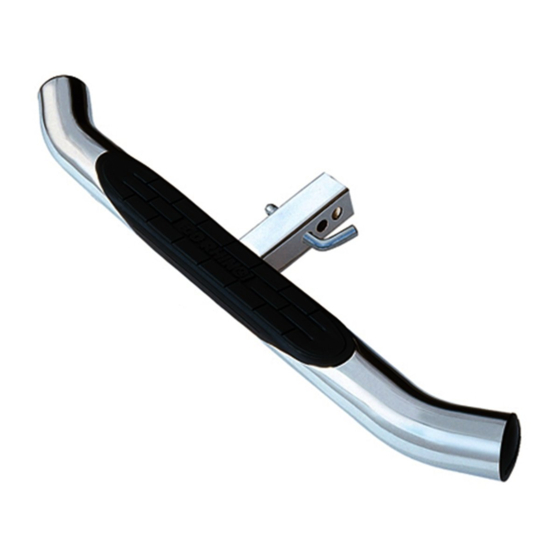
HITCHSTEP
1
SLIDER TUBE
1
ANTI-RATTLE BRACKET
2
FINISHING CAP
Step-1 Slide the slider tube over the HitchStep receiver tube. Photo #1
Step-2 Install the finishing caps onto the anti-rattle bracket and attach the anti-rattle bracket and knob to
the slider tube. Leave the knob loose for final adjustment. Photo #2
#1
WARNING- HitchStep are not compatible for vehicles equipped with rear view camera, back up and or
parking sensors. If your vehicle is equipped with rear view camera, back up and or parking sensors, and
you choose to install this product it is advised that you check their functionality. Install this product at your
own risk.
RHINO! HITCHSTEP
INSTALLATION INSTRUCTIONS
PART NO. 310B, 310C & 310PS
PARTS LIST
INSTALLATION
QTY PAR PART DESCRIPTION
1
KNOB
1
HITCH PIN
1
HITCH PIN CLIP
1
STORAGE BAG
#2
1
Advertisement
Table of Contents

Related Manuals for Go Rhino 310B


Summary of Contents for Go Rhino 310B
- Page 1 Install this product at your own risk. RHINO! HITCHSTEP INSTALLATION INSTRUCTIONS PART NO. 310B, 310C & 310PS PARTS LIST PART DESCRIPTION QTY PAR PART DESCRIPTION HITCHSTEP...
- Page 2 Do not use abrasive cleaners on the finish. FOR TECHNICAL OR WARRANTY INFORMATION CALL: TOLL FREE (888) 427-4466 FAX (714) 672-0278 GO RHINO! Products® 591 W. Apollo St. Brea, CA 92821...
Need help?
Do you have a question about the 310B and is the answer not in the manual?
Questions and answers