Table of Contents
Advertisement
Quick Links
Advertisement
Table of Contents

Subscribe to Our Youtube Channel
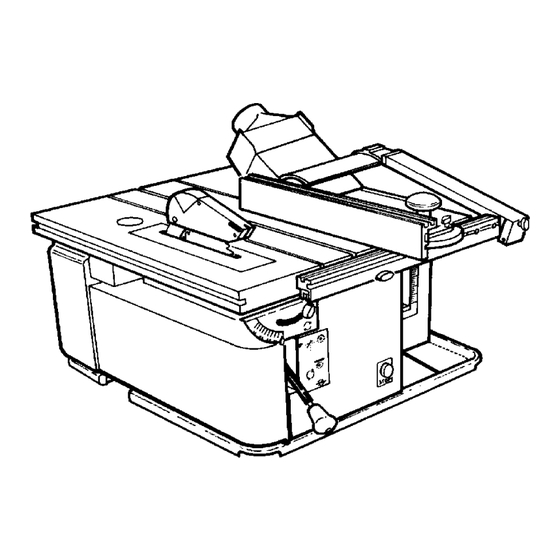
Summary of Contents for Elektra Beckum Multi 180 A
- Page 1 Multi 180 A Betriebsanleitung .....3 Operating Instruction ....18 Betjeningsvejledning .
- Page 2 ** 98/37/EG, 89/336/EWG, 73/23/EWG, 93/68/EWG * 0070 050C 5471 07 00 **** INRS - Institut Nationale de Recherche et de Securité Avenue de Bourgogne, B.P. 27 F-54501 Vandoeuvre Cedex Jürgen Kusserow Vorstand ELEKTRA BECKUM AG – Daimlerstraße 1 – 49716 Meppen 1000896/ 00...
-
Page 3: Table Of Contents
XW0005E.fm Operating Instruction ENGLISH ENGLISH • Dispose of the packing in an envi- Keep all documents, supplied with the Table of Contents ronmentally friendly manner. Take machine, for future reference. to a proper collecting point. Please Read First! .....18 This machine shall only be started and •... -
Page 4: Symbols Used Throughout These Instructions
ENGLISH saw blades, cutters or cutter knives Mains Connection 3. Special Product Features without delay. Danger! Electrical hazard. • − Hazard generated by an unstable One machine – four operating Operate in dry environment modes: stand of the machine: only. −... -
Page 5: Surface Planer Mode
ENGLISH Undervoltage relay An undervoltage relay trips in the event of a voltage failure to prevent restarting of the machine when the power is restored. To start the machine again the START button must be actuated. Secure suction port in place by rais- ing the thicknesser bed. -
Page 6: Operation
ENGLISH Risk of injury by cuts with the Exert downward pressure on the 1 mm is required between arm (29) cutterblock at standstill: workpiece only in the infeed table and guide extrusion (30). area. − Always cover the cutterlock with the guard extrusion of the cutterblock Switch machine off if no further plan- cover when the machine is not used... -
Page 7: Operation
ENGLISH • All fingers of the anti-kickback lock must Use roller supports on both sides of end in a point at their lower end. the planer/thicknesser when work- All anti-kickback fingers must automati- ing long stock. cally return to their rest position (down- •... -
Page 8: Safety
ENGLISH For cutting boards position the fence Safety carrier in the groove at the rear of Safety Devices the sliding carriage (52). Tighten • Blade guard knob (53). The blade guard (55) protects against unintentional contact with the saw blade and from chips flying about. -
Page 9: Operation
ENGLISH − Ensure the rip fence is adjusted Assume proper operating position: exactly parallel with the saw blade. − Always use sharp saw blades. If in doubt check workpiece for inclusion of foreign objects (e.g. nails, screws, lose knots). − Always work one workpiece at a time. -
Page 10: Safety
ENGLISH − the distance between workpiece and Fit desired cutter in the chuck – if exactly to the respective application necessary, use reducing bush. the underside of the cutter guard and the workpiece dimensions. The cutter must only protrude as (77) is max. -
Page 11: Care And Maintenance
ENGLISH Adapt all safety devices and operat- Straight edge moulding: Tips and Tricks • ing elements to the workpiece as Always make several passes if a illustrated. large amount of material needs to be removed. Work the workpiece. • • Make trial cuts on a piece of scrap Moulding curved stock: before working the actual work-... -
Page 12: Saw Blade Change
ENGLISH − Install cutter knives using only Remove table insert (98). genuine replacement parts. Place spring clips back into their ori- ginal position in the cutterblock’s groove. Place the cutter knife lockbar in the cutterblock’s groove. Turn the three square-head bolts so far out that the cutter knife will just slide in. -
Page 13: Care And Maintenance
ENGLISH − Do not use loose-fitting reducing − guide extrusion of the cutterblock Apply a light coat of care and main- rings; the saw blade could work guard extrusion; tenance spray to the following com- − tilting mechanism of the circular loose. -
Page 14: Repairs
ENGLISH Care and Maintenance Spray Planed surface not smooth 14.3 Spindle moulder to remove resin residue and for pre- Cutter knives blunt. Motor does not run serving the metal surfaces. − Install sharp knives. No supply voltage. Cutter knives blocked by chips. −... -
Page 15: Technical Specifications
ENGLISH 15. Technical Specifications Combination machine Length (in transport mode, w/o add-on parts) Width (in transport mode, w/o add-on parts) Height (in transport mode, w/o add-on parts) Weight (w/o add-on parts) Surface/thickness planer Operating mode S1 (%) Power input P 1150 Power output P Voltage... - Page 16 ENGLISH Spindle moulder Operating mode S1 (%) Power input P 1150 Power output P Voltage 230 ~ 1 Nominal current Frequency IP rating Protection class Insulation class – No-load speed n 17500 Collet diameter - without / with reducing bush) 12 / 8 Cutting depth Sliding carriage - width...
- Page 17 U3w0034.fm 092 005 3939 092 005 3955 092 005 4021 092 005 3963 092 005 3971 092 005 3980 091 005 3353 431 306 2258 091 101 8691...


Need help?
Do you have a question about the Multi 180 A and is the answer not in the manual?
Questions and answers
Cerco pezzi ricambio per la 180 A
You can find replacement parts for the Elektra Beckum Multi 180 A (also known as Metabo 029001801310 MULTI 180 A/W COMBINATION MACHINE) on the Power Tool Spares website.
This answer is automatically generated