Advertisement
D
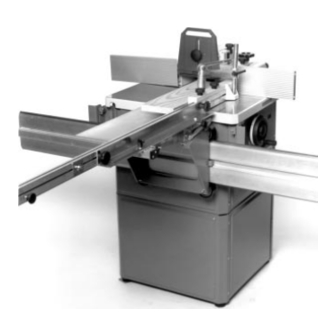
Montage- und Betriebsanleitung Schiebeschlitten
Assembly and Operation Manual
ENG
Sliding Carriage
F
Instructions de service relatives au chariot coulissant
Montage en gebruiksaanwijzing Afkortgeleider
NL
IT
Istruzioni per l'uso ed il montaggio della slitta di
spinta
ES
Instrucciones de montaje y uso - Carro deslizante
DA
Betjeningsvejledning Tapslæde
TF 900/TF 904
Achtung!
Lesen Sie diese Anleitung vor der Installation und Inbetriebnahme aufmerksam durch.
D
Attention!
Carefully read through these instructions prior to installation and commissioning.
ENG
Attention!
Prière de lire attentivement la présente notice avant l'installation et la mise en service.
F
Attentie!
Lees deze instructies voor de installatie en ingebruikname aandachtig door.
NL
Attenzione! Prima dell'installazione e della messa in esercizio, leggete attentamente e completamente queste istruzioni.
IT
Atención!
Lea atentamente estas instrucciones antes de la instalación y puesta en marcha.
ES
Bemærk!
Læs denne vejledning opmærksomt igennem inden installationen og idrifttagningen.
DA
®
Advertisement
Table of Contents

Summary of Contents for Elektra Beckum none
- Page 1 Montage- und Betriebsanleitung Schiebeschlitten Assembly and Operation Manual Sliding Carriage Instructions de service relatives au chariot coulissant Montage en gebruiksaanwijzing Afkortgeleider Istruzioni per l'uso ed il montaggio della slitta di spinta Instrucciones de montaje y uso - Carro deslizante Betjeningsvejledning Tapslæde TF 900/TF 904 Achtung! Lesen Sie diese Anleitung vor der Installation und Inbetriebnahme aufmerksam durch.
-
Page 2: Table Of Contents
In case of a defect notify your dealer or Elektra Beckum distributor, who will decide how to handle your claim. Warranty claims can only be taken care of by your Elektra Beckum dealer or authorized service centre. -
Page 3: Installation
Installation Fit the two crosshead plates (370/371) to the machine housing. Use 4 each cup square neck bolt M 6x20 flange nut M 6 Reinstall backstop plate. The carriage table should be set approx. 0.5 mm higher than the machine table. Set with setting screws B. -
Page 4: Operation
Fit slide washer into the groove of the link bracket extrusion. Insert pivot bolt and secure with starknob screw. Attach link bracket extrusion end plate (357) with two pan head tapping screws to the link bracket extrusion. Set fence square with the machine's fence and set the link bracket extrusion to the zero mark by moving it as required. -
Page 5: Care And Maintenance
Care and Maintenance Regularly apply a light coat of oil to the guide bars. All grooves in the aluminium extrusions should be kept greased. The deep grooved roller bearing of the traversing saddle are factory lubricated for life and require no maintenance. Spare Parts List Sliding Carriage TF 900/TF 904 Pos.


Need help?
Do you have a question about the none and is the answer not in the manual?
Questions and answers