Table of Contents
Advertisement
Quick Links
Advertisement
Table of Contents

Related Manuals for GVM GVM-BX8C


Summary of Contents for GVM GVM-BX8C
- Page 1 GVM-BX8C...
-
Page 2: Table Of Contents
CONTENTS Important Safety Instructions --------------------------------------------- Page 1~2 Warning ----------------------------------------------------------------------- Page 2 Product Introduction ---------------------------------------------------------- Page 3 Disclaimers -------------------------------------------------------------------- Page 3 Product Parameter ------------------------------------------------------------ Page 4 Precautions -------------------------------------------------------------------- Page 4 Product Structure Diagram --------------------------------------------------- Page 5 Installation Method -------------------------------------------------------- Page 6~7 Description Of Product Control Buttons ------------------------------------- Page 8 Functions Introduction &... -
Page 3: Important Safety Instructions
IMPORTANT SAFETY INSTRUCTIONS First and foremost: this product is professional lighting and staging equipment and should be used by a professional lighting technician or under the guidance of a professional. When using this product, you must always follow the cautions below: 1.Read the product manual carefully before use. -
Page 4: Warning
17.For some products with long power cords, please place the power cords properly and avoid contact with overheated surfaces that may damage or trip personnel. Please use the original power cords of our manufactory. The damage caused by using non-original power cords is not covered by our repair service. -
Page 5: Product Introduction
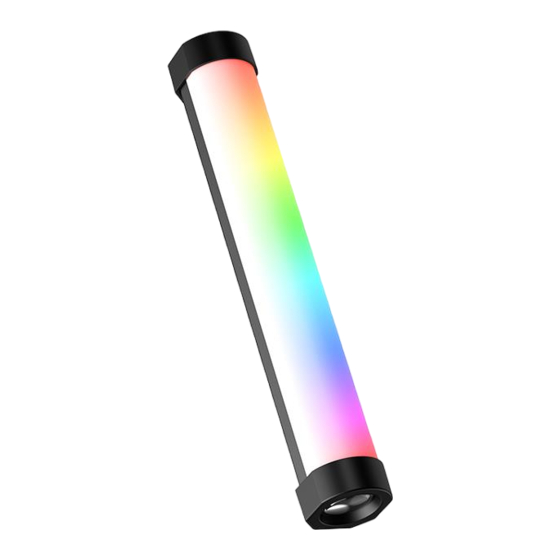
PRODUCT INTRODUCTION Thank you for purchasing the "GVM-BX8C", this product is designed for photography and videography enthusiasts. The product is suitable to use in live broadcast / outdoor / studio photography, etc. It can also be used for lighting YouTube videos. -
Page 6: Product Parameter
PRODUCT PARAMETER ◆ Brand : GVM ◆ Product Model : GVM-BX8C ◆ Product Name : Photography Light ◆ Product Type : Photography Fill Light ◆ Features : Multi-scene Mode; High-display Finger Light Beads; One-click To Switch Between Light Wand Mode And Spotlight Mode ◆... -
Page 7: Product Structure Diagram
PRODUCT STRUCTURE DIAGRAM 1/4 Screw Hole On/Off Switch Spotlight & Pause/Play Button Value Up Button DC Input Socket Display Screen Value Down Button Mode Switching Button Parameter TAB Spotlight Bead... -
Page 8: Installation Method
INSTALLATION METHOD Powering the unit 1.Using a TYPE-C charging cable to power the light through DC socket or charge the product. Installation 1.Magneticly attaches to metal surfaces. Magnet Location Magnet Location * This product contains magnets. When using, please keep it away from items that are easily magnetized like disk drive, credit cards, computer monitors, watches, mobile phones, and medical devices (pacemakers), etc. - Page 9 3.Turn it clockwise to secure the light to the mounting point, and counterclockwise to release.
-
Page 10: Description Of Product Control Buttons
DESCRIPTION OF PRODUCT CONTROL BUTTONS ON/OFF Switch : Use this switch to turn on/off the Light. DC Input Socket : Use TYPE-C charging cable to Connect this Socket to Charge the Product. Spotlight Button & Pause/Play Button: Press and hold the [Spotlight] button for 2 seconds to switch between spotlight mode and light wand mode. -
Page 11: Functions Introduction & Instructions
FUNCTIONS INTRODUCTION & INSTRUCTIONS Setting: Press the [MODE] button to switch to the [ ] setting page. BT STATE: Press [TAB] to switch to [BT STATE] → Press [+/-] to select [On/Off] to turn Bluetooth on or off. BT RESET: Press [TAB] to switch to [BT RESET] →... - Page 12 2. HSI: Press [MODE] to switch to [HSI] mode to adjust the intensity, hue, and color saturation of light. INT: Press [TAB] to switch to [INT] → Press [+/-] to adjust the intensity of the light. HUE: Press [TAB] to switch to [HUE] → Press [+/-] to adjust the hue.
- Page 13 5. Pixel Effect: Press [MODE] to switch the lighting mode to [PIXEL FX] to adjust the following parameters, and press [ ] to pause/play the pixel light effect. Press [TAB] to switch to [FX] → Press [+/-] to switch the scene light effect. Simulates 6 pixel light effects: flow, rainbow, block game, ping pong, wave, meteor.
-
Page 14: App Control
APP CONTROL APP Download Method (Scan the QR code on the back of the manual to download the APP) Android Device:Official website QR code, Google Play, Huawei Store, etc. iOS Device:App Store Figure 1 Figure 2 Device-adding 1.Before adding a device, please make sure you have turned on your phone’s B l u e t o o t h a n d n e t w o r k d a t a , accessibility to Bluetooth and network... - Page 15 Account Login Figure 5 ◆ Use e-mail to get the verification code to log in (the first login automatically registers the account). (Figure 5) ◆ There may be a delay in sending the verification code, and the speed of delivery depends on the e-mail server you are using.
-
Page 16: Quick Troubleshooting
QUICK TROUBLESHOOTING Check the product Troubleshooting Issue Whether the connection Make sure the adapter is well between the light and the connected with the power plug. power supply is normal. The indicator does not light up. When using a lithium battery to supply power, make sure Use the product after recharging that the battery does not have... -
Page 17: Use And Preservation
USE AND PRESERVATION Do not place the product in a high humidity, strong electromagnetic field, direct sunlight, or high-temperature environment. If the product will not be used for a long time, please disconnect power . Clean: Before cleaning, disconnect the power plug. And use a damp cloth instead of any detergent or soluble liquids to avoid damaging the surface layer. -
Page 18: Product Warranty
PRODUCT WARRANTY Dear user, this warranty card is important proof for applying for warranty service. Please cooperate with the salesperson to fill it out and keep it properly. Thank you! Model Number Product Barcode Product Information Name Contact Number User Information Mailing Address Name... - Page 19 8.Other malfunctions or damages not caused by quality issues of the product itself. In such cases, you should seek solutions from the relevant responsible parties, and GVM will not be held liable. Malfunctions or damages caused by components, accessories, or software not covered by the warranty or beyond the warranty scope that renders the product unable to function properly are not covered by the warranty.
- Page 20 Download APP GVM Official website Facebook Huizhou City Latu Photographic Equipment Co., Ltd. Web: www.gvmled.com B&H Email: bh@gvmled.com GVM Email: support@gvmled.com Amazon Email: amazonsupport@gvmled.com Warehouse Address: 12285 MCNULTY RD, STE 105 PHILADELPHIA, Pennsylvania 19154,USA...
Need help?
Do you have a question about the GVM-BX8C and is the answer not in the manual?
Questions and answers