Table of Contents
Advertisement
Quick Links
Advertisement
Table of Contents

Related Manuals for GVM GVM-B200C


Summary of Contents for GVM GVM-B200C
- Page 1 GVM-B200C...
-
Page 2: Table Of Contents
CONTENTS Important Safety Instructions --------------------------------------------- Page 1~2 Warning ----------------------------------------------------------------------- Page 2 Product Introduction ---------------------------------------------------------- Page 3 Disclaimers -------------------------------------------------------------------- Page 3 Product Parameter ------------------------------------------------------------ Page 4 Precautions -------------------------------------------------------------------- Page 4 Product Structure Analysis ---------------------------------------------------- Page 5 Installation Method -------------------------------------------------------- Page 6~9 Description Of Product Control Keys ---------------------------------------- Page 10 Function Introduction &... -
Page 3: Important Safety Instructions
IMPORTANT SAFETY INSTRUCTIONS First and foremost: this product is professional lighting and staging equipment and should be used by a professional lighting technician or under the guidance of a professional. When using this product, you must always follow the cautions below: 1.Read the product manual carefully before use. -
Page 4: Warning
17.For some products with long power cords, please place the power cords properly and avoid contact with overheated surfaces that may damage or trip personnel. Please use the original power cords of our manufactory. The damage caused by using non-original power cords is not covered by our repair service. -
Page 5: Product Introduction
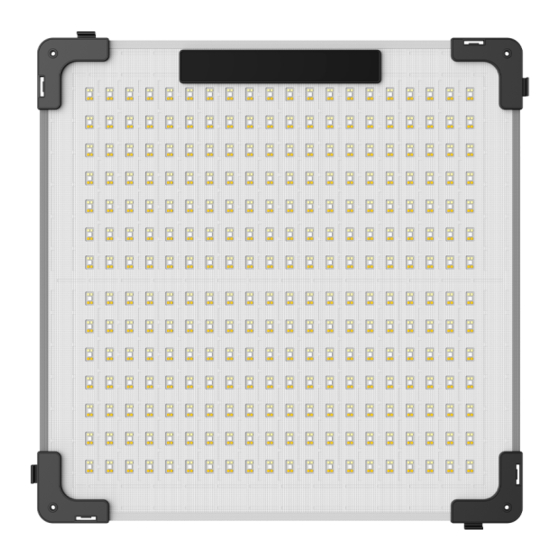
PRODUCT INTRODUCTION Thank you for purchasing our "GVM-B200C”. This product is specifically designed for photography and videography enthusiast. This product is suitable for use in live stream / broadcast / outdoors / studio settings. The main features of this product are: 1.6 lighting modes: CCT mode, HSI mode, RGB mode, color paper mode, light... -
Page 6: Product Parameter
PRODUCT PARAMETER ◆ Brand: GVM ◆ Product Model: GVM-B200C ◆ Product Name: Video Light ◆ Product Type: Professional LED Video Lights ◆ Features: Fold-Able, Splice-Able, Multiple Build In Light Effects, High Display Index LED Beads ◆ Control Methods: On Board Control , APP Control, Bluetooth Mesh Networking, Wireless Remote Control ◆... - Page 7 PRODUCT STRUCTURE DIAGRAM Power ON/OFF Control box LCD Screen Knob DC Input Adapter Support frame Lock hook M6 mounting hole Corner guards Locking latch...
-
Page 8: Installation Method
INSTALLATION METHOD Components Introduction. Steering Seat Adapter Power Clamp Softbox Light Mat Support Frame AC Power Cord The Installation of Support Frame: Unfold the support frame → Attach the frame to the back of the light mat as shown in the figure below. - Page 9 The Installation of Locking Bracket: Loosen the knob on the locking bracket → Attach the locking bracket to the supporting frame → Tighten the knob to fix the locking bracket to the supporting frame. The Adjustment of locking bracket: Loosen the angle fixing handle on the locking bracket → Adjust the light to the desired angle →...
- Page 10 The installation of Softbox: Attach the softbox to the light. Attach the power clamp to the light stand and tighten the fixing knob.
- Page 11 Install the adapter onto the power clamp. Mounting the light to the light stand: Loosen the knob on the locking bracket → Attach the locking bracket to the supporting frame → Tighten the knob to fix the locking bracket to the supporting frame.
- Page 12 This product can be used by connecting the power supply to the DC input port of the lamp, and then turning on the power switch of the lamp. Storage: The light can be folded in half for storage.
-
Page 13: Description Of Product Control Keys
DESCRIPTION OF PRODUCT CONTROL KEYS Power ON/OFF button. DC Input: Connect to power supply. LCD Screen: Display current settings, modes and parameters. Knob: 【Turn the knob】To go through menu items, mode or adjust parameters. 【Click the knob】 to confirm selection. 【Double-click the knob】to return to the previous menu page. -
Page 14: Function Introduction & Instructions For Use
FUNCTION INTRODUCTION & INSTRUCTIONS FOR USE ① Lighting mode: There are six light modes: CCT, HSI, RGB, color gel, light source match, light effect. CCT mode: In this mode you can adjustable color temperature and brightness. INT: Short press and rotate the knob to adjust the brightness. CCT: Short press and rotate the knob to adjust the color temperature. - Page 15 Light source match mode: In this mode you have 12 types of light sources to choose from: Tungsten, HMI5600, HMI6000, Studio Lamps, Sodium Lamp, Halogen, Arc Lamp, Candle, Sunset/Sunrise, Daylight, Overcast Sky, CFL Cool White. Source: Short press and turn the knob to select the light source. INT: After selecting the light source, rotate the knob to adjust the brightness.
- Page 16 ④ SETTINGS: The menu setting interface includes: System language, product information, studio, and system reset. System language: Supports switching between Chinese and English. Product information: Displays the product's firmware version and hardware version info. Studio: You can view and switch studio status. Studio ON: In this mode the video light will record and store it's current settings for next time your turn on the light.
-
Page 17: App Control
APP CONTROL APP Download Method (Scan the QR code on the back of the manual to download the APP) Android Device:Official website QR code, Google Play, Huawei Store, etc. iOS Device:App Store Figure 1 Figure 2 Device-adding 1.Before adding a device, please make sure you have turned on your phone’s Bluetooth and network data, accessibility to Bluetooth and network data, then... - Page 18 Account Login Figure 5 Use e-mail to get the verification code to log in (the first login ◆ automatically registers the account). (Figure 5) There may be a delay in sending the verification code, and ◆ the speed of delivery depends on the e-mail server you are using.
-
Page 19: Quick Troubleshooting
QUICK TROUBLESHOOTING Check the product Troubleshooting Issue Whether the connection The indicator Make sure the adapter is well between the light and the does not light up. connected with the power plug. power supply is normal. Follow these steps: 1. Turn on phone’s Bluetooth and While using the network data function, android APP to add a... -
Page 20: Use And Preservation
USE AND PRESERVATION Do not place the product in a high humidity, strong electromagnetic field, direct sunlight, or high-temperature environment. If the product will not be used for a long time, please disconnect power. Clean: Before cleaning, disconnect the power plug. And use a damp cloth instead of any detergent or soluble liquids to avoid damaging the surface layer. -
Page 21: Product Warranty
PRODUCT WARRANTY Dear user, this warranty card is important proof for applying for warranty service. Please cooperate with the salesperson to fill it out and keep it properly. Thank you! Model Number Product Barcode Product Information Name Contact Number User Information Mailing Address Name... - Page 22 8.Other malfunctions or damages not caused by quality issues of the product itself. In such cases, you should seek solutions from the relevant responsible parties, and GVM will not be held liable. Malfunctions or damages caused by components, accessories, or software not covered by the warranty or beyond the warranty scope that renders the product unable to function properly are not covered by the warranty.
- Page 23 Download APP GVM Official website Facebook Huizhou City Latu Photographic Equipment Co., Ltd. Web: www.gvmled.com B&H Email: bh@gvmled.com GVM Email: support@gvmled.com Amazon Email: amazonsupport@gvmled.com Warehouse Address: 12285 MCNULTY RD, STE 105 PHILADELPHIA, Pennsylvania 19154,USA...
Need help?
Do you have a question about the GVM-B200C and is the answer not in the manual?
Questions and answers