Table of Contents
Advertisement
Quick Links
MODEL G1066R/G1066Z/G1079R
DRUM SANDER
OWNER'S MANUAL
(For models manufactured since 02/24)
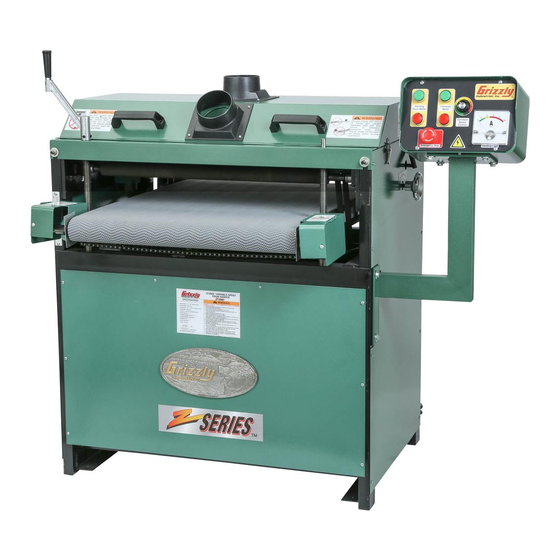
Model G1066Z
Model G1066R
177335
Model G1079R
Model G1079R Only
COPYRIGHT © MAY, 2002 BY GRIZZLY INDUSTRIAL, INC., REVISED FEBRUARY, 2024 (JP)
WARNING: NO PORTION OF THIS MANUAL MAY BE REPRODUCED IN ANY SHAPE
OR FORM WITHOUT THE WRITTEN APPROVAL OF GRIZZLY INDUSTRIAL, INC.
#0443 PRINTED IN TAIWAN
V3.02.24
***Keep for Future Reference***
Advertisement
Table of Contents

Related Manuals for Grizzly G1066R


Summary of Contents for Grizzly G1066R
- Page 1 177335 Model G1079R Model G1079R Only COPYRIGHT © MAY, 2002 BY GRIZZLY INDUSTRIAL, INC., REVISED FEBRUARY, 2024 (JP) WARNING: NO PORTION OF THIS MANUAL MAY BE REPRODUCED IN ANY SHAPE OR FORM WITHOUT THE WRITTEN APPROVAL OF GRIZZLY INDUSTRIAL, INC.
- Page 2 This manual provides critical safety instructions on the proper setup, operation, maintenance, and service of this machine/tool. Save this document, refer to it often, and use it to instruct other operators. Failure to read, understand and follow the instructions in this manual may result in fire or serious personal injury—including amputation, electrocution, or death.
-
Page 3: Table Of Contents
SECTION 9: PARTS ........55 Dust Collection ..........24 G1066R Stand & Motor ....... 55 Test Run ............25 G1066R Conveyor Belt & Table ....56 Recommended Adjustments ......26 G1066R Drums & Rollers ......57 Disabling & Locking Switch (G1079R) ..27 G1066Z Stand &... -
Page 4: Introduction
Models G1066R, G1066Z, and G1079R are heavy- duty drum sanders with the following differences: • Model G1066R is a 5 HP, 24" drum sander. Manufacture Date • Model G1066Z is a 5 HP, 24" drum sander with a variable-speed conveyor and rear drum height micro-adjustment knobs. -
Page 5: Identification (G1066R)
Front Sanding Drum 4" Dust Ports Conveyor Height Crank Handle Top Cover Conveyor Table w/Belt Rear Access Front Access ON/OFF Panel Panel Buttons To reduce your risk of serious injury, read this entire manual BEFORE using machine. Model G1066R/Z/G1079R (Mfd. Since 02/24) -
Page 6: Identification (G1066Z)
Knob Conveyor Height Control 4" Dust Ports Crank Handle Panel Top Cover Conveyor Table w/Belt Front Access Panel Rear Access Panel To reduce your risk of serious injury, read this entire manual BEFORE using machine. Model G1066R/Z/G1079R (Mfd. Since 02/24) -
Page 7: Identification (G1079R)
4" Dust Ports Conveyor Height Top Cover Crank Handle Conveyor Table w/Belt Front Access ON/OFF Panel Buttons Rear Access Stand Panel To reduce your risk of serious injury, read this entire manual BEFORE using machine. Model G1066R/Z/G1079R (Mfd. Since 02/24) -
Page 8: Controls & Components
Refer to Figures 1–3 and the following descrip- tions to become familiar with the basic con- trols and components of the Model G1066R. Understanding these items and how they work will help you understand the rest of the manual and stay safe when operating this machine. - Page 9 Front Sanding Drum: Cylindrical drum with machined surface that is covered in hook- and-loop material. Typically wrapped with coarse grit sandpaper to perform thickness sanding portion of operation. Figure 5. G1066Z front controls. Model G1066R/Z/G1079R (Mfd. Since 02/24)
- Page 10 Push to reset circuit breaker after allowing machine to cool down. Figure 8. G1079R front controls. D. Conveyor Height Crank Handle: Rotate to raise or lower conveyor table according to workpiece thickness. Model G1066R/Z/G1079R (Mfd. Since 02/24)
-
Page 11: Machine Data Sheet (G1066R)
MACHINE DATA SHEET Customer Service #: (570) 546-9663 · To Order Call: (800) 523-4777 · Fax #: (800) 438-5901 MODEL G1066R 24" 5 HP DRUM SANDER Product Dimensions: Weight................................389 lbs. Width (side-to-side) x Depth (front-to-back) x Height..............37 x 34-1/2 x 43 in. - Page 12 The information contained herein is deemed accurate as of 2/6/2024 and represents our most recent product specifications. Model G1066R PAGE 2 OF 2 Due to our ongoing improvement efforts, this information may not accurately describe items previously purchased. -10- Model G1066R/Z/G1079R (Mfd. Since 02/24)
-
Page 13: Machine Data Sheet (G1066Z)
The information contained herein is deemed accurate as of 2/6/2024 and represents our most recent product specifications. Model G1066Z PAGE 1 OF 2 Due to our ongoing improvement efforts, this information may not accurately describe items previously purchased. -11- Model G1066R/Z/G1079R (Mfd. Since 02/24) - Page 14 The information contained herein is deemed accurate as of 2/6/2024 and represents our most recent product specifications. Model G1066Z PAGE 2 OF 2 Due to our ongoing improvement efforts, this information may not accurately describe items previously purchased. -12- Model G1066R/Z/G1079R (Mfd. Since 02/24)
-
Page 15: Machine Data Sheet (G1079R)
The information contained herein is deemed accurate as of 2/6/2024 and represents our most recent product specifications. Model G1079R PAGE 1 OF 2 Due to our ongoing improvement efforts, this information may not accurately describe items previously purchased. -13- Model G1066R/Z/G1079R (Mfd. Since 02/24) - Page 16 The information contained herein is deemed accurate as of 2/6/2024 and represents our most recent product specifications. Model G1079R PAGE 2 OF 2 Due to our ongoing improvement efforts, this information may not accurately describe items previously purchased. -14- Model G1066R/Z/G1079R (Mfd. Since 02/24)
-
Page 17: Section 1: Safety
Never operate under the influence of drugs or injury or blindness from flying particles. Everyday alcohol, when tired, or when distracted. eyeglasses are NOT approved safety glasses. -15- Model G1066R/Z/G1079R (Mfd. Since 02/24) - Page 18 EXPERIENCING DIFFICULTIES. If at any time debris. Make sure they are properly installed, you experience difficulties performing the intend- undamaged, and working correctly BEFORE ed operation, stop using the machine! Contact our operating machine. Technical Support at (570) 546-9663. -16- Model G1066R/Z/G1079R (Mfd. Since 02/24)
-
Page 19: Additional Safety For Drum Sanders
If normal safety pre- respect. Failure to do so could result in cautions are overlooked or ignored, seri- serious personal injury, damage to equip- ous personal injury may occur. ment, or poor work results. -17- Model G1066R/Z/G1079R (Mfd. Since 02/24) -
Page 20: Section 2: Power Supply
D.) G1066R Amp Draw at 220V ....26 Amps G1066Z Amp Draw at 220V ....27 Amps G1079R Amp Draw at 220V ....9.5 Amps... - Page 21 Grounding Pin We do not recommend using an extension cord with this machine. If you must use an extension Figure 10. Typical L6-30 (G1066R, G1066Z) and cord, only use it if absolutely necessary and only 6-15 (G1079R) plugs and receptacles.
-
Page 22: Section 3: Setup
IMPORTANT: Save all packaging materials until you are completely satisfied with the machine and have resolved any issues between Grizzly or the shipping agent. You MUST have the original pack- aging to file a freight claim. It is also extremely helpful if you need to return your machine later. -
Page 23: Inventory
Lighting Lighting around the machine must be adequate enough that operations can be performed safely. Shadows, glare, or strobe effects that may distract or impede the operator must be eliminated. Figure 11. Inventory. -21- Model G1066R/Z/G1079R (Mfd. Since 02/24) -
Page 24: Lifting & Placing
Unbolt machine from metal skids. Drilled Hole Carefully lift machine off metal skids and Figure 12. Popular method for anchoring move it to prepared location, then lower machinery to a concrete floor. machine into position. -22- Model G1066R/Z/G1079R (Mfd. Since 02/24) -
Page 25: Assembly
This machine creates substantial amounts of wood dust while in operation. Failure to use a dust- collection system can result in short- and long-term respiratory illness. Figure 15. Attaching control panel to machine base. -23- Model G1066R/Z/G1079R (Mfd. Since 02/24) -
Page 26: Dust Collection
Figure 18. Location of dust ports (G1066R shown). Tug hoses to make sure they do not come off. A tight fit is necessary for proper perfor- mance. Note: A tight fit is necessary for proper per- formance. -24- Model G1066R/Z/G1079R (Mfd. Since 02/24) -
Page 27: Test Run
Emergency Stop Button G1066R/G1079R Figure 19. Location of Emergency Stop button. For Model G1066R/G1079R, the Test Run verifies that the motors power up and run correctly. Connect machine to power supply. To test run machine: Twist Emergency Stop button clockwise until it pops out (see Figure 20). -
Page 28: Recommended Adjustments
The Emergency Stop safety feature is not working correct- ly. This safety feature must work properly before proceeding with regular operations. Call Tech Support for help. -26- Model G1066R/Z/G1079R (Mfd. Since 02/24) -
Page 29: Disabling & Locking Switch (G1079R)
Padlock Shaft Minimum Shaft Diameter: 0.192" (4.8mm) Maximum Shaft Diameter: 0.2" (5.0mm) Figure 22. Minimum lock shaft requirements. Figure 21. ON button disabled by a padlock. -27- Model G1066R/Z/G1079R (Mfd. Since 02/24) -
Page 30: Section 4: Operations
Regardless of the content in this sec- handle), then repeats the feeding process of tion, Grizzly Industrial will not be held liable workpiece through sander. for accidents caused by lack of training. Changes sandpaper to a finer grit, as needed. -
Page 31: Stock Inspection & Requirements
• Excessive Warping: Workpieces with excessive cupping, bowing, or twisting are dangerous to sand because they are unsta- ble and often unpredictable when being sanded. DO NOT use workpieces with these characteristics! -29- Model G1066R/Z/G1079R (Mfd. Since 02/24) -
Page 32: Setting Depth Of Cut
⁄ turn ⁄ " or 0.4mm) or less; the maximum depth for most sanding conditions. Note: Each full rotation of conveyor elevation handwheel raises conveyor table approxi- mately 0.06" ( ⁄ ") or 1.5mm. -30- Model G1066R/Z/G1079R (Mfd. Since 02/24) -
Page 33: Monitoring Sanding Load (G1066Z)
Overloading the motor or pushing the sand- er to failure weakens the electrical sys- tem. Repeatedly doing so is abuse to the machine that will cause motor, capacitor, or circuit breaker damage, which is not cov- ered under warranty. -31- Model G1066R/Z/G1079R (Mfd. Since 02/24) -
Page 34: Sanding Tips
Extend the life of the sandpaper by regu- grits; the larger the grit increase, the harder it will larly using a PRO-STIK sanding pad (see ® be to remove the scratches from the previous grit. Page 34). -32- Model G1066R/Z/G1079R (Mfd. Since 02/24) -
Page 35: Installing/Replacing Sandpaper
The Model G1066R/G1066Z/G1079R allows you Starting with right side of drum, position to place a different grit sandpaper on each drum. end of sandpaper flush with end of drum The front drum should have a coarser grit than (see Figure 28), then rotate drum clockwise the rear. -
Page 36: Section 5: Accessories
Roller Tables. Ideal for easily positioning of mate- To reduce this risk, only install accessories rial into sander. Simply place a roller table on one recommended for this machine by Grizzly. or both sides of your sander and production time is automatically improved! -
Page 37: Section 6: Maintenance
SECTION 6: MAINTENANCE Cleaning Machine To reduce risk of shock or accidental startup, always Cleaning the Model G1066R/G1066Z/G1079R is disconnect machine from relatively easy. Vacuum excess wood chips and power before adjustments, sawdust, and wipe off the remaining dust with a maintenance, or service. -
Page 38: Lubrication
Grease Gun ............1 periodically, depending on usage. See below for Shop Rags ......... As Needed some lubrication products that Grizzly offers. To lubricate the pillow bearings, remove the grease T26685—ISO 32 Moly-D Machine Oil, 1 Gal. fitting cap (see Figure 35), use a grease gun to T26419—Syn-O-Gen Synthetic Grease... -
Page 39: Section 7: Service
6. Motor fan rubbing on fan cover. 6. Fix/replace fan cover; replace loose/damaged fan. 7. Worn drum bearings. 7. Test/repair/replace. 8. Centrifugal switch at fault. 8. Adjust centrifugal switch/contact points; replace if necessary. 9. Motor bearings at fault. 9. Test/repair/replace. -37- Model G1066R/Z/G1079R (Mfd. Since 02/24) - Page 40 4. Poor dust collection. 4. Unclog ducts; close gates to improve suction; re- design collection system. 5. Clean/replace sandpaper (Page 35). 5. Sandpaper loaded with sawdust and gum. 6. Replace sandpaper (Page 33). 6. Worn sandpaper. -38- Model G1066R/Z/G1079R (Mfd. Since 02/24)
-
Page 41: Tracking & Tensioning Conveyor Belt
Proceed to Tensioning Conveyor Belt on ments to infeed end of conveyor to avoid needing next page. to make adjustments to table elevation chain. Items Needed Phillips Head Screwdriver #2 ......1 Open-End Wrench 19mm ........1 -39- Model G1066R/Z/G1079R (Mfd. Since 02/24) -
Page 42: Making Blocks
Cut 2x4 into two even pieces to make two 36" long wood gauge blocks. Note: Steps 1–2 can be skipped, but hav- ing gauge blocks of equal height is critical to accuracy of adjustments. -40- Model G1066R/Z/G1079R (Mfd. Since 02/24) -
Page 43: Aligning Drums
Measure distances between outside of front sanding drum and inside of front brace on For the Model G1066R/G1066Z/G1079R Drum both ends of drum. Sander to function properly, the sanding drums must be aligned in two directions: (1) perpendicu- —... - Page 44 DISCONNECT MACHINE FROM POWER! crucial to all subsequent steps. Lower conveyor two full turns. Remove gauge block and insert it on left side. Line it up with front of conveyor, as was done in Step 3. -42- Model G1066R/Z/G1079R (Mfd. Since 02/24)
-
Page 45: Adjusting Pressure Rollers
Raise conveyor until gauge block just touch- es front sanding drum. Lower conveyor one full turn. Micro-Adjustment Lock Knob Figure 45. Model G1066Z rear drum micro- adjustment controls. -43- Model G1066R/Z/G1079R (Mfd. Since 02/24) - Page 46 Note: It may be necessary to remove dust scoop to access adjustment bolt. Refer to Adjusting 10. If dust scoop was removed, refer to Adjusting Dust Scoop on Page 45. Dust Scoop on Page 45. -44- Model G1066R/Z/G1079R (Mfd. Since 02/24)
-
Page 47: Adjusting Dust Scoop
Ensure sanding drums are properly aligned The sanding drums are driven by two V-belts on (see Aligning Drums on Page 41). the Model G1066R and G1066Z, and one V-belt on the Model G1079R. The belts must have prop- Place gauge blocks under rear sanding drum er tension for optimum power transfer. - Page 48 While pressing down on motor to keep ten- sion on belt, tighten motor mount fasteners. Reinstall and properly tension V-belts, tighten motor mount fasteners, and reinstall right access panel. -46- Model G1066R/Z/G1079R (Mfd. Since 02/24)
-
Page 49: Replacing Bearings
Carefully lift drum up and out of machine and place on flat, stable surface. Loosen (2) bearing set screws (see Figures The Model G1066R/G1066Z/G1079R is designed 51–52) on each side of drum, then remove for many years of reliable service. But after long bearing assemblies from drum shaft. -
Page 50: Section 8: Wiring
Technical Support at (570) 546-9663. The photos and diagrams included in this section are best viewed in color. You can view these pages in color at www.grizzly.com. -48- Model G1066R/Z/G1079R (Mfd. Since 02/24) -
Page 51: G1066R Electrical Components
G1066R Electrical Components Figure 55. G1066R drum motor connections. Figure 56. G1066R drum motor capacitors. Figure 53. G1066R magnetic switch connections. Figure 54. G1066R feed motor connections and capacitor. READ ELECTRICAL SAFETY -49- Model G1066R/Z/G1079R (Mfd. Since 02/24) ON PAGE 48! -
Page 52: G1066R Wiring Diagram
L1/1 L2/3 L3/5 N013 Magnetic Switch Assembly T1/2 T2/4 T3/6 N014 Conveyor Motor Run Capacitor 12uF 350VAC Motor Junction Box Ground Drum Motor Motor Junction Box READ ELECTRICAL SAFETY -50- Model G1066R/Z/G1079R (Mfd. Since 02/24) ON PAGE 48! -
Page 53: G1066Z Electrical Components
G1066Z Electrical Components Figure 57. G1066Z drum motor connections and Figure 58. G1066Z controls connections capacitors. (rotated 90°). Figure 59. G1066Z control panel connections. READ ELECTRICAL SAFETY -51- Model G1066R/Z/G1079R (Mfd. Since 02/24) ON PAGE 48! -
Page 54: G1066Z Wiring Diagram
MA-30 R1 T1 T2/4 T1/2 T3/6 Motor Junction Box Circuit Board RA-30 − Run Capacitor 50uF 350VAC Start Capacitor 600MFD 125VAC 220 VAC L6-30 PLUG Drum Motor Ground READ ELECTRICAL SAFETY -52- Model G1066R/Z/G1079R (Mfd. Since 02/24) ON PAGE 48! -
Page 55: G1079R Electrical Components
Figure 62. G1079R drum motor connections. Figure 63. G1079R drum motor start capacitor. Figure 60. G1079R switch and circuit breaker connections. Figure 61. G1079R feed motor connections and run capacitor. READ ELECTRICAL SAFETY -53- Model G1066R/Z/G1079R (Mfd. Since 02/24) ON PAGE 48! -
Page 56: G1079R Wiring Diagram
R Capacitor 12uF 350VAC Ground WARNING! SHOCK HAZARD! Disconnect power before working on wiring. ON/OFF Switch Drum Motor Thermal Circuit Breaker Ground Ground Ground 6-15 Plug (As Recommended) READ ELECTRICAL SAFETY -54- Model G1066R/Z/G1079R (Mfd. Since 02/24) ON PAGE 48! -
Page 57: Section 9: Parts
SECTION 9: PARTS G1066R Stand & Motor 14V2 FRONT 20V2-1 20V2-5 15V2 20V2-2 20V2-5 20V2-3 20V2-6 20V2-4 20V2-7 90 18 20V2 -55- BUY PARTS ONLINE AT GRIZZLY.COM! Model G1066R/Z/G1079R (Mfd. Since 02/24) Scan QR code to visit our Parts Store. -
Page 58: G1066R Conveyor Belt & Table
G1066R Conveyor Belt & Table FRONT 62V2 35V2 35V2 62V2 51V2 62V2 35V2 35V2 39-4 62V2 39-2 39-1 39-3 -56- BUY PARTS ONLINE AT GRIZZLY.COM! Model G1066R/Z/G1079R (Mfd. Since 02/24) Scan QR code to visit our Parts Store. -
Page 59: G1066R Drums & Rollers
G1066R Drums & Rollers FRONT 92V2 99V2 71V2 99V2 71V2 -57- BUY PARTS ONLINE AT GRIZZLY.COM! Model G1066R/Z/G1079R (Mfd. Since 02/24) Scan QR code to visit our Parts Store. - Page 60 PHLP HD SCR 10-24 X 5/8 P1066R043 CHAIN P1066R110 PHLP HD SCR M4-.7 X 6 P1066R044 SPROCKET P1066R111 TAP SCREW #8 X 3/8 -58- BUY PARTS ONLINE AT GRIZZLY.COM! Model G1066R/Z/G1079R (Mfd. Since 02/24) Scan QR code to visit our Parts Store.
- Page 61 P1066R208 STRAIN RELIEF TYPE-3 PG20 P1066R139 TAP SCREW #8 X 1/2 P1066R209 TAP SCREW #8 X 5/8 P1066R140 FLAT WASHER #10 -59- BUY PARTS ONLINE AT GRIZZLY.COM! Model G1066R/Z/G1079R (Mfd. Since 02/24) Scan QR code to visit our Parts Store.
-
Page 62: G1066Z Stand & Motor
G1066Z Stand & Motor 20-1 20-2 FRONT 20-3 20-6 20-4 20-5 20-7 259V2 221-1 226-1 218V2 221-2V2 218-1 33V2 261V2 261V2 261V3 222V2 261V2 -60- BUY PARTS ONLINE AT GRIZZLY.COM! Model G1066R/Z/G1079R (Mfd. Since 02/24) Scan QR code to visit our Parts Store. -
Page 63: G1066Z Conveyor Belt & Table
G1066Z Conveyor Belt & Table 74V2 FRONT 74V2 74V2 74V2 39V2-1 39V2 -61- BUY PARTS ONLINE AT GRIZZLY.COM! Model G1066R/Z/G1079R (Mfd. Since 02/24) Scan QR code to visit our Parts Store. -
Page 64: G1066Z Drums & Rollers
G1066Z Drums & Rollers FRONT -62- BUY PARTS ONLINE AT GRIZZLY.COM! Model G1066R/Z/G1079R (Mfd. Since 02/24) Scan QR code to visit our Parts Store. - Page 65 MOTOR BRACKET P1066Z118 LINE CORD P1066Z047 CAP SCREW 1/4-20 X 3/4 P1066Z119 LINE CORD P1066Z048 FLAT WASHER 1/4 P1066Z120 EARTH LEAD GREEN -63- BUY PARTS ONLINE AT GRIZZLY.COM! Model G1066R/Z/G1079R (Mfd. Since 02/24) Scan QR code to visit our Parts Store.
- Page 66 TAP SCREW #8 X 5/8 P1066Z245 SET SCREW 10-24 X 1/4 P1066Z292 PHLP HD SCR M6-1 X 20 P1066Z246 PHLP HD SCR 1/4-20 X 3/8 -64- BUY PARTS ONLINE AT GRIZZLY.COM! Model G1066R/Z/G1079R (Mfd. Since 02/24) Scan QR code to visit our Parts Store.
-
Page 67: G1079R Stand & Motor
G1079R Stand & Motor 14V3 15V2 16V2 116V2 22 24 20V2-1 20V2-4 32V2 20V2-2 31V2 117V2 20V2-3 20V2-5 20V2 -65- BUY PARTS ONLINE AT GRIZZLY.COM! Model G1066R/Z/G1079R (Mfd. Since 02/24) Scan QR code to visit our Parts Store. -
Page 68: G1079R Conveyor Belt & Table
G1079R Conveyor Belt & Table 74V2 FRONT 51V2 51V2 74V2 51V2 74V2 51V2 74V2 39-4 39-2 39-1 39-3 118V2 -66- BUY PARTS ONLINE AT GRIZZLY.COM! Model G1066R/Z/G1079R (Mfd. Since 02/24) Scan QR code to visit our Parts Store. -
Page 69: G1079R Drums & Rollers
G1079R Drums & Rollers FRONT 91V2 99V2 92V2 99V2 -67- BUY PARTS ONLINE AT GRIZZLY.COM! Model G1066R/Z/G1079R (Mfd. Since 02/24) Scan QR code to visit our Parts Store. - Page 70 MOTOR CORD 16G 3C 30" V2.02.11 P1079R044 SPROCKET 118V2 P1079R118V2 FEED MOTOR CORD V2.02.09 P1079R045 SET SCREW 1/4-20 X 1/2 P1079R137 FLANGE BOLT 10-24 X 3/8 -68- BUY PARTS ONLINE AT GRIZZLY.COM! Model G1066R/Z/G1079R (Mfd. Since 02/24) Scan QR code to visit our Parts Store.
- Page 71 FLAT WASHER #10 P1079R183 PHLP HD SCR 1/4-20 X 3/8 P1079R162 HEX NUT 10-24 P1079R184 TAP SCREW #8 X 5/8 P1079R163 PLATE -69- BUY PARTS ONLINE AT GRIZZLY.COM! Model G1066R/Z/G1079R (Mfd. Since 02/24) Scan QR code to visit our Parts Store.
-
Page 72: G1066R Labels & Cosmetics
Safety labels help reduce the risk of serious injury caused by machine hazards. If any label comes off or becomes unreadable, the owner of this machine MUST replace it in the original location before resuming operations. For replacements, contact (800) 523-4777 or www.grizzly.com. -70- BUY PARTS ONLINE AT GRIZZLY.COM! -
Page 73: G1066Z Labels & Cosmetics
Safety labels help reduce the risk of serious injury caused by machine hazards. If any label comes off or becomes unreadable, the owner of this machine MUST replace it in the original location before resuming operations. For replacements, contact (800) 523-4777 or www.grizzly.com. -71- BUY PARTS ONLINE AT GRIZZLY.COM! -
Page 74: G1079R Labels & Cosmetics
Safety labels help reduce the risk of serious injury caused by machine hazards. If any label comes off or becomes unreadable, the owner of this machine MUST replace it in the original location before resuming operations. For replacements, contact (800) 523-4777 or www.grizzly.com. -72- BUY PARTS ONLINE AT GRIZZLY.COM! -
Page 75: Warranty & Returns
WARRANTY & RETURNS Grizzly Industrial, Inc. warrants every product it sells for a period of 1 year to the original purchaser from the date of purchase. This warranty does not apply to defects due directly or indirectly to misuse, abuse, negligence, accidents, repairs or alterations or lack of maintenance. This is Grizzly’s sole written warranty...
Need help?
Do you have a question about the G1066R and is the answer not in the manual?
Questions and answers