Table of Contents
Advertisement
MODEL G1066R/G1066Z/G1079R
DRUM SANDER
OWNER'S MANUAL
(For models manufactured since 02/11)
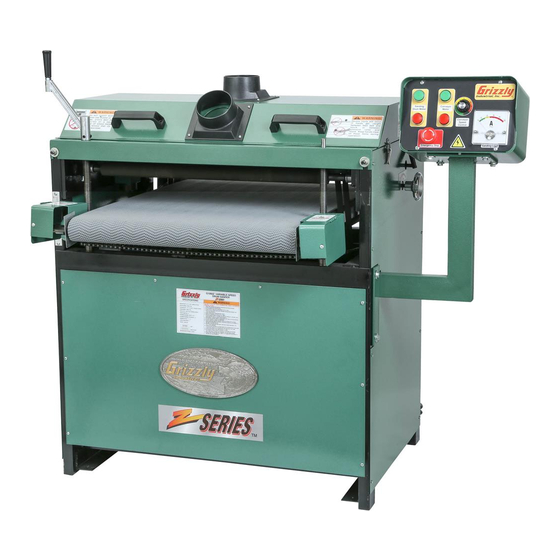
Model G1066Z
Model G1066R
Model G1079R
COPYRIGHT © MAY, 2002 BY GRIZZLY INDUSTRIAL, INC. REVISED OCTOBER, 2018 (ES)
WARNING: NO PORTION OF THIS MANUAL MAY BE REPRODUCED IN ANY SHAPE
OR FORM WITHOUT THE WRITTEN APPROVAL OF GRIZZLY INDUSTRIAL, INC.
#0443 PRINTED IN TAIWAN
V2.10.18
Advertisement
Table of Contents

Related Manuals for Grizzly G1066R


Summary of Contents for Grizzly G1066R
- Page 1 Model G1066Z Model G1066R Model G1079R COPYRIGHT © MAY, 2002 BY GRIZZLY INDUSTRIAL, INC. REVISED OCTOBER, 2018 (ES) WARNING: NO PORTION OF THIS MANUAL MAY BE REPRODUCED IN ANY SHAPE OR FORM WITHOUT THE WRITTEN APPROVAL OF GRIZZLY INDUSTRIAL, INC.
- Page 2 This manual provides critical safety instructions on the proper setup, operation, maintenance, and service of this machine/tool. Save this document, refer to it often, and use it to instruct other operators. Failure to read, understand and follow the instructions in this manual may result in fire or serious personal injury—including amputation, electrocution, or death.
-
Page 3: Table Of Contents
G1079R Wiring Diagram ......54 Anchoring to Floor (G1079R)....... 22 SECTION 9: PARTS ........55 Assembly ............. 23 G1066R Stand & Table Elevation ....55 Dust Collection ..........24 G1066R Conveyor Belt & Table ....56 Test Run ............25 G1066R Drum &... -
Page 4: Introduction
Machine Differences Models G1066R, G1066Z, and G1079R are heavy- duty drum sanders with the following differences: Manufacture Date Model G1066R is a 5 HP, 24" drum sander. • • Model G1066Z is a 5 HP, 24" drum sander Serial Number with a variable-speed conveyor and rear drum height micro-adjustment knobs. -
Page 5: Identification (G1066R)
Infeed (Front) Sanding Drum 4" Dust Ports Table Height Crank Handle Top Cover Conveyor Table w/Belt On/Off Switch Rear Access Front Access Panel Panel To reduce your risk of serious injury, read this entire manual BEFORE using machine. Model G1066R/Z/G1079R (Mfd. Since 02/11) -
Page 6: Identification (G1066Z)
Infeed (Front) Sanding Drum Control Table Height Crank Handle 4" Dust Ports Top Cover Panel Conveyor Table w/Belt Front Access Panel Rear Access Panel To reduce your risk of serious injury, read this entire manual BEFORE using machine. Model G1066R/Z/G1079R (Mfd. Since 02/11) -
Page 7: Identification (G1079R)
4" Dust Ports Table Height Crank Handle Top Cover Conveyor Table w/Belt On/Off Front Access Switch Panel Rear Access Stand Panel To reduce your risk of serious injury, read this entire manual BEFORE using machine. Model G1066R/Z/G1079R (Mfd. Since 02/11) -
Page 8: Controls & Components
Refer to Figures 45–47 and the following descrip- tions to become familiar with the basic con- trols and components of the Model G1066R. Understanding these items and how they work will help you understand the rest of the manual and stay safe when operating this machine. - Page 9 Infeed (Front) Sanding Drum: Cylindrical drum with machined surface that is covered in hook-and-loop material. Typically wrapped with coarse grit sandpaper to perform thick- ness sanding portion of operation. Figure 49. G1066Z—front controls. Model G1066R/Z/G1079R (Mfd. Since 02/11)
- Page 10 Typically wrapped with coarse grit sandpaper to per- form thickness sanding portion of operation. Figure 52. G1079R—front controls. D. Table Height Crank Handle: Rotate to raise or lower conveyor table according to workpiece thickness. Model G1066R/Z/G1079R (Mfd. Since 02/11)
-
Page 11: Machine Data Sheet (G1066R)
MACHINE DATA SHEET Customer Service #: (570) 546-9663 · To Order Call: (800) 523-4777 · Fax #: (800) 438-5901 MODEL G1066R 24" DRUM SANDER Product Dimensions: Weight................................389 lbs. Width (side-to-side) x Depth (front-to-back) x Height..............37 x 34-1/2 x 43 in. - Page 12 The information contained herein is deemed accurate as of 10/29/2018 and represents our most recent product specifications. Model G1066R PAGE 2 OF 2 Due to our ongoing improvement efforts, this information may not accurately describe items previously purchased. -10- Model G1066R/Z/G1079R (Mfd. Since 02/11)
-
Page 13: Machine Data Sheet (G1066Z)
The information contained herein is deemed accurate as of 10/29/2018 and represents our most recent product specifications. Model G1066Z PAGE 1 OF 2 Due to our ongoing improvement efforts, this information may not accurately describe items previously purchased. -11- Model G1066R/Z/G1079R (Mfd. Since 02/11) - Page 14 The information contained herein is deemed accurate as of 10/29/2018 and represents our most recent product specifications. Model G1066Z PAGE 2 OF 2 Due to our ongoing improvement efforts, this information may not accurately describe items previously purchased. -12- Model G1066R/Z/G1079R (Mfd. Since 02/11)
-
Page 15: Machine Data Sheet (G1079R)
The information contained herein is deemed accurate as of 10/29/2018 and represents our most recent product specifications. Model G1079R PAGE 1 OF 2 Due to our ongoing improvement efforts, this information may not accurately describe items previously purchased. -13- Model G1066R/Z/G1079R (Mfd. Since 02/11) - Page 16 The information contained herein is deemed accurate as of 10/29/2018 and represents our most recent product specifications. Model G1079R PAGE 2 OF 2 Due to our ongoing improvement efforts, this information may not accurately describe items previously purchased. -14- Model G1066R/Z/G1079R (Mfd. Since 02/11)
-
Page 17: Section 1: Safety
Never operate under the influence of drugs or injury or blindness from flying particles. Everyday alcohol, when tired, or when distracted. eyeglasses are NOT approved safety glasses. -15- Model G1066R/Z/G1079R (Mfd. Since 02/11) - Page 18 Make sure they are properly installed, you experience difficulties performing the intend- undamaged, and working correctly BEFORE ed operation, stop using the machine! Contact our operating machine. Technical Support at (570) 546-9663. -16- Model G1066R/Z/G1079R (Mfd. Since 02/11)
-
Page 19: Additional Safety For Drum Sanders
If normal safety pre- respect. Failure to do so could result in cautions are overlooked or ignored, seri- serious personal injury, damage to equip- ous personal injury may occur. ment, or poor work results. -17- Model G1066R/Z/G1079R (Mfd. Since 02/11) -
Page 20: Section 2: Power Supply
G1066R Amp Draw at 220V ....26 Amps codes in your area. G1066Z Amp Draw at 220V ....27 Amps G1079R Amp Draw at 220V ....9.5 Amps... - Page 21 Grounding Pin We do not recommend using an extension cord with this machine. If you must use an extension Figure 54. Typical L6-30 (G1066R, G1066Z) and cord, only use it if absolutely necessary and only 6-15 (G1079R) plugs and receptacles.
-
Page 22: Section 3: Setup
IMPORTANT: Save all packaging materials until you are completely satisfied with the machine and have resolved any issues between Grizzly or the shipping agent. You MUST have the original pack- aging to file a freight claim. It is also extremely helpful if you need to return your machine later. -
Page 23: Inventory
E. Flat Washers 10mm ........8 gevity of machine components. For best results, Sandpaper Clips (G1066R, G1079R) ..2 operate this machine in a dry environment that is G. Control Panel (G1066Z) ......1 free from excessive moisture, hazardous chemi- H. -
Page 24: Lifting & Placing
Unbolt machine from metal skids. Drilled Hole Carefully lift machine off metal skids and Figure 56. Popular method for anchoring move it to prepared location, then lower machinery to a concrete floor. machine into position. -22- Model G1066R/Z/G1079R (Mfd. Since 02/11) -
Page 25: Assembly
Figure 57. Note: The dust ports on the Model G1066Z are positioned front-to-back, rather than side -by-side as on the G1066R and G1079R. Set Screw Attach the dust hoods to the Model G1066Z in the same manner as described here. -
Page 26: Dust Collection
Figure 61), and secure in place with (2) hose clamps. 4" Dust Ports Figure 61. Location of 4" dust ports (G1066R shown). Tug hoses to make sure they do not come off. A tight fit is necessary for proper perfor- mance. -24- Model G1066R/Z/G1079R (Mfd. Since 02/11) -
Page 27: Test Run
(see Figure 63). This resets but- death, or machine/property damage. ton so machine will start. G1066R/G1079R For Model G1066R/G1079R, the Test Run verifies that the motors power up and run correctly prior to regular operation. To test run machine: OFF Button Clear all setup tools away from machine. -
Page 28: Recommended Adjustments
A small amount of black belt dust at the bottom of the belt housing is normal during the life of the machine and does not indicate a problem with the machine or belt. -26- Model G1066R/Z/G1079R (Mfd. Since 02/11) -
Page 29: Disabling & Locking Switch (G1079R)
This risk increases with unsupervised operation. To help prevent unsupervised operation, disable and lock the switch before leaving machine unattended! Place key in a well- hidden or secure location. -27- Model G1066R/Z/G1079R (Mfd. Since 02/11) -
Page 30: Section 4: Operations
Regardless of the content in this sec- workpiece through sander. tion, Grizzly Industrial will not be held liable for accidents caused by lack of training. Changes sandpaper to a finer grit, as needed. -
Page 31: Stock Inspection And Requirements
80–100 Medium Removing planer sanded. DO NOT use workpieces with these marks and initial fin- characteristics! ish sanding. 120–180 Fine Finish sanding. -29- Model G1066R/Z/G1079R (Mfd. Since 02/11) -
Page 32: Sanding Tips
The Model G1066R/G1066Z/G1079R allows you speed up, causing a gouge. to place a different grit sandpaper on each drum. -
Page 33: Sanding
Repeatedly doing so is abuse to the tact with sanding drums. This is the correct machine that will cause motor, capacitor, or height to begin sanding the workpiece. circuit breaker damage, which is not cov- ered under warranty. -31- Model G1066R/Z/G1079R (Mfd. Since 02/11) -
Page 34: Setting Conveyor Speed (G1066Z)
Figure 69. Location of conveyor speed control er to failure weakens the electrical sys- (G1066Z). tem. Repeatedly doing so is abuse to the machine that will cause motor, capacitor, or circuit breaker damage, which is not cov- ered under warranty. -32- Model G1066R/Z/G1079R (Mfd. Since 02/11) -
Page 35: Installing/Replacing Sandpaper
Tip: Note direction sandpaper was wrapped Installing Sandpaper G1066R around drum. The Model G1066R/G1079R is designed for 6" wide sandpaper rolls. The sandpaper roll attach- es to the sanding drums with a spring clip on one 17"... -
Page 36: Installing/Replacing Sandpaper (G1066Z)
To change the sandpaper: DISCONNECT MACHINE FROM POWER! Remove/open top cover. Figure 74. Strapping tape securing sandpaper roll to drums. Repeat Steps 3–5 with second drum. Close/re-install top cover. Make sure dust- collection hoses are secure. -34- Model G1066R/Z/G1079R (Mfd. Since 02/11) -
Page 37: Section 5: Accessories
⁄ ". serious personal injury or machine damage. To reduce this risk, only install accessories recommended for this machine by Grizzly. NOTICE Refer to our website or latest catalog for additional recommended accessories. Aluminum Oxide Sanding Rolls, 6" x 50' H4776—36 Grit: Use for rough sawn boards,... - Page 38 T20503—Face Shield Window W1053 T20451—“Kirova” Clear Safety Glasses W1007 T20452—“Kirova” Anti-Reflective S. Glasses W1317 W1017 T20456—DAKURA Safety Glasses Figure 77. Dust collection accessories. T20502 T20503 T20452 T20451 T20456 Figure 79. Assortment of basic eye protection. -36- Model G1066R/Z/G1079R (Mfd. Since 02/11)
-
Page 39: Section 6: Maintenance
SECTION 6: MAINTENANCE Cleaning To reduce risk of shock or accidental startup, always Cleaning the Model G1066R/G1066Z/G1079R is disconnect machine from relatively easy. Vacuum excess wood chips and power before adjustments, sawdust, and wipe off the remaining dust with a maintenance, or service. -
Page 40: Section 7: Service
6. Motor fan rubbing on fan cover. 6. Fix/replace fan cover; replace loose/damaged fan. 7. Worn drum bearings. 7. Test/repair/replace. 8. Centrifugal switch at fault. 8. Adjust centrifugal switch/contact points; replace if necessary. 9. Motor bearings at fault. 9. Test/repair/replace. -38- Model G1066R/Z/G1079R (Mfd. Since 02/11) - Page 41 3. Increase feed rate (G1066Z) (Page 32). 3. Feed rate too slow (G1066Z). 4. Re-install sandpaper roll (Pages 33–34). 4. Sandpaper roll not properly wrapped around drum. 5. Replace sandpaper roll (Pages 33–34). 5. Sandpaper roll worn or damaged. -39- Model G1066R/Z/G1079R (Mfd. Since 02/11)
-
Page 42: Aligning Drums
Drums Perpendicular to Feed Direction Item(s) Needed Drum Alignment Tape Measure ............ 1 For the Model G1066R/G1066Z/G1079R Drum Open-End or Socket Wrench ⁄ " ....1 Sander to function properly, the sanding drums must be aligned in two directions: (1) perpendicu-... - Page 43 Raise table two full turns to bring it back up to Reference Height #1. Set height of front sanding drum to gauge block (refer to Adjusting Drum Height on This Page for instructions). Figure 84. Bearing block components. -41- Model G1066R/Z/G1079R (Mfd. Since 02/11)
-
Page 44: Adjusting Pressure Rollers
Figure 85. Model G1066Z rear drum micro-adjustment controls. Jam Nut (1 of 4) Pressure Roller Tension Hex Bolt Pressure Roller (1 of 4) (1 of 2) Figure 86. Location of pressure roller tensioners. -42- Model G1066R/Z/G1079R (Mfd. Since 02/11) -
Page 45: Adjusting Conveyor Belt Tension
The pressure rollers slowly. should just touch surface of gauge block, allowing enough room to rotate. DISCONNECT MACHINE FROM POWER! Tighten jam nuts on hex bolts to secure Remove roller bracket guards. height position. -43- Model G1066R/Z/G1079R (Mfd. Since 02/11) -
Page 46: Adjusting Dust Scoop
(see Figure 87) counter- Dust Scoop clockwise to increase belt tension. The Model G1066R/G1079R is equipped with a dust scoop located next to the rear sanding drum. The Model G1066Z features a dust scoop for each Roller Bracket drum. -
Page 47: Tensioning/Replacing V-Belts
Loosen motor mount fasteners shown in The sanding drums are driven by two V-belts on Figure 90. DO NOT completely remove the Model G1066R/G1066Z and one V-belt on motor mount fasteners. the Model G1079R. The belts must have proper tension for optimum power transfer. However, Press down on motor to keep tension on belt. - Page 48 Each pulley can be adjusted by loosening the set access panel. screw that secures the pulley to the shaft, sliding the pulley in/out, and retightening the set screw to lock the pulley in place. -46- Model G1066R/Z/G1079R (Mfd. Since 02/11)
-
Page 49: Replacing Bearings
Make sure, when installing the new bearing, Bearing Replacement that lubrication groove in the bearing will The Model G1066R/G1066Z/G1079R is designed match groove and grease fitting in housing for many years of reliable service. But after long once it is in place. -
Page 50: Section 8: Wiring
Technical Support at (570) 546-9663. The photos and diagrams included in this section are best viewed in color. You can view these pages in color at www.grizzly.com. -48- Model G1066R/Z/G1079R (Mfd. Since 02/11) -
Page 51: G1066R Electrical Components
G1066R Electrical Components Figure 96. G1066R drum motor connections. Figure 97. G1066R drum motor capacitors. Figure 94. G1066R magnetic switch connections. Figure 95. G1066R feed motor connections and capacitor. READ ELECTRICAL SAFETY -49- Model G1066R/Z/G1079R (Mfd. Since 02/11) ON PAGE 33! -
Page 52: G1066R Wiring Diagram
N013 L1/1 L2/3 L3/5 MAGNETIC SWITCH ASSEMBLY T1/2 T2/4 T3/6 N014 Feed Motor Run Capacitor 12uF 350VAC Motor Junction Box Ground Drum Motor Motor Junction Box READ ELECTRICAL SAFETY -50- Model G1066R/Z/G1079R (Mfd. Since 02/11) ON PAGE 33! -
Page 53: G1066Z Electrical Components
G1066Z Electrical Components Figure 98. G1066Z feed motor connections and Figure 99. G1066Z controls connections capacitors. (rotated 90°). Figure 100. G1066Z control panel connections. READ ELECTRICAL SAFETY -51- Model G1066R/Z/G1079R (Mfd. Since 02/11) ON PAGE 33! -
Page 54: G1066Z Wiring Diagram
MA-30 R1 T1 T1/2 T2/4 T3/6 Motor Junction Box Circuit Board RA-30 − Run Capacitor 50uF 350VAC Start Capacitor 220 VAC 600MFD 125VAC L6-30 PLUG Drum Motor Ground READ ELECTRICAL SAFETY -52- Model G1066R/Z/G1079R (Mfd. Since 02/11) ON PAGE 33! -
Page 55: G1079R Electrical Components
Figure 103. G1079R drum motor connections. Figure 104. G1079R drum motor start capacitor. Figure 101. G1079R switch and circuit breaker connections. Figure 102. G1079R feed motor connections and run capacitor. READ ELECTRICAL SAFETY -53- Model G1066R/Z/G1079R (Mfd. Since 02/11) ON PAGE 33! -
Page 56: G1079R Wiring Diagram
SHOCK HAZARD! Disconnect power before working on ON/OFF SWITCH wiring. (viewed from behind) DRUM MOTOR THERMAL CIRCUIT BREAKER (viewed from behind) Ground Ground Ground 6-20 Plug (As Recommended) READ ELECTRICAL SAFETY -54- Model G1066R/Z/G1079R (Mfd. Since 02/11) ON PAGE 33! -
Page 57: Section 9: Parts
SECTION 9: PARTS G1066R Stand & Table Elevation 20-1 20-5 20-2 20-5 20-3 20-6 20-4 20-7 90 18 BUY PARTS ONLINE AT GRIZZLY.COM! -55- Model G1066R/Z/G1079R (Mfd. Since 02/11) Scan QR code to visit our Parts Store. -
Page 58: G1066R Conveyor Belt & Table
G1066R Conveyor Belt & Table 35V2 35V2 51V2 35V2 35V2 39-4 39-3 39-2 39-1 BUY PARTS ONLINE AT GRIZZLY.COM! -56- Model G1066R/Z/G1079R (Mfd. Since 02/11) Scan QR code to visit our Parts Store. -
Page 59: G1066R Drum & Roller Mechanism
G1066R Drum & Roller Mechanism BUY PARTS ONLINE AT GRIZZLY.COM! -57- Model G1066R/Z/G1079R (Mfd. Since 02/11) Scan QR code to visit our Parts Store. - Page 60 HEX NUT 10-24 P1066R046 MOTOR BRACKET P1066R125 FLAT WASHER 1/4 P1066R047 CAP SCREW 3/8-16 X 3/4 P1066R137 PHLP HD SCR 10-24 X 3/8 BUY PARTS ONLINE AT GRIZZLY.COM! -58- Model G1066R/Z/G1079R (Mfd. Since 02/11) Scan QR code to visit our Parts Store.
- Page 61 EXT TOOTH WASHER #10 P1066R208 STRAIN RELIEF TYPE-3 PG20 P1066R156 LOCK WASHER #10 P1066R209 TAP SCREW #8 X 5/8 P1066R200 ID/WARNING LABEL BUY PARTS ONLINE AT GRIZZLY.COM! -59- Model G1066R/Z/G1079R (Mfd. Since 02/11) Scan QR code to visit our Parts Store.
-
Page 62: G1066Z Stand & Table Elevation
G1066Z Stand & Table Elevation 20-1 20-2 20-3 20-6 20-4 20-5 20-7 221-1 226-1 221-2V2 218-1 33V2 222V2 BUY PARTS ONLINE AT GRIZZLY.COM! -60- Model G1066R/Z/G1079R (Mfd. Since 02/11) Scan QR code to visit our Parts Store. -
Page 63: G1066Z Conveyor Belt & Table
G1066Z Conveyor Belt & Table BUY PARTS ONLINE AT GRIZZLY.COM! -61- Model G1066R/Z/G1079R (Mfd. Since 02/11) Scan QR code to visit our Parts Store. -
Page 64: G1066Z Drum & Roller Mechanism
G1066Z Drum & Roller Mechanism 202A 86 85 BUY PARTS ONLINE AT GRIZZLY.COM! -62- Model G1066R/Z/G1079R (Mfd. Since 02/11) Scan QR code to visit our Parts Store. - Page 65 P1066Z098 V-BELT B67 P1066Z042 KEY 5 X 5 X 20 P1066Z101 STRIKE P1066Z043 CHAIN P1066Z102 LATCH P1066Z044 SPROCKET P1066Z105 SPRING PLATE BUY PARTS ONLINE AT GRIZZLY.COM! -63- Model G1066R/Z/G1079R (Mfd. Since 02/11) Scan QR code to visit our Parts Store.
- Page 66 226-1 P1066Z226-1 LOAD/AMP METER COVER P1066Z287 CORD RETAINER CLIP P1066Z227 CABLE MARKER P1066Z288 TAP SCREW #8 X 5/8 P1066Z238 LOCK HANDLE BUY PARTS ONLINE AT GRIZZLY.COM! -64- Model G1066R/Z/G1079R (Mfd. Since 02/11) Scan QR code to visit our Parts Store.
-
Page 67: G1079R Stand & Table Elevation
G1079R Stand & Table Elevation 14V2 15V2 16V2 22 24 20-1 20-4 32V2 20-2 31V2 117V2 20-5 20-3 BUY PARTS ONLINE AT GRIZZLY.COM! -65- Model G1066R/Z/G1079R (Mfd. Since 02/11) Scan QR code to visit our Parts Store. -
Page 68: G1079R Conveyor Belt & Table
G1079R Conveyor Belt & Table 51V2 51V2 51V2 51V2 39-4 39-2 39-1 39-3 118V2 BUY PARTS ONLINE AT GRIZZLY.COM! -66- Model G1066R/Z/G1079R (Mfd. Since 02/11) Scan QR code to visit our Parts Store. -
Page 69: G1079R Drum & Roller Mechanism
G1079R Drum & Roller Mechanism BUY PARTS ONLINE AT GRIZZLY.COM! -67- Model G1066R/Z/G1079R (Mfd. Since 02/11) Scan QR code to visit our Parts Store. - Page 70 SET SCREW 1/4-20 X 1/4 P1079R139 TAP SCREW #8 X 1/2 P1079R046 MOTOR BRACKET P1079R140 FLAT WASHER #10 P1079R149 HEX WRENCH 3MM BUY PARTS ONLINE AT GRIZZLY.COM! -68- Model G1066R/Z/G1079R (Mfd. Since 02/11) Scan QR code to visit our Parts Store.
- Page 71 ELECTRICITY LABEL 1.4W X 1.2H P1079R166 HEX NUT 10-24 P1079R208 FEED ONLY ONE LABEL V1.07.02 P1079R167 EXT TOOTH WASHER #10 P1079R209 GRIZZLY NAMEPLATE- SMALL BUY PARTS ONLINE AT GRIZZLY.COM! -69- Model G1066R/Z/G1079R (Mfd. Since 02/11) Scan QR code to visit our Parts Store.
- Page 73 Would you recommend Grizzly Industrial to a friend? _____ Yes _____No Would you allow us to use your name as a reference for Grizzly customers in your area? Note: We never use names more than 3 times. _____ Yes _____No 10.
- Page 74 FOLD ALONG DOTTED LINE Place Stamp Here GRIZZLY INDUSTRIAL, INC. P.O. BOX 2069 BELLINGHAM, WA 98227-2069 FOLD ALONG DOTTED LINE Send a Grizzly Catalog to a friend: Name_______________________________ Street_______________________________ City______________State______Zip______ TAPE ALONG EDGES--PLEASE DO NOT STAPLE...
-
Page 75: Warranty & Returns
WARRANTY & RETURNS Grizzly Industrial, Inc. warrants every product it sells for a period of 1 year to the original purchaser from the date of purchase. This warranty does not apply to defects due directly or indirectly to misuse, abuse, negligence, accidents, repairs or alterations or lack of maintenance.
Need help?
Do you have a question about the G1066R and is the answer not in the manual?
Questions and answers