Grizzly G1015 Owner's Manual
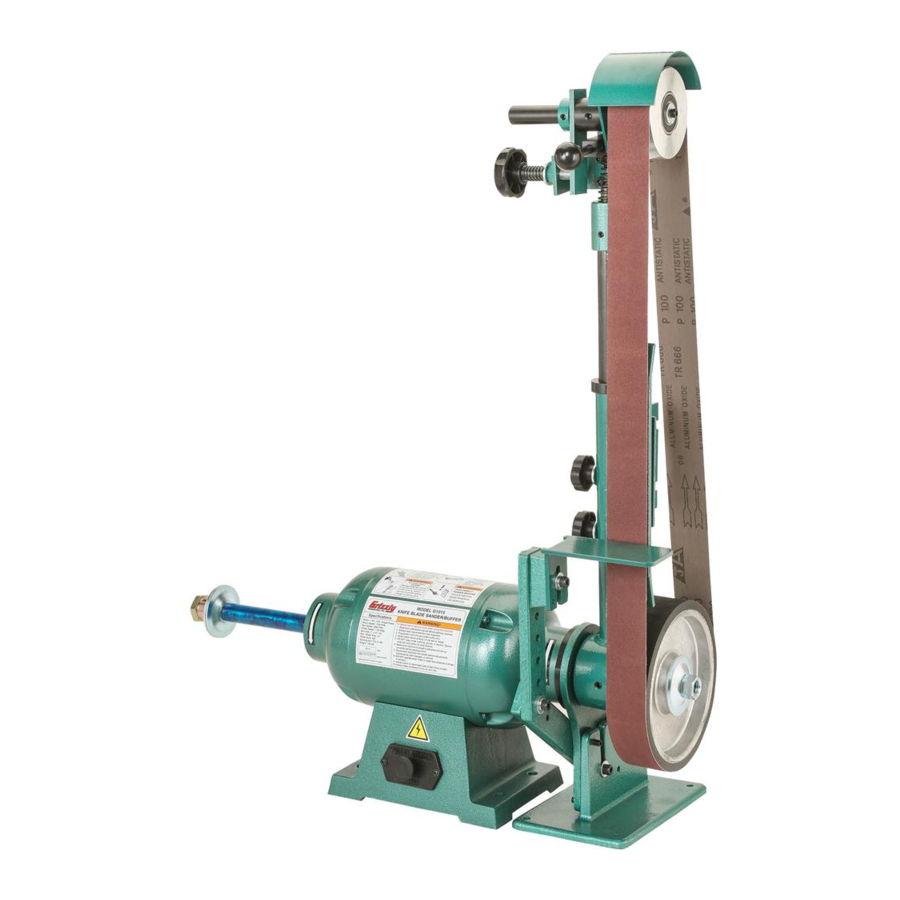
Knife blade
sander/buffer
Hide thumbs
Also See for G1015:
- Instruction manual (25 pages) ,
- Parts list (5 pages) ,
- Owner's manual (40 pages)
Table of Contents
Advertisement
Quick Links
Download this manual
See also:
Instruction Manual
MODEL G1015
KNIFE BLADE
SANDER/BUFFER
OWNER'S MANUAL
(For models manufactured since 7/99)
COPYRIGHT © OCTOBER, 1999 BY GRIZZLY INDUSTRIAL, INC. REVISED JULY, 2017 (MN)
WARNING: NO PORTION OF THIS MANUAL MAY BE REPRODUCED IN ANY SHAPE
OR FORM WITHOUT THE WRITTEN APPROVAL OF GRIZZLY INDUSTRIAL, INC.
(FOR MODELS MANUFACTURED SINCE 7/99) #TS11937 PRINTED IN TAIWAN
Advertisement
Table of Contents

Subscribe to Our Youtube Channel
Related Manuals for Grizzly G1015


Summary of Contents for Grizzly G1015
- Page 1 OWNER'S MANUAL (For models manufactured since 7/99) COPYRIGHT © OCTOBER, 1999 BY GRIZZLY INDUSTRIAL, INC. REVISED JULY, 2017 (MN) WARNING: NO PORTION OF THIS MANUAL MAY BE REPRODUCED IN ANY SHAPE OR FORM WITHOUT THE WRITTEN APPROVAL OF GRIZZLY INDUSTRIAL, INC.
- Page 2 This manual provides critical safety instructions on the proper setup, operation, maintenance, and service of this machine/tool. Save this document, refer to it often, and use it to instruct other operators. Failure to read, understand and follow the instructions in this manual may result in fire or serious personal injury—including amputation, electrocution, or death.
-
Page 3: Table Of Contents
Table of Contents INTRODUCTION ..........................2 Manual Accuracy ........................2 Contact Info ..........................2 Machine Description ........................2 Identification ..........................3 Machine Data Sheet ........................4 SECTION 1: SAFETY ........................6 Safety Instructions for Machinery ....................6 Additional Safety Instructions for Sander/Buffer ................ 8 SECTION 2: CIRCUIT REQUIREMENTS .................. -
Page 4: Introduction
ID label (see below). This information is required for us to provide proper tech support, and it helps us determine if updated documenta- tion is available for your machine. Manufacture Date Serial Number Model G1015 (Mfg. since 7/99) -
Page 5: Identification
Release Lever Sanding Platen Auxiliary Arbor Adjustable Tool Rest Tilting Sanding Drive Wheel Push/Pull ON/OFF Button Figure 1. Model G1015 identification. To reduce your risk of serious injury, read this entire manual BEFORE using machine. Model G1015 (Mfg. since 7/99) -
Page 6: Machine Data Sheet
Machine Data Sheet MACHINE DATA SHEET Customer Service #: (570) 546-9663 · To Order Call: (800) 523-4777 · Fax #: (800) 438-5901 MODEL G1015 KNIFE BELT SANDER / BUFFER Product Dimensions: Weight................................105 lbs. Length/Width/Height......................... 38-3/4 x 29-1/2 x 39 in. - Page 7 The information contained herein is deemed accurate as of 6/23/2009 and represents our most recent product specifications. Model G1015 PAGE 2 OF 2 Due to our ongoing improvement efforts, this information may not accurately describe items previously purchased. Model G1015 (Mfg. since 7/99)
-
Page 8: Section 1: Safety
Everyday ery. Never operate under the influence of drugs or eyeglasses are NOT approved safety glasses. alcohol, when tired, or when distracted. Model G1015 (Mfg. since 7/99) - Page 9 EXPERIENCING DIFFICULTIES. If at any time debris. Make sure they are properly installed, you experience difficulties performing the intend- undamaged, and working correctly BEFORE ed operation, stop using the machine! Contact our operating machine. Technical Support at (570) 546-9663. Model G1015 (Mfg. since 7/99)
- Page 10 However, dust collection is not a substitute for and control when sanding force is applied. using a respirator. Model G1015 (Mfg. since 7/99)
-
Page 11: Section 2: Circuit Requirements
Model G1015 (Mfg. since 7/99) -
Page 12: Extension Cords
Two-prong outlets do not meet the grounding requirements for this machine. Do not modify or use an adapter on the plug provided—if it will not fit the outlet, have a qualified electrician install the proper outlet with a verified ground. -10- Model G1015 (Mfg. since 7/99) -
Page 13: Section 3: Setup
When you are completely satisfied with the condi- tion of your shipment, inventory the contents. SUFFOCATION HAZARD! Keep children and pets away from plastic bags or packing materials shipped with this machine. Discard immediately. -11- Model G1015 (Mfg. since 7/99) -
Page 14: Inventory
Cap Screws ⁄ "-20 x ⁄ " ......6 G. Mounting Adapter ........1 H. Drive Wheel Flanges ........2 Drive Wheel Arbor Hex Nut ⁄ "-16 ....1 Figure 3. Model G1015 inventory. -12- Model G1015 (Mfg. since 7/99) -
Page 15: Hardware Recognition Chart
Hardware Recognition Chart -13- Model G1015 (Mfg. since 7/99) -
Page 16: Cleanup
Figure 4. T23692 Orange Power Degreaser. Repeat Steps 2–3 as necessary until clean, then coat all unpainted surfaces with a quality metal protectant to prevent rust. -14- Model G1015 (Mfg. since 7/99) -
Page 17: Site Considerations
Only install in an Shadows, glare, or strobe effects that may distract access restricted location. or impede the operator must be eliminated. ⁄ ⁄ Figure 5. Minimum working clearances. -15- Model G1015 (Mfg. since 7/99) -
Page 18: Mounting
Another option for mounting is a "Direct Mount" where the machine is simply secured to the work- bench with a lag screw. The Model G1015 is a top-heavy machine. Pressure applied to the sanding arm during operation could easily tip the machine over, Lag Screw causing personal injury or property damage. - Page 19 You will fully tighten these fasteners in a later step. Note: Make sure the four set screws do not make contact with the other part of the assembly. -17- Model G1015 (Mfg. since 7/99)
- Page 20 Figure 15. Sanding platen and bracket installed. 15. Install the sanding platen onto the platen Drive bracket with the pre-installed hardware, as Wheel shown in Figure 15. Outer Flange & Arbor Hex Nut Figure 13. Drive wheel installed. -18- Model G1015 (Mfg. since 7/99)
-
Page 21: Test Run
Always disconnect the machine from power when investigating or correcting potential problems. Figure 17. Tool rest installed. Push the ON/OFF button in to turn the machine OFF. -19- Model G1015 (Mfg. since 7/99) -
Page 22: Section 4: Operations
SECTION 4: OPERATIONS Operation Overview To reduce your risk of serious injury, read this The Model G1015 is a versatile machine that can entire manual BEFORE perform a number of different tasks. The follow- using machine. ing overview gives you the basic process that happens during a sanding operation. -
Page 23: Sanding Belt
⁄ " away from the sanding belt to prevent the workpiece being trapped The Model G1015 accepts sanding belts that are between the tool rest and belt. 2" wide and 72"–76" in length. Tensioning Sanding Belt Note: If you use the optional Model G9242 10"... -
Page 24: Adjusting Sanding Belt Tracking
— If the belt does not wander, then it is installed and tensioned. tracked correctly. — If the belt does wander, very slowly adjust the tracking adjustment knob until the belt stays centered on the wheels. -22- Model G1015 (Mfg. since 7/99) -
Page 25: Belt Sanding
(see Figure 24). Figure 22. Typical wood sanding operation. Figure 24. An example of contour sanding. -23- Model G1015 (Mfg. since 7/99) -
Page 26: Auxiliary Attachments
Check and adjust, if necessary, the sanding Wheel belt tracking (refer to Adjusting Sanding Belt Rotation Tracking on Page 21 for detailed instruc- tions). Correct Figure 27. Using the bottom front contour of the attachment. -24- Model G1015 (Mfg. since 7/99) -
Page 27: Section 5: Accessories
Grizzly. NOTICE Refer to our website or latest catalog for additional recommended accessories. Sanding Belts for the Model G1015, 2" x 72" G2744—Aluminum Oxide, 60 Grit Figure 31. Spiral sewn buffing wheel. G2745—Aluminum Oxide, 100 Grit G2746—Aluminum Oxide, 150 Grit... -
Page 28: Section 6: Maintenance
SECTION 6: MAINTENANCE Lubrication Always disconnect power to the machine before The bearings for the Model G1015 were lubricated performing maintenance. and sealed at the factory. Merely leave them Failure to do this may alone unless they need replacement. result in serious person- al injury. -
Page 29: Section 7: Service
2. Belt rotation incorrect. 2. Make sure belt is installed with direction arrows following rotation direction (Page 20). 3. Poor quality/incorrect type belt. 3. Replace belt with good quality belt of the correct type for the operation. -27- Model G1015 (Mfg. since 7/99) - Page 30 Pivot arm hard to 1. Pivot arm set screws tight. 1. Loosen pivot arm set screws before rotating the arm move. (Page 23). 2. Pivot arm bushing not lubricated. 2. Lubricate the bushing arm bushing (Page 25). -28- Model G1015 (Mfg. since 7/99)
-
Page 31: Section 8: Wiring
Technical Support at (570) 546-9663. The photos and diagrams included in this section are best viewed in color. You can view these pages in color at www.grizzly.com. -29- Model G1015 (Mfg. since 7/99) -
Page 32: Wiring Diagram
Wiring Diagram ON/OFF Button Motor Start Capacitor 400M 125V Ground Neutral Ground 110V NEMA 5-15 Plug (As Recommended) Figure 33. Electrical wiring. READ ELECTRICAL SAFETY -30- Model G1015 (Mfg. since 7/99) ON PAGE 28! -
Page 33: Section 9: Parts
PHLP HD SCR 10-24 X 3/8 P1015014 BALL BEARING 6206ZZ P1015029A WHEEL FLANGE 64.7 X 19.2 X 2.8MM P1015015 LOCK WASHER 1/4 P1015031 ARBOR NUT 5/8-18 LH P1015016 PHLP HD SCR 1/4-20 X 5/8 P1015085 COMPLETE MOTOR ASSEMBLY -31- Model G1015 (Mfg. since 7/99) -
Page 34: Sanding Assembly
Sanding Assembly Breakdown 54 53A 50 65 47 68 60 61 33C (Mfg. Since 7/99) 33B (Mfg. 12/95–6/99) -32- Model G1015 (Mfg. since 7/99) - Page 35 SANDING BELT 2" X 72" 100GR 56A P1015056A TENSION KNOB SHAFT PCAP11 CAP SCREW 5/16-18 X 1-1/4 P1015057 TENSION KNOB 3/8-16 PCAP04 CAP SCREW 1/4-20 X 1/2 58A PRP03M ROLL PIN 5 X 20 P1015088 MOUNTING ADAPTOR -33- Model G1015 (Mfg. since 7/99)
-
Page 36: Machine Labels
MUST maintain the original location and readability of the labels on the machine. If any label is removed or becomes unreadable, REPLACE that label before using the machine again. Contact Grizzly at (800) 523-4777 or www.grizzly.com to order new labels. -34-... - Page 37 Would you recommend Grizzly Industrial to a friend? _____ Yes _____No Would you allow us to use your name as a reference for Grizzly customers in your area? Note: We never use names more than 3 times. _____ Yes _____No 10.
- Page 38 FOLD ALONG DOTTED LINE Place Stamp Here GRIZZLY INDUSTRIAL, INC. P.O. BOX 2069 BELLINGHAM, WA 98227-2069 FOLD ALONG DOTTED LINE Send a Grizzly Catalog to a friend: Name_______________________________ Street_______________________________ City______________State______Zip______ TAPE ALONG EDGES--PLEASE DO NOT STAPLE...
-
Page 39: Warranty And Returns
WARRANTY & RETURNS Grizzly Industrial, Inc. warrants every product it sells for a period of 1 year to the original purchaser from the date of purchase. This warranty does not apply to defects due directly or indirectly to misuse, abuse, negligence, accidents, repairs or alterations or lack of maintenance.
Need help?
Do you have a question about the G1015 and is the answer not in the manual?
Questions and answers
I need a replacement on off switch
You can find a replacement on/off switch for the Grizzly G1015 in the parts section for the G1015 knife grinder on the Grizzly website.
This answer is automatically generated