
Related Manuals for Pitco SELV Series


Summary of Contents for Pitco SELV Series
- Page 1 Solstice Electric Fryers SELV Series Service M anual RETAIN AND STORE THIS MANUAL IN A SAFE PLACE FOR FUTURE USE L22-393 R0 Page 1...
- Page 2 DANGER Improper installation, operation, adjustment, maintenance, all alterations or service, and unauthorized alterations or modifications can cause property damage, injury or death. Read the installation, operating and service manuals thoroughly before installing or servicing this equipment. DANGER Prior to moving, testing, maintaining or repairing your appliance, ensure it is emptied of all oil, cool, disconnected from electric and all electrical power.
- Page 3 DANGER The contents of the crumb catch and/or filter pan of any filter system must be emptied into a fireproof container at the end of the frying operation each day. Some food particles can spontaneously combust into flames if left soaking in certain oil/shortening materials, causing fire, property damage, injury and death.
- Page 4 Property damage, personal injury or death can result from unqualified operators. WARNING If the electrical power supply cord is damaged, it must be replaced by a Pitco Authorized Service Agent or a similarly qualified person in order to avoid a hazard. WARNING Always fill both sides of a split-pot vat when heating for any purpose, testing, cooking or boiling out the vats.
- Page 5 See chapter one for descriptions of qualified personnel. NOTE If, during the warranty period, the end user uses a part for this Pitco appliance other than an UNMODIFIED new part purchased directly from Pitco or any of Pitco’s authorized service agents, and/or the part being used is modified from its original configuration, THE WARRANTY WILL BE VOID.
-
Page 6: Notice
Service and Parts Manual. Parts orders may be placed directly with your local ASAP or distributor. A list of Pitco Factory Authorized Service and Parts is located on the Pitco Frialator website at www.pitco.com. If you do not have access to this list, contact the Pitco Frialator Service Department... -
Page 7: Table Of Contents
TABLE OF CONTENTS Notice ..........................6 General ..........................9 Serial Numbers ........................10 Safety Information ........................ 11 2.2.1 Installation, Operating, and Service Personnel ..............11 Definitions..........................11 2.3.1 ... - Page 8 Replacing the Flush Hose Assembly and Valve ............45 15.1 Replacing the Optional Flush Hose Assembly and Valve ............ 48 Replacing the Waste Oil and Components ..............51 16.1 Removing Rear Mounting Bracket ..................51 ...
-
Page 9: General
Read the instructions in this manual thoroughly before attempting to operate this equipment. This manual covers all configurations of Pitco SELV electric models. The fryers in this model family have most parts in common, and when discussed as a group, will be referred to as SELV fryers. -
Page 10: Serial Numbers
2.1 Serial Numbers NOTE If, parts returned to the factory under warranty are found to be a functional/serviceable, Pitco may, at its discretion, decline warranty reimbursement and may charge for replacement parts. L22-393 R0 Page 10... -
Page 11: Safety Information
Operating information for Pitco equipment has been prepared for use by qualified and/or authorized personnel only, as defined in Section 2.3. All installation and service on Pitco equipment must be performed by qualified, certified, licensed, and/or authorized installation or service personnel, as defined in Section 2.3.2. -
Page 12: Qualified Service Personnel
PITCO DOES NOT ASSUME RESPONSIBILITY FOR DAMAGE OR LOSS INCURRED IN TRANSIT. 3 Theory of Operation SELV Series electric fryers utilize a welded, stainless steel fryvat that is directly heated with high efficiency, ribbon style heating elements. Ribbon style elements offer a lower watt density per square inch and are gentler on the oil. -
Page 13: The Heating System
3.1 The Heating System A hi-limit device located in the fry vat provides an additional level of operator safety. If the high limit is satisfied that the fryer is operating within design parameters, a “side on” contactor will close and stay closed so long as the cooking oil temperature stays below a specified limit. -
Page 14: Auto Filtration Boards
3.3 Auto Filtration Boards All fryers in this series have an Auto-Filtration Board (AFB) located in the component box behind the control bezel. The AFB provides a “bus” between the controller and the fryer's individual components without requiring additional wiring by using a communication protocol over a twisted pair, and allows the controller to execute commands from one central point. - Page 15 Figure 2 - Auto-Filtration Board (AFB) L22-393 R0 Page 15...
-
Page 16: Thermostats
Pulling the BROWN waste oil valve will: (If equipped): Divert oil flow from the pump to the fry vat to user supplied waste oil plumbing through a Pitco supplied three way valve.The return piping system may be provided with optional heat tape to prevent solidification of solid shortening. -
Page 17: Basket Lift (Optional)
3.7 Basket Lift (Optional) The basket lift is a self contained unit that requires a 120V, 208V, or 240V supply. With most fryer configurations, the power is supplied from the entrance box at the back of the fryer, but some configurations require power directly from a wall outlet. -
Page 18: Automated Filtration (Optional)
When the cooking control shows Ready, the oil level probe will take time to detect the low level condition. The lower the level the faster the response. The reverse is also true. Modestly low levels take longer to resolve. (< 3/8” below probe). Levels ½” below probe should detect in 3-1/2 minutes or less. -
Page 19: Accessing Fryer For Servicing
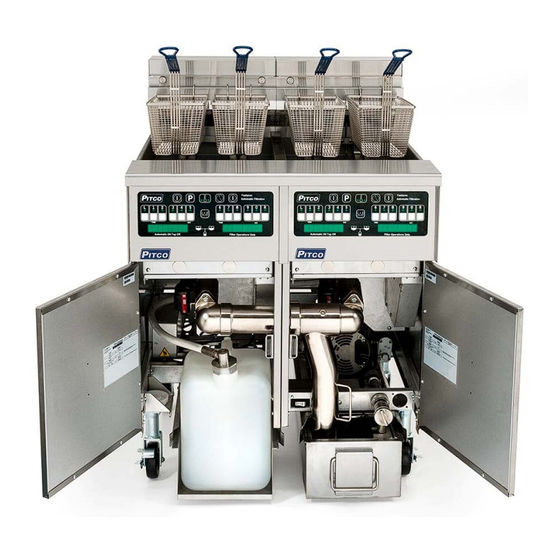
4 Accessing Fryer for Servicing 2. Unplug all power cords if equipped, there is one for each vat. Actual plug DANGER may vary from photo below. Prior to moving, testing, maintaining or repairing your appliance, ensure it is emptied of all oil, cool, disconnected from all electrical power. Failure to do so may result in property damage, damage to your fryer, injury or death. -
Page 20: Removing The Controller Front Panel Bezel
4.1 Removing the Controller Front Panel Bezel 1. Remove the two (2) screws on the controller 3. Disconnect the controller wiring harness. panel using a Phillips screwdriver. (on a Dual unit you will need to remove the front panel divider). (For a dual unit- remove the front panel divider) 2. -
Page 21: Removing The Entrance Box Covers
4.2 Removing the Entrance Box Covers 1. Remove the two (2) screws on the entrance 3. Remove the two (2) screws on the entrance box lower cover located on the left side of the box upper cover using a Philips screwdriver. unit using a Philips screwdriver. -
Page 22: Manual Operation Of Drain And Return (Auto Filter Only)
4.3 Manual Operation of Drain and Return (Auto Filter Only) 1. To open and/or close drain or return oil from 3. Pressing the “1” key brings up drain toggle filter pan manually, hold center filter button option- press “YES” to open drain – drain will until display changes to fryer control (can be remain open until “YES”... -
Page 23: Removing The Entrance Box Wire Guard
5 Removing the Entrance Box Wire Guard 1. Remove the two (2) screws on the wire guard 3. Follow steps 1 through 2 in reverse to using a 5/16” inch hex wrench. reinstall the entrance wire guard. 2. Slide the wire guard down to remove. L22-393 R0 Page 23... -
Page 24: Blocked Drain (Auto Filter Only)
3.If after three tries, the drain is still blocked the fryer will no longer operate. If you have a multi fryer system, the other fryers shouldn’t be affected by this error. Contact Pitco Service or Authorized Service Person for assistance. There is NO reset from front controller panel. -
Page 25: Diagram Identifying Terminals For Second Resistance
6.1 Diagram Identifying Terminals for Second Resistance PP10429 PP10428 Secondary Resistance Secondary Resistance Volts Resistance Volts Resistance 10 ‐ 6 10 ‐ 6 Primary Resistance Primary Resistance Volts Resistance Volts Resistance 5 ‐ 1 240V 30.4 5 ‐ 1 480V 119.5 5 ‐ 2 208V 25.3 5 ‐ 2 440V 107.7 5 ‐ 3 120V 5 ‐ 3 380V 90.2 6.2 Checking the Resistance of the DVI Switch 1. -
Page 26: Checking The Resistance Of The Hi-Limit
6.3 Checking the Resistance of the Hi-Limit 1. Remove the Hi-Limit connection. 2. Connect the multimeter to the Hi-limit leads and check the resistance. L22-393 R0 Page 26... -
Page 27: Checking The Resistance Of The Probe
6.4 Checking the Resistance of the Probe 1. Remove the probe connection. 2. Connect the multimeter to the thermostat leads and check the resistance. See “Probe Resistance Chart” on page 78. L22-393 R0 Page 27... -
Page 28: Replacing The Relay Board And Paper
7 Replacing the Relay Board and Paper 1. Remove the front panel. See “removing the disconnect for each frying vat. The power Controller Front Panel Bezel page 20”. switch or circuit breaker may not be located directly behind the fryer(s), check circuit DANGER breaker boxes located in the kitchen. Prior to moving, testing, maintaining or repairing WARNING your appliance, ensure it is emptied of all oil,... - Page 29 8. Remove the existing insulator and replace with a new insulator. NOTE: Make sure the insulator doesn’t have puncture marks in it, if so replace with another piece without puncture marks. 9. Reinstall by following steps 1 through 8 in reverse L22-393 R0 Page 29...
-
Page 30: Replacing Hi-Limit Switch And/Or Sensing Probe
8 Replacing Hi‐limit Switch and/or Sensing Probe 4. Remove element rack by removing fifteen Remove the cabinet back cover. Using 5/16 (15) screws using a phillips screw driver. socket remove eight (8) screws. 2. Remove two (2) screws from hi-limit switch box in rear using a Phillips screw driver. 5. -
Page 31: Replacing Drain Valve With Actuator (Auto Filter Only)
Failure to do so may result in property damage, damage to your fryer, injury or death. 1. Pitco ROV fryer with automated filtration uses a 24 VDC drain actuator for opening /closing the drain for each pot. - Page 32 7. Don’t forget gray rubber protector on the thread of the clamp so they don’t get damaged. 8. After servicing the powered drain system, If the drain remains open, the motor and valve assembly are not indexed correctly, remove motor, and align marks as instructed 9.
-
Page 33: Replacing The Dc Power Supply
10 Replacing the DC Power Supply DANGER Prior to moving, testing, maintaining or repairing any appliance, ensure it is emptied of all oil, cool, disconnected from electric and all electrical power. Failure to do so may result in property damage, damage to your fryer, injury or death. 1. -
Page 34: Replacing The Dc Power Transformer Box
10.1 Replacing the DC Power Transformer Box Remove the front panel (see “Removing the 2. Remove the two (2) screws on the Controller Front Panel page 20). transformer box using a Philips screw driver. 1. Remove the four (4) terminal connections. 3. -
Page 35: Changing Filter Pump Actuator
11 Changing Filter Pump Actuator 1. Pull two (2) re-usable cotter pins. One is located in the front of the actuator unit, second is located in the rear of the actuator. 3. Remove filter pump actuator. 4. Follow steps 1 through 3 in reverse to reinstall new filter pump actuator. -
Page 36: Testing The Auto Top Off Probe (If Equipped)
12 Testing the Auto Top Off Probe (if equipped) The Auto Top Off probe should be tested prior to replacement (follows this section). 1. Unplug connector J7 from the Auto Top Off Relay board. Measure the resistance with a multimeter (set to OHMS) between pins 1 and 2. The resistance should be approximately 150 ohms (+/- 2 ohms). - Page 37 L22-393 R0 Page 37...
-
Page 38: Replacing Oil Top Off Probe
12.1 Replacing Oil Top off Probe DANGER Prior to moving, testing, maintaining or repairing any appliance, ensure it is emptied of all oil, cool, disconnected from electric and all electrical power. Failure to do so may result in property damage, damage to your fryer, injury or death. 1. -
Page 39: Replacing The Return Valve
13 Replacing the Return Valve WARNING DO NOT remove fry vat or drain fittings before all oil is drained from the tank. Serious injury will result from slipping, falling or contact with hot liquids causing property damage, injurious severe burns and/or death. 1. Remove all connections from the 3-way 2. -
Page 40: Replacing The Basket Lift Components
14 Replacing the Basket Lift Components 14.1 Removing the Basket Lift Cover 1. Remove the six (6) screws, which hold the 2. Lift up the back and remove. back of the basket lift cover, using a 5/16 inch socket. 14.2 Replacing the Basket Lift Transformer 1. -
Page 41: Replacing The Basket Lift Driver Board
14.3 Replacing the Basket Lift Driver Board 1. Remove all wires on basket lift driver board 4. Remove the actuator power connection using using needle-nose pliers. needle-nose pliers. 2. Remove the sensor connection using needle- 5. Remove the four (4) screws, which hold the nose pliers. -
Page 42: Adjusting The Magnetic Sensor
14.4 Adjusting the Magnetic Sensor 1. Make sure the sensor is approximately 3/4 2. Make sure the sensor is approximately 7 3/4 inch from top of the motor to bottom of the inch from top of the motor to bottom of the sensor. - Page 43 5. Remove the top retaining bushing by 8. Rotate up the actuator collar. unscrewing. 9. Remove the actuator collar. 6. Slide the bushing off the shaft. 10. Follow steps 1 through 9 in reverse to 7. Disconnect the motor connector from the reinstall a new basket lift actuator.
-
Page 44: Filter System
Filter System L22-393 R0 Page 44... -
Page 45: Replacing The Flush Hose Assembly And Valve
15 Replacing the Flush Hose Assembly and Valve 1. Remove the lower connection at the 3-way 4. Remove two (2) screws holding the flush return valve in the back of the unit using a hose assembly using a 5/16 socket. 15/16 inch wrench. 5. Remove the flush hose assembly. 2. - Page 46 7. Remove the two (2) screws from the valve 9. Lift bracket out and slide forward. mounting brackets using a 5/16 inch socket. 10. Bend down tabs of the stem nut washer using a needle-nose plier. 8. Slide the bracket to the back of the assembly.
- Page 47 12. Remove the handle. 14. Remove the piping using a 15/16 inch wrench on the valve and an adjustable wrench on the piping. 13. Remove the mounting bracket. 15. Replace the flush hose assembly and valve by following steps 1 through 14 in reverse. L22-393 R0 Page 47...
-
Page 48: Replacing The Optional Flush Hose Assembly And Valve
15.1 Replacing the Optional Flush Hose Assembly and Valve 4. Remove two (2) screws holding the flush DANGER hose assembly using a 5/16 socket. Prior to moving, testing, maintaining or repairing your appliance, ensure it is emptied of all oil, cool, disconnected from electric and all electrical power. - Page 49 7. Remove the two (2) screws from the valve 9. Lift bracket out and slide forward. mounting brackets using a 5/16 socket. 10. Bend down tabs of the stem nut washer using a needle-nose plier. 8. Slide the bracket to the back of the assembly.
- Page 50 12. Remove the handle. 14. Remove the piping using a 15/16 inch wrench on the valve and an adjustable wrench on the piping. 13. Remove the mounting bracket. 15. Replace the flush hose assembly and valve by following steps 1 through 14 in reverse. ...
-
Page 51: Replacing The Waste Oil And Components
16 Replacing the Waste Oil and Components 16.1 Removing Rear Mounting Bracket 1. Remove six (6) screws using a 5/16 socket 3. Remove two (2) screws with a 5/16 socket wrench. wrench. DANGER Prior to moving, testing, maintaining or repairing your appliance, ensure it is emptied of all oil, cool, disconnected from electric and all electrical power. -
Page 52: Removing The Check Valve
16.2 Removing the Check Valve 1. Remove the 3/8 inch nipple using an adjustable wrench. 3. Remove the valve nut using a 9/16 inch open-ended wrench. 2. Remove the second nipple using two 4. Remove the valve lever. adjustable wrenches. L22-393 R0 Page 52... - Page 53 5. Remove the two (2) screws using a Phillips screwdriver. 8. Follow steps 1 through 7 in reverse to reinstall. 6. Lift off the mounting bracket. 7. Remove the valve using two adjustable wrenches. L22-393 R0 Page 53...
-
Page 54: Replacing The Filter Pump And Motor
17 Replacing the Filter Pump and Motor 17.1 Removing the Filter Pump and Motor NOTE DANGER Photos are for illustrative purposes only and Any and all spilled oil, water or other liquids that may not be an exact match to your appliance.. occurs as a result of operation, cleaning, maintenance or repair of this fryer should immediately be cleaned and dried. - Page 55 6. Remove the lower connection at the 3-way return valve using a 15/16 inch wrench. 9. Remove the rear hair pin on the actuator. 7.Using a 1” inch wrench remove the JIB hose. 10.Remove the bracket. 8. Remove one (1) screw, which holds a bracket which is underneath the ON/OFF breaker switch using a 5/16 inch socket.
- Page 56 14. Remove two (2) screws on back of filter 11. Turn down the pins and then pull them out. pump using a 5/16 inch socket. 12. ROV units with a solofilter, will require the 15. Remove existing piping from old filter pump removal of the RH pan guide rail to allow the using two adjustable wrenches.
-
Page 57: Replacing Seal Kit
17.2 Replacing Seal Kit 1. Remove the four (4) bolts on filter pump 3. Replace the seal. using 7/16 inch open-ended wrench. 4. Reinstall the filter pump head to the motor by 2. Remove the filter pump head. following steps 1 through 2 in reverse. L22-393 R0 Page 57... -
Page 58: Removing The Filter Pump From The Motor
17.3 Removing the Filter Pump from the Motor 1. Remove the two (2) bolts holding the filter 2. Remove the filter pump head from the motor. pump head to the motor using a 1/2 inch open-ended wrench. 3. Reinstall the filter pump head to the motor by following steps 1 through 2 in reverse. -
Page 59: Replacing The Pump Relay And Circuit Breaker
18 Replacing the Pump Relay and Circuit Breaker 18.1 Replacing the Circuit Breaker 1. Disconnect the connections and power 4. Remove all wires on the circuit breaker using supply cords from the filter pump. needle-nose pliers. 2. Remove the pump box. 5. Squeeze the tabs on the circuit breaker and push it out. -
Page 60: Replacing The Pump Relay
18.2 Replacing the Pump Relay 1. Remove the two (2) screws, which hold the 2. Remove all wires on the pump relay using pump relay, using a Phillips screwdriver. needle-nose pliers. See “Wiring Schematics” on page 80. 3. Remove the pump relay. 4. -
Page 61: Replacing The Drain Line Or Electricket
18.3 Replacing the Drain Line or Electricket 1. Remove one (1) screw on the drain line using 3. Slide off the drain manifold electricket. a 7/16 inch wrench. 4. Slide out the drain line. 2. Lift off the drain manifold clamp. 5. -
Page 62: Troubleshooting And Problem Isolation
Troubleshooting and Problem Isolation L22-393 R0 Page 62... -
Page 63: Replacing High Limit (Side On) Contactor
19 Replacing High Limit (Side On) Contactor 1. Open front door and remove four (4) phillips screws on the access panel to gain access to 3. Remove four (4) using a Philips screwdriver the latching contactor. and move to the side. 4. Replace high limit contactor by following 2. -
Page 64: Replacing Heat Demand And Transformer
19.1 Replacing Heat Demand and Transformer DANGER Prior to moving, testing, maintaining or repairing 2. Lower the front cover to a flat position. your appliance, ensure it is emptied of all oil, Depending on model or date of equipment, cool, disconnected from electric and all electrical relay board may look different than picture power. - Page 65 4. The Heat Demand is located above the high limit contactor and transformer is located to the right hand side. 5. Disconnect wires from heat demand and/or transformer, note connection and location sequence. Transformer Heat Demand Contactor 6. Remove screws holding on heat demand contactors and/or transformer.
-
Page 66: Replacing The Dvi Switch
20 Replacing the DVI Switch 1. Remove the two (2) screws, which hold the 3. Unfasten the switch harness from the wire proximity sensor on the drain handle, using a channel. flathead screwdriver. 4. Remove the switch from mounting plate 2. Loosen the two (2) screws, which hold the using a narrow tip flathead screwdriver. -
Page 67: Replacing The Frypot
21 Replacing the Frypot DANGER 3. Loosen the entrance box heat shield sides Prior to moving, testing, maintaining or repairing (top and bottom) using a 5/16 inch hex wrench. your appliance, ensure it is emptied of all oil, cool, disconnected from electric and all electrical power. - Page 68 5. Disconnect and remove the power cords from the entrance box. 9. Disconnect the filter pump box power supply. 6. Loosen the four (4) drain elbow bolts using a 10. Disconnect the following connectors at the 9/16 inch socket. wire channel: DVI switch, probes, and hi-limit. 7.
- Page 69 15. Remove the four (4) screws, which hold the 12. Remove the six (6) screws, which hold the cabinet back cover, using a 5/16 inch socket. back of the splash back, using a 5/16 inch socket. 16. Disconnect all return hoses from the tank being replaced using an adjustable wrench.
- Page 70 18. Remove the filter return handle clip and 21. Score the silicon sealer between the tanks filter return handle using a 5/16 inch hex using a flathead screwdriver or utility knife. wrench. NOTE: Retain all removed clamps. 19. Remove the six (6) screws (front and back), 23.
- Page 71 26. Remove the filter return valve using an adjustable wrench. 30. Remove the entrance box and wire channel assembly as one piece. 31. Remove the entrance box support brackets 27. Remove the filter return valve adapter using from entrance box heat shields using a 5/16 an adjustable wrench.
-
Page 72: Replacing The Element
22 Replacing the Element 1. Lift the element to the upright position. Using a 5/16 inch nut driver remove eight (8) screws 3. Unplug Molex connector (element on back of unit. connection). 2. Remove back cover, set aside. 4.Insert screw driver to hold spring assembly. Screw driver will release the tension of the spring (after releasing the spring tension the elements will go down... - Page 73 5. Remove six (6) screw, three on the right and 8. Remove fifteen (15) screws with phillips three on the left. screw driver on element rack bottom. 6. Remove four (4) springs and spring housing. 9. Remove two (2) screws using a phillips screw driver to remove thermal couple.
- Page 74 11. Remove element bars by removing five (5) 13. Remove four (4) screws. screws from both top and bottom bars using a flathead screw driver. 14. Unplug and pull element bars out. 12. Using a phillips screw driver remove four (4) screws holding element brackets.
-
Page 75: Troubleshooting And Problem Isolation
23 Troubleshooting and Problem Isolation 24 Component Troubleshooting The following sections provide troubleshooting information for the fryer components. 24.1 Probe The resistance of the probe changes as the temperature changes. The resistance decreases as the temperature rises. The lower the temperature, the greater the resistance change is per degree of temperature change. As the temperature approaches the working range of the probe, the resistance change becomes more linear. -
Page 76: Drain Valve And Return Valve Switches
24.5 Drain Valve and Return Valve Switches These switches are a magnetically operated proximity switches. When the BLUE drain valve handle is moved to the open position, the actuator moves away from the switch causing the switch to open. When the drain valve is closed, the switch closes. Opening the RED filter return valve handle closes the proximity switch, causing the “pump on”... -
Page 77: Relay Board
24.8 Relay Board NOTE: J connectors are marked on the relay board. With 24 VAC supplied to pin #2 at connector J35 and a good F1 fuse, the relay board has a 24 VAC output at pin #2 on connectors J33 and J34 and the AC indicator is illuminated. When the board receives a 24 VDC SO input at pin #7 on connector J31 or J33, the SO indicator is illuminated, the SO relay is energized, and there is a 24 VAC output at pin #4 on connector J32. -
Page 78: Probe Resistance Chart
24.10 Probe Resistance Chart Probe Resistance in 5°F Increments. Probe Probe Probe Probe Probe Probe Resistance Resistance Resistance Temp Temp Temp Temp Temp Temp (Ohms) (Ohms) (Ohms) (°F) (°C) (°F) (°C) (°F) (°C) -12.2 562734 79.4 11719 171.1 1058.23 -9.4 483875 82.2 10716... -
Page 79: Wiring Diagrams
Wiring Diagrams L22-393 R0 Page 79... -
Page 80: Simplified Wiring Diagramsheat Control (Rov)
25 Simplified Wiring DiagramsHeat Control (ROV) L22‐393 Rx0 (12/14) 80 ... -
Page 81: Auto-Filter Control (Rov)
25.1 Auto-Filter Control (ROV) L22‐393 Rx0 (12/14) 81 ... -
Page 82: Control Power Supply (Rov)
25.2 Control Power Supply (ROV) L22‐393 Rx0 (12/14) 82 ... -
Page 83: And Canada Wiring Diagrams (Controls)
25.3 US and Canada Wiring Diagrams (Controls) L22‐393 Rx0 (12/14) 83 ... -
Page 84: And Canada Wiring Diagrams (Replacement Parts List)
25.4 US and Canada Wiring Diagrams (Replacement Parts List) L22‐393 Rx0 (12/14) 84 ... -
Page 85: And Canada Wiring Diagrams (Basket Lift Option)
25.5 US and Canada Wiring Diagrams (Basket Lift Option) L22‐393 Rx0 (12/14) 85 ... -
Page 86: And Canada Wiring Diagrams (Filter Pump Option)
25.6 US and Canada Wiring Diagrams (Filter Pump Option) L22‐393 Rx0 (12/14) 86 ... -
Page 87: And Canada Wiring Diagrams (Single Phase Twin Vat)
25.7 US and Canada Wiring Diagrams (Single Phase Twin Vat) L22‐393 Rx0 (12/14) 87 ... -
Page 88: And Canada Wiring Diagrams (Single Phase Full Vat)
25.8 US and Canada Wiring Diagrams (Single Phase Full Vat) L22‐393 Rx0 (12/14) 88 ... -
Page 89: And Canada Wiring Diagrams (3 Phase Full Vat)
25.9 US and Canada Wiring Diagrams (3 Phase Full Vat) L22‐393 Rx0 (12/14) 89 ... -
Page 90: Export And Ce Wiring Diagrams (Filter Pump Option)
25.10 Export and CE Wiring Diagrams (Filter Pump Option) L22‐393 Rx0 (12/14) 90 ... -
Page 91: Export And Ce Wiring Diagrams (Single Phase Twin Vat)
25.11 Export and CE Wiring Diagrams (Single Phase Twin Vat) L22‐393 Rx0 (12/14) 91 ... -
Page 92: Export And Ce Wiring Diagrams (Single Phase Full Vat)
25.12 Export and CE Wiring Diagrams (Single Phase Full Vat) L22‐393 Rx0 (12/14) 92 ... -
Page 93: Export And Ce Wiring Diagrams (3 Phase Full Vat)
25.13 Export and CE Wiring Diagrams (3 Phase Full Vat) L22‐393 Rx0 (12/14) 93 ... - Page 94 25.14 Export and CE Wiring Diagrams (3 Phase Twin WYE Vat) L22‐393 Rx0 (12/14) 94 ...
- Page 95 25.15 Export and CE Wiring Diagrams (3 Phase Twin Delta Vat) L22‐393 Rx0 (12/14) 95 ...
- Page 96 Pitco Frialator factory at: 603- Frialator Authorized Service and Parts 225-6684 World Wide representative (ASAP) covering your www.pitco.com area or contact Pitco at the number listed to the left. MAILING ADDRESS – P.O. BOX 501 CONCORD, NH 03302-0501 L22‐393 Rx0 (12/14) ...
Need help?
Do you have a question about the SELV Series and is the answer not in the manual?
Questions and answers