
Related Manuals for Pitco SG Series


Summary of Contents for Pitco SG Series
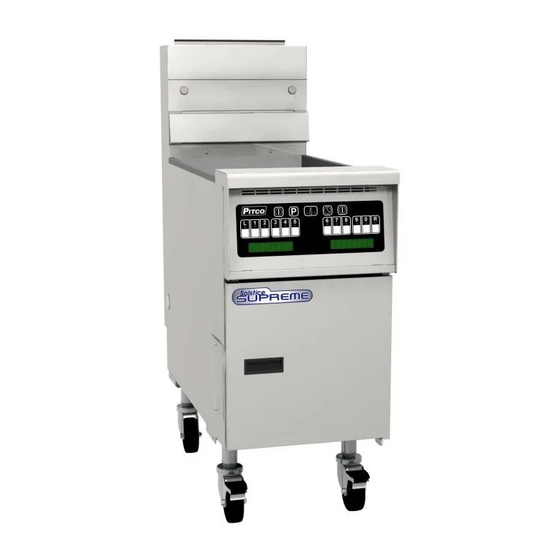
- Page 1 There's Always Something Cooking! Installation and Operation Manual For Gas Fryers ALL OPTIONS Covering Models SG & SGF 14, 14R, 14T, 18, 18F, 24P, 24F, 34P & 34F R5 (07/13) www.pitco.com...
- Page 2 If you need to convert the appliance to another type of fuel, Authorized Service and Parts (ASAP) companies, this warranty will be contact your dealer. void. In addition, Pitco and its affiliates will not be liable for any WARNING claims, damages or expenses incurred by the customer which arises...
-
Page 3: Checking Your New Fryer
Locate your Pitco Frialator warranty and fill in the serial number of the fryer and the date received. You will find the serial number on the plate inside the door. Put your warranty card in a safe place for future reference. DO NOT return the card to Pitco Frialator. -
Page 4: Gas Connection
c. Once the unit is in place, check and readjust the levelness as necessary. GAS CONNECTION Your fryer will give you peak performance when the gas supply line is of sufficient size to provide the correct gas flow. The gas line must be installed to meet the local building codes or National Fuel Gas Code ANSI Z223.1 Latest Edition. In Canada, install the fryer in accordance with CAN/CGA-B149.1 or .2 and local codes. -
Page 5: Ventilation And Fire Safety Systems
VENTILATION AND FIRE SAFETY SYSTEMS Your new fryer must have proper ventilation to function safely and properly. Exhaust gas temperatures can reach as high as 1000°F. Therefore, it is very important to install a fire safety system. Your ventilation system should be designed to allow for easy cleaning. -
Page 6: Lighting Instructions
This will remove the oil coating and any foreign matter that may have accumulated during storage and shipment. Perform the cleaning as described below. a. Fill the tank with water and add one packet of Pitco fryer cleaner or a mild detergent, and turn gas valve knob to ON position. -
Page 7: Thermostat Calibration
c. While wearing protective gloves, use the fryer cleaning brush to scrub the inside of the fryer to remove protective coating. d. When cleaning is complete, turn off the fryer main burners and turn gas valve knob to the OFF position. - Page 8 Fryer Shut-Down There are two shutdown modes of fryer operation, STANDBY and COMPLETE. The standby mode removes the ability for the fryer's main burners to cycle. Complete shutdown turns off the gas supply to the fryer. Shut down the fryer by: STANDBY Turn the thermostat or controller OFF.
- Page 9 R5 (07/13)
- Page 10 R5 (07/13)
- Page 11 R5 (07/13)
- Page 12 R5 (07/13)
-
Page 13: Filter Procedures
FILTER PROCEDURES NOTE When working with hot oil ALWAYS wear oil-proof, insulated gloves. WARNING NEVER • Run the filter system without a filter bag/paper. NEVER • Empty the oil from the fryer before turning OFF the fryer burners. NEVER • Store the UFM Filter Unit anywhere other than in the fryer filter cavity. Slide the filter pan out. -
Page 14: Filter Media Replacement
WARNING The power supply must be disconnected before servicing or cleaning the appliance. FILTER MEDIA REPLACEMENT The filter module stores neatly under the fryer when not in use. The unit is very easy to use and allows for quick installation and filtration, even under the busiest conditions. Follow the procedures below to change the filter media. WARNING At operating temperature, the shortening in the fryer may be hotter than 375°F (190°C). -
Page 15: Fryer Cleaning
Remove tube rack/mesh tube screens and remove any large debris from the bottom of the fry tank. Close the drain valve and fill the fry tank with water and noncaustic detergent. For best results use Pitco Fryer Cleaner part number P6071397. - Page 16 Pitco Frialator Frialator factory at: Authorized Service and Parts representative (603)-225-6684 World Wide (ASAP) covering your area, or contact Pitco at the Website Address: www.pitco.com number listed to the left. MAILING ADDRESS – P.O. BOX 501, CONCORD, NH 03302-0501 SHIPPING ADDRESS –...
- Page 17 Il y a Toujours Quelque Chose qui Mijote chez Nous ! Manuel d’Installation et de Fonctionnement Pour Friteuses à Gaz TOUTES OPTIONS Modèles SG et SGF 14, 14R, 14T, 18, 18F, 24P, 24F, 34P et 34F www.pitco.com...
- Page 18 Si, pendant la période de garantie, un client utilise une pièce qui n’est AVERTISSEMENT pas d’origine ou modifie une pièce d'origine achetée auprès de Pitco NE PAS alimenter l’appareil avec un gaz ne figurant pas sur la plaque et (ou) de ses prestataires d’entretien et de pièces détachées signalétique.
-
Page 19: Vérification De La Nouvelle Friteuse
Cherchez la garantie Pitco Frialator et inscrivez le numéro de série sur la friteuse et la date de réception. Le numéro de série se trouve sur la plaque à l’intérieur de la porte. Conservez la garantie dans un endroit sûr afin de pouvoir la consulter ultérieurement. -
Page 20: Raccordement Du Gaz
RACCORDEMENT DU GAZ Votre friteuse offre un rendement optimal lorsque le tuyau d’alimentation en gaz est d’une taille suffisante afin de permettre un débit de gaz adéquat. Le tuyau de gaz doit être installé conformément aux codes du bâtiment de votre localité et à la norme ANSI Z223 de la dernière édition du Code national d’installation des appareils à... - Page 21 VENTILATION ET SYSTÈMES DE SÉCURITÉ CONTRE LES INCENDIES Votre nouvelle friteuse doit être correctement ventilée et fonctionner en toute sécurité. La température des gaz d’échappement peut atteindre 1000°F (537°C). Par conséquent, il est indispensable d’installer un système de protection contre les incendies. Votre système de ventilation doit être conçu afin de pouvoir être facilement nettoyé. Nettoyez fréquemment le système de ventilation et la friteuse afin de réduire les risques d’incendie.
-
Page 22: Instructions D'allumage
Vérification de la pression du gaz INSTRUCTIONS D’ALLUMAGE Thermostat à semi-conducteurs Commande numérique: Commande par ordinateur AVERTISSEMENT NE PAS RÉGLER LE BOUTON DE LA COMMANDE DE GAZ MIXTE SUR "ON" (MARCHE) AVANT QUE LA FRITEUSE NE SOIT REMPLIE D’EAU OU DE MATIÈRE GRASSE. LE FAIT DE PLACER LE BOUTON SUR "ON"(MARCHE) ALORS QUE LA FRITEUSE EST VIDE, ENDOMMAGERA L’APPAREIL ET LES ÉLÉMENTS ASSOCIÉS ET ANNULERA LA GARANTIE. - Page 23 AVIS Ne pas laisser la friteuse sans surveillance lors du nettoyage. Ne jamais laisser le niveau d’eau tomber en dessous de la mention "Min Level" (niveau minimum) au dos de la cuve. ATTENTION Toute cuve en acier normal doit être essuyée et protégée avec une fine pellicule d’huile afin d’éviter qu’elle ne rouille.
- Page 24 PROGRAMMATION DE LA COMMANDE NUMÉRIQUE ÉCRAN À AFFICHAGE NUMÉRIQUE TOUCHE DE PROGRAMMATION MARCHE/ARRÊT VOYANT DE MINUTERIE VOYANT DE DROITE ALLUMÉE MINUTERIE GAUCHE ALLUMÉE TOUCHE DE TOUCHE DE MINUTERIE DROITE MINUTERIE TOUCHE DE GAUCHE TEMPÉRATURE FONCTIONS DE LA COMMANDE PRESSEZ POUR ALLUMER LA COMMANDE PRESSEZ ET MAINTENEZ PENDANT 3 SECONDES POUR ÉTEINDRE LA COMMANDE PRESSEZ POUR AFFICHER LA TEMPÉRATURE RÉELLE PRESSEZ DEUX FOIS POUR AFFICHER LA TEMPÉRATURE CONSIGNÉE...
- Page 25 PROGRAMMATION DE NIVEAU INFÉRIEUR (SUITE) REMARQUE: TOUTE PROGRAMMATION EST IMPOSSIBLE LORSQUE LES MINUTERIES FONCTIONNENT. POUR SAUVEGARDER ET SORTIR DU MODE DE PROGRAMMATION, PRESSEZ ET MAINTENEZ LA TOUCHE PENDANT 5 SECONDES. ÉTAPE 6 PRESSEZ . L’écran affichera . PRESSEZ pour modifier PROGRAMMATION DU le réglage programmé...
- Page 26 INSTRUCTIONS DE PROGRAMMATION À MULTI- PLES NIVEAUX POUR ORDINATEUR TOUCHE DE PROGRAMMATION TOUCHE DE TEMPS TOUCHE DE TEMPÉRATURE TOUCHE TOUCHE MARCHE/ARRÊT MARCHE/ARRÊT TOUCHES DE PRODUITS PROGRAMMATION DE PREMIER NIVEAU...
- Page 27 PROGRAMMATION DE DEUXIÈME NIVEAU ACCÉDER AU DEUXIÈME NIVEAU SELECT OPTIONS REMARQUE: À chaque fois que vous utilisez pour sauvegarder un réglage, il vous faut également presser afin de retourner au mode "Select Options PROGRAMMATION DES FONCTIONS COD NEC "AUC COD 1, 2 ou 3 NON FOND SOLIDE...
- Page 28 FILTRAGE REMARQUE Veillez à TOUJOURS porter des gants étanches à l’huile lorsque vous travaillez avec de l’huile chaude. AVERTISSEMENT NE JAMAIS faire fonctionner le système de filtrage sans sac-filtre ou papier filtre. NE JAMAIS vider l’huile de la friteuse avant d’éteindre (OFF) les brûleurs. NE JAMAIS stocker le dispositif de filtrage UFM dans un endroit autre que le compartiment réservé...
-
Page 29: Remplacer Le Filtre
AVERTISSEMENT Débrancher de cordon d’alimentation électrique avant de procéder à l’entretien et à la maintenance de la machin REMPLACER LE FILTRE AVERTISSEMENT À la température de fonctionnement de la friteuse, la température de la matière grasse à l’intérieur de la friteuse risque de dépasser 375°F (190°C). Cette matière grasse fondue risque de provoquer des brûlures graves. -
Page 30: Nettoyage De La Friteuse
NETTOYAGE DE LA FRITEUSE Nettoyage quotidien Nettoyage hebdomadaire (ébouillantage) ATTENTION Éteignez complètement la friteuse lorsque vous comptez remplacer l’huile par l’eau et lorsque la phase de nettoyage comprenant tout chauffage de la friteuse est terminée. Ceci évitera que le système de chauffe ne s’allume lors de la vidange de l’huile et du remplissage d’eau. AVERTISSEMENT Ne pas utiliser le bac de filtrage afin de vidanger l’eau de nettoyage. - Page 32 Veuillez contacter l’usine Pitco Frialator si vous Veuillez contacter votre représentant agréé Pitco Frialator si vous avez des problèmes ou des avez des problèmes ou des questions questions concernant votre équipement par concernant votre commande de 8:00 heures à l’intermédiaire du réseau de service après-vente 17:00 heures, heure normale de l’Est des États-...
- Page 33 ¡Siempre Algo Cocinándose! Manual de Instalación y Operación de Freidores de Gas con TODAS LAS OPCIONES Cubre los Modelos SG & SGF 14, 14R, 14T, 18, 18F, 24OP, 24F, 34P & 34F www.pitco.com...
- Page 34 Hay una llama expuesta dentro del equipo. Esta unidad puede comprada a Pitco y/o a sus compañías de Servicios y Repuestos calentarse lo suficiente como para incendiar materiales cercanos.
- Page 35 REVISION DE UN FREIDOR NUEVO PRECAUCION Para evitar daños al equipo no incline o sostenga el freidor en sólo dos de sus roldanas o trate de mover la unidad tirando de las aberturas de ventilacion del cañón de la chimenea. INSTALACION ADVERTENCIA NO obstruya el flujo de combustión y ventilación o las aberturas de aire alrededor del freidor.
-
Page 36: Conexion Electrica
CONEXION DE GAS ADVERTENCIA NUNCA utilice en el freidor un tipo de gas que no sea el indicado en la placa de especificaciones. El uso de un tipo de gas que no sea el apropiado causará una operación defectuosa. Si usted desea convertir su freidor a otro tipo de combustible, póngase en contacto con el distribuidor. - Page 37 SISTEMAS DE VENTILACION Y CONTRA INCENDIOS PRECAUCION Asegúrese de que el sistema de ventilación no causa una corriente descendente de aire en la abertura del cañón de chimenea del freidor. Las corrientes descendentes de aire no permiten que el freidor pueda descargar en forma apropiada y causan recalentamiento que puede ocasionar daños permanentes.
- Page 38 Verificación de la Presión de Gas INSTRUCCIONES PARA EL ENCENDIDO álvula de combinaci n de gas a la posic n "ON" (encendido). Termostato de Estado Sólido Control Digital: Control de computadora ADVERTENCIA NO GIRE LA PERILLA DE LA VALVULA DE COMBINACION DE GAS A LA POSICION “ON” ( ENCENDIDO), HASTA QUE EL RECIPIENTE NO ESTE COMPLETAMENTE LLENO DE AGUA O DE GRASA.
- Page 39 NOTA No deje el freidor desatendido durante la limpieza. Nunca deje que el nivel de agua descienda por debajo de la marca “Min Level” en el respaldo del tanque. c. Usando el cepillo de limpieza del freidor, friegue el interior del freidor para remover la capa de protección de aceite.
- Page 40 PROGRAMACION DEL TABLERO DIGITAL DE CONTROL VENTANA DEL TABLERO DE CONTROL TECLA DE PROGRAMACION ENCENDIDO/ APAGADO LUZ INDICADORA DE ENCENDIDO DEL CONTROL LUZ INDICADORA DE DE TIEMPO DERECHO ENCENDIDO DEL CONTROL TECLA DE CONTROL DE TIEMPO IZQUIERDO DE TIEMPO DERECHO TECLA DE CONTROL DE TIEMPO IZQUIERDO TECLA DE TEMPERATURA...
- Page 41 PROGRAMACION PARA EL NIVEL BAJO (CONTINUACION) NOTA: NO SE PUEDE HACER MIENTRAS LOS MEDIDORES DE TIEMPO ESTEN EN OPERACION. PARA SALVAR LO PROGRAMADO Y SALIR DE LA MODALIDAD DE PROGRAMACION, OPRIMA Y MANTENGA OPRIMIDA LA TECLA POR 5 SEGUNDOS. PASO 6 OPRIMA .
- Page 42 INSTRUCCIONES DE PROGRAMACION PARA COMPUTADORA DE NIVEL MULTIPLE TECLA DE PROGRAMACION TECLA DE TIEMPO TECLA DE TEMPERATURA TECLA TECLA DE ENCENDIDO DE ENCENDIDO TECLAS DE PRODUCTOS PRIMER NIVEL DE PROGRAMACION PROGRAMA...
- Page 43 PROGRAMACION DEL SEGUNDO NIVEL ENTRADA A LA PROGRAMACION DEL SEGUNDO NIVEL PROGRAMA SELECT OPTIONS NOTA: En cualquier momento en que se usa para guardar un valor fijado, debe oprimirse para volver a la modalidad de "Select Options PROGRAMACION DE FUNCIONES PASS REQ "NO PASS 1, 2, 3...
- Page 44 PROCEDIMIENTOS DE FILTRADO NOTA Cuando esté trabajando con aceite caliente use siempre guantes aislantes, a prueba de aceite. ADVERTENCIA NUCA opere el sistema de filtrado sin el filtro de bolsa o de papel. NUNCA vacíe el aceite del freidor antes de apagar los quemadores del freidor. NUNCA almacene la unidad de filtro UFM en ningún otro lugar que no sea la cavidad de filtro del freidor.
- Page 45 ADVERTENCIA El suministro de energía debe estar desconectado antes de limpiar o dar servicio al aparato. REEMPLAZO DEL MATERIAL DEL FILTRODEL MATERIAL DEL FILTRO ADVERTENCIA A la temperatura de operación, la grasa en el freidor puede llegar a temperaturas mayores de 375°F (190°C).
- Page 46 LIMPIEZA DEL FREIDOR Diariamente Semanalmente (Hervido) PRECAUCION Apague completamente el freidor cuando va a reemplazar el aceite por agua y cuando la parte de calentamiento de la limpieza se ha terminado. Esto evita que el sistema de calentamiento se encienda durante la operación de drenaje del aceite y llenado con agua.
Need help?
Do you have a question about the SG Series and is the answer not in the manual?
Questions and answers