Table of Contents
Advertisement
Available languages
Available languages
Quick Links
Advertisement
Chapters
Table of Contents

Subscribe to Our Youtube Channel
Related Manuals for Candy CIKC30


Summary of Contents for Candy CIKC30
- Page 1 Instructions Manual For Induction Hob ENGLISH Manuel d’instructions pour plaque à induction FRANÇAIS Thank you for purchasing the Candy induction hob. Please read this instruction manual carefully before using the hob and keep it in a safe place for future reference.
-
Page 3: Table Of Contents
ENGLISH Content Foreword ......................3 1.1 Safety Warnings ..................3 1.2 Installation ..................... 3 Electrical Shock Hazard ............... 3 1.2.1 Cut Hazard ................3 1.2.2 Important safety instructions ............3 1.2.3 1.3 Operation and maintenance ................ 4 Electrical Shock Hazard ............... 4 1.3.1 ... - Page 4 9.6 Cautions ..................... 20 9.7 Connecting the hob to the mains power supply ..........21 ...
-
Page 5: Foreword
Foreword Safety Warnings Your safety is important to us. Please read this information before using your cooktop. Installation 1.2.1 Electrical Shock Hazard • Disconnect the appliance from the mains electricity supply before carrying out any work or maintenance on it. •... -
Page 6: Operation And Maintenance
• This appliance can be used by children aged from 8 years and above and persons with reduced physical, sensory or mental capabilities or lack of experience and knowledge if they have been given supervision or instruction concerning use of the appliance in a safe way and understand the hazards involved. -
Page 7: Hot Surface Hazard
• However, persons with cardiac pacemakers or other electrical implants (such as insulin pumps) must consult with their doctor or implant manufacturer before using this appliance to make sure that their implants will not be affected by the electromagnetic field. •... - Page 8 • Do not leave children alone or unattended in the area where the appliance is in use. • Children or persons with a disability which limits their ability to use the appliance should have a responsible and competent person to instruct them in its use.
-
Page 9: Product Induction
Congratulations on the purchase of your new Induction Hob. We recommend that you spend some time to read this Instruction / Installation Manual in order to fully understand how to install correctly and operate it. For installation, please read the installation section. Read all the safety instructions carefully before use and keep this Instruction / Installation Manual for future reference. -
Page 10: Before Using Your New Induction Hob
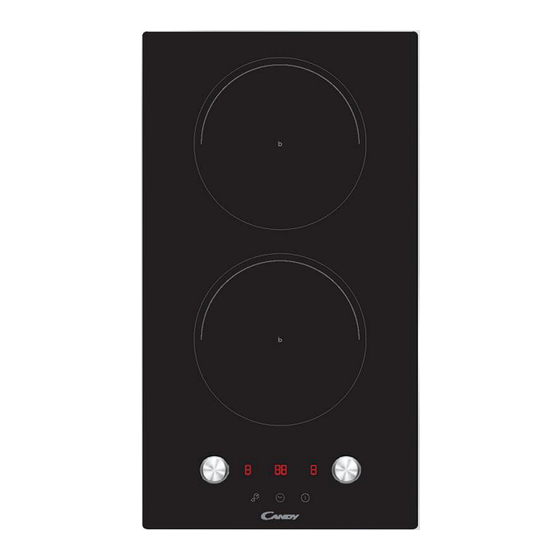
Read this guide, taking special note of the ‘Safety Warnings’ section. • Remove any protective film that may still be on your Induction hob. Technical Specification Cooking Hob CIKC30 Cooking Zones 2 Zones Supply Voltage 220-240V~ 50Hz or 60Hz Installed Electric Power 3500W Product Size L×W×H(mm) -
Page 11: Choosing The Right Cookware
Choosing the right Cookware • Only use cookware with a base suitable for induction cooking. Look for the induction symbol on the packaging or on the bottom of the pan. • You can check whether your cookware is suitable by carrying out a magnet test. Move a magnet towards the base of the pan. -
Page 12: How To Use
The cooking zones are, up to a limit, automatically adapted to the diameter of the pan. However the bottom of this pan must have a minimum of diameter according to the corresponding cooking zone. To obtain the best efficiency of your hob, please place the pan in the centre of the cooking zone. -
Page 13: Finish Cooking
3.3.2 Finish cooking Rotate the corresponding knob that you wish to switch off Turn the cooking zone off by contra-rotating knob to “0”. Make sure the display shows “0”. Turn the whole cooktop off by touching the ON/OFF control. Beware of hot surfaces “H”... -
Page 14: Using The Boost Function
Setting the timer to turn one cooking zone off Set one zone Rotate the corresponding knob control that you want to set the timer for. Set the time by touching the time control and then rotating knob Hint: Rotate the corresponding knob control of the timer once time will decrease or increase by 1 minute. -
Page 15: Default Working Times
• The function can work in any cooking zone. • The heat setting of cooking zone will return to 9 after 5 minutes. 3.3.6 Default working times Auto shut down is a safety protection function for your induction hob. It shut down automatically if ever you forget to turn off your cooking. -
Page 16: For Stir-Frying
4.1.3 For stir-frying Choose an induction compatible flat-based wok or a large frying pan. Have all the ingredients and equipment ready. Stir-frying should be quick. If cooking large quantities, cook the food in several smaller batches. Preheat the pan briefly and add two tablespoons of oil. Cook any meat first, put it aside and keep warm. -
Page 17: Care And Cleaning
Care and Cleaning What? How? Important! Everyday soiling on 1. Switch the power to the cooktop off. • When the power to the cooktop is switched glass (fingerprints, 2. Apply a cooktop cleaner while the off, there will be no ‘hot surface’ indication marks, stains left by glass is still warm (but not hot!) but the cooking zone may still be hot! Take... -
Page 18: Failure Display And Inspection
Some pans make This may be caused by the This is normal for cookware and crackling or clicking construction of your cookware does not indicate a fault. noises. (layers of different metals vibrating differently). The induction hob This is caused by the technology of This is normal, but the noise should makes a low humming induction cooking. - Page 19 fan. Supply voltage is below the rated voltage. Please inspect whether power supply is normal. Power on after the power supply is normal. Supply voltage is above the rated voltage. Reinsert the connection between the display Communication error. board and the power board. Replace the power board or the display board.
-
Page 20: Installation
Installation Selection of installation equipment Cut out the work surface according to the sizes shown in the drawing. For the purpose of installation and use, a minimum of 50mm space shall be preserved around the hole. Be sure the thickness of the work surface is at least 30mm. Please select heat-resistant and insulated work surface material (Wood and similar fibrous or hygroscopic material shall not be used as work surface material unless impregnated) to avoid the electrical shock and larger deformation caused by the heat radiation from the hotplate. -
Page 21: Before Installing The Hob, Make Sure That
accidental touch with the overheating bottom of the hob, or getting unexpectable electric shock during working, it is necessary to put a wooden insert, fixed by screws, at a minimum distance of 50mm from the bottom of the hob. Follow the requirements below. -
Page 22: Adjusting The Bracket Position
The unit should be placed on a stable, smooth surface (use the packaging). Do not apply force onto the controls protruding from the hob. Adjusting the bracket position Fix the hob on the work surface by screw 4 brackets on the bottom of hob(see picture) after installation. Adjust the bracket position to suit for different table top thickness. - Page 23 3. The induction hotplate shall be installed such that better heat radiation can be ensured to enhance its reliability. 4. The wall and induced heating zone above the table surface shall withstand heat. 5. To avoid any damage, the sandwich layer and adhesive must be resistant to heat. 6.
- Page 24 This appliance is labeled in compliance with European directive 2012/19/EU for Waste Electrical and Electronic Equipment (WEEE). By ensuring that this appliance is disposed of correctly, you will help prevent any possible damage to the environment and to human health, which might otherwise be caused if it were disposed of in the wrong way.
- Page 25 FRANÇAIS Contenu Avant-propos .............................. 3 1.1 Consignes de sécurité ........................3 1.2 Installation ............................3 Risque d’électrocution ....................3 1.2.1 1.2.2 Risque de coupure ...................... 3 Consignes de sécurité importantes ................3 1.2.3 1.3 Fonctionnement et entretien ......................4 Risque d’électrocution ....................4 1.3.1 Risque pour la santé...
- Page 26 9.4 Avant de placer les étriers de fixation .................... 20 9.5 Réglage de la position des étriers ....................20 9.6 Mises en garde ..........................21 9.7 Branchement de la plaque sur le secteur ..................21...
-
Page 27: Avant-Propos
1. Avant-propos 1.1 Consignes de sécurité Votre sécurité est importante pour nous. Veuillez lire ces informations avant d’utiliser votre plaque de cuisson. 1.2 Installation Risque d’électrocution 1.2.1 • Débrancher l’appareil du secteur avant d’effectuer tout travail ou opération d’entretien. • Le raccordement à un bon système de mise à la terre est essentiel et obligatoire. -
Page 28: Fonctionnement Et Entretien
mentales réduites ou un manque d’expérience et de connaissances, s’ils sont sous surveillance ou si on leur a appris à utiliser l’appareil en toute sécurité et s’ils comprennent les risques courus. • Les enfants ne doivent pas jouer avec l’appareil. Le nettoyage et l’entretien ne doivent pas être effectués par des enfants sans surveillance. -
Page 29: Risque Pour La Santé
Risque pour la santé 1.3.2 • Cet appareil est conforme aux normes de sécurité électromagnétique. • Toutefois, les personnes portant un pacemaker ou un autre implant électrique (comme une pompe à insuline) doivent consulter leur docteur ou le fabricant de l’implant avant d’utiliser cet appareil afin d’être certaines que leurs implants ne seront pas affectés par le champ électromagnétique. - Page 30 • N’utilisez jamais l’appareil pour chauffer la pièce. • Après toute utilisation, éteignez toujours les zones de cuisson et la plaque comme cela est décrit dans ce manuel (par ex. au moyen des commandes tactiles). Ne comptez pas sur la fonction de détection de la casserole pour éteindre les zones de cuisson quand vous enlevez les casseroles.
-
Page 31: Induction Du Produit
Félicitations pour l’achat de votre nouvelle plaque de cuisson à induction. Nous vous conseillons de prendre le temps de lire ce manuel d’instruction/d’installation afin de comprendre parfaitement comme l’installer correctement et la faire fonctionner. Pour l’installation, veuillez lire le paragraphe Installation. Lisez attentivement toutes les consignes de sécurité... -
Page 32: Avant D'utiliser Votre Nouvelle Plaque À Induction
Lisez ce guide, en faisant particulièrement attention au paragraphe « Consignes de sécurité ». • Ôtez le film protecteur qui pourrait encore se trouver sur la plaque à induction. 2.5 Caractéristiques techniques Plaque de cuisson CIKC30 Zones de cuisson 2 zones Tension d’alimentation 220-240 V~ 50 ou 60 Hz Puissance électrique installée... -
Page 33: Sélection Du Bon Ustensile De Cuisson
3.2 Sélection du bon ustensile de cuisson • N’utilisez que des ustensiles de cuisson ayant une base adaptée à la cuisson à induction. Cherchez le symbole de l’induction sur l’emballage ou le fond de la casserole. • Vous pouvez vérifier si votre ustensile de cuisson est adapté en effectuant un test magnétique. -
Page 34: Comment L'utiliser
Les zones de cuisson sont, jusqu’à une certaine limite, automatiquement adaptées au diamètre de la casserole. Le fond de cette casserole pourrait néanmoins avoir un minimum de diamètre selon la zone de cuisson correspondante. Pour obtenir la meilleure efficacité possible de la plaque, placer la casserole au centre de la zone de cuisson. Le diamètre de la base des ustensiles de cuisson à... -
Page 35: Finir De Cuisiner
3.3.2 Finir de cuisiner Tourner le bouton correspondant à ce que vous souhaitez arrêter. Éteignez la zone de cuisson en faisant tourner le bouton dans le sens inverse pour arriver sur "0". Assurez-vous que “0” s’affiche. Éteignez toute la plaque en touchant la commande Marche/Arrêt. Faites attention aux surfaces chaudes La lettre “H”... -
Page 36: Utilisation De La Fonction Boost
Réglage de la minuterie pour éteindre une zone de cuisson Régler une zone Tournez le bouton de la commande dont vous souhaitez régler la minuterie. Réglez le temps en touchant la minuterie, puis en tournant le bouton Astuce : Tournez le bouton correspondant de la minuterie une fois et le temps diminuera ou augmentera de 1 minute. -
Page 37: Temps De Fonctionnement Par Défaut
Temps de fonctionnement par défaut 3.3.6 La coupure automatique est une fonction de sécurité pour votre plaque à induction. Elle se coupe automatiquement si vous oubliez de l’éteindre. Les temps de fonctionnement par défaut pour divers niveaux de puissance sont indiqués dans le tableau ci-dessous : Niveau de puissance Temps de fonctionnement par défaut... -
Page 38: Détection Des Petits Articles
4.1.3 Pour faire sauter des aliments 1. Choisissez un wok à fond plat compatible avec l’induction ou une grande poêle à frire. 2. Préparez tous les ingrédients et l’équipement. Les aliments doivent revenir rapidement. Si vous cuisinez de grandes quantités, cuisinez les aliments en plusieurs groupes plus petits. 3. -
Page 39: Entretien Et Nettoyage
6. Entretien et nettoyage Quoi ? Comment ? Important ! • Quand la plaque de cuisson est hors tension, Salissures de tous les 1. Mettez la plaque de cuisson hors tension. l’indication « surface chaude » n’apparaît pas jours sur le verre 2. -
Page 40: Affichage Des Pannes Et Inspection
Cela peut être dû à la construction de Certaines casseroles Cela est normal pour les ustensiles de cuisson et émettent des cela n’indique pas un défaut. votre ustensile de cuisson (des couches de métaux différents qui vibrent craquements ou des cliquètements. - Page 41 Attendez que la température d’IGBT revienne à la normale. Effleurez la touche “Marche/Arrêt” pour Température élevée d’IGBT. redémarrer l’appareil. Vérifiez si le ventilateur fonctionne correctement ; si ce n’est pas le cas, remplacez le ventilateur. La tension d’alimentation est inférieure à la Veuillez contrôler que la tension d’alimentation tension nominale.
-
Page 42: Installation
9. Installation 9.1 Sélection de l’équipement d’installation Coupez la surface de travail en fonction de la taille indiquée sur le dessin. Pour l’installation et l’utilisation, un espace minimum de 50 mm doit être laissé autour du trou. Vérifiez que l’épaisseur de la surface de travail soit d’au moins 30 mm. -
Page 43: Avant D'installer La Plaque De Cuisson, Assurez-Vous Que
AVERTISSEMENT : assurez une ventilation adéquate Assurez-vous que la plaque à induction soit bien ventilée et que l’entrée et la sortie d’air ne soient pas obstruées. Afin d’éviter tout contact accidentel avec le fond de surchauffe de la plaque de cuisson ou d’obtenir une décharge électrique inattendue pendant le travail, il est nécessaire de placer une pièce en bois, fixée par des vis, à... - Page 44 9.4 Avant de placer les étriers de fixation L’unité doit être placée sur une surface stable et lisse (utilisez l’emballage). Ne forcez pas sur les commandes dépassant de la plaque de cuisson. 9.5 Réglage de la position des étriers Fixez la plaque sur la surface de travail au moyen de 4 étriers à vis sur le fond de la plaque (voir image) après l’installation.
- Page 45 9.6 Mises en garde 1. La plaque à induction doit être installée par du personnel ou des techniciens qualifiés. Nous avons des professionnels à votre disposition. N’effectuez jamais l’opération vous-même. 2. La plaque ne sera pas installée directement au-dessus d’un lave-vaisselle, réfrigérateur, congélateur, lave-linge ou séchoir car l’humidité...
- Page 46 Cet appareil est marqué conformément à la Directive Européenne 2012/19/CE relative aux déchets d’équipements électriques et électroniques (DEEE). En vous assurant que cet appareil est mis au rebut correctement, vous aiderez à éviter de porter atteinte à l’environnement et à la santé humaine, ce qui aurait par contre lieu s’il était éliminé de manière incorrecte.
Need help?
Do you have a question about the CIKC30 and is the answer not in the manual?
Questions and answers