Table of Contents
Advertisement
Available languages
Available languages
Quick Links
Advertisement
Table of Contents

Related Manuals for Candy CIDSCS633TT


Summary of Contents for Candy CIDSCS633TT
- Page 1 Instruction Manual For Induction Hob SPANISH Manual de instrucciones para encimera de inducción MODEL: CIDSCS633TT Thank you for purchasing the CANDY induction hob. Please read this instruction manual carefully before using the hob and keep it in a safe place for future reference.
-
Page 2: Safety Warnings
By placing the mark on this product, we are confirming compliance to all relevant European safety, health and environmental requirements which are applicable in legislation for this product. Safety Warnings Your safety is important to us. Please read this information before using your cooktop. Installation Electrical Shock Hazard •... -
Page 3: Health Hazard
placed on this appliance at any time. • Please make this information available to the person responsible for installing the appliance as it could reduce your installation costs. • In order to avoid a hazard, this appliance must be installed according to these instructions for installation. - Page 4 safety standards. • However, persons with cardiac pacemakers or other electrical implants (such as insulin pumps) must consult with their doctor or implant manufacturer before using this appliance to make sure that their implants will not be affected by the electromagnetic field. •...
- Page 5 Important safety instructions • Never leave the appliance unattended when in use. Boilover causes smoking and greasy spillovers that may ignite. • Never use your appliance as a work or storage surface. • Never leave any objects or utensils on the appliance.
- Page 6 have a responsible and competent person to instruct them in its use. The instructor should be satisfied that they can use the appliance without danger to themselves or their surroundings. • Do not repair or replace any part of the appliance unless specifically recommended in the manual.
- Page 7 Care should be taken to avoid touching heating elements. Children less than 8 years of age shall be kept away unless continuously supervised. •This appliance can be used by children aged from 8 years and above and persons with reduced physical, sensory or mental capabilities or lack of experience and knowledge if they have been given supervision or instruction concerning use of the appliance in a safe way and...
- Page 8 CAUTION: The cooking process has to be supervised. A short term cooking process has to be supervised continuously. WARNING: In order to prevent tipping of the appliance, this stabilizing means must be installed. Refer to the instructions for installation. WARNING: Use only hob guards designed by the manufactuer of the cooking appliance or indicated by the manufacture of the appliance in the instruction for use as suitable or hob guards...
-
Page 9: Product Overview
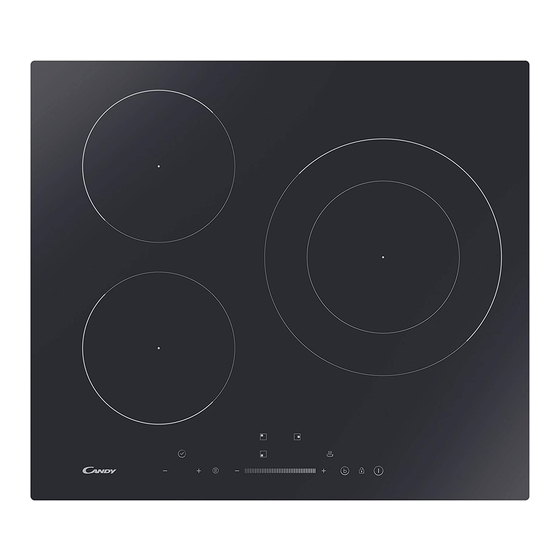
Product Overview Top View 1.2000 W zone, boost to 2600W 2.1500 W zone, boost to 2000W 3.2300 W zone, boost to 3000w 4. Glass plate 5. Control panel Control Panel 1. Heating zone selection controls 2. Timer control 3. Power regulating key 4. -
Page 10: A Word On Induction Cooking
A Word on Induction Cooking Induction cooking is a safe, advanced, efficient, and economical cooking technology. It works by electromagnetic vibrations generating heat directly in the pan, rather than indirectly through heating the glass surface. The glass becomes hot only because the pan eventually warms it up. iron pot magnetic circuit ceramic glass plate... -
Page 11: Choosing The Right Cookware
Choosing the right Cookware • Only use cookware with a base suitable for induction cooking. Look for the induction symbol on the packaging or on the bottom of the pan. • You can check whether your cookware is suitable by carrying out a magnet test. -
Page 12: Pan Dimensions
Pan dimensions The cooking zones are up to a limit, automatically adapted to the diameter of the pan. However the bottom of this pan must have a minimum of diameter according to the corresponding cooking zone. To obtain the best efficiency of your hob, please place the pan in the centre of the cooking zone. -
Page 13: When You Have Finished Cooking
a. If you don’t select a heat zone within 1 minute, the ceramic hob will automatically switch off. You will need to start again at step 1. b. You can modify the heat setting at any time during cooking. c. If slide along the “—”, power will vary from stage 2 to stage 8. Press “-”, power will decrease by one stage each time till stage 0. - Page 14 and then and then Make sure the power display shows “0”, then shows “H”. and then 3. Turn the whole cooktop off by touching the ON/OFF control. 4. Beware of hot surfaces ‘H’ will show which cooking zone is hot to touch. It will disappear when the surface has cooled down to a safe temperature.
- Page 15 3 second, the timer indicator will show flashing previous total power level, e.g. ‘2.5’. Touch and hold ” +” and ”-” for 1 second again to switch to other power level, for example 3.0. When the power that you want is flashing, touch the button “Stop+Go”...
-
Page 16: Restrictions When Using
3. The Boost power will last for 5 minutes and then the zone will go back to the power stage 9. 4. If you want to cancel the Boost during this 5 minutes, touch the heating zone selection button, an indicator next to the key will flash. And then touch the Boost button, the heating zone will go back to the power stage 9. - Page 17 Using the Keep warm Keep warm function is suitable for keeping food warm. Using the Keep warm to get stable temperature 1. Touch the heating zone selection button that you wish to use keep warm, an indicator next to the key will flash. 2.
-
Page 18: Locking The Controls
3. To cancel the pause status, touch the button STOP+GO , then the cooking zone will go back to the power stage which you set before. Locking the Controls • You can lock the controls to prevent unintended use (for example children accidentally turning the cooking zones on). -
Page 19: Using The Timer
Auto Shutdown Protection Auto shut down is a safety protection function for your induction hob. It shut down automatically if ever you forget to turn off your cooking. The default working times for various power levels are shown in the below table: Power level Default working timer (hour) -
Page 20: Setting The Timer To Turn One Cooking Zone Off
5. When the time is set, it will begin to count down immediately. The display will show the remaining time and the timer indicator will flash for 5 seconds. 6. Buzzer will bips for 30 seconds and the timer indicator shows “- - “ when the setting time finished. - Page 21 When cooking timer expires, the corresponding cooking zone will be automatically switch off and show “H”. Other cooking zone will keep operating if they are turned on previously. Setting the timer to turn more than one cooking zone 1. If use this function to more than one heating zone, the timer indicator will show the shortest time.
-
Page 22: Care And Cleaning
Care and Cleaning What? How? Important! Everyday soiling on 1. Switch the power to the • When the power to the cooktop is glass (fingerprints, cooktop off. switched off, there will be no ‘hot marks, stains left by 2. Apply a cooktop cleaner surface’... -
Page 23: Hints And Tips
Hints and Tips Problem Possible causes What to do The induction hob No power. Make sure the induction hob is cannot be turned on. connected to the power supply and that it is switched on. Check whether there is a power outage in your home or area. -
Page 24: Failure Display And Inspection
The induction hob or a Technical fault. Please note down the error cooking zone has letters and numbers, switch turned itself off the power to the induction hob unexpectedly, a tone off at the wall, and contact a sounds and an error qualified technician. -
Page 25: Technical Specification
Technical Specification Cooking Hob CIDSCS633TT Cooking Zones 3 Zones Supply Voltage 220-240V~, 50-60Hz Installed Electric Power 2.5kw:2250-2750W or 3.0 kw:2700-3300W or 4.5kw:4050-4950W or 5.5kw:4950-6050W or 6.9kw:5500-6900W Product Size L×W×H(mm) 590X520X55 Building-in Dimensions A×B (mm) 560X490 Weight and Dimensions are approximate. Because we continually strive to improve our products we may change specifications and designs without prior notice. - Page 26 Under any circumstances, make sure the Induction cooker hob is well ventilated and the air inlet and outlet are not blocked. Ensure the Induction cooker hob is in good work state. As shown below Note: The safety distance between the hotplate and the cupboard above the hotplate should be at least 760mm.
-
Page 27: Before Locating The Fixing Brackets
When you have installed the hob, make sure that • the power supply cable is not accessible through cupboard doors or drawers • there is adequate flow of fresh air from outside the cabinetry to the base of the • if the hob is installed above a drawer or cupboard space, a thermal protection barrier is installed below the base of the hob •... -
Page 28: Connecting The Hob To The Mains Power Supply
2. The hob will not be installed directly above a dishwasher, fridge, freezer, washing machine or clothes dryer, as the humidity may damage the hob electronics 3. The induction hotplate shall be installed such that better heat radiation can be ensured to enhance its reliability. - Page 29 • The installer must ensure that the correct electrical connection has been made and that it is compliant with safety regulations. • The cable must not be bent or compressed. • The cable must be checked regularly and replaced by authorised technicians only.
- Page 30 Product Information for Domestic Electric Hobs Compliant to Commission Regulation (EU) No 66/2014 Position Symbol Value Unit Model identification CIDSCS633TT Type of hob: Electric Hob zones Number of cooking zones and/or areas areas Induction cooking zones Heating technology (induction cooking...
- Page 31 Central left Central central Central right Front left Front central Front right ECelectric Rear left 193,5 Wh/kg cooking ECelectric Rear central Wh/kg cooking ECelectric Rear right Wh/kg cooking ECelectric Central left Wh/kg cooking Energy consumption for cooking zone Central ECelectric Wh/kg or area calculated per kg central...
-
Page 32: Advertencias De Seguridad
Al colocar la marca en este producto, ratificamos el cumplimiento todos los requisitos ambientales, sanitarios y de seguridad aplicables a este producto según la legislación europea. Advertencias de seguridad Su seguridad nos importa. Lea esta información antes de utilizar la encimera. Instalación Riesgo de descarga eléctrica •... - Page 33 responsable de instalar el electrodoméstico, ya que podría reducir los costes de instalación. • Para evitar riesgos, el electrodoméstico debe instalarse conforme se indica en estas instrucciones. • Un técnico cualificado debe instalar y conectar correctamente a tierra este electrodoméstico. •...
-
Page 34: Instrucciones De Seguridad Importantes
insulina) deben consultar a su médico o al fabricante del implante antes de utilizar este electrodoméstico para asegurarse de que el campo electromagnético no afectará al implante. • El incumplimiento de esta recomendación puede causar la muerte. Peligro, superficie caliente •... - Page 35 • No deje nunca el electrodoméstico sin vigilancia mientras se esté usando. La ebullición produce humo y derrames grasientos que pueden inflamarse. • Nunca utilice el electrodoméstico como superficie de trabajo o almacenamiento. • Nunca deje objetos o utensilios sobre el electrodoméstico. •...
- Page 36 ningún peligro para ellos o para el entorno. • No repare ni reemplace componentes del electrodoméstico a menos que se recomiende de forma expresa en el manual. Un técnico cualificado debe realizar cualquier otra reparación o mantenimiento. • No utilice limpiadores a vapor para limpiar la encimera. •...
- Page 37 • Pueden utilizarlo niños a partir de 8 años de edad y personas con facultades físicas, sensoriales o mentales reducidas, o con falta de experiencia y conocimiento, si lo emplean bajo supervisión o se les instruye acerca de la seguridad del producto y entienden los riesgos que comporta.
- Page 38 debe instalarse un elemento estabilizador. Consulte las instrucciones de instalación. ADVERTENCIA: Utilice solamente las protecciones que incorpora el electrodoméstico, las protecciones diseñadas por el fabricante del equipo de cocina o las protecciones que indica el fabricante en las instrucciones de uso, según corresponda.
-
Page 39: Descripción Del Producto
Descripción del producto Vista superior 1. Zona de 2000 W, con potencia extra hasta 2600 W 2. Zona de 1500 W, con potencia extra hasta 2000 W 3. Zona de 2300 W, con potencia extra hasta 3000 W 4. Placa de vidrio 5. - Page 40 Introducción sobre las encimeras de inducción Es una tecnología de cocción segura, avanzada, eficiente y económica. Funciona mediante vibraciones electromagnéticas que generan calor directamente en la cacerola, en lugar de hacerlo de forma indirecta a través de la superficie de vidrio. El vidrio se caliente solamente por estar en contacto con la cacerola.
- Page 41 Elección de los utensilios de cocina adecuados • Utilice solamente utensilios aptos para el uso con encimeras de inducción. Compruebe que el símbolo de inducción aparece en el embalaje o en el fondo de la cacerola. • Para comprobar si el utensilio es válido, puede hacer la prueba del imán.
- Page 42 Dimensiones de la cacerola Hasta cierto límite, las zonas de cocción se adaptan automáticamente al diámetro de la cacerola. Sin embargo, la base debe tener un diámetro mínimo según cada zona. Para optimizar la eficiencia de la placa de cocina, coloque la cacerola en el centro de la zona de cocción.
- Page 43 a. Si no elige una zona de cocción en 1 minuto, la encimera cerámica se apagará de forma automática. Entonces, tendrá que comenzar por el paso 1 otra vez. b. La temperatura se puede cambiar en cualquier momento durante la cocción.
- Page 44 O deslice «—» hasta el extremo izquierdo y entonces toque «-». También puede tocar el extremo izquierdo de «—» y, a continuación, «-». seguido de seguido de Asegúrese de que el visor de potencia muestra «0» y, a continuación, «H». seguido de Para apagar la placa de cocción completa, toque el mando de encendido/apagado.
- Page 45 Programación del nivel de potencia total según sus necesidades 1. Asegúrese de que la placa de cocción está apagada. Nota: La gestión de la potencia solo se puede programar con la placa de cocción apagada. 2. Toque el botón de pausa durante 5 segundos. Sonará un pitido. 3.
- Page 46 minutos. Permite cocinar con más potencia y rapidez. Activación de la potencia extra 1. Toque el mando de selección de la zona de cocción donde desea potencia extra y la indicación situada al lado parpadeará. 2. Toque el mando de potencia extra; la zona de cocción empezará a funcionar en ese modo.
- Page 47 Restricciones durante el uso Las tres zonas están divididas en dos grupos. Dentro de uno grupo, si usa la potencia extra en una zona, asegúrese de que la otra zona no funcione por encima del nivel 5. Uso de la función Mantener caliente Esta es una función adecuada para mantener la comida caliente.
-
Page 48: Bloqueo De Los Mandos
Uso de la función de pausa La función de pausa se puede activar en cualquier momento mientras cocina. Le permite detener la encimera de inducción mientras se ausenta hasta que regresa. 1. Asegúrese de que la zona de cocción está funcionando. 2. -
Page 49: Uso Del Temporizador
Protección contra el exceso de temperatura El sensor de temperatura integrado monitoriza la temperatura en el interior de la encimera de inducción. Cuando se detecta una temperatura excesiva, la encimera de inducción deja de funcionar de forma automática. Protección contra derrames La protección contra derrames es una función de seguridad. - Page 50 Uso del temporizador como minutero Si no se selecciona ninguna zona de cocción 1. Asegúrese de que la placa de cocción está encendida. Nota: Puede utilizar el minutero aunque no seleccione ninguna zona de cocción. 2. Cuando toque «-» o «+» en el mando del temporizador, el indicador del minutero empezará...
- Page 51 Toque el mando de selección de la zona de cocción cuyo temporizador quiera programar (por ejemplo, la zona 1). Cuando toque el mando del temporizador, el indicador del minutero empezará a parpadear y mostrará «30». 3. Programe el tiempo tocando el mando «-» o «+». Consejo: Para reducir o aumentar minuto a minuto, toque el mando «-»...
- Page 52 Programación del temporizador para apagar más de una zona de cocción 1. Si usa esta función para más de una zona de cocción, el indicador del temporizador mostrará el tiempo restante más breve. (Por ejemplo, si en la zona 1 se ha programado 2 minutos y en la 2, 5 minutos, el indicador del temporizador muestra «2»).
-
Page 53: Cuidado Y Limpieza
Cuidado y limpieza Qué Cómo Importante Suciedad del vidrio 1. Apague la encimera. • Tras apagar la encimera las zonas diaria (huellas 2. Aplique un producto de de cocción pueden seguir calientes dactilares, marcas, limpieza para placas de aunque no esté encendida la manchas de comida cocción mientras el vidrio indicación de «superficie caliente». -
Page 54: Consejos Y Sugerencias
Consejos y sugerencias Problema Posible causa Qué hacer No se puede encender No hay corriente. Asegúrese de que la encimera de la encimera de inducción está conectada a la red inducción. eléctrica y encendida. Compruebe si hay un corte de corriente en su domicilio o en la zona. - Page 55 Las cacerolas no se La encimera de inducción no Utilice utensilios de cocina aptos para calientan y aparece en puede detectar la cacerola encimeras de inducción. Consulte la el visor. porque no es adecuada para sección «Elección de los utensilios de este tipo de encimera.
-
Page 56: Especificaciones Técnicas
Especificaciones técnicas Encimera de cocción CIDSCS633TT Zonas de cocción 3 zonas Tensión de suministro 220-240 V~, 50-60 Hz Potencia eléctrica instalada 2,5 kW: 2250-2750 W 3,0 kW: 2700-3300 W 4,5 kW: 4050-4950 W 5,5 kW: 4950-6050 W 6,9 kW: 5500-6900 W Tamaño del producto L×An.×Al. - Page 57 Asegúrese, en cualquier circunstancia, de que la encimera de inducción esté ventilada y de que la entrada y la salida de aire no estén obstruidas. Compruebe que la encimera de inducción se encuentra en buen estado de funcionamiento. Consulte la figura siguiente. Nota: Entre la encimera y el armario situado encima de ella debe haber una distancia de seguridad de al menos 760 mm.
- Page 58 • La superficie de las paredes que rodean la encimera debe tener un acabado resistente al calor y fácil de limpiar (como azulejos). Comprobaciones posteriores a la instalación de la encimera • No se puede acceder al cable eléctrico a través de cajones o puertas de armarios. •...
- Page 59 vidrio abrazadera de retención tornillo ST3. 5*8 Encimera de la cocina/sala Marco inferior Precauciones 1. La instalación de la placa de inducción es responsabilidad de personal o técnicos cualificados. Tenemos profesionales a su disposición. Nunca realice la operación personalmente. 2. La placa no debe instalarse justo encima de un lavavajillas, un frigorífico, un congelador, una lavadora o una secadora, ya que la humedad dañaría los componentes electrónicos.
- Page 60 220-240V~ 220-240V~ Entrada Entrada Entrada Entrada 220-240V~ 400V~ 220-240V~ 220-240V~ 400V~ N1 N2 Cable de Cable de Cable de Cable de • Si el cable resulta dañado o necesita reemplazarse, el servicio posventa debe realizar la operación con herramientas especiales para evitar accidentes. •...
- Page 61 Información de producto de las placas de cocina eléctricas de uso doméstico según el Reglamento (UE) n.o 66/2014 de la Comisión Posición Símbolo Valor Unidad Identificación de modelo CIDSCS633TT Tipo de placa: Placa eléctrica Número de zonas zonas y/o áreas de áreas cocción...
- Page 62 Central izquierda Central central Central derecha Delantera izquierda Delantera central Delantera derecha Trasera Cocina 193,5 Wh/kg izquierda eléctrica CE Trasera Cocina Wh/kg central eléctrica CE Trasera Cocina Wh/kg derecha eléctrica CE Central Cocina Wh/kg izquierda eléctrica CE Consumo energético en zona o área de Central Cocina Wh/kg...
Need help?
Do you have a question about the CIDSCS633TT and is the answer not in the manual?
Questions and answers