
Subscribe to Our Youtube Channel
Related Manuals for Aaeon UP Xtreme i11


Summary of Contents for Aaeon UP Xtreme i11
- Page 1 SourcePoint Getting Started Guide for the AAEON UP Xtreme i11 Support for v0000 and v0001 boards Revision 2.10 ©2023 ASSET InterTech, Inc. SourcePoint Getting Started Guide – UP Xtreme i11...
-
Page 2: Table Of Contents
Firmware gets out of sync with software ........................ 32 Trace buffer overflows............................. 32 Intel Processor Trace – Slow! ........................... 35 My board is not booting – what now? ........................37 Conclusion ................................... 38 ©2023 ASSET InterTech, Inc. SourcePoint Getting Started Guide – UP Xtreme i11... -
Page 3: Revision History
Added content for new support of v0001 May 30, 2022 (with the Type-C connector removed) AAEON UP Xtreme i11 board 2.10 Updated for WinDbg support and other December 3, 2023 perfective changes ©2023 ASSET InterTech, Inc. SourcePoint Getting Started Guide – UP Xtreme i11... -
Page 4: Welcome
Troubleshooting section of this Guide, and if it persists, give us a call. We are happy to support you. ©2023 ASSET InterTech, Inc. SourcePoint Getting Started Guide – UP Xtreme i11... -
Page 5: Which Board And Cables To Purchase
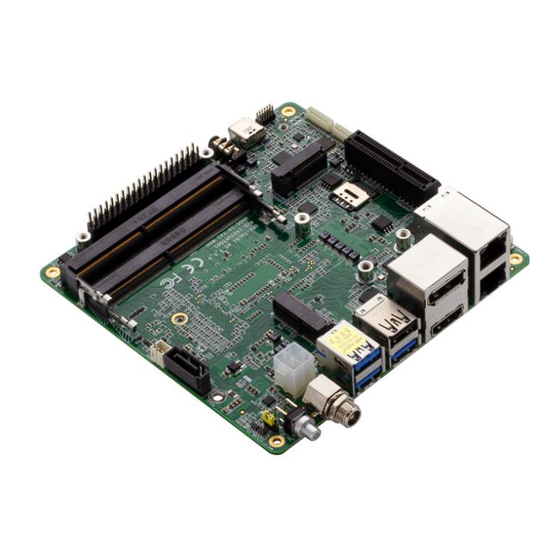
Which Board and Cables to Purchase? The board covered in this document is the AAEON UP Xtreme i11 board, based upon an Intel Tiger Lake CPU. As of February 2022, to address part availability issues, AAEON redesigned the v0000 boards to remove the on-board 40-pin GPIO Bus header, Intel FPGA Altera Max V, and the USB Type-C port. - Page 6 For the v0001 boards, purchase the DCI Type-A/A cable. The good news is that, in addition to www.designintools.intel.com, these cables can be purchased from DataPro: https://www.datapro.net/products/usb-3-0-super-speed-a-a-debugging-cable.html. ©2023 ASSET InterTech, Inc. SourcePoint Getting Started Guide – UP Xtreme i11...
-
Page 7: Bios Settings
BIOS Settings The AAEON UP Xtreme i11 boards come equipped with an AMI Aptio BIOS that is based upon typical Intel Customer Reference Board (CRB) BIOS. For the v0001 board, if there is a need to retrieve the BIOS and re-flash the board, it can be obtained here: https://downloads.up-community.org/download/up-xtreme-i11-... - Page 8 And that’s all that’s needed. All the Debug Settings in the CRB Advanced menu can be safely ignored. You are now ready to test your connection, and then launch SourcePoint and begin debugging. ©2023 ASSET InterTech, Inc. SourcePoint Getting Started Guide – UP Xtreme i11...
-
Page 9: Dbcstatus.exe: Red Is Bad, Green And Yellow Are Good
For the v0000 board, ensure that the Type-C cable is firmly connected to both the host and target, power up the UP Xtreme i11. In a moment the ball should turn green: Let the platform boot to the UEFI shell. Congratulations! You have a working DCI connection. - Page 10 Is the ball still red? Try cycling power on the target (don’t just power cycle with the reset button; physically remove the power plug, then plug it back in again). Still red? See our Troubleshooting section. ©2023 ASSET InterTech, Inc. SourcePoint Getting Started Guide – UP Xtreme i11...
-
Page 11: Getting Started With Sourcepoint
Project for each separate debugging session. That’s really a matter of user preference and what you’re debugging – it’s your choice. Now it’s time to create the Project. Under File > Project… select New Project: ©2023 ASSET InterTech, Inc. SourcePoint Getting Started Guide – UP Xtreme i11... - Page 12 You’ll be presented by the New Project Wizard (NPW). The emulator connection should be via DCI: ©2023 ASSET InterTech, Inc. SourcePoint Getting Started Guide – UP Xtreme i11...
- Page 13 After hitting Next, you’ll be prompted for the Project Name, Location to store the Project, and the location of the Target Configuration file: ©2023 ASSET InterTech, Inc. SourcePoint Getting Started Guide – UP Xtreme i11...
- Page 14 SourcePoint settings necessary to ensure a successful DCI connection. For the UP Xtreme i11 boards, custom TC files have been created, so you shouldn’t do an Identify Target to automatically select the TC file of interest. Rather, manually select the specific TC file that is customized for this target (TGL\UP-Xtreme- i11_DbC.tc) and hit Open:...
- Page 15 Then, your screen should look something like this: ©2023 ASSET InterTech, Inc. SourcePoint Getting Started Guide – UP Xtreme i11...
- Page 16 Hit Next, then Finish, and SourcePoint should successfully connect to the target. You should see “JtagTest: Successful operation” followed by “Configuration state: Connected” in the Status bar at the bottom left: ©2023 ASSET InterTech, Inc. SourcePoint Getting Started Guide – UP Xtreme i11...
- Page 17 You can right-click in the title bar of each window to change its type and, for example, to dock the window to the bottom, right side, etc. A sample layout is below: ©2023 ASSET InterTech, Inc. SourcePoint Getting Started Guide – UP Xtreme i11...
- Page 18 For instance, I like to ensure that both Load last project on startup and Save project on exit are disabled. This gives me more control on entry and exit from the application: ©2023 ASSET InterTech, Inc. SourcePoint Getting Started Guide – UP Xtreme i11...
- Page 19 You can issue a Stop on the target, Step Into, Reset it and halt at the reset vector, set some breakpoints, Go to the breakpoint, and so on. ©2023 ASSET InterTech, Inc. SourcePoint Getting Started Guide – UP Xtreme i11...
- Page 20 Refer to the SourcePoint User Guide in your install directory for detailed instructions on using all of the tool’s features. The v0000 board will halt automatically at the reset vector when you hit the SourcePoint Reset button: ©2023 ASSET InterTech, Inc. SourcePoint Getting Started Guide – UP Xtreme i11...
- Page 21 But, the v0001 board has an incomplete implementation of DbC2, as you can see from the yellow ball reference earlier, so a couple of extra steps are needed to get there: Firstly, after hitting the Reset button, an error message is thrown: ©2023 ASSET InterTech, Inc. SourcePoint Getting Started Guide – UP Xtreme i11...
- Page 22 Hit OK, and then hit Go, to boot again to the UEFI shell (or as far as it will go before stopping autonomously). Then Stop and Refresh in the Code window if needed: Click on the Breakpoints button, and then set an Init breakpoint: ©2023 ASSET InterTech, Inc. SourcePoint Getting Started Guide – UP Xtreme i11...
- Page 23 Hit Go. Hit the Reset button again, and wait 20 seconds. Voila! You’re at the reset vector: ©2023 ASSET InterTech, Inc. SourcePoint Getting Started Guide – UP Xtreme i11...
-
Page 24: Note
Many users are content to just use these basic operations, because run- control by itself is very powerful. However, if you wish to master the product and use some of its more advanced features, read on. ©2023 ASSET InterTech, Inc. SourcePoint Getting Started Guide – UP Xtreme i11... -
Page 25: Advanced Topics: Using Trace
The next step is to load in the ITH macros that enable the Trace Hub and hide it from the OS. Fortunately, SourcePoint comes equipped with a couple of macro buttons built ©2023 ASSET InterTech, Inc. SourcePoint Getting Started Guide – UP Xtreme i11... - Page 26 Trace button in the toolbar at the top, to open the Trace window; then click on the Configure… button; then click on the Trace Hub tab. Set the settings as below: ©2023 ASSET InterTech, Inc. SourcePoint Getting Started Guide – UP Xtreme i11...
-
Page 27: Architectural Event Trace
Once the Trace Hub has been enabled for the features you need, click on the AET tab, select All as Processors to trace, and select RDMSR/WRMSR and Port In/Out as events to trace: ©2023 ASSET InterTech, Inc. SourcePoint Getting Started Guide – UP Xtreme i11... - Page 28 This is a very powerful debugging utility, especially when troubleshooting code execution leading up to events before system memory is initialized and Intel Processor Trace is available. ©2023 ASSET InterTech, Inc. SourcePoint Getting Started Guide – UP Xtreme i11...
- Page 29 ©2023 ASSET InterTech, Inc. SourcePoint Getting Started Guide – UP Xtreme i11...
-
Page 30: Intel Processor Trace
Intel PT tab, put p0 in Processors to trace, and be sure that TSC and Cycle accurate under the Timestamp heading are enabled: That’s all. Then use the go til cf8io trick to capture some instruction trace data: ©2023 ASSET InterTech, Inc. SourcePoint Getting Started Guide – UP Xtreme i11... - Page 31 The SourcePoint User Guide also provides a very thorough, comprehensive review of the tool. And visit our for helpful “How To” content. SourcePoint Academy ©2023 ASSET InterTech, Inc. SourcePoint Getting Started Guide – UP Xtreme i11...
-
Page 32: Troubleshooting Tips
We’ll respond as soon as possible. intertech.com/support/ In the meantime, here are a few errata that we’ve noticed on the UP Xtreme i11, and the steps needed to mitigate. Firmware gets out of sync with software On the host PC using DCI, functionality is roughly partitioned between software (SourcePoint application with its GUI) and firmware (lower-level run-control primitives). - Page 33 Sometimes, after maybe a few minutes, it recovers. Sometimes, you end up in limbo. The only solution at this point is to quit SourcePoint, do an End task on the AssetDCI Background process, power cycle the target, and start over: ©2023 ASSET InterTech, Inc. SourcePoint Getting Started Guide – UP Xtreme i11...
- Page 34 Getting Started Guide in case they are still encountered out in the wild – please contact our Support line directly if you see one. ©2023 ASSET InterTech, Inc. SourcePoint Getting Started Guide – UP Xtreme i11...
-
Page 35: Intel Processor Trace - Slow
Intel Processor Trace – Slow! When you configure Intel PT, you can specify the size of the buffer in system memory to collect trace data: ©2023 ASSET InterTech, Inc. SourcePoint Getting Started Guide – UP Xtreme i11... - Page 36 Focus your debug efforts in the vicinity of the bug. ©2023 ASSET InterTech, Inc. SourcePoint Getting Started Guide – UP Xtreme i11...
-
Page 37: My Board Is Not Booting - What Now
There’s only one thing: it has gone back to the factory settings, so you need to reset the WDT timer, as per BIOS Settings section in this manual. Then, you’ll be back in business. ©2023 ASSET InterTech, Inc. SourcePoint Getting Started Guide – UP Xtreme i11... -
Page 38: Conclusion
“how to” videos. If you ever have any questions, please call, email or open a Support Case here: https://www.asset-intertech.com/support/. We’ll be glad to help! ©2023 ASSET InterTech, Inc. SourcePoint Getting Started Guide – UP Xtreme i11...
Need help?
Do you have a question about the UP Xtreme i11 and is the answer not in the manual?
Questions and answers