
Subscribe to Our Youtube Channel
Related Manuals for Mountup MU7012


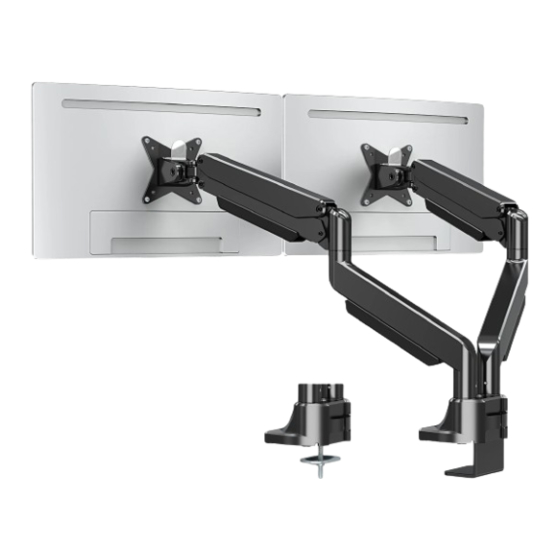
Summary of Contents for Mountup MU7012
- Page 1 Premium Dual Monitor Stand Instruction Manual US1.0 (6.6 ~ 33 lbs) x 2 75 x 75 mm 100x100mm (3~15kg) x 2 If you have any questions, please feel free to contact Customer Service via Amazon before returning.
-
Page 2: Part List
SAFETY INSTRUCTIONS BEFORE ASSEMBLY Layout all components and hardware. Check all parts are included and undamaged. Should anybody intends to install or use this monitor arm, please read and understand this manual carefully. WARNING This product contains small items that could be a choking hazard if swallowed. KEEP AWAY FROM CHILDREN UNDER 3 YEARS OLD. -
Page 3: Step 1: Mounting The Base
ASSEMBLY STEPS STEP 1: Mounting the Base OPTION A: Clamp Installation Adjust the Clamp width to fit with desk. Table thickness: 0.4''~1.97'' 10~50mm Secure stand to desktop by tightening Clamp with Allen key (6). - Page 4 STEP 1: Mounting the Base OPTION B: Grommet Installation ø 0.4~2.4" ø 10~60mm DESK DESK Ensure the desktop has a hole between 0.4'' and 2.4'' in diameter to use this option. Using a grommet hole that is Remove the short bolt for clamp installation from part 2. already in your desktop is acceptable.
-
Page 5: Step 2: Arm Installation
STEP 2: Arm Installation Turn the head to the straight by hand before assembling the arm. Insert the arm into the base and adjust the screw with the Allen key (7) to fix the lower arm. The screw are used to adjust the tightness of the connection between the base and the bracket arm to avoid the arms from... - Page 6 STEP 3 : Attach Monitor OPTION A: Flat Back Monitor Attach the VESA plate (3) to the back of monitor Monitor Monitor Monitor and secure it by using a 5mm Allen Key (6) to tighten screws along with washers. Do not tighten the screws excessively or your monitor might be damaged.
- Page 7 STEP 4: Hang Monitor and Adjust Monitor Tilting Angle Slide the monitors onto the head of arm. Important Notice: The pressure of the gas spring is initially set to an intermediate value. So when the monitor hangs, make sure to hold it with both hands and don't let it drop suddenly.
- Page 8 STEP 5: Adjust Gas Spring Tension For proper functioning of this mount, depending on different weight of monitor you might need to adjust tension in upper arm (1) . Situation 1: Arm falls down Upper Arm with monitor falls down and fails to stay where intended. Solution: Turn the inside screw counter- clockwise (“+”direction) to increase...
-
Page 9: Step 6: Cable Management
STEP 6: Cable Management Remove Cable Cover Remove two keys first, then remove the cover. Attach Cable Cover Insert the cover first, then install the two keys. - Page 10 Adjust as Desired Adjust monitor position and rotation. Tilt +90° Swivel Rotation ±180° Height -45° Note: To ensure stability, the tightness of the rotating axis has been preseted, so it would be kind of difficult to rotate the VESA plate. Suggestion: Please attach the monitor first, then hold the two sides of it with both hands, and rotate vigorously.
-
Page 11: Product Dimensions
Product Dimensions ±90° min9.88''~max12.44'' 2.95'' ±90° 8.19'' ±180° 2.95'' 3.94'' 4.53'' 2.76'' ±180° ±9 0° min0.4''~max1.97'' CAUTION AND MAINTENANCE: • Never allow children to climb, stand, hang, or play on any part of monitor or stand. • This product is intended for indoor use only. Using this product outdoors could lead to product failure and personal injury.
Need help?
Do you have a question about the MU7012 and is the answer not in the manual?
Questions and answers