Subscribe to Our Youtube Channel
Summary of Contents for Clarke CWS250
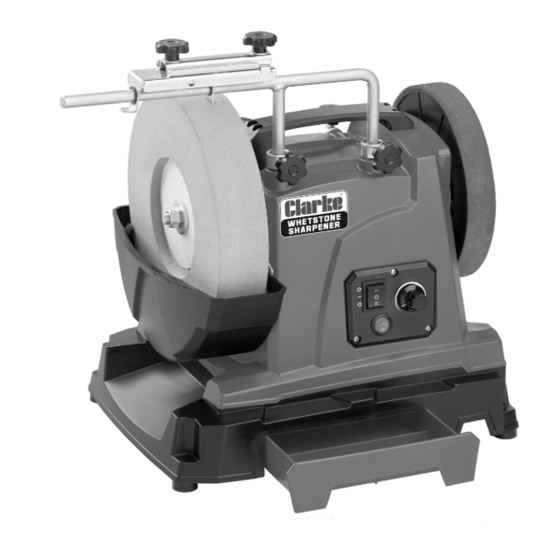
- Page 1 WHETSTONE SHARPENER MODEL NO: CWS250 PART NO: 6500498 OPERATING & MAINTENANCE INSTRUCTIONS ORIGINAL INSTRUCTIONS GC08/23-Rev 1...
-
Page 2: Specifications
INTRODUCTION Thank you for purchasing this CLARKE Whetstone Sharpener. Before attempting to use this product, please read this manual thoroughly and follow the instructions carefully. In doing so you will ensure the safety of yourself and that of others around you, and you can look forward to your purchase giving you long and satisfactory service. -
Page 3: General Safety Rules
GENERAL SAFETY RULES CAUTION: FAILURE TO FOLLOW THESE PRECAUTIONS COULD RESULT IN PERSONAL INJURY, AND/OR DAMAGE TO PROPERTY. WORK ENVIRONMENT 1. Keep the work area clean, tidy and well lit. Cluttered and dark areas invite accidents 2. DO NOT operate power tools in explosive atmospheres, such as in the presence of flammable liquids, gases or dust. -
Page 4: Electrical Safety
6. NEVER attempt any repairs yourself. If you have a problem with this product contact your local CLARKE dealer. 7. DO NOT use the tool for any purpose than that described in this manual. - Page 5 tool in a damp location is unavoidable, use a residual current device (RCD) protected supply. 4. When operating a power tool outdoors, use an extension cable suitable for outdoor use. Use of a cable suitable for outdoor use reduces the risk of electric shock.
-
Page 6: Safety Symbols
2. ALWAYS use the tool rests to steady the workpiece. If the tool attachments are not used, the torque of the spinning grinding/polishing wheel may pull the workpiece from your hands. 3. Hold a hand tool or blade being sharpened firmly to prevent loss of control. 4. -
Page 7: Electrical Connections
ELECTRICAL CONNECTIONS WARNING! READ THESE ELECTRICAL SAFETY INSTRUCTIONS THOROUGHLY BEFORE CONNECTING THE PRODUCT TO THE MAINS SUPPLY. Before switching the product on, make sure that the voltage of your electricity supply is the same as that indicated on the rating plate. This product is designed to operate on 230VAC 50Hz. - Page 8 Water Trough Some items above may be supplied loose in the carton. If any are missing or damaged please contact the CLARKE dealer where you purchased the product. Position the machine in good light and on a suitable workbench. It is designed to be operated from either side, depending upon the grinding or honing task.
-
Page 9: Before Use
BEFORE USE FITTING THE TOOL SUPPORT The tool support can be used to support grinding jigs/clamps, a trueing or dressing tool, or as a tool or hand rest when working without jigs. 1. Attach the tool support by inserting the legs into the two mounting holes located on the top of the grinder. - Page 10 4. Press the switch down to (II) for forward rotation (clockwise when viewed from the grinding wheel end). 5. If the grinder does not run, turn the drive adjusting knob until the drive shaft makes firm contact with the perimeter of the friction drive wheel.
-
Page 11: Using Your Grinder
USING YOUR GRINDER WARNING: FRAGMENTS FROM A BROKEN/DETACHED GRINDING WHEEL CAN CAUSE INJURY. WARNING: ENSURE THAT THE WORKING POSITION ADOPTED DOES NOT CAUSE OPERATOR FATIGUE WHICH MAY LEAD TO LOSS OF CONTROL OF THE ITEM BEING GROUND. WARNING: THE STONE WILL CONTINUE TO ROTATE BRIEFLY AFTER THE SWITCH HAS BEEN PRESSED. -
Page 12: Grinding Tips
USING THE ANGLE GUIDE 1. The angle guide is used to determine the cutting edge angle of a tool. To do so, secure the tool into the tool clamp, then install the clamp to the tool support as shown. 2. With the machine switched off, hold the angle guide with the desired angle (as indicated on the angle guide) at the tool tip. -
Page 13: Honing Tips
The drive motor and bearings are sealed units and require no regular maintenance. Should you require assistance, contact your local CLARKE service agent. The honing wheel may develop a bump after extensive use where the glued joint in the leather covering stands proud as the leather becomes compressed. -
Page 14: Installing A New Grinding Stone
New grinding stones are frequently not true or in time can become grooved, glazed (built-up), out of round, or otherwise mis-shapen. To correct these defects, a grinding stone dresser is available from your CLARKE dealer. • ET125 Grinding Wheel Dresser - Part No:1700225 •... -
Page 15: Cleaning And Storage
Store the machine in a clean, dry location, out of reach of children. REPLACEMENT WHEELS Replacement Grinding and Honing wheels are available from your CLARKE dealer. • 250mm dia Grinding Wheel - Part No: 6500656 • 200mm dia Honing Wheel - Part No: 6500657 ENVIRONMENTAL PROTECTION Do not dispose of this product with general household waste. -
Page 16: Troubleshooting
CAUSE SOLUTION Grinder will not No power supply. Check supply & rectify. operate. ON/OFF switch is faulty. Consult your CLARKE dealer. Fuse blown. Check & replace if necessary. Consult your dealer if condition persists. Motor faulty. Consult your CLARKE dealer. -
Page 17: Declarations Of Conformity
DECLARATIONS OF CONFORMITY Parts & Service: 020 8988 7400 / E-mail: Parts@clarkeinternational.com or Service@clarkeinternational.com... -
Page 18: Component Parts
COMPONENT PARTS Parts & Service: 020 8988 7400 / E-mail: Parts@clarkeinternational.com or Service@clarkeinternational.com... - Page 19 COMPONENT PARTS Description No Description Bolt Threaded rod Label Potentiometer Knob for baffle On/Off switch Wiper strip X-pan headed screw Water tank Switchbox cover plate Steel sleeve Forward/reverse switch Securing knob X-pan headed screw Wiper clamp Printed circuit board X-pan headed screw Switch box Main housing Hex socket cap screws...


Need help?
Do you have a question about the CWS250 and is the answer not in the manual?
Questions and answers