Table of Contents
Advertisement
Advertisement
Table of Contents

Related Manuals for Clarke Metalworker CDP301B


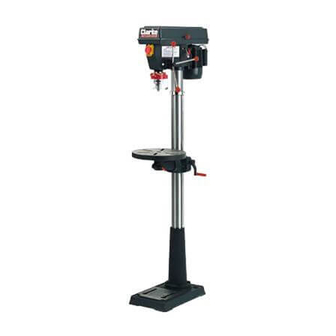
Summary of Contents for Clarke Metalworker CDP301B
- Page 1 SERIAL No....0205...
-
Page 2: Spare Parts & Servicing
For Spare Parts and Service, please contact your nearest dealer, or CLARKE For Spare Parts and Service, please contact your nearest dealer, or CLARKE International, on one of the following numbers. International, on one of the following numbers. PARTS & SERVICE TEL: 020 8988 7400 PARTS &... -
Page 3: Table Of Contents
By doing so you will ensure the safety of both yourself and others around you, and at the same time, you should look forward to long and trouble free service from your Clarke Drill Press. GUARANTEE This product is guaranteed against faults in manufacture for 12 months from date of purchase. -
Page 4: Safety Precautions
GENERAL SAFETY PRECAUTIONS WARNING As with all machinery, there are certain hazards involved with their operation and use. Exercising respect and caution will considerably lessen the risk of personal injury. However, if normal safety precautions are overlooked, or ignored, personal injury to the operator, or damage to property may result. -
Page 5: Additional Safety Rules For Drill Presses
19. DO NOT STAND ON THE MACHINE. Serious injury could occur if the machine is tipped over. Do not store materials above or near the machine such that it is necessary to stand on the machine to get to them. 20. -
Page 6: Electrical Connections And Wiring Diagram
ELECTRICAL CONNECTIONS Connect the mains lead to a standard, 230 Volt (50Hz) electrical supply through an approved 13 amp BS 1363 plug, or a suitably fused isolator switch. WARNING! THIS APPLIANCE MUST BE EARTHED IMPORTANT: The wires in the mains lead are coloured in accordance with the following code: Green &... -
Page 7: Preparation For Use
1 X Box of loose parts. Chuck Guard Assy. Loose Items in Box and Bag Check the parts against the above list and refer to the following diagrams. Should there be any deficiencies or damage, you should contact your CLARKE dealer immediately . -
Page 8: Description Of Parts
Remove all traces of preservative from the components with paraffin or a good quality solvent, and wipe all parts thoroughly with a clean dry cloth. Apply a coating of wax paste or light oil, to the table, column and base, to prevent rust. Take the necessary precautions when lifting components, considering their weight. -
Page 9: Assembly
ASSEMBLY CAUTION! ASSISTANCE MUST BE USED WHEN ASSEMBLING THIS MACHINE. A. Column Assembly to Base Fig. 1 NOTE: Ideally, the base should be firmly bolted to the floor or workbench, prior to assembly of other components. The mounting surface must flat, level and capable of supporting the drills’... - Page 10 E. Installing the Chuck. Fig. 4 Slide the table up the column and secure it to within 6" of the spindle. Open the jaws of the chuck to their maximum using the chuck key supplied. Put a piece of scrap wood on to the table to protect the chuck nose.
-
Page 11: Settings And Adjustments
SETTINGS and ADJUSTMENTS 1. Table. Fig. 7 The table may be raised, lowered or swivelled about the column, by slackening off the table support locking handle, (Fig.8), adjusting accordingly using the table crank, and re-tightening the locking handle . If the table assembly moves stiffly when being swivelled about the column, slacken the upper collar grub screw (at the rack) to allow... -
Page 12: Drill Speed Table
2. Changing Drill (Spindle) Speed. Fig. 11 Before changing the speeds, ensure the machine is switched OFF, and disconnected from the mains supply. Undo the Belt Tension Locking Screws (A Fig. 11), one either side of the head, and turn lever B - Fig.5 clockwise to relieve any tension on the belts. -
Page 13: Operation
OPERATION Insert the drill bit into the jaws of the chuck by approx 1", ensuring that the jaws do not touch the flutes of the drill. Before tightening the chuck, ensure that the drill is centred within the jaws. Ensure the table height and position is set so that drill travel is sufficient for the job in hand. Ensure the work is securely clamped, or held in a drill vice, bolted to the table. -
Page 14: Maintenance
Any damage should be repaired, and faults rectified. Please refer to the trouble shooting chart on page 16. If you are unable to rectify any faults, please contact your local dealer or Clarke International Service Division on 020 8988 7400 for assistance. -
Page 15: Cutting Speed Chart
CUTTING SPEEDS Factors which determine the best speed to use in any drill press operation are: Kind of material being worked. Size of hole. Type of drill. Quality of cut desired. Generally, the smaller the drill, the greater the required RPM. In soft material, the speed should be higher than for hard metals. -
Page 16: Trouble Shooting
TROUBLE SHOOTING PROBLEM PROBABLE CAUSE REMEDY A) Incorrect belt tension A) Adjust tension Noisy B) Dry spindle B) Remove spindle/quill assembly operation C) Loose pulley and lubricate (under load) D) Worn bearing C) Tighten pulley D) Replace bearing Excessive A) Loose chuck A) Tighten by pressing chuck down drill wobble B) Worn spindle, or bearing... -
Page 17: Specifications
Light Bulb Type ............ES 60W(Max) Heavy Duty Weight (301B) ............52.5 kg WeIght (351F & RE) ..........57 kg OPTIONAL ACCESSORIES Morticing Attachments, Mortice Chisels, Drill Press Vices, Cross Vices (Cast Iron), and Table Clamps are available from your CLARKE dealer... -
Page 18: Parts Lists And Diagrams
HEAD ASSEMBLY... - Page 19 HEAD ASSEMBLY PARTS LIST Description Part No. Head w/pointer & trim DD13302001 Cable Clamp DD16102014 Pan Head Screw M5 3040656 Hex. Screw M8 3044500 Adjusting Lever DD16102006 Motor Support Rod DD16102003 Motor Support Rod DD16102002 Motor Mount DD16102007A Lockwasher 12mm DDGB93-87 Nut Hex.
- Page 20 PULLEY & SPINDLE ASSY. PARTS LIST No.Description Part No No.Description Part No. ‘V’ Belt M24 DD16105011 15 Chuck JT3 DDJ2216 Pulley Nut DD13302025 16 Chuck Key DD16103010 Spindle Pulley DD13305009A 17 Wedge Drift DD16103008 Pulley Insert DD13302022 18 Ball Bearing 60202 BRG60202 Ball Brg 17mm 60203 BRG60203...
-
Page 21: Base Assembly
BASE ASSEMBLY Part No. Part No. Description CDP301B CDP351F & RE Column DD16101003B DD16101003 Rack DD16101010A DD16101010 Hex. Socket Screw Set 3040430 3040430 Column Support DD16101002B DD16101002 Hex. Socket Screw Set M10 3040508 3040508 Base DD13301001 DD13301001 Table Support w/indicator...
Need help?
Do you have a question about the Metalworker CDP301B and is the answer not in the manual?
Questions and answers