
Related Manuals for ACME Splendor 220 II


Summary of Contents for ACME Splendor 220 II
- Page 1 审核 2019.05.13 受控正本 CM-220 II User Manual Please read the instruc on carefully before use...
-
Page 2: Table Of Contents
TABLE OF CONTENTS 1. Safety Instruction................2 2. Technical Specification ..............3 3. Change Beam Angle ..............4 4. How To Set The Unit ..............4 4.1 Control Panel................ 4 4.2 Main Function ............... 5 4.3 Home Position Adjustment ........... 9 5. -
Page 3: Safety Instruction
1. Safety Instruction Please read carefully the instruction, which includes important information about the installation, usage and maintenance. WARNING Please keep this User Guide for future consultation. If you sell the unit to another user, be sure that they also receive this instruction booklet. ... -
Page 4: Technical Specification
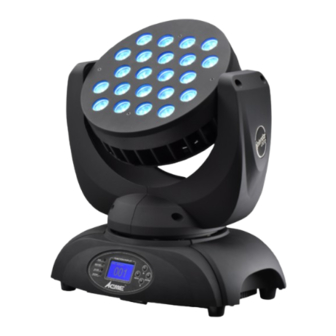
10 times weight of the unit. 2. Technical Specification Splendor 220 II features 22 high-power LEDs with the capability of producing full range of color mixing. Its compact, lightweight design and powerful output make it ideal for all kinds of applications. -
Page 5: Change Beam Angle
3. Change Beam Angle If you want to change the beam angle of the fixture, you can change lens of the fixture refer to the photo below: Turn off the mains power first, or high voltage may cause electric shock! 4. -
Page 6: Main Function
1.LED DMX input present MASTER Master Mode SLAVE Slave Mode POWER Power input present 2. Display To show the various menus and the selected functions 3.Button MENU To select the programming functions DOWN To go backward in the selected functions To go forward in the selected functions ENTER To confirm the selected functions... - Page 7 Dmx Address 1~512 Mode 1 (9) Channel Mode Mode 2 (16) Show1 Show2 Show Mode Show3 Show4 Master Slave 1 Slave Mode Slave 2 Black Out Pan Inverse Tilt Inverse DimmerSpeed MENU Back Light Display Inverse Auto Test Tilt Green Manual Test 0~255 Blue...
- Page 8 DMX Address Press the MENU button up to when the DMX Address is showing on the display. Press ENTER button and the display will blink. Use DOWN and UP button to change the DMX512 address. Once the address has been selected, press the ENTER button to store. Back to the main functions without any change press the MENU button or wait for one minute.
- Page 9 to the main functions without any change press the MENU button or wait for one minute. Dimmer Speed Press the MENU button up to when the Dimmer Speed is showing on the display. Pressing ENTER button and the display will blink. Use DOWN and UP button to select the No (Normal) or Yes (dimmer speed) mode.
-
Page 10: Home Position Adjustment
White Balance Press the MENU button up to when the White Balance is showing on the display. Press ENTER button and the Red will blink, press UP and Down button to adjust the value, press ENTER button to store and Green will blink on the display, press UP and Down button to adjust the value, press ENTER button to store and Blue will blink on the display, press UP and Down button to adjust the value, and press ENTER button to store. -
Page 11: How To Control The Unit
Offset Menu -127~127 Enter offset mode, select Pan or Tilt, press the ENTER button to confirm. Use the UP/DOWN button to offset the value from -127 to 127, press the ENTER button to store. Press the MENU button to exit. 5. -
Page 12: Dmx 512 Configuration
5.4 DMX 512 Configuration 9 Channel DMX512 Configuration(Mode 1) Tilt Strobe Green Blue White Dimmer ° ° Open 240-247 Random Strobe Open 232-239 240-255 Slow close Stand alone 190-231 Fast open Open 182-189 200-209 Slow open Reset 140-181 fast close 132-139 Open 80-89... -
Page 13: Dmx512 Connection
5.5 DMX512 Connection DMX Out DMX controller COMMON DMX + DMX INPUT DMX OUTPUT DMX - Termination reduces signal errors and avoids signal transmission problems and interference. It is always advisable to connect a DMX terminal. (Resistance 120 ohm 1/4W)between pin2(DMX-)and pin3(DMX+) of the last fixture. -
Page 14: Troubleshooting
soldered joints or corroded connectors can easily distort the signal and shut down the system. 4. The DMX output and input connectors are pass-through to maintain the DMX circuit, when power is disconnected to the unit. 5. Each lighting unit needs to have an address set to receive the data sent by the controller. -
Page 15: Fixture Cleaning
7. Fixture Cleaning The cleaning of internal and external optical lenses and/or mirrors must be carried out periodically to optimize light output. Cleaning frequency depends on the environment in which the fixture operates: damp, smoky or particularly dirty surrounding can cause greater accumulation of dirt on the unit’s optics. ... - Page 16 Declaration of Conformity We declare that our products (lighting equipments) comply with the following specification and bears CE mark in accordance with the provision of the Electromagnetic Compatibility (EMC) Directive 89/336/EEC. EN55103-1: 2009 ; EN55103-2: 2009; EN62471: 2008; EN61000-3-2: 2006 + A1:2009 + A2:2009; EN61000-3-3: 2008.
Need help?
Do you have a question about the Splendor 220 II and is the answer not in the manual?
Questions and answers