Table of Contents
Advertisement
Precautions. . . . . . . . . . . . . . . . . . . . . . . . . . . . . . . . . . . . . . . . . . . . . . . . . . . . . . . . . . . . . . . . . . . . 1
BC895XLT Controls and Display . . . . . . . . . . . . . . . . . . . . . . . . . . . . . . . . . . . . . . . . . . . . . . . . . . . 2
Introduction. . . . . . . . . . . . . . . . . . . . . . . . . . . . . . . . . . . . . . . . . . . . . . . . . . . . . . . . . . . . . . . . . . . . 3
Important Notice . . . . . . . . . . . . . . . . . . . . . . . . . . . . . . . . . . . . . . . . . . . . . . . . . . . . . . . . . . . . . . . . 4
About this Manual . . . . . . . . . . . . . . . . . . . . . . . . . . . . . . . . . . . . . . . . . . . . . . . . . . . . . . . . . . . . 4
Terminology . . . . . . . . . . . . . . . . . . . . . . . . . . . . . . . . . . . . . . . . . . . . . . . . . . . . . . . . . . . . . . . . . . . 5
What is Scanning? . . . . . . . . . . . . . . . . . . . . . . . . . . . . . . . . . . . . . . . . . . . . . . . . . . . . . . . . . . . 5
What is Searching? . . . . . . . . . . . . . . . . . . . . . . . . . . . . . . . . . . . . . . . . . . . . . . . . . . . . . . . . . . . 5
What is CTCSS? . . . . . . . . . . . . . . . . . . . . . . . . . . . . . . . . . . . . . . . . . . . . . . . . . . . . . . . . . . . . . 5
What is Trunk Tracking? . . . . . . . . . . . . . . . . . . . . . . . . . . . . . . . . . . . . . . . . . . . . . . . . . . . . . . . 6
Feature Highlights . . . . . . . . . . . . . . . . . . . . . . . . . . . . . . . . . . . . . . . . . . . . . . . . . . . . . . . . . . . . . . 7
Where to Obtain More Information . . . . . . . . . . . . . . . . . . . . . . . . . . . . . . . . . . . . . . . . . . . . . . . . . . 8
Information on the Internet . . . . . . . . . . . . . . . . . . . . . . . . . . . . . . . . . . . . . . . . . . . . . . . . . . . . . 8
Computer Control of Your BC895XLT. . . . . . . . . . . . . . . . . . . . . . . . . . . . . . . . . . . . . . . . . . . . . 8
Included with Your Scanner . . . . . . . . . . . . . . . . . . . . . . . . . . . . . . . . . . . . . . . . . . . . . . . . . . . . . . . 9
For Home Use (Desktop Installation) . . . . . . . . . . . . . . . . . . . . . . . . . . . . . . . . . . . . . . . . . . . . 10
Adapter Safety Feature . . . . . . . . . . . . . . . . . . . . . . . . . . . . . . . . . . . . . . . . . . . . . . . . . . . . . . . 11
For Mobile Use (In-Car Installation). . . . . . . . . . . . . . . . . . . . . . . . . . . . . . . . . . . . . . . . . . . . . . 12
Basic Operation . . . . . . . . . . . . . . . . . . . . . . . . . . . . . . . . . . . . . . . . . . . . . . . . . . . . . . . . . . . . . . . 13
Setting the Squelch . . . . . . . . . . . . . . . . . . . . . . . . . . . . . . . . . . . . . . . . . . . . . . . . . . . . . . . . . . 13
Using the VFO Control . . . . . . . . . . . . . . . . . . . . . . . . . . . . . . . . . . . . . . . . . . . . . . . . . . . . . . . 14
Programming . . . . . . . . . . . . . . . . . . . . . . . . . . . . . . . . . . . . . . . . . . . . . . . . . . . . . . . . . . . . . . . . . 15
Programming using Manual Entry . . . . . . . . . . . . . . . . . . . . . . . . . . . . . . . . . . . . . . . . . . . . . . . 15
Programming using the Rotary Tuner . . . . . . . . . . . . . . . . . . . . . . . . . . . . . . . . . . . . . . . . . . . . 16
Programming using AutoStore . . . . . . . . . . . . . . . . . . . . . . . . . . . . . . . . . . . . . . . . . . . . . . . . . 17
Transferring a Programmed Frequency . . . . . . . . . . . . . . . . . . . . . . . . . . . . . . . . . . . . . . . . . . 18
Duplicate Frequency Alert . . . . . . . . . . . . . . . . . . . . . . . . . . . . . . . . . . . . . . . . . . . . . . . . . . . . . 20
Deleting a Stored Frequency. . . . . . . . . . . . . . . . . . . . . . . . . . . . . . . . . . . . . . . . . . . . . . . . . . . 20
Preventing Accidental Programming . . . . . . . . . . . . . . . . . . . . . . . . . . . . . . . . . . . . . . . . . . . . . 20
Programming Tips . . . . . . . . . . . . . . . . . . . . . . . . . . . . . . . . . . . . . . . . . . . . . . . . . . . . . . . . . . . 21
Scanning. . . . . . . . . . . . . . . . . . . . . . . . . . . . . . . . . . . . . . . . . . . . . . . . . . . . . . . . . . . . . . . . . . . . . 22
Setting the Delay Mode . . . . . . . . . . . . . . . . . . . . . . . . . . . . . . . . . . . . . . . . . . . . . . . . . . . . . . . 23
Channel Lockout . . . . . . . . . . . . . . . . . . . . . . . . . . . . . . . . . . . . . . . . . . . . . . . . . . . . . . . . . . . . 24
Lockout in Manual Mode . . . . . . . . . . . . . . . . . . . . . . . . . . . . . . . . . . . . . . . . . . . . . . . . . . . . . . 24
Lockout in Scanning Mode . . . . . . . . . . . . . . . . . . . . . . . . . . . . . . . . . . . . . . . . . . . . . . . . . . . . 24
Lockout Tips . . . . . . . . . . . . . . . . . . . . . . . . . . . . . . . . . . . . . . . . . . . . . . . . . . . . . . . . . . . . . . . 25
Restoring a Locked Out Channel . . . . . . . . . . . . . . . . . . . . . . . . . . . . . . . . . . . . . . . . . . . . . . . 25
Restoring All Locked-Out Channels . . . . . . . . . . . . . . . . . . . . . . . . . . . . . . . . . . . . . . . . . . . . . 25
Priority Scan . . . . . . . . . . . . . . . . . . . . . . . . . . . . . . . . . . . . . . . . . . . . . . . . . . . . . . . . . . . . . . . 26
Changing the Priority Channel . . . . . . . . . . . . . . . . . . . . . . . . . . . . . . . . . . . . . . . . . . . . . . . . . 26
Tape Recording Channel Communication . . . . . . . . . . . . . . . . . . . . . . . . . . . . . . . . . . . . . . . . 27
Weather Channel Scanning . . . . . . . . . . . . . . . . . . . . . . . . . . . . . . . . . . . . . . . . . . . . . . . . . . . . . . 28
Weather Alert . . . . . . . . . . . . . . . . . . . . . . . . . . . . . . . . . . . . . . . . . . . . . . . . . . . . . . . . . . . . . . 28
Testing the Weather Alert Siren . . . . . . . . . . . . . . . . . . . . . . . . . . . . . . . . . . . . . . . . . . . . . . . . 29
Searching . . . . . . . . . . . . . . . . . . . . . . . . . . . . . . . . . . . . . . . . . . . . . . . . . . . . . . . . . . . . . . . . . . . . 30
Setting a Search Range . . . . . . . . . . . . . . . . . . . . . . . . . . . . . . . . . . . . . . . . . . . . . . . . . . . . . . 30
Search Hold Feature . . . . . . . . . . . . . . . . . . . . . . . . . . . . . . . . . . . . . . . . . . . . . . . . . . . . . . . . . 30
Data Skip. . . . . . . . . . . . . . . . . . . . . . . . . . . . . . . . . . . . . . . . . . . . . . . . . . . . . . . . . . . . . . . . . . 31
Channel Skip . . . . . . . . . . . . . . . . . . . . . . . . . . . . . . . . . . . . . . . . . . . . . . . . . . . . . . . . . . . . . . . 31
Storing Search Frequencies . . . . . . . . . . . . . . . . . . . . . . . . . . . . . . . . . . . . . . . . . . . . . . . . . . . 32
CTCSS Operation. . . . . . . . . . . . . . . . . . . . . . . . . . . . . . . . . . . . . . . . . . . . . . . . . . . . . . . . . . . . . . 33
Searching for CTCSS Tones. . . . . . . . . . . . . . . . . . . . . . . . . . . . . . . . . . . . . . . . . . . . . . . . . . . 34
Changing a CTCSS Tone . . . . . . . . . . . . . . . . . . . . . . . . . . . . . . . . . . . . . . . . . . . . . . . . . . . . . 36
CONTENTS
. . . . . . . . . . . . . . . . . . . . . . . . . . . . . . . . . . . . . . . . . . . . . . . . . . . . . . 10
Advertisement
Table of Contents

Related Manuals for Uniden BC895XLT


Summary of Contents for Uniden BC895XLT
-
Page 1: Table Of Contents
Computer Control of Your BC895XLT........ -
Page 2: Bc895Xlt Controls And Display
Erasing a CTCSS Tone............37 CTCSS Tone Frequencies (Hz) . -
Page 3: Introduction
The Rotary Tuner enables rapid and easy selection of channels and frequencies, and with AutoStore , you can automatically program channels in an available bank. In addition, your new scanner has AutoSort , which is an automatic frequency-sorting feature which provides faster scanning within each bank. -
Page 4: Important Notice
Your local law enforcement officials should be able to provide you with information regarding the laws in your community. Changes or modifications to this product not expressly approved by Uniden, or operation of this product in any way other than as detailed by this Operating Guide, could void your authority to operate this product. -
Page 5: Terminology
CTCSS is used for many purposes. In many cases, CTCSS is used to restrict access to a commercial repeater, so that only those units which transmit the correct tone along with their signal can “talk to the repeater.” You may also need to have your scanner coded correctly to “hear” the repeater. -
Page 6: What Is Trunk Tracking
ID, you won’t miss any of the action. If you’re a new scanner enthusiast, you may want to read the first part of this manual and use your scanner in conventional mode before you begin trunk tracking. Understanding scanning fundamentals and terminology will make trunk tracking much easier. -
Page 7: Feature Highlights
14 Bands – Includes 14 bands, with Aircraft and 800 MHz. 29 MHz-956 MHz – Your scanner covers an extensive frequency range so that you can monitor most of the transmissions in your area. Note: The frequency coverage is not continuous and excludes the cellular band. -
Page 8: Where To Obtain More Information
To order a copy of the frequency guide, call the enclosed Mr. Scanner (800) Number. A Uniden representative should be able to order you a copy of Betty Bearcat for your area and provide you with sample frequencies. -
Page 9: Included With Your Scanner
Included with Your Scanner If any of these items are missing or damaged, immediately contact your place of purchase or Uniden Customer Service at: (800) 297-1023, 8:00 a.m. to 5:00 p.m., Central, Monday through Friday. STEP ALRT/RMT HOLD LIMIT LINE... -
Page 10: Installing Your Bc895Xlt
Installing Your These are helpful guidelines when using your new scanner: If your scanner receives interference or electrical noise, move the scanner or its antenna away from the source. You might also try changing the height or angle of the telescoping antenna. -
Page 11: Adapter Safety Feature
Adapter Safety Feature The AC Adapter included with this scanner may be equipped with a polarized line plug — a plug with one blade wider than the other. This plug will fit into a power outlet only one way. If you are unable to insert the adapter’s plug into an outlet, try reversing the plug. -
Page 12: For Mobile Use (In-Car Installation)
Connect the BLACK wire of the DC power cord to the negative side of the vehicle (usually the chassis). Insert the DC plug into the DC 13.8V jack on the back of the scanner. . Avoid a location that could... -
Page 13: Basic Operation
Guide. Setting the Squelch To set the squelch, you must be in the Manual mode, and you should not be receiving a signal on your scanner. Press until you do not hear a signal. Adjust VOLUME to a comfortable listening level. -
Page 14: Using The Vfo Control
Turn SQUELCH back counter-clockwise just until the hiss stops. Now the “Squelch Gate” allows only clearer signals through. Using the VFO Control Rotary Tuner Use the Rotary Tuner for the following: Rapidly and precisely selecting either frequencies or channels Selecting a CTCSS tone during CTCSS Programming Scrolling through Scan and Lockout Lists in the Trunking Mode. -
Page 15: Programming
This unique Auto Sort feature enables faster scanning. When you manually step through a bank, however, frequencies are sorted according to channel number. Select one of the following ways to program your scanner: Manually select a channel and frequency, using your numeric keypad... -
Page 16: Programming Using The Rotary Tuner
Then press Note: To clear a mistake while entering the frequency, press If you enter a frequency which is outside the scanner’s frequency bands, a distinctive beep sounds. The display will flash for a moment and then reset itself, or you can press and go back to the previous step. -
Page 17: Programming Using Autostore
To use this feature, you must set up a search range. Once the search begins, AutoStore will automatically program active frequencies into the available channels of the bank(s) you select. For more information about your scanner’s search feature, see Searching on page 30. Press to stop scanning. -
Page 18: Transferring A Programmed Frequency
You cannot transfer a frequency which is stored in a priority channel. Error will flash for two seconds and then your scanner resets. If you want to transfer the frequency stored in a priority channel, you must designate another channel in the bank as the priority channel. - Page 19 Press All the bank indicators start flashing. If you have programmed CTCSS tones, they also display when you press Use these steps to transfer to the first available channel in another bank: Select the bank where you want to send the frequency.
-
Page 20: Duplicate Frequency Alert
Channels with no frequencies are automatically locked out. Preventing Accidental Programming You can prevent the accidental programming of your scanner by setting the Lock feature. To prevent the programming of your scanner, follow these steps: Set the switch labeled ENTER LOCK on the rear panel of your scanner to the ON position. -
Page 21: Programming Tips
For example, when you are programming five new frequencies into Channels 4 through 8, start with Channel 4. After you finish programming a channel, press the next higher channel. Record channels and frequencies in some convenient place in case the scanner memory is lost. to go to... -
Page 22: Scanning
During normal scanning the scanner skips unprogrammed or locked out channels. When a transmission is received, the Scanner stops on that channel. When the transmission ends, scanning resumes automatically. Press to stop on a channel during scanning. -
Page 23: Setting The Delay Mode
A delay can be set for each programmed channel so that when Scan or Search stops on a channel there is a brief pause before the scanning cycle resumes. Delay must be set for each programmed channel, and it can be set when your scanner pauses during a scan or when manual mode is selected. -
Page 24: Channel Lockout
Lockout in Scanning Mode If the scanner keeps stopping on a particular channel due to noise or too frequent transmissions, you may want to keep that channel from scanning. Wait until the scanner stops at the channel. -
Page 25: Lockout Tips
Lockout Tips To quickly lockout a series of channels, start with the lowest number channel. For example, if you are locking out channels 4, 7, 8, 12, and 15, start with Channel 4. After selecting channel 4, press next channel to be locked out. Record the locked-out channels in some convenient place so you can restore them. -
Page 26: Priority Scan
When Priority Scan is turned on, your scanner checks the priority channel every two seconds for activity. If a signal is present on the priority channel, your scanner monitors the channel until the transmission ends, then resumes normal scanning. You can designate one channel in each bank as a Priority Channel. -
Page 27: Tape Recording Channel Communication
Channel is changed. Tape Recording Channel Communication You can set any channel for recording while scanning. Then, if your scanner stops on a channel you have designated for recording, the transmission and its time, as well as the channel number and frequency, are all recorded. -
Page 28: Weather Channel Scanning
In Weather Alert Mode, your scanner functions as a severe weather warning radio. This is especially useful when your area is expecting severe weather conditions late at night. When you set the scanner to Weather Alert Mode, it emits a loud siren whenever your local NOAA weather station broadcasts a severe weather emergency tone. -
Page 29: Testing The Weather Alert Siren
To test the Weather Alert siren to ensure it’s working or to hear how it sounds, follow these steps: Press Press ALERT displays and your scanner’s volume is muted. Press and hold You will hear two short beeps, and then the test siren will begin to sound. -
Page 30: Searching
Setting a Search Range can search a specific frequency range to find frequencies if you don’t have a BC895XLT frequency guide available or if new stations have been added since your guide was published. Press to stop scanning. Using your keypad, enter the lower frequency of your search range. -
Page 31: Data Skip
When data skip is active, your scanner may pause momentarily on an unwanted signal but will resume searching in 2 or 3 seconds. Channel Skip If a particular channel continues to interrupt search scanning, it is possible to set your scanner to skip the frequency. To skip a frequency, press Note: You can program up to 20 skip frequencies. -
Page 32: Storing Search Frequencies
157.000 MHz. Press Press Press when the scanner stops at the frequency you want. Note: You can press Press and hold either key to rapidly step through the frequencies. You can also use the Rotary Tuner to step through frequencies, just make sure FREQ is selected before turning the dial. -
Page 33: Ctcss Operation
Your scanner is equipped with a Continuous Tone Control Squelch System (CTCSS) which allows squelch to open only when the tone you have programmed with a specific frequency is received along with a transmission. When using CTCSS, consider the following: You do not have to use CTCSS tones while scanning. -
Page 34: Searching For Ctcss Tones
You may find frequencies which do not have a tone associated with them. This may be because CTCSS tones are not being transmitted or because digital encoded tones, sometimes called DCS, are used and your scanner does not recognize these. Using CTCSS Tone Search While Scanning... - Page 35 You can select the CTCSS Search Mode before pressing until the CTCSS indicator begins flashing, and then press When your scanner stops, the CTCSS Tone Search begins immediately. If a tone is found before the transmission ends, press the channel.
-
Page 36: Changing A Ctcss Tone
If a CTCSS tone is found, the tone begins flashing in the display. Press to program the tone with the frequency stored in the channel. — or — Send the frequency with its associated tone to another channel. For information about sending a frequency to another channel, see Transferring a Programmed Frequency on page 18. -
Page 37: Erasing A Ctcss Tone
Enter the new CTCSS tone using your keypad or the Rotary Tuner. If you make a mistake while using your keypad, press twice and enter the tone again, or if you’re using your Rotary Tuner, make sure FREQ is selected. Press to change the CTCSS tone. -
Page 38: Trunk Tracking
Even though there are many Type II systems, Type I systems are still in use. There are also Hybrid systems which are a combination of both Type I and Type II. Your scanner defaults to monitor Type II systems, but it’s possible to select a Preprogrammed Fleet Map or create a Custom Fleet Map for your area. -
Page 39: Setting The Squelch
However, the squelch setting you select before you begin trunk tracking can affect how fast your scanner acquires the data channel, and, in some instances, the squelch setting can prevent your scanner from acquiring the data channel at all. -
Page 40: Searching A Trunked Bank
Searching a Trunked Bank Before you Search a Trunked Bank with your scanner, consider the following: You can only trunk track one bank at a time. to toggle between the conventional and the trunk tracking modes. -
Page 41: Id Hold Mode
Once the data channel is acquired, the scanner begins trunk tracking. Talk group ID’s, which represent different service groups, begin to display. Press again to return to conventional scanning mode. While searching, you won’t know exactly who the IDs are assigned to until you listen awhile or until ID lists are available in frequency guides or on internet sites. -
Page 42: Id Lockout
ID Lockout Like conventional scanning, it’s possible to lockout unwanted traffic. This is particularly important in trunked systems because in many areas water meters, door alarms, traffic signals, and other mechanical devices are assigned IDs just like other users. Also some departments scramble or encrypt their communications, and you may want to lock out these unintelligible broadcasts. -
Page 43: Restoring All Ids
Delay mode if it’s not active. This mode holds an ID for 5 seconds while you wait for a reply. Other groups may use the system, but your scanner will only look for the ID in the display. -
Page 44: Channel Activity Indicators
Each frequency you program in a trunking bank corresponds to an activity indicator on your scanner’s display. The way in which the Activity Indicators display provide you with information about the system you’re tracking. The indicator which remains on, even when there is no traffic, represents the frequency being used as the data channel. -
Page 45: Scan Lists
BC895XLT bank. When you designate a bank as a trunking bank, your scanner sets up 5 Scan Lists (A –E), which are simply lists used to store your favorite IDs. Each list can contain up to 10 IDs, so you can store a total of 50 IDs for each trunk tracking bank (500 if you use all banks as trunking banks!). - Page 46 Programming Scan Lists During Search To select a Scan List location and store an ID during Search mode, follow these steps: When your scanner stops on an ID you want to store, press Use either the Rotary Tuner or the...
-
Page 47: Deleting A Stored Id
To let your scanner automatically store an ID in an available Scan List location, follow these steps: Press when your scanner stops on an ID you want to store. Press to return to Trunk Tracking Search mode. Deleting a Stored ID To delete a stored ID: a. -
Page 48: Fleet Map Programming
If you have programmed a trunk tracking bank and select your screen. Since your scanner defaults to monitor Type II systems, most if not all IDs appear as even numbers. However, if you notice an even mix of odd and even user IDs, for example 6477, 2560, 6481, 6144, 1167, etc., then you are probably monitoring either a Type I or Hybrid system. -
Page 49: Selecting A Preset Fleet Map
Programming a Fleet Map You may want to read User Defined Fleet Maps in the Appendix before programming a fleet map. It contains a detailed explanation of Scanner Fleet Map Programming, as well as a table listing the Fleet Map Size Codes. - Page 50 For specifics about each size code, see Fleet Map Size Codes in the Appendix. Press The scanner exits the Trunking Programming mode, acquires the data channel, and begins searching using the map you’ve programmed.
-
Page 51: Restoring Default Tracking
Restoring Default Tracking Your scanner is set to monitor Type II systems as its default. However, if you select a preset fleet map or program your own fleet map, then you’ll change the default setting. To reset the Type II... -
Page 52: Care And Maintenance
Repairs Do not attempt any repair. The scanner contains no user serviceable parts. Contact the Uniden Customer Service Center or take it to a qualified repair technician. Birdies All radios can receive “birdies” (undesired signals). If your scanner stops during Scan mode and no sound is heard, it may be receiving a birdie. -
Page 53: Troubleshooting
1. Adjust squelch threshold — refer to Setting the Squelch on page 13, 2. Check the antenna connection. 3. Check to see if many of the channels are locked out. If so, the scanner has less chance of finding an active channel. - Page 54 If you still cannot get satisfactory results while using your scanner or if you want additional information, please call or write the Uniden Parts and Service Division. The address and phone number are listed in the Warranty at the end of this manual. If you would like immediate assistance, please call Customer Service at (800) 297-1023.
-
Page 55: Specifications
Certified in accordance with FCC Rules and Regulations Part 15, Subpart C, as of date of manufacture. Channels: Banks: Service Bands: Frequency Range: Operating Temperature: Scan Rate: Search Rate: Scan Delay: Audio Output: Power Requirements: Antenna: External Jacks: Size: Weight: Features, Specifications, and Availability of optional accessories are all subject to change without notice. -
Page 56: Optional Accessories
Optional Accessories Contact your local Uniden Dealer or call the Uniden Parts Center at: (800) 554-3988, 8:00 AM to 5:00 PM EST, Monday through Friday, for information about ordering these optional accessories. DC Power Cord Cigarette Lighter Power Cord ®... -
Page 57: Appendix
Preset Fleet Maps Preset Map E1P1 Block Size Code Preset Map E1P4 Block Size Code Preset Map E1P7 Block Size Code Preset Map E1P10 Block Size Code Appendix Preset Map E1P2 Block Size Code Preset Map E1P5 Block Size Code Preset Map E1P8 Block Size Code... -
Page 58: User Defined Fleet Maps
When a block is assigned a size code, the Fleet or Fleets created within the block are assigned a Type I ID. The way these IDs display on your scanner depend on the block number and the block’s size code. When a Type I ID displays, the leftmost digit represents the block which contains the ID. - Page 59 If you don’t already know the size codes used, you’ll have to guess at them. But since you don’t have to figure out all the blocks at once, this isn’t as hard as it seems. Select a size code for a block, and then press .
- Page 60 WARNING! Uniden does not represent this unit to be waterproof. To reduce the risk of fire or electrical shock, do not expose this unit to rain or moisture. ®...
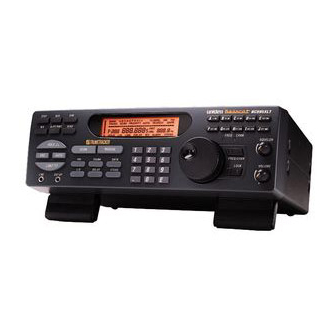
- Page 61 BC895XLT Controls and Display STEP ALRT/RMT SEND HOLD SCAN AUTO LIMIT EXT SP LINE Programming and Status Keys Display Bank Keys Squelch/Volume Controls Rotary Tuning Control BA NK A B C D E F G H I J 1 2.5K Hz...
-
Page 62: One Year Limited Warranty
(E) used in any conjunction with equipment or parts or as part of any system not manufactured by Uniden, or (F) installed or programmed by anyone other than as detailed by the Operating Guide for this product. - Page 63 4,156,193 4,157,505 4,179,662 4,219,821 4,270,217 4,398,304 4,409,688 4,455,679 4,461,036 4,521,915 4,597,104 4,627,100 4,841,302 4,888,815 4,932,074 4,947,456 5,014,348 5,199,109 5,408,692 5,428,826 5,438,688 5,448,256 5,465,402 5,471,660 5,483,684 5,548,832 5,551,071 and other patents pending. ©1997 Uniden America Corporation. All rights reserved. Printed in the Philippines...
Need help?
Do you have a question about the BC895XLT and is the answer not in the manual?
Questions and answers