Table of Contents
Advertisement
Quick Links
Advertisement
Table of Contents

Related Manuals for oventrop ClimaCon F 316


Summary of Contents for oventrop ClimaCon F 316
- Page 1 ClimaCon F 316 Operating instructions...
-
Page 3: Table Of Contents
6.4.4 Fitting of the control unit..........................12 App installation .............................13 Commissioning ......................... 13 Establishment of the power supply ......................13 7.1.1 ClimaCon F 316 - Teach-in ........................13 7.1.2 Removal of a room thermostat ........................15 7.1.3 Setting of the heating profile ........................15 7.1.4 Configuration ...............................17... - Page 4 ClimaCon F 316 Contents Page Operation ......................... 19 8.1.1 Auto mode ..............................19 8.1.2 Eco mode ..............................19 8.1.3 Manual mode ...............................19 8.1.4 Switching off ..............................19 Troubleshooting ........................20 Maintenance ........................21 Disposal ..........................21 10231719 000 00...
-
Page 5: General Information
EU directives. Oventrop GmbH & Co. KG hereby declares that the ClimaCon F 316 wireless installation types comply with the directive 2014/53/EU. The full text of the EU declaration of conformity is available at the following internet address: www.oventrop.com. -
Page 6: Safety-Related Information
2.3.1 Danger due to electric current The ClimaCon F 316 room thermostats are electronically Make sure that the product can be disconnected controlled operating devices for controlling heating and cooling ceilings as well as ceiling sails and radiant ceiling from the power supply at any time. -
Page 7: Technical Description
Cooling circuit Cocon QTZ pressure independent control valve Optibal W6 six-way ball valve Heating and cooling ceiling Aktor R ST L rotary actuator ClimaCon F 316 room thermostat Heating and cooling ceiling ClimaCon F 316 room thermostat 10231719 000 00... -
Page 8: Design
In Eco mode, the temperature is constantly regulated to the “Eco temperature” (see section 7.1.3.1 on page 15). ClimaCon F 316 devices are equipped with an Eco output (leader). Whenever the Eco mode is active, a voltage is present at this output. The Eco output can be connected to the Eco input (follower) of a ClimaCon F 90, F 100 room... -
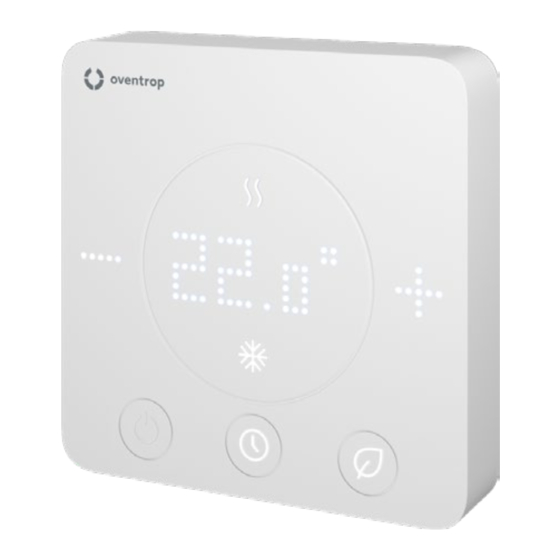
Page 9: Operating Elements And Displays
ClimaCon F 316 Technical description Operating elements and displays Technical data Parameter Value Mode of operation Type 1.Y Contamination degree Software class Rated surge voltage 2500 V Temperature for the ball 75 °C pressure test Temperature adjustment 12 °C to 28 °C, frost pro-... -
Page 10: Accessories And Spare Parts
Danger to life due to electric current ! Call up the search on the website There is a danger to life if live components are www.oventrop.com by clicking on the magnifying touched. glass symbol and search for 1155536. Check that not voltage is present. -
Page 11: Mounting Of The Mounting Plate
ClimaCon F 316 Mounting Mounting of the mounting plate Drill at least two holes (opposite each other) and insert dowels. The ClimaCon F room thermostat is designed for Screw on the mounting plate. surface-mounted installation. Only use device screws for switch boxes Operate the room thermostat at a location in the (countersunk screws). -
Page 12: Applications
ClimaCon F 316 Mounting 6.4.2 Applications 6.4.3 Connection of the room thermostat 6.4.2.1 Application 1 NOTICE Damage to the ClimaCon due to several outer conductors (phases) in the installation! 0-10 Use the same outer conductor (phase) for the terminals 1 (operating voltage) and 4 (Eco input or Eco output). -
Page 13: App Installation
Switch on the room thermostat (position in Fig. 4 on page 9). Press the “Eco mode” and “Auto mode” keys Search for the Oventrop App “ClimaCon” and install it. simultaneously for approx. 3 seconds (positions in Fig. 4 on page 9). Fig. 11: ClimaCon F - Activation of the teach-in mode The “Eco mode”... - Page 14 ClimaCon F 316 Commissioning Fig. 12: ClimaCon F app - Start screen General information “+” sign (teach-in of the room thermostat) Tap the “+” sign to teach in a (further) room thermostat. Fig. 14: ClimaCon F app - Room thermostat overview...
-
Page 15: Removal Of A Room Thermostat
ClimaCon F 316 Commissioning 7.1.2 Removal of a room thermostat Fig. 15: ClimaCon F app - Removal of a room thermostat Fig. 16: ClimaCon F app - Setting of the “Eco Tap and hold the room thermostat that you want to temperature”... - Page 16 ClimaCon F 316 Commissioning You can choose from three weekly profiles. • “Mo - Su”: With this weekly profile, you configure identical temperature curves for each day of the week. • “Mo - Fr, Sa, Su”: With this weekly profile, you...
-
Page 17: Configuration
ClimaCon F 316 Commissioning 7.1.4 Configuration 7.1.4.7 Removal of a room thermostat Tap “Configuration” in the “Settings” menu. Here you can remove the currently selected room thermostat. 7.1.4.1 Temperature limitation After the room thermostat has been removed, the app The maximum adjustable temperature range is switches to the start screen (Fig. -
Page 18: Extended Settings
ClimaCon F 316 Commissioning 7.1.5 Extended settings 7.1.5.6 Hysteresis NOTICE By setting a hysteresis, you define the value by which the measured temperature may deviate Malfunctions due to improper configuration! from the setpoint temperature before the Improperly configured extended settings can cause actuator is opened for heating or cooling. -
Page 19: Operation
ClimaCon F 316 Operation 8. Operation 8.1.1 Auto mode Auto mode is active when the “Auto mode” display lights up. Temperature control is time-controlled according to the set values (see section 7.1.3 on page 15). To activate or deactivate the Auto mode, tap “Auto mode”... -
Page 20: Troubleshooting
ClimaCon F 316 Troubleshooting 9. Troubleshooting MALFUNCTION CAUSE REMEDY The app does not find the room Other devices equipped with Blue- During the teach-in process, thermostat during teach-in. tooth interfere with the connection temporarily switch off all Bluetooth- between the room thermostat and equipped devices that are not needed. -
Page 21: Maintenance
ClimaCon F 316 Maintenance 10. Maintenance WARNING Danger to life due to electric current ! Penetrating liquids can cause electric shocks and fires. If necessary, clean the surfaces with a soft cloth. 11. Disposal Directive 2012/19/UE WEEE: • The “crossed-out wheeled bin” symbolises... - Page 24 Oventrop GmbH & Co. KG · Paul-Oventrop-Str. 1 · 59939 Olsberg Tel. +49 2962 820 · Fax +49 2962 82400 · mail@oventrop.com · www.oventrop.com...