Table of Contents
Advertisement
Quick Links
Advertisement
Table of Contents

Related Manuals for oventrop ClimaCon F Series


Summary of Contents for oventrop ClimaCon F Series
- Page 1 ClimaCon F Operating instructions...
-
Page 3: Table Of Contents
ClimaCon F Contents Page General information ......................5 Validity of the instructions ........................5 Type plate ............................... 5 Scope of delivery ............................ 5 Contact ..............................5 Declaration of conformity (ClimaCon F 210 / F 310) ......................... 5 Symbols used ............................5 Safety-related information ....................6 Correct use ............................. - Page 4 ClimaCon F Contents Page 7.2.2 ClimaCon F 210, F 310 - Removal of a room thermostat ................17 7.2.3 ClimaCon F 210, F 310 - Setting of the heating profile ................17 7.2.4 ClimaCon F 210, F 310 - Configuration ......................19 7.2.5 ClimaCon F 210, F 310 - Extended settings ....................
-
Page 5: General Information
Phone: +49 (0) 29 62 82-234 Declaration of conformity (ClimaCon F 210 / F 310) Oventrop GmbH & Co. KG hereby declares that these products comply with the directive 2014/53/EU. The full text of the EU declaration of conformity is available at the following internet address: www.oventrop.com... -
Page 6: Safety-Related Information
ClimaCon F Safety-related information 2. Safety-related information Safety notes We have developed this product in accordance with current safety requirements. Correct use Please observe the following notes concerning safe use. Operational safety is only guaranteed if the product is used as intended. 2.3.1 Danger to life due to electric current The ClimaCon F room thermostats are electronically... -
Page 7: Technical Description
ClimaCon F Technical description 3. Technical description Installation scheme (example) Fig. 1: Installation scheme (example) Design 3.2.1 ClimaCon F 90, F 100 Control unit Base plate Terminal strip Opening for the cable feed Release clip Fig. 2: Design F 90, F 100 115500983-V02.01.2022... -
Page 8: Climacon F 210, F 310
ClimaCon F Technical description 3.2.2 ClimaCon F 210, F 310 3.3.1.2 Eco mode In Eco mode, the temperature is constantly regulated to the “Eco setback temperature” (see par. 7.2.3.1 on page 18). ClimaCon F 210, F 310 devices are equipped with a setback output (master). -
Page 9: Operating Elements And Displays
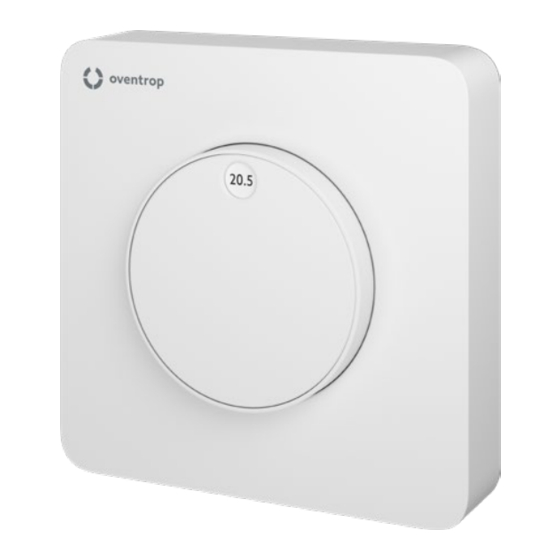
ClimaCon F Technical description 3.3.2.4 ClimaCon F 310 - Heating or cooling 3.4.2 ClimaCon F 210, F 310 • Dot-Matrix display for visualisation of the setpoint temperature, the actual temperature, various error codes, the display “BLu” for the teach-in mode, as well as the OFF display when the device is switched off •... -
Page 10: Technical Data
ClimaCon F Technical description Technical data Dimensions (WxHxD) mm 88x88x25 3.5.1 F 90, F 100 3.5.1.3 ClimaCon F 100 (24 V) 3.5.1.1 ClimaCon F 90 (230 V) Parameter Value Parameter Value Temperature adjustment 12 °C to 28 °C, frost range protection Temperature adjustment 12 °C to 28 °C, frost range protection... - Page 11 ClimaCon F Technical description App languages DE/EN/FR Required actuator Electrothermal actuator “normally closed” Dimensions (WxHxD) mm 88x88x20 Fuse SMD (not exchangeable) Colour White 3.5.2.2 ClimaCon F 310 (230 V) Operating voltage 24 V AC +/- 15% Parameter Value Protection class Temperature adjustment 12 °C to 28 °C, frost BLE 5.0...
-
Page 12: Accessories And Spare Parts
Danger to life due to electric current ! Call up the search on the website There is a danger to life if live components are www.oventrop.com by clicking on the magnifying touched. glass symbol and search for 1155. Disconnect the product from the power supply Select your product. -
Page 13: Mounting Of The Base Plate
ClimaCon F Installation Mounting of the base plate Electrical connection of the room thermostat The ClimaCon F room thermostat is designed for surface-mounted installation. 6.4.1 Terminal assignment Operate the room thermostat at a location in the room where the room air is well distributed. Mount the room thermostat on an interior wall or on a pillar, at a height of 140 cm to 170 cm. - Page 14 ClimaCon F Installation 6.4.1.2 ClimaCon F 100 (230 V) (item no.1155010) 6.4.1.4 ClimaCon F 210 (230 V) (item no.1155021) Terminal Assignment Terminal Assignment IN (L 230 V) operating voltage IN (L 230 V) operating voltage IN (N 230 V) operating voltage IN (N 230 V) operating voltage OUT (L 230 V) two point /PWM OUT (L 230 V) two point / PWM...
-
Page 15: Connection Of The Room Thermostat
Only ClimaCon F 310 (24 V) (item no. 1155531) Danger to life due to excessive voltages at the terminals for potential-free contacts Search for the Oventrop App “ClimaCon” and install it. Only apply extra-low voltages (SELV) to terminals 9 and 10. -
Page 16: Commissioning
ClimaCon F Commissioning Commissioning Connection of the power supply Connect the power supply. The room thermostat is now ready for operation. ClimaCon F 210, F 310 The display shows the currently measured temperature. After approx. 5 seconds, the display switches off. Fig. -
Page 17: Climacon F 210, F 310 - Removal Of A Room Thermostat
ClimaCon F Commissioning Select a suitable symbol from the list (position in Fig. If the “heating” or the “cooling” symbol lights up 12 on page 16). blue, “heating” or “cooling” is active. When the Confirm the entry with “OK”. room has reached the setpoint temperature, the symbol turns grey. - Page 18 ClimaCon F Commissioning 7.2.3.1 Setting of the “Eco setback temperature” 7.2.3.2 Setting of a time profile Tap the key “Call-up of the Settings menu” on the Select the weekly profile overview screen of the room thermostat for which you You can choose from three weekly profiles. want to make the settings (position in Fig.
-
Page 19: Climacon F 210, F 310 - Configuration
ClimaCon F Commissioning Numerical time entry 7.2.4 ClimaCon F 210, F 310 - Configuration Tap “Configuration” in the “Settings” menu. Alternatively, you can enter the times numerically. You can call up the input menu by tapping on the 7.2.4.1 Temperature limitation pen symbol (position in Fig. -
Page 20: Climacon F 210, F 310 - Extended Settings
ClimaCon F Commissioning 7.2.4.8 Firmware room thermostat 7.2.5 ClimaCon F 210, F 310 - Extended settings NOTICE Malfunctions due to improper configuration Improperly configured extended settings can cause unexpected room temperatures and damage parts of the system. Fig. 18: ClimaCon F app - Firmware update Extended settings may only be carried out by specialist tradespeople who are sufficiently Call-up of the firmware update... -
Page 21: Operation
ClimaCon F Operation ClimaCon F 210, F 310 7.2.5.5 Output signal of the actuator Electrothermal actuators can be wired with a two 8.2.1 Auto mode point control or pulse-width modulation. Auto mode is active when the “Auto mode” For surface heating systems, we generally display lights up. -
Page 22: Troubleshooting
ClimaCon F Troubleshooting 9. Troubleshooting MALFUNCTION CAUSE REMEDY The app does not find the room Other devices equipped with During the teach-in process, temporarily thermostat during teach-in. Bluetooth interfere with the switch off all Bluetooth-equipped devices connection between the room that are not needed. - Page 24 Oventrop GmbH & Co. KG · Paul-Oventrop-Str. 1 · 59939 Olsberg Tel. +49 2962 820 · Fax +49 2962 82400 · mail@oventrop.com · www.oventrop.com...
Need help?
Do you have a question about the ClimaCon F Series and is the answer not in the manual?
Questions and answers