Table of Contents
Advertisement
Advertisement
Table of Contents

Summary of Contents for Degritter MARK II
- Page 1 User guide DEGRITTER automatic record cleaning machine MARK II - ENG 3.3...
-
Page 2: Table Of Contents
Contents Warning Features Cleaning Effect Machine overview Getting started Turning on/off Using the machine Settings menu... - Page 3 Water, fluid, filter Cleaning the machine Installing software updates Troubleshooting guide Frequently Asked Questions Limited warranty disclaimer Customer support contacts...
-
Page 5: Warning
Warning Read before use Make sure that you have selected The machine must be electrically Do not operate the machine in a the correct AC voltage range on the grounded. Failing to do so can result tight closed environment such as a back of the machine before plug- in serious electric shock or death. -
Page 6: Features
120-125 kHz. This evens the designed for you Ultrasonic cleaning tank that’s in cavitation energy distribution in the Degritter is purpose built for vinyl water, minimizing losses and giving records. The tank has two ultrasonic an uniform cleaning action. - Page 7 Both the drying time and Cleaning water is pumped through fan speed can be adjusted to keep The Degritter is fully automatic, a replaceable filter during washing. noise levels in check and to prevent requiring no additional effort after Continuous filtration static electricity build up.
-
Page 8: Cleaning Effect
Cleaning Effect ULTRASONIC CLEANING ULTRASONIC CLEANING Ultrasonic cleaning has a unique The smallest features in a vinyl THE PRINCIPLE ability to remove dirt that is not record groove are the size of a few easily accessible by using other tra- micrometers. - Page 9 Ultrasonic cleaning works by agi- Ultrasonic cleaning as used in away with a microfibre cloth. This tating the cleaning liquid with high Degritter removes contaminants will speed up the cleaning process frequency acoustic pressure waves. from records layer by layer. The and will give better results faster.
- Page 10 Machine overview CONTENTS OF THE PACKAGE CONTENTS OF THE PACKAGE • Degritter machine • Water level measurement strip PHYSICAL AND ELECTRICAL SPECIFICATIONS • Removable water tank with lid • Pack of replacement filters • Replacement valve for • Microfiber cloth...
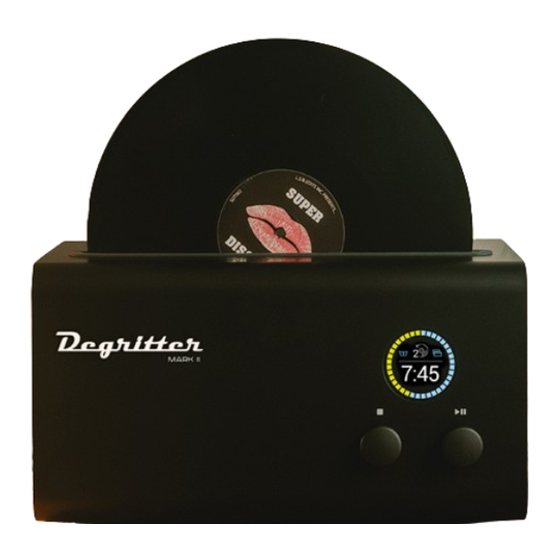
- Page 11 MACHINE FRONT WATER & SIDE PANELS TANK The Degritter is controlled using the Record slot buttons on the front of the machine. Records are inserted into the slot on VENTILATION slots top of the machine. The water tank SCREEN is accessible from the top of the machine.
-
Page 12: Machine Overview
Machine overview BUTTONS AND SCREEN All Degritter functionalities can be accessed using the two buttons WASHING REVOLUTIONS PRE-SOAK and the screen. Push and rotate the TURNED ON buttons for different operations. Quick TWO TANK RINSE WASH TURNED ON 7:45 4:00... - Page 13 REMOVABLE WATER TANK The removable water tank is located on the back of the machine. There is a marking Min on the outside of the water tank, indicating the necessary minimum water level. When filling the tank, it is recom- mended to fill the tank with as much water as one feels comfortable carrying.
-
Page 14: Getting Started
INSERT THE RECORD INTO THE MACHINE PRESS START PLACE ON LEVEL SURFACE Degritter must be placed on a level surface for it to function properly. TURN DEGRITTER ON Plug one end of the power cable into the machine and the other end into your wall outlet. - Page 15 PUT WATER INTO THE TANK INSERT THE RECORD INTO PRESS START THE MACHINE Fill the water tank with distilled Start the washing program by water to a level exceeding the “Min” Insert the 12” record into the pressing the button on the right. marking.
-
Page 16: Turning On/Off
AC switch you’ll first see a This is the best option if you are not welcome text on the screen. After SOFT SHUTDOWN AND STARTUP planning to use Degritter for a long this, the machine will prime its time or for transportation. pumps. TIMED SHUTDOWN... - Page 17 Degritter. It cuts all power to the machine except for a small current to the processor and its power LONG TERM STORAGE supply.
-
Page 18: Using The Machine
Using the machine MENU NAVIGATION MENU NAVIGATION Turn the right button to move RUNNING PROGRAMS between menu items. Push the right button to activate the selected ADJUSTING DRYING TIME program. PRE-SOAK INDICATOR WASHING WATER TEMPERATURE REVOLUTIONS PRE-SOAK TURNED ON Quick TWO TANK COOLING WATER RINSE WASH... - Page 19 RUNNING PROGRAMS PROGRAM DESCRIPTION Washing programs with 1-4 record revolu- Select the desired program by tions for washing and drying the record. rotating the button on the right. To start the selected program, press REVOLUTIONS WASHING DURATION the button on the right. To stop the 2 minutes 15 seconds* program press the left button and 3 minutes 45 seconds*...
- Page 20 Using the machine PROGRAM DESCRIPTION The Degas program gets rid of excessive gas in your distilled water. This improves the ultrasonic cleaning process. Running the Degas program is not mandatory, as the first cleaning program will have the 2:15 similar effect as the Degas. The Degas program should be run after adding cleaning fluids to the water as this will mix the fluid in the water.
- Page 21 ADJUSTING DRYING TIME SELECTED 3:00 Turn the left button to change DRYING TIME NOTE drying time for all programs. DRYIng time Drying time will change the overall adjustment Washing programs move the record length of the program, but it will icon back and forth.
- Page 22 Using the machine PRE-SOAK INDICATOR WATER TEMPERATURE Pre-soak is a feature that can be During ultrasonic washing, the enabled and disabled from the machine will display water temper- settings menu. When enabled, the ature reading from its ultrasonic pre-soak icon will be displayed next cleaning tank.
- Page 23 COOLING WATER Energy emitted during ultrasonic cleaning will slowly increase the NOTE cleaning water temperature. Excess heat is mitigated automatically to Water cooling cycles can lengthen protect records by adding 3 minutes the washing program, but they will of cooling to the washing time when not increase the total ultrasonic over-temperature is sensed (35 °C cleaning time that the record is...
-
Page 24: Settings Menu
Settings menu SETTINGS MENU SETTINGS MENU PRE-SOAK To access the settings menu, press Press the right button to turn pre- PRE-SOAK the right button on the settings icon. soak on or off. To exit the settings menu, press the TWO TANK RINSE WASH left button. - Page 25 TWO TANK RINSE WASH FILTER RUNS COUNTER Press the right button to enable or The machine will prompt a message Press the right button to reset the disable the two tank rinse wash to insert the rinse water tank once filter runs to 0.
- Page 26 FAN POWER WATER LEVEL To adjust the fan power setting, The water level setting allows you to Degritter comes packaged with a press the button on the right - this change the water level in the ultra- color coded measurement strip.
- Page 27 INFO TEMPERATURE UNITS INFO DEsCRIPTION WATER LEVEL DESCRIption ITEMS Pressing the right button in the Furthest from the Serial The machine’s unique serial INFO section of the Settings Menu label. number. will alter between Celsius and Recommended Medium Version The current software version on Fahrenheit temperature units.
-
Page 28: Water, Fluid, Filter
You can add Degritter Cleaning Fluid into the machine water tank to improve the cleaning process. NOTE Degritter will run without it, but some Limescale build up in the machine impurities need a detergent to will cause failures and it will void properly get rid of them. - Page 29 FILTER REMINDER MAINTAINING THE FILTER The machine will remind you to To access the water filter, unscrew When screwing the cap back into clean the filter after every 50 the cap on the bottom half of the the chassis, make sure that the washing cycles.
-
Page 30: Cleaning The Machine
Cleaning the machine WHEN TO CLEAN WHEN TO CLEAN Degritter machine must be cleaned CLEANING THE MACHINE at a minimum of every 200 washing cycles. This is to prevent bacterial growth from forming inside the machine and to remove dirt that may have accumulated. - Page 31 CLEANING THE MACHINE 1. Remove the rubber cover from 4. Add 200ml of 10% vinegar to 7. Replace the vinegar solution around the record insertion slot. The the water tank and run 3 shortest with pure distilled water and run 3 cover is not glued and is washing cycles with 1 shortest washing cycles with...
-
Page 32: Installing Software Updates
“Eject”. Only after this has been done can you remove the card Download the latest compati- from the computer. This makes ble software from the Degritter sure that the computer does website (degritter.com). The not accidentally corrupt any name of the software file is data on the drive. - Page 33 INSTALL SOFTWARE Turn off Degritter from the Turn on the machine from Navigate to the INFO menu of switch at the back and wait 10 the switch on the back. After the machine and check the seconds so that the capacitors turning on the machine, the software version.
-
Page 34: Troubleshooting Guide
7-10s intervals. If there is doubt that Degritter’s ultrasonic cleaning is not working properly, then the following char- acteristics of the machine can be checked. - Page 35 In order to prevent water from turned on again. leaking from the water tank con- nection, make sure to press down If the water leaks persists, contact slightly on the water tank when support@degritter.com.
- Page 36 In order to reduce water cooling cycles: • Fill the removable water tank with as much water as you feel Degritter machine is using 300W safe carrying. The more the of power for its ultrasonic clean- better. ing. Most of this will be eventually converted to heat that will slowly •...
- Page 37 Swap water tanks of cleaning fluid per water tank. every 50 cycles. between cycles, so that one Degritter cleaning fluid should tank can cool while the other be added only once per water • Fill the removable water tank one is in use.
- Page 38 Record does not get wet When the record in the machine tilts Degritter make sure that the device to one side and rubs against the has been turned off from the AC Thick records get stuck rubber gasket that is around the...
- Page 39 Increase the roller groove width by To solve the issue, turn off the very small increments and test it Degritter from the AC switch at the with the record. Driving roller sides back. Remove the rubber gasket too far from each other will cause...
- Page 40 Troubleshooting guide MACHINE MAINTENANCE MACHINE MAINTENANCE Water droplets on record after drying The maintenance program is run every 50 cycles with an offset of 10. This means that the program will start on the 60th, 110th, 160th, 210th cycles and so on. Machine maintenance cycle can be started manually.
- Page 41 Water droplets on record after drying Water droplets on the record after In order for the machine to pump To start Machine maintenance nav- the drying cycle can be caused by out all the water from the ultrasonic igate to the Degas program in the insufficient drying time, too high cleaning tank, it is important for the menu.
- Page 42 Troubleshooting guide Water is leaking into the Water is leaking into the ultrasonic cleaning tank ultrasonic cleaning tank How to empty ultrasonic If water from the removable water To start Machine maintenance nav- tank is slowly leaking into the igate to the Degas program in the tank without power ultrasonic cleaning tank, then it menu.
- Page 43 Face the machine and start very slowly tilting it to the right, by raising the left side of the Degritter. Even- tually the water will start flowing through the filtration port out from the machine.
- Page 44 Troubleshooting guide Fans are on after program Fans are on after Display has scrambled has finished program has finished sections Display upside down The machine monitors the tem- During the machine’s transport, sec- perature of its internals. Once the tions of its memory may have been Display has scrambled temperature exceeds 28 °C or 83 °F, exposed to strong electromagnetic...
- Page 45 You can also try restarting the unit removable water tank has not been manually from the back panel. inserted properly and the machine If the issue persists, contact is having trouble pumping sufficient support@degritter.com for help.
- Page 46 Troubleshooting guide the right button. If this solves the Warning: Drain Fail Warning: Drain Fail issue, then clean the machine with Drain Fail warning is presented vinegar as described in Cleaning Warning: ERR Sens4 & ERR Sens5 when the machine is unable to the machine section verify that the ultrasonic cleaning tank has been properly emptied.
- Page 47 Sens4 & ERR Sens5 manual available of the pins. on our website degritter.com under troubleshooting section. For cleaning the pins, turn the Degritter off from the AC switch Ultrasonic Error 1 on the back of the machine and ERR Sens4 detach the power cable. Remove...
-
Page 48: Frequently Asked Questions
Degritter. Still, running them solutions, such as very high acidity Degritter is safe for the records through cleaning programs with or very alkaline chemicals. when no cleaning fluid is used. -
Page 49: Limited Warranty Disclaimer
In no event shall Degritter OÜ, or its rials or workmanship for a period the consumer for damages resulting employees, agents, suppliers, man-... -
Page 50: Customer Support Contacts
Also provide us with your machine’s serial number and the software version found in the Info menu. support@degritter.com +372 5884 8839 Monday to Friday, 8:00-16:00 UTC Degritter user guide: Mark II-ENG 3.3 © Degritter all rights reserved, 2023 www.degritter.com... - Page 52 Degritter user guide: Mark II-ENG 3.3 www.degritter.com © Degritter all rights reserved, 2023...
Need help?
Do you have a question about the MARK II and is the answer not in the manual?
Questions and answers