Table of Contents
Advertisement
Quick Links
Advertisement
Table of Contents

Related Manuals for National Instruments PCI-7354


Summary of Contents for National Instruments PCI-7354
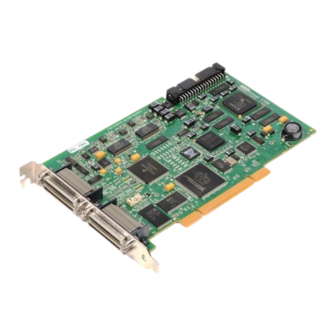
- Page 1 PCI-7354...
-
Page 2: Table Of Contents
Getting Started with NI 7340/7350 Motion Controllers and AKD Servo Drives This document explains how to install and configure the AKD servo drives for use with the NI 7340 and NI 7350 motion controllers. If you encounter any problems during setup, refer to the Tips and Troubleshooting section for assistance. -
Page 3: What You Need To Get Started
Note AKM series servo motors available from NI contain built-in encoders and come pre-wired for use with the AKD servo drive. National Instruments recommends using one of these motors for the best user experience and system performance. 2 | ni.com | Getting Started with NI 7340/7350 Controllers and AKD Drives... -
Page 4: Software
(NI PS-15 Shown) UMI-7772/74 SHC68- UMI-7772/74 C68-S to AKD Cable Drive Cable +24 V Power Supply (NI PS-15 Shown) Screw Terminal Connector for Additional I/O (Limits, etc.) Getting Started with NI 7340/7350 Controllers and AKD Drives | © National Instruments | 3... -
Page 5: Related Documentation
Figure 2. UMI-7764 to AKD Drive Connections Ethernet Cable (Initial Configuration Only) Host PC AKD Analog Servo Drive UMI-7764 SH68-C68-S UMI-7764 to Cable AKD Drive Cable +5 V Power Supply +24 V Power Supply (NI PS-15 Shown) Related Documentation The following documents contain additional information that you may find helpful. All referenced documents ship with the product and are available at ni.com/manuals •... -
Page 6: Ni Motion Controller Configuration And Installation
Power off and unplug the chassis. Caution To protect yourself and the computer from electrical hazards, the computer must remain unplugged until the installation is complete. Getting Started with NI 7340/7350 Controllers and AKD Drives | © National Instruments | 5... - Page 7 Choose an unused peripheral slot and remove the filler panel. Touch a metal part on the chassis to discharge any static electricity that might be on your clothes or body. Static electricity can damage the controller. Insert the PXI controller into the chosen slot. Use the injector/ejector handle to fully secure the device into place.
-
Page 8: Step 3: Install Software On And Configure The Rt Pxi Controller (Pxi 7340/7350 Only)
IP address or select Static to specify a static IP address in the IPv4 Address section. Click Save on the toolbar and let MAX reboot the system. Getting Started with NI 7340/7350 Controllers and AKD Drives | © National Instruments | 7... -
Page 9: Ni Umi And Akd Servo Drive Configuration And Installation
For more information about connecting external power, encoders, and other motion I/O signals to the UMI-7772/74, refer to the National Instruments Universal Motion Interface (UMI)-7772/74 User Manual and Specifications. 8 | ni.com | Getting Started with NI 7340/7350 Controllers and AKD Drives... - Page 10 X1 3-pin Connector—+24 V power supply connection for the AKD servo drive. • Screw Terminal Connector—20-pin screw terminal connector for external I/O connections. Table 1 shows the UMI-7772/74 to AKD Drive Cable screw terminal pinout. Getting Started with NI 7340/7350 Controllers and AKD Drives | © National Instruments | 9...
- Page 11 Table 1. UMI-7772/74 to AKD Drive Cable Screw-Terminal Pinout Signal Name Forward Limit Home Reverse Limit † +24 V OUT † ‡ ‡ ‡ † Digital Ground +5 V (Output) Reserved Reserved † Digital Ground Reserved Reserved Reserved Reserved Reserved Reserved †...
- Page 12 +24 V power supply to the AKD drive X1 connector as described in Step 4: Connect the Logic Power Supply to the AKD Servo Drive. Getting Started with NI 7340/7350 Controllers and AKD Drives | © National Instruments | 11...
- Page 13 Figure 5 shows the power terminal block. Figure 5. UMI-7772/74 Power Connection POWER GLOBAL STOP Viso INHIBIT ALL INTERLOCK +24 V External (24VDC±10%) Supply(+) Terminal Viso (5-30VDC) Ciso POWER ANALOG INPUT V i s +24 V External C i s TRIGGER / BREAKPOINT Supply(–) Terminal DIGITAL I/O...
- Page 14 UMI-7764 Inhibit Output signals. Getting Started with NI 7340/7350 Controllers and AKD Drives | © National Instruments | 13...
-
Page 15: Step 2: Mount The Drive And Connect The Protective Earth
Figure 8 shows the location of the UMI 7764 Power Input Terminal Block. Figure 8. UMI-7764 Power Input Terminal Block UMI-7764 S2 S1 ASSY186343A-01 AXIS1 AXIS3 AXIS4 AXIS2 FWDLIM1 FWDLIM3 FWDLIM4 FWDLIM2 ACTIVE HOME1 HOME3 HOME2 HOME4 REVLIM1 REVLIM3 REVLIM4 REVLIM2 INHIN1 INHIN3... -
Page 16: Step 3: Connect The Ni Umi To Akd Cable To The Akd Servo Drive
10 Static IP Addressing Switch (S1) AC Input Power (X3) I/O Connector (X8) 11 Drive Communication (X11) Encoder Emulation (X9) I/O Connector (X7) 12 LED Indicators Getting Started with NI 7340/7350 Controllers and AKD Drives | © National Instruments | 15... -
Page 17: Step 4: Connect The Logic Power Supply To The Akd Servo Drive
Connect the cable X9 DSUB connector to the AKD servo drive X9 DSUB connector. Connect the cable X8 10-pin connector to the AKD servo drive X8 10-pin connector. Note You can use the X7 I/O connector for additional I/O but it is not used for connection to the NI UMI. - Page 18 Connect the +24 V power supply (+) terminal to the wire labeled +24V on the UMI-7764 to AKD cable. Connect the +24 V power supply return (–) terminal to the wire labeled GND on the UMI-7764 to AKD cable. Getting Started with NI 7340/7350 Controllers and AKD Drives | © National Instruments | 17...
- Page 19 The +24 V logic power supply also powers the safe torque output (STO) input on the X1 connector. The STO input must be powered by +24V for proper drive operation. If you need to use the STO functionality complete the following additional steps: Disconnect the STO wire from UMI-7764 to AKD cable from the from the X1 connector and insulate it.
-
Page 20: Step 5: Connect The Motor And Encoder To The Drive
Connect the motor DSUB feedback connector to the AKD servo drive X10 feedback connector. Figure 12. Motor and Encoder Connections Motor Connector (X2) Feedback Connector (X10) Getting Started with NI 7340/7350 Controllers and AKD Drives | © National Instruments | 19... -
Page 21: Step 6: Connect The Ac Input Power
Step 6: Connect the AC Input Power Connect the X3 mains supply connector to AC input power. Pins 4 through 7 contain the AC power signals. The X3 connector also provides signals for an external brake (regen) resistor (±RB) and DC bus link (–DC). Refer to the AKD Installation Manual for information about using these terminals. -
Page 22: Step 7: Connect The Drive Communication
. This process may take up to a minute to complete. Figure 9 shows the 169.254.x.x locations of S1 and S2. Connect the AKD servo drive X11 service port to a hub, switch, or router using an Ethernet cable. Getting Started with NI 7340/7350 Controllers and AKD Drives | © National Instruments | 21... -
Page 23: Step 8: Confirm Drive Connections
Figure 16 shows the location of the X11 service port on the drive. Figure 16. AKD Servo Drive X11 Connector Step 8: Confirm Drive Connections After all hardware connections have been made complete the following steps to confirm the AKD hardware setup. Apply AC power. -
Page 24: Software Installation And Configuration
Click Axis Configuration and set Type to Servo. Click Motion I/O Settings and select Disabled for the Forward Limit Switch, Reverse Limit Switch, and Home Switch. Getting Started with NI 7340/7350 Controllers and AKD Drives | © National Instruments | 23... - Page 25 Note These configuration settings disable limits for initial setup and testing purposes. National Instruments recommends connecting and enabling limits in your final application. Set the limit and home input active state. This prevents the limit active error from occurring when no limits are connected.
-
Page 26: Step 3: Install Akd Workbench And Configure The Drive
Select the drive to configure from the list and click Connect. Note If the drive is not in the list, refer to the Tips and Troubleshooting section of this document for possible solutions. Getting Started with NI 7340/7350 Controllers and AKD Drives | © National Instruments | 25... - Page 27 Figure 18 shows the AKD WorkBench start page. Figure 18. AKD WorkBench Start Page Available Drives Specify Address Connect to Drive 26 | ni.com | Getting Started with NI 7340/7350 Controllers and AKD Drives...
- Page 28 Configure the command source and operation mode. Open the Settings page and set the Command Source to 3 - Analog. Set the Operation Mode to 0 - Torque Mode. Getting Started with NI 7340/7350 Controllers and AKD Drives | © National Instruments | 27...
- Page 29 When you have updated these settings the Settings page should look similar to the following figure. Figure 20. AKD WorkBench Settings Page Command Source Setting Operation Mode Setting Configure the emulated encoder output. Expand the Settings tree item and open the Encoder Emulation page. Select 1 - Output - With once per rev index pulse from the Function dropdown list.
- Page 30 Configure the analog input command scaling. Expand the Settings tree item and open the Motor page. Write down the motor Continuous Current value. Note Motor continuous current is in Arms. Getting Started with NI 7340/7350 Controllers and AKD Drives | © National Instruments | 29...
- Page 31 Figure 22 shows the AKD WorkBench Motor page. Figure 22. AKD WorkBench Motor Page Expand the Settings tree item and open the Analog Input page. Set the Scale to the appropriate Arms/V value based on the following equation: Scale = Motor continuous current / 10 For example, if you have a motor with a maximum current of 3.00 Arms set Scale to 0.3 Arms/V.
- Page 32 Configure the software enable signal: Click the Parameters tree icon to list all configurable drive parameters. Expand the Drive section. Set the Software enable default parameter to 1. Getting Started with NI 7340/7350 Controllers and AKD Drives | © National Instruments | 31...
- Page 33 Figure 24 shows the AKD WorkBench parameters page. Figure 24. AKD WorkBench Parameters Page Note If you are using an EtherCAT AKD drive in analog mode, refer to Using an EtherCAT AKD Drive in Analog Mode in the Tips and Troubleshooting section for additional settings you may need to apply.
-
Page 34: Step 4: Test The Motor In Max
Manually Tuning a System From Scratch topic in the Measurement & Automation Explorer Help for Motion for information about using the Servo Tune tabs to tune your motor. Getting Started with NI 7340/7350 Controllers and AKD Drives | © National Instruments | 33... -
Page 35: Tips And Troubleshooting
Tips and Troubleshooting The Drive Does Not Enable If, after going through all steps in this document, the AKD servo drive does not enable, verify the following settings: • The Inhibit Output from the NI 7340/7350 must not be active. Figure 19 shows the location of the hardware enable indicator in the AKD WorkBench software. -
Page 36: The Motor Responds Poorly
Set the FBUS.PARAM05 parameter to 4. Save all configuration changes to the drive by clicking the Save to Drive toolbar button shown in Figure 19. Getting Started with NI 7340/7350 Controllers and AKD Drives | © National Instruments | 35... -
Page 37: Cannot See The Akd Servo Drive In The Akd Workbench Software
Figure 26 shows the Fieldbuses section of the AKD WorkBench parameters page. Figure 26. AKD WorkBench Fieldbuses Section Cannot See the AKD Servo Drive in the AKD WorkBench Software Manually enter the drive IP address by enabling the Specify Address checkbox on the AKD WorkBench software Start Page shown in Figure 18. -
Page 38: Wiring Diagram
24V DC Mains Contactor Encoder Encoder Evaluation Emulation Service TCP/IP PE–Connection (Protective Earth) L1 L2 L3 PE Chassis Ground Connection (Panel) Shield Connection Via Plug Getting Started with NI 7340/7350 Controllers and AKD Drives | © National Instruments | 37... -
Page 39: Worldwide Support And Services
Worldwide Support and Services The National Instruments Web site is your complete resource for technical support. At you have access to everything from troubleshooting and application ni.com/support development self-help resources to email and phone assistance from NI Application Engineers. Visit for NI Factory Installation Services, repairs, extended warranty, ni.com/services... - Page 40 CVI, LabVIEW, National Instruments, NI, ni.com, the National Instruments corporate logo, and the Eagle logo are trademarks of National Instruments Corporation. Refer to the Trademark Information at ni.com/trademarks for other National Instruments trademarks. The mark LabWindows is used under a license from Microsoft Corporation. Windows is a registered trademark of Microsoft Corporation in the United States and other countries.
Need help?
Do you have a question about the PCI-7354 and is the answer not in the manual?
Questions and answers