Table of Contents
Advertisement
Quick Links
Advertisement
Table of Contents

Subscribe to Our Youtube Channel
Related Manuals for AVM Fritz!Box 7270


Summary of Contents for AVM Fritz!Box 7270
- Page 1 FRITZ!Box Fon WLAN 7270 Installation, configuration and operation...
- Page 2 AVM will not be liable for damages arising directly or indirectly from the use of the manual or the software, nor for incidental or consequential damages, except in case of intent or gross negligence.
-
Page 3: Table Of Contents
Contents CONNECTING AND OPERATION..... . . 7 Security and Handling ......7 FRITZ!Box Fon WLAN 7270 . - Page 4 Telephone Connections ......33 Entering Your Phone Numbers....... . .33 Configuring Telephony Equipment .
- Page 5 Uninstallation ........108 12.1 Disconnecting the FRITZ!Box from the Computer ....108 12.2 Removing the FRITZ!DSL Software.
- Page 6 Updates and Software ........142 Support from the AVM Service Team......143 Glossary.
-
Page 7: Iconnecting And Operation
Security and Handling CONNECTING AND OPERATION Security and Handling What to watch out for When working with the FRITZ!Box Fon WLAN 7270, observe Security the following security instructions in order to protect your- self and the FRITZ!Box from harm. Do not install the FRITZ!Box during an electrical storm. Disconnect FRITZ!Box from the power supply during electrical storms. - Page 8 Security and Handling For detailed information about the symbols, numerals and function keys used in the manual, see the section “Direc- tions for Operation” from page 112. FRITZ!Box Fon WLAN 7270...
-
Page 9: Fritz!Box Fon Wlan 7270
FRITZ!Box Fon WLAN 7270 FRITZ!Box Fon WLAN 7270 An Overview The FRITZ!Box Fon WLAN 7270 is a Private Branch Exchange (PBX) for making telephone calls via the Internet and the fixed-line network. The FRITZ!Box connects your computers directly with your DSL line. Each connected computer can establish an Internet connection over the FRITZ!Box. - Page 10 USB Port which you can connect a USB storage device (hard drive, stick), a printer, an AVM FRITZ!WLAN USB Stick N, an AVM FRITZ!WLAN USB Stick or a USB hub. The USB port supports the USB 1.1 and USB 2.0 standards.
-
Page 11: Package Contents
RJ45/RJ11 adapter (black) for connecting FRITZ!Box Fon WLAN 7270 to the analog telephone network one FRITZ!Box CD with – Installation Help – FRITZ!DSL software package – software for the printer port – documentation for all enclosed AVM products printed installation manual FRITZ!Box Fon WLAN 7270... -
Page 12: Operation Requirements
Operation Requirements Operation Requirements In order to operate the FRITZ!Box, you must have the follow- ing: a Web browser that supports Java script (for instance, Internet Explorer version 6.0 or higher, or Firefox version 1.5 or higher) DSL line 1TR112 (compatible with U-R2), ITU G.992.1, ITU G.992.3, ITU G.992.5 for connection via WLAN: computer with a WLAN adapter compliant with... -
Page 13: Connecting
Connecting Connecting Connecting FRITZ!Box This chapter contains instructions on the following topics: launching FRITZ!Box operation connecting FRITZ!Box to electrical power connecting one or several computers to the FRITZ!Box connecting FRITZ!Box to DSL connecting FRITZ!Box to ISDN or the analog telephone line connecting ISDN terminal devices to the FRITZ!Box connecting analog terminal devices to the FRITZ!Box Please see the instructions about the placement of the... - Page 14 Launching Operation without the Installation Help CD At the conclusion of the Installation Help, you will be routed directly to the FRITZ!Box user interface. Launching Operation without the Installation Help CD If you do not want to use the Installation Help on the FRITZ!Box CD, then work through the instructions below in the recommended order: Placement of FRITZ!Box;...
-
Page 15: Connecting To Electrical Power
Connecting to Electrical Power Connecting to Electrical Power Connecting to the power supply Set aside the power supply unit out of the FRITZ!Box pack- Connecting age. Connect the power supply unit to the socket on the FRITZ!Box labeled “Power”. Plug the other end into an AC power outlet. The green “Power/DSL”... -
Page 16: Connecting Computer(S) To The Lan Port
Connecting Computer(s) to the LAN Port Note the following when connecting computers to the Connection Szenarios FRITZ!Box: One computer can be connected to the FRITZ!Box by only one of these means. At each of the network ports of the FRITZ!Box, a com- puter can be connected directly or via a hub/switch. - Page 17 Connecting More Computers to the LAN Ports Set aside the network cable (yellow) from the FRITZ!Box Connecting package. Switch on your computer. If you work with a Linux operating system, use YaST to configure your network card with the setting “DHCP”, if this setting is not already configured.
-
Page 18: Connecting Computer(S) Wirelessly Via Wlan
Connecting Computer(s) Wirelessly via WLAN Connecting FRITZ!Box to a network hub Set aside the network cable (yellow) from the FRITZ!Box Connecting package. Connect one end of the LAN cable to the uplink port of the network hub or switch. Connect the other end of the cable to one of the LAN sockets on the FRITZ!Box. - Page 19 Connecting the FRITZ!WLAN USB Stick If you are using a FRITZ!WLAN USB Stick N or a Connect FRITZ!WLAN USB Stick by AVM as a WLAN adapter, you can transmit the security settings of the FRITZ!Box to your FRITZ!WLAN Stick quickly and conveniently using AVM Stick &...
- Page 20 Using WLAN adapters from Other Manufacturers Install the WLAN adapter in your computer along with the appropriate software. Please take note of the in- structions in the documentation of the adapter. In order to establish a WLAN connection to the FRITZ!Box, you must either use the WLAN software supplied with the operating system, or the manufac- turer’s WLAN software included in the WLAN adapter...
- Page 21 Using WLAN adapters from Other Manufacturers If your WLAN adapter does not support WPA, you must con- WPA Not Supported vert the encryption in the FRITZ!Box to WEP. For this you must change the WLAN settings in the FRITZ!Box. To do so, proceed as follows: Connect the FRITZ!Box and the computer using the network cable (yellow) (see the section “Connecting...
-
Page 22: Connecting To The Dsl Line
Connecting to the DSL Line Connecting to the DSL Line Connecting to the DSL splitter The gray and black Y-shaped cable is for connecting to the Connecting DSL splitter. This cable is a combination of a DSL cable and a telephone cable. Connect the longer of the two gray branches of the ca- ble to the port labeled “DSL/TEL”. -
Page 23: Connecting To The Isdn Line
Connecting to the ISDN Line The green “Power” LED stops flashing after a short time and remains lit to signalize that FRITZ!Box is ready for Internet connections over DSL. Connecting to the ISDN Line Your telephone line is either an analog line or an ISDN line. If you have an ISDN line, read here how to connect the FRITZ!Box with the ISDN line. -
Page 24: Connecting With The Analog Telephone Line
Connecting with the Analog Telephone Line the cable into the gray RJ45/RJ11 adapter included in the package and then insert the adapter into the sock- et of the ISDN-NT. Now the FRITZ!Box and the ISDN line are connected. Connecting with the Analog Telephone Line Your telephone line is either an analog line or an ISDN line. -
Page 25: Connecting Telephone, Fax, Or Answering Machine
Connecting Telephone, Fax, or Answering Machine Then insert the black plug into the appropriate socket of your DSL splitter. If the plug does not fit into the splitter, connect the end of the cable to the black RJ45/RJ11 adapter included in the package and then insert the adapter into the socket on the DSL splitter. -
Page 26: Connecting Isdn Pbxs
Connecting ISDN PBXs Connecting an ISDN telephone to the FRITZ!Box Use an ISDN cable to connect an ISDN telephone. Connecting Connect one end of the ISDN cable with the ISDN tele- phone. Connect the other end of the ISDN cable with the “FON S ”... - Page 27 Connecting ISDN PBXs Use an ISDN cable to connect an ISDN PBX. Connecting Connect one end of the ISDN cable with the ISDN PBX. Connect the other end of the ISDN cable with the “FON S ” port of the FRITZ!Box. If you have no more than two analog devices con- nected to the PBX, you can connect them directly to the FRITZ!Box and do without the PBX.
-
Page 28: Opening The User Interface
Opening the User Interface Opening the User Interface fritz.box The FRITZ!Box has a user interface that can be used in a web browser. The user interface presents information about the FRITZ!Box product, ports and connections. This is also where you configure settings for operation of the FRITZ!Box. The user interface can be opened from any computer con- nected with the FRITZ!Box. -
Page 29: Internet Connections
Internet Connections Internet Connections Setting Up the Internet Connection In order to allow Internet access with the FRITZ!Box, you must first config- ure the Internet connection in the FRITZ!Box user interface. The FRITZ!Box can be operated directly at the DSL line. Alternatively, it can be connected to a cable modem, a DSL modem, or a DSL router, or in- tegrated into an existing network. - Page 30 Configuring the Internet Connection Manually As a final step, click “Apply”. If the FRITZ!Box is connected to a cable modem, a DSL mo- dem or a router, or integrated into an existing network, you must also configure your Internet connection as described above.
-
Page 31: The Dect Function
The DECT Function The DECT Function Cordless Telephony with FRITZ!Box Thanks to the integrated DECT function, the FRITZ!Box Fon WLAN 7270 can be used as a basis station for cordless phones. Every cordless phone that supports the DECT-GAP standard (also known as a DECT telephone) can be registered at the FRITZ!Box. -
Page 32: Logging A Cordless Phone Off Of The Fritz!Box
Logging a Cordless Phone off of the FRITZ!Box Position in the List of Cordless Keypad sequence Phones ss612 Entry 3 ss613 Entry 4 ss614 Entry 5 Logging a Cordless Phone off of the FRITZ!Box Start a web browser. Open the FRITZ!Box user interface by entering fritz.box in the address field. -
Page 33: Telephone Connections
Telephone Connections Telephone Connections Configuring FRITZ!Box for Telephony Using the FRITZ!Box you can make telephone calls via the Internet and the fixed-line network. Once you have connected the FRITZ!Box as described in the chapter “Connecting” from page 13, you can configure the FRITZ!Box for making telephone calls. -
Page 34: Configuring Telephony Equipment
Fixed-line Number You can enter multiple Internet numbers in the FRITZ!Box. The Internet numbers can be from one or from multiple dif- ferent Internet telephony providers. Fixed-line Number With the FRITZ!Box you can make calls both via the analog fixed-line network and via the ISDN fixed-line network: In order to make calls via the analog fixed-line network with the FRITZ!Box, enter your telephone numbers in the FRITZ!Box. - Page 35 Settings for Telephony Devices answering machines If you have connected an analog answering machine (to “FON 1” or “FON 2”, for instance), configure it as an answering machine. The FRITZ!Box is also equipped with integrated an- swering machines, which can be enabled and config- ured in the “Settings / Advanced Settings / Telephony / Answering Machines”...
-
Page 36: Functions And Settings For Telephony
Functions and Settings for Telephony fax machine – kind of connection used to connect the fax ma- chine with the FRITZ!Box – internal name for the fax machine – number used to send faxes: This entry defines whether outgoing faxes are sent via the Internet or the fixed-line network. - Page 37 Telephone Book Telephone Book A Telephone Book is at your disposal in the FRITZ!Box. If an AVM handset is registered at the FRITZ!Box, the Tele- phone Book can be transferred to the handset. Call Diversion With this function you can divert incoming calls to another number.
- Page 38 Dialing Rules An individual telephone can be selected for the alarm function. Dialing Rules Dialing rules specify when calls are conducted on the fixed- line network, and when they take place over the Internet. All connections to number ranges for which a dialing rule has been defined are established using the specified con- nection type.
-
Page 39: The Answering Machine Menu
The Answering Machine Menu The Answering Machine Menu Main menu Play back messages If no messages have been recorded, you hear two short audio signals and return to the main menu. Pause / Play Delete message To previous message To next message Listen to “Play back messages”... -
Page 40: Usb Devices
The FRITZ!Box is equipped with a USB port (also known as a USB host controller). Various USB devices can be connected to the host controller: an AVM FRITZ!WLAN USB Stick N or an AVM FRITZ!WLAN USB Stick a USB mass storage device (hard drive, memory stick) -
Page 41: Accessing Usb Devices
Accessing USB Devices Accessing USB Devices As soon as a USB device is connected to the FRITZ!Box, all Network Access of its functions are available in the entire network: The files in the USB mass storage can be accessed from the network via FTP (File Transfer Protocol), or you can make the USB mass storage device available as a network storage device. - Page 42 Enabling the USB Remote Connection Please note that the FTP and USB network memory func- tions are not available as long as the USB remote connec- tion is active for USB storage devices. With the FRITZ!Box USB remote connection you can enjoy the full range of functions of your USB devices.
- Page 43 Disabling the USB Remote Connection Open the “USB Remote Connection” menu and install the program for the USB remote connection on the computer from which you want to use the USB de- vices. Follow the instructions on the “USB Remote Connection”...
-
Page 44: Usb Mass Storage Devices
USB Mass Storage Devices USB Mass Storage Devices USB mass storage devices include hard drives and memory sticks. For access via FTP (File Transfer Protocol), USB mass storage File Systems devices are supported using the file systems FAT and FAT32. If the USB remote connection is enabled for USB storage devices, the FAT, FAT32 and NTFS files systems are sup- ported. - Page 45 Accessing the Data in the USB Mass Storage Accessing the Data in the USB Mass Storage USB storage devices connected to the FRITZ!Box directly or via a USB hub are displayed with their device name in the “USB Devices / Device Overview” menu on the user inter- face.
-
Page 46: Usb Printers
USB Printers The devices automatically communicate via Universal Plug and Play (UPnP). This technology allows the devices con- nected to each other by cable or radio network to perform automatic detection, recognize events, and exchange data with each other accordingly. With UPnP AV this technology has been expanded to audio and video contents. - Page 47 USB Printers When the USB remote connection is enabled, all-in- one printers (printers with supplementary fax or scan- ner functions) can also be used for faxing and scan- ning. If the USB printer is operated as a network printer, only the printing function is supported. If your printer is equipped with a status monitor, you can use this feature when the USB remote connection is enabled.
- Page 48 You must make this selection because the printer port on the computer functions as a local port. Select the setting “Use an existing port” and then choose the entry “AVM: (FRITZ!Box USB Printer Port)” from the list. Click “Next”. Select the manufacturer for the USB printer connected to the FRITZ!Box from the “Manufacturers”...
- Page 49 Click “Next”. In the “Select a Printer Port” window, select the option “Use the following port” and select “AVM: (FRITZ!Box USB Printer Port)” from the list field. Click “Next”. Select the manufacturer for the USB printer connected to the FRITZ!Box from the “Manufacturers”...
- Page 50 Setting Up Printers in SUSE Linux Systems Setting Up Printers in SUSE Linux Systems A USB printer can be connected to the USB port of the FRITZ!Box for use as a network printer. The printer is then available to all computers connected with the FRITZ!Box. Install the printer as “root”...
- Page 51 Setting Up USB Printers on Apple Computers Setting Up USB Printers on Apple Computers A USB printer can be connected to the USB port of the FRITZ!Box for use as a network printer. The printer is then available to all computers connected with the FRITZ!Box. Under “Go / Utilities”, open the “Printer Setup Utility”.
-
Page 52: Fritz!Wlan Usb Stick N And Fritz!Wlan Usb Stick
For more information, see the section “More about WLAN” from page 122 and the manual for the FRITZ!WLAN USB Stick. With the AVM Stick & Surf technology it is easy to establish AVM Stick & Surf a secure WLAN connection. Stick & Surf is possible with the FRITZ!WLAN USB Stick N and also with the FRITZ!WLAN USB Stick. -
Page 53: Usb Hub
USB Hub Insert the your stick into the USB port on the FRITZ!Box. The WLAN security settings are transmitted automati- cally to the FRITZ!WLAN USB Stick. The “INFO” LED on the FRITZ!Box begins flashing rapidly. As soon as the “INFO” LED stops flashing, transmis- sion of the settings has been concluded. - Page 54 USB hub with its own power supply. AVM has no influence over external interference to the USB storage devices on the FRITZ!Box. Thus such phe- nomena as voltage spikes during storms may occur,...
-
Page 55: Fritz!Dsl: The Software Suite
FRITZ!Box in your web browser. Click the “Update” button to check whether a firmware up- date for your FRITZ!Box is available on the AVM web site. The “Diagnosis” button starts the FRITZ!DSL Diagnosis. This programs displays all relevant data about your DSL connec- tion and checks the connection to your FRITZ!Box. -
Page 56: Installing Fritz!Dsl
Installing FRITZ!DSL Installing FRITZ!DSL Insert the FRITZ!Box CD and start “Setup.exe”. Select “View CD Contents / Install FRITZ!DSL”. The “File Download” window opens. Select the “Open” button. The FRITZ!DSL welcome screen appears. Confirm with “Continue”. Specify the folder in which you want to install FRITZ!DSL on your computer. -
Page 57: Fritz!Box
Click the “FRITZ!Box” button to open the user interface of the FRITZ!Box in your web browser. Update New firmware updates for FRITZ!Box are provided by AVM at regular intervals, free of charge. The updates can add new functions to your FRITZ!Box. -
Page 58: Fritz!Dsl Diagnosis
FRITZ!DSL Diagnosis FRITZ!DSL Diagnosis FRITZ!DSL Diagnosis reports comprehensively about all of the details of the DSL connection, including data transmis- sion and the activated fast-path mode. The comprehensive DSL diagnostics function makes it possible to monitor the FRITZ!Box connection and installation. WebWatch Click the “Web Test”... -
Page 59: Configuration And Operation At The Telephone
Configuration and Operation at the Telephone Configuration and Operation at the Telephone FRITZ!Box Keypad Sequences Many of the FRITZ!Box functions and features can be config- ured and used over a telephone connected to a FRITZ!Box extension. Only tone-dialing (dual-tone multifrequency = DTMF) telephones can be used in configuration and opera- tion. - Page 60 Restoring Factory Settings Saving Permanently Pick up the handset. r91ss Save all settings permanently by dialing the sequence shown at left. Hang up the handset. Restoring Factory Settings The FRITZ!Box can be reset to its condition upon delivery by restoring factory settings. All settings you made in the FRITZ!Box—including the con- figured Internet connection—are deleted when the factory settings are restored.
- Page 61 Do Not Disturb Do Not Disturb You can enable the Do Not Disturb function for any tele- phone connected to FRITZ!Box in the user interface. When Do Not Disturb is enabled, the telephone will not ring. In configuring this function you can choose between enabling the function immediately and selecting a specific time peri- When Do Not Disturb is enabled immediately, no incoming Immediately...
- Page 62 Alarm Disabling Do Not Disturb r81<Ext.>s6s disables Do Not Disturb for extension <Ext.> Alarm The FRITZ!Box includes an alarm function. The alarm can be configured individually for each connected telephone. First enter on the telephone the time at which you would like to be awoken and save this entry.
- Page 63 Call Diversion on the ISDN Line Call Diversion on the ISDN Line Call forwarding is performed by the ISDN operator’s switch- ing station. To use call forwarding, FRITZ!Box must be con- nected to an ISDN line. Then this feature can be used to for- ward calls to an external line.
- Page 64 Call Diversion on the ISDN Line Call Forwarding Immediately for Any MSN Pick up the handset. s21s<DNo> Dial the sequence shown at left. s<MSN>r Wait for the acknowledgement tone. Hang up the handset. Call Forwarding Immediately for All MSNs Pick up the handset. s21s<DNo>sr Dial the sequence shown at left.
- Page 65 Call Diversion on the ISDN Line Disabling Call Forwarding Immediately for All MSNs Pick up the handset. s21ssr Dial the sequence shown at left. Wait for the acknowledgement tone. Hang up the handset. Incoming calls are forwarded to the specified number only Call Forwarding When Busy if a call is already being conducted using the number di-...
- Page 66 Call Diversion on the ISDN Line Call Forwarding When Busy for All MSNs Pick up the handset. s67s<DNo>sr Dial the sequence shown at left. Wait for the acknowledgement tone. Hang up the handset. Disabling Call Forwarding When Busy for Your Outgoing Caller ID Pick up the handset.
- Page 67 Call Diversion on the ISDN Line Incoming calls are forwarded to the specified number if not Call Forwarding Delayed answered at the number originally dialed within 20 seconds (about five rings). Call forwarding can be con- figured for your extension’s outgoing caller ID (the first number assigned to an extension), for any number (for in- stance, a telephone at the other FRITZ!Box extension), or for all numbers.
- Page 68 Call Diversion on the ISDN Line Disabling Call Forwarding Delayed for Your Outgoing Caller ID Pick up the handset. s61sr Dial the sequence shown at left. Wait for the acknowledgement tone. Hang up the handset. Disabling Call Forwarding Delayed for Any MSN Pick up the handset.
- Page 69 Call Diversion Call Diversion Incoming calls to the FRITZ!Box telephones can be diverted to a different extension or to an external number. In con- trast to call diversion over FRITZ!Box, there is also call for- warding (call diversion via the central exchange). How to use call forwarding by phone is described in the section “Call Diversion on the ISDN Line”...
- Page 70 Call Diversion Call Diversion After the Third Ring Pick up the handset. r42<Ext.>s Dial the sequence shown at left. <DNo>/<Ext.>s r91ss Save your settings if desired by di- aling the sequence shown at left. Hang up the handset. Call Diversion When Busy Pick up the handset.
- Page 71 Call Waiting Call Diversion Immediately by Ringing Pick up the handset. r45<Ext.>s Dial the sequence shown at left. <DNo>/<Ext.>s r91ss Save your settings if desired by di- aling the sequence shown at left. Hang up the handset. Disabling Call Diversion Pick up the handset.
- Page 72 Caller ID Suppression for Outgoing Calls (CLIR) Enabling Call Waiting Pick up the handset. r2 <Ext.> s0s Dial the sequence shown at left. r91ss Save your settings if desired by dialing the sequence shown at left. Hang up the handset. Disabling Call Waiting Pick up the handset.
- Page 73 Displaying the Incoming Caller ID (CLIP) Enabling CLIR Permanently r51<Ext.>s1s Dial the sequence shown at left. r91ss Save your settings if desired by dialing the sequence shown at left. Hang up the handset. Disabling CLIR Permanently Pick up the handset. r51<Ext.>s0s Dial the sequence shown at left.
- Page 74 Connected ISDN Line Identification Restriction and Presentation (COLR/COLP) Enabling Display of Incoming Caller ID (CLIP) r50<Ext.>s1s Dial the sequence shown at left. r91ss Save your settings if desired by dialing the sequence shown at left. Hang up the handset. Disabling Display of Incoming Caller ID (CLIP) Pick up the handset.
- Page 75 Disabling Automatic Outside Dialing Enabling Connected Line Identification Restriction (COLR) Permanently Pick up the handset. r53<Ext.>s1s Dial the sequence shown at left to disable transmission of the connected line’s num- ber. r91ss Save your settings if desired by dialing the sequence shown at left.
- Page 76 Call Rejection on Busy (Busy on Busy) Disabling Automatic Outside Dialing Pick up the handset. r1<Ext.>s0s Dial the sequence shown at left. r91ss Save your settings if desired by dialing the sequence shown at left. Hang up the handset. Enabling Automatic Outside Dialing Pick up the handset.
-
Page 77: Operation At The Telephone
Operation at the Telephone Disabling Busy on Busy Pick up the handset. r52<Ext.>s0s Dial the sequence shown at left. r91ss Save your settings if desired by dialing the sequence shown at left. Hang up the handset. 10.2 Operation at the Telephone This section describes how you can use the FRITZ!Box fea- tures via your telephone keypad. - Page 78 Making Internal Calls Selecting the Outgoing Number and the Type of Connection s111r dials up this connection using the fixed-line network <Phone number> s12r dials up this connection using the first Inter- net phone number <Phone number> s12<P>r establishes an Internet telephony connection via the specified Internet phone number.
- Page 79 Group Call Dialing Internal Calls without Automatic Outside Dialing Pick up the handset. You hear the internal dial tone. <Ext.> Dial the desired extension number, for in- stance 1 or 2. If you would like to call all ISDN terminal de- vices for which no phone number has been configured, dial 50.
- Page 80 Picking up a Call from the Answering Machine Picking up a Call from the Answering Machine Use this function to pick up incoming calls on your tele- phone that already have been taken by the answering ma- chine. Picking up a Call Pick up the handset.
- Page 81 Call Back on Busy (CCBS) on the ISDN Line Call Back on Busy (CCBS) on the ISDN Line When you dial a number and it is busy, you can enable the “Call Back on Busy” feature. As soon as the line is free, your telephone rings for 20 seconds, as it would for an external call.
- Page 82 Call Back on No Response (CCNR) on the ISDN Line Enabling Call Back on No Response (CCNR) You have just dialed a number and hear a ring tone. If the call is not answered, within twenty seconds, dial either the number 5 Rs37r the sequence shown at left.
- Page 83 Alternating Between Calls Alternating Between Calls Whenever you have one active connection and one caller on hold, you can switch from one call to the other as often as you want using the Hold button. Alternating Between Calls Call 1 You are talking to Caller 1.
- Page 84 Three-Party Conference Call Three-Party Conference Call FRITZ!Box allows you to hold telephone conferences with two other people at once. Two external and one internal party, or two internal and one external party can conduct a conference call with each other. Holding a Three-Party Conference Call Pick up the handset.
- Page 85 Consultation / Hold Consultation / Hold The Consultation/Hold feature allows you to place an exist- ing call on hold. You then may consult with someone else at your workplace or dial a second call. The party on hold does not hear the second conversation. Once you have fin- ished the consultation, you can return to the original con- nection.
- Page 86 Transferring Calls Transferring Calls The “Call Transfer” function allows you to transfer a connec- tion from one of FRITZ!Box's extension to another. Transferring Calls Call 1 You are talking to Caller 1. Press the Hold button. Caller 1 is now on hold. ss<Ext.>...
- Page 87 One-time Explicit Transfer on the ISDN Line Explicit Call Transfer from a Three-party Conference Call Pick up the handset. Dial the external number of the first party. Talk. Press the Hold button. Dial the number for your second external call. You can now conduct a second conversation while your first call is on hold.
- Page 88 Suspending/Resuming a Call on the ISDN Line time explicit call transfer before connecting to two parties. When you end the connection, the other two parties will be connected to each other. One-time Explicit Transfer Pick up the handset. s32r Dial the sequence shown at left. You hear the ex- ternal dial tone.
- Page 89 Call Tracing (MCID) on the ISDN Line the “Suspend/Resume” feature is not enabled on your line. It is also possible that the parked-call ID you chose is al- ready in use. You can resume the suspended call using another ISDN de- vice on the S bus.
- Page 90 Using Keypad Messages Enabling Room Monitoring Pick up the handset or activate the speaker phone function of your telephone. Dial the sequence shown at left. For <level>, enter a number between 1 (the most sensi- <level> tive sound level) and 8. For <number>, enter the number to be called.
- Page 91 Using Keypad Messages Entering a Keypad Sequence on an Extension without Automatic Outside Dialing Pick up the handset. 0sr<Seq> Dial the sequence shown at left. <Seq> stands for the keypad sequence you received from your tele- phone carrier. FRITZ!Box Fon WLAN 7270...
-
Page 92: Troubleshooting
Troubleshooting Troubleshooting Help for Errors This chapter provides concrete assistance if you are not able to open the user interface of your FRITZ!Box, if you are having problems with the WLAN connection, or if you want to change the IP settings on your com- puter. - Page 93 Checking the Cable Connections Checking the Cable Connections The user interface of the FRITZ!Box does not appear in the window of your web browser. Possible Cause The cable connections are not secure. Remedy Make sure that all cable connections are plugged in secure- Check the Name Resolution The user interface of the FRITZ!Box cannot be opened by entering fritz.box.
- Page 94 Checking the IP Address Checking the IP Address The user interface of the FRITZ!Box cannot be reached at the address fritz.box nor at 192.168.178.1. Possible Cause The IP address set on the connected computer is inapplica- ble. Remedy Set the network adapter used to DHCP so that the IP ad- dress can be obtained via the DHCP server of the FRITZ!Box.
- Page 95 Disabling Online Operation Disabling Online Operation The user interface does not appear in the window of your web browser. Possible Cause The web browser is set for offline operation. Remedy Configure the web browser for online operation. Using the example of Internet Explorer 6: Open the “File”...
- Page 96 Checking the CGI Settings Under “Exceptions” enter: “fritz.box; 192.168.178.1; 169.254.1.1” and click “OK”. Checking the CGI Settings The user interface does not appear in the window of your web browser. Possible Cause The execution of CGI scripts is disabled in the web browser. Remedy Configure the web browser so that the execution of scripts is allowed in the user interface.
- Page 97 Checking the Security Software Checking the Security Software The user interface cannot be displayed in the web browser. Possible Cause Security software is blocking access to the user interface. Remedy Security software like firewalls can prevent access to the user interface of the FRITZ!Box. Configure exceptions for the FRITZ!Box in all of the enabled security software.
-
Page 98: The Wlan Adapter Cannot Find Fritz!Box
The WLAN Adapter Cannot Find FRITZ!Box Start your Internet browser and enter FRITZ!Box's fixed IP address: 169.254.1.1 The FRITZ!Box user interface opens. Once you have reached the FRITZ!Box user interface again, you should check the FRITZ!Box settings and correct them if necessary. - Page 99 Enabling WLAN Enabling WLAN The wireless network of the FRITZ!Box is not found by the WLAN adapter. Possible Cause WLAN is not enabled in the FRITZ!Box. If the “WLAN” LED on the FRITZ!Box is not lit up or is flashing, this means that WLAN is not enabled.
-
Page 100: Wlan Connection Is Not Established
WLAN Connection Is Not Established Click the “Apply” button. Remove the network cable and try again to establish a connection via WLAN. 11.3 WLAN Connection Is Not Established Comparing the Security Settings for WLAN Make sure that the WLAN security settings registered in the FRITZ!Box agree with the security settings of the WLAN adapter. - Page 101 Testing the WLAN Connection Without Security Settings Testing the WLAN Connection Without Security Settings Disable the WLAN security settings to test whether a WLAN connection between the FRITZ!Box and the WLAN adapter is possible at all. Connect the FRITZ!Box to a computer using a network cable.
- Page 102 Installing the Patch for WPA2 with Microsoft WLAN Service Installing the Patch for WPA2 with Microsoft WLAN Service The WLAN connection to FRITZ!Box cannot be established using the Microsoft WLAN Service (WZC = Windows Zero Configuration) in Windows XP with Service Pack 2. Possible Cause The required Microsoft patch for WPA2 (IEEE 802.11i) may not be not installed.
-
Page 103: Ip Settings
IP Settings Select a different radio channel from the “Select radio channel” list. Click the “Apply” button. Remove the network cable and check whether interfer- ence continues to occur. 11.4 IP Settings The FRITZ!Box is equipped with its own DHCP server. This means that the connected computers obtain their IP ad- dresses from the FRITZ!Box. - Page 104 Obtaining an IP Address Automatically in Windows XP On the “General” tab, enable the options “Obtain an IP address automatically” and “Obtain DNS server ad- dress automatically”. Properties of the Internet protocol (TCP/IP) Confirm your selection by clicking “OK”. If necessary, repeat steps 5 through 7 for the “Internet Protocol Version 6 (TCP/IPv6)”...
- Page 105 Obtaining an IP Address Automatically in Windows 2000 Properties of the Internet protocol (TCP/IP) Confirm your selection by clicking “OK”. The computer now receives an IP address from the FRITZ!Box. Obtaining an IP Address Automatically in Windows 2000 Select “Start / Settings / Control Panel / Network and Dial-up Connections”.
- Page 106 Obtaining an IP Address Automatically in Mac OS X Properties of the LAN connection of a network adapter Enable the options “Obtain an IP address automatical- ly” and “Obtain DNS server address automatically”. Properties of the Internet protocol (TCP/IP) Confirm your selection by clicking “OK”. The computer now receives an IP address from the FRITZ!Box.
- Page 107 Obtaining an IP Address Automatically in Linux The computer now receives an IP address from the FRITZ!Box. Obtaining an IP Address Automatically in Linux For comprehensive information and tips on the topic of net- work configuration in Linux, see, for example: http://www.tldp.org/HOWTO/NET3-4-HOWTO-5.html FRITZ!Box Fon WLAN 7270...
-
Page 108: Uninstallation
Control Panel of the Windows operating system. Removing FRITZ!DSL in Windows Vista Open “Start / Settings / Control Panel / Programs and Functions”. From the list displayed, select the entry “AVM FRITZ!DSL”. Click the “Uninstall/Change” button. Confirm the next query by clicking “Continue”. -
Page 109: Removing The Printer Port
Open “start / Control Panel / Add or Remove Pro- grams”. Make sure that the “Change or Remove Pro- grams” button is selected in the column at left. Select the “AVM FRITZ!DSL” entry from the list of “Cur- rently installed programs”. Click the “Change/Remove” button. -
Page 110: Removing The Program Group
Open “start / Control Panel / Add or Remove Pro- grams”. Make sure that the “Change or Remove Pro- grams” button is selected in the column at left. Select the “AVM FRITZ!Box Printer Port” entry from the list of “Currently installed programs”. Click the “Change/Remove” button. - Page 111 Open “start / Control Panel / Add or Remove Pro- grams”. Make sure that the “Change or Remove Pro- grams” button is selected in the column at left. Select the “AVM FRITZ!Box Documentation” entry from the list of “Currently installed programs”. Click the “Change/Remove” button.
-
Page 112: Directions For Operation
“F1” key Buttons “Help” Settings pages “Advanced” Menus “Edit/Paste” Commands “Copy” File paths “C:/My Documents” File names “Documentation” Underlined text Text input www.avm.de/en fritz.box Pointed brackets Joker <MSN> Bold Emphasis Do not click the but- ton... FRITZ!Box Fon WLAN 7270... -
Page 113: The Telephone Keypad
The Telephone Keypad 13.2 The Telephone Keypad 0 through 9 Numeric keys Asterisk key Hold or Flash key Pound key 13.3 Instructions for Operation at the Telephone Dial a number. Pick up the handset. Hang up the handset. Talk Three-party conference call Wait for the acknowledgement tone. -
Page 114: Leds
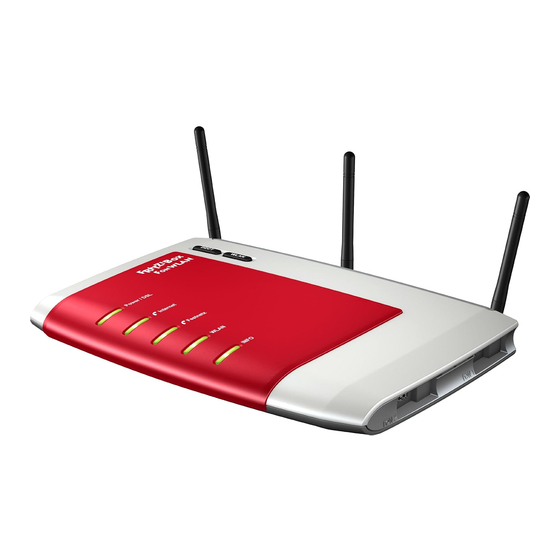
LEDs 13.4 LEDs Five LEDs are built into the top of the FRITZ!Box Fon WLAN 7270, which flash or light up to display various connection statuses. Status Meaning Power/DSL FRITZ!Box on standby the device has electrical power and the DSL line is ready for operation flashes the device has electrical power... -
Page 115: Handset And Ring Patterns
Handset and Ring Patterns Here you can define what additional information should be displayed on the “INFO” LED. For details, see the ”Settings / Advanced Settings / System / “INFO” Display” section of the FRITZ!Box Fon WLAN 7270 user interface. 13.5 Handset and Ring Patterns The following diagram illustrates the duration and intervals of the various handset and ring signals on the connected... -
Page 116: Product Details And Useful Information
DSL/Telephone Cable The DSL/telephone cable is a special combined cable de- veloped by AVM to connect the FRITZ!Box Fon WLAN 7270 to the DSL splitter and the ISDN NT or analog telephone line. If you need a longer cable, you can extend one or multiple ends of the combined cable using RJ45 double couplings. -
Page 117: Wlan Button
RJ5. You can use either straight cable or cross- link cable. All components are available from specialized vendors. AVM recommends using a network cable no more than 100 meters long. WLAN Button The FRITZ!Box is equipped with a WLAN button on its top panel. -
Page 118: Technical Specifications
Technical Specifications Technical Specifications Ports and Interfaces DSL/Telephone port – DSL modem in accordance with the standard ITU G.992.1, ITU G.992.3 (ADSL2), ITU G.992.5 (ADSL2+), ITU G.994.1 (G.hs) – Telephone port for connecting to the analog net- work or ISDN Two a/b ports for connecting two extensions via RJ11 sockets One ISDN S... - Page 119 User Interface and Display User Interface and Display Configuration and status messages via a web browser on a connected computer Five LEDs indicate the condition of the device Physical Specifications Dimensions (WxDxH): approx. 210 x 155 x 25 mm Supply voltage: 230 V / 50 Hz Maximum power consumption: 16 W Average power consumption: 6 W Firmware can be updated...
-
Page 120: Declaration Of Ce Conformity
Declaration of CE Conformity Declaration of CE Conformity The manufac- AVM GmbH turer Alt-Moabit 95 D-10559 Berlin herewith declares that the product FRITZ!Box Fon WLAN 7270 Type: ADSL-WLAN Router complies with the following directives: 1999/5/EC R&TTE Directive: Radio Equipment and Telecommunica-... -
Page 121: Disposal
Disposal Disposal The symbols shown below mean that old appliances and electronic parts must be disposed of separate from house- hold waste. Symbols for labeling electronic devices In accordance with European regulations and the Electrical and Electronic Equipment Act (ElektroG), the FRITZ!Box Fon WLAN 7270, as well as all devices and electronic compo- nents contained in the FRITZ!Box Fon WLAN 7270 package may not be disposed with household waste. -
Page 122: More About Wlan
More about WLAN More about WLAN AVM and WLAN WLAN (Wireless Local Area Network) is a radio technology that allows Ethernet networks and access to the Internet to be provided without cable connections. This allows multi- ple users to share one wireless Internet connection. - Page 123 Standards for the Throughput Rate The range within a WLAN is highly dependent on the follow- Range ing factors: the WLAN adapter used the structural conditions the amount of radio traffic on the same frequency band. Other WLAN networks, microwave ovens or Bluetooth transmitters (mobile telephones) may be active.
- Page 124 The Standard for Security Combining this standard with the 802.11g ensures compati- bility with older WLAN adapters. The Standard for Security The WPA2 security mechanism is defined in the IEEE 802.11i IEEE 802.11i standard. WPA2 is an extension of the familiar security mechanism WPA (Wi-Fi Protected Access).
-
Page 125: Security
Security Security Security is of utmost importance within radio networks. Radio signals can also be received outside of office or resi- dential spaces and abused for criminal purposes. Therefore it is important that no unauthorized users can register in a WLAN to use its Internet access or shared net- work resources. - Page 126 Encryption Encryption The most important security setting is encryption. FRITZ!Box supports the security mechanisms WEP (Wired Equivalent Privacy), WPA (Wi-Fi Protected Access) and WPA2 as follows: As part of the WEP mechanism a static key is deter- mined to serve for the encryption of the user data. Enter the key in the WLAN security settings of the FRITZ!Box.
- Page 127 Encryption If your WLAN adapter supports an encryption method that Recommendation is more secure than the one preconfigured in the FRITZ!Box, you should select the more secure encryption method in your FRITZ!Box. To configure the best security settings possible with FRITZ!Box and your WLAN adapter, please note the follow- ing recommendations: If your WLAN adapter supports WPA2 in accordance...
-
Page 128: Frequency Ranges
Frequency Ranges Frequency Ranges WLAN uses the frequency range around 2.4 GHz in the ISM band or, alternatively, the frequency range at 5 GHz. You can use both frequency ranges with the FRITZ!Box. A WLAN in the 2.4-GHz frequency band works in the same 2.4-GHz Frequency Band band as Bluetooth, microwave devices and many cordless... - Page 129 Frequency Ranges In the 5-GHz frequency band, your FRITZ!Box occasionally may change channels unexpectedly due to DFS (Dynamic Frequency Selection) if a “higher privileged user” simulta- neously claims the selected channel. This can happen es- pecially when military or civilian radar is used in the imme- diate vicinity.
- Page 130 Frequency Ranges Allocation of the WLAN channels in the 2.4-GHz range: Channel Frequency (MHz) Channel Frequency (MHz) 2412 2447 2417 2452 2422 2457 2427 2462 2432 2467 2437 2472 2442 Allocation of the WLAN channels in the 5-GHz range: Channel Frequency (GHz) Channel Frequency (GHz) 5.180...
-
Page 131: More About Network Settings
More about Network Settings More about Network Settings FRITZ!Box and Networks The FRITZ!Box is delivered with preconfigured network settings. Accord- ing to these settings, all computers connected with the FRITZ!Box are lo- cated in the same subnetwork. You can change any of these preconfigured settings, but should only do so if you are well versed in networking tech- nology. -
Page 132: Ip Address
IP Address IP Address The FRITZ!Box is delivered with an IP address preset. Factory Settings All computers are located in the enabled same IP network IP address 192.168.178.1 Subnet mask 255.255.255.0 DHCP server enabled The IP address and the corresponding subnet mask auto- matically yield the following values: Network address of the subnet 192.168.178.0 Entire IP address pool for the... - Page 133 Reserved IP Addresses The subnet mask must correspond with that of the connected subnet. When the DHCP server of the FRITZ!Box is enabled, the addresses 20 through 200 in the fourth group of nu- merals of the IP address are reserved for the DHCP server.
-
Page 134: Dhcp Server
DHCP Server DHCP Server The FRITZ!Box is equipped with its own DHCP server. The DHCP server is enabled by default in the factory settings. Every time the operating system on a computer connected with FRITZ!Box is started, it is assigned an IP address by the DHCP server. - Page 135 Fixed IP Addresses when the DHCP Server Is Enabled The computers can receive their IP addresses from the DH- CP server only if the setting “Obtain an IP address auto- matically” is enabled in the their IP settings. For more infor- mation, see the section “IP Settings”...
-
Page 136: Subnetwork
Changing the DHCP Server Settings In the case of the preset IP address of the FRITZ!Box, the fol- lowing IP addresses are available for assignment to the computers: 192.168.178.2 - 192.168.178.253 Each IP address can be assigned only once. Changing the DHCP Server Settings Proceed as follows to open the DHCP server settings: Start a web browser on your computer. - Page 137 Disabling “All computers are located in the same IP network” The DHCP server of the FRITZ!Box assigns all of the comput- ers connected with the FRITZ!Box an IP address from the ad- dress pool of the DHCP server. Address pool of the DHCP server 192.168.178.20 - 200 This means that all of the computers connected with the FRITZ!Box are located in the same subnet.
- Page 138 Disabling “All computers are located in the same IP network” Interface Network Address of the Subnet LAN 1 192.168.178.0 LAN 2 like LAN 1 LAN 3 like LAN 1 LAN 4 like LAN 1 WLAN 192.168.182.0 Proceed as follows to disable the setting “All computers are Deactivating located in the same IP network”: Open your a web browser on your computer and enter...
-
Page 139: More About Internet Telephony
More about Internet Telephony More about Internet Telephony Voice over IP (VoIP) Internet telephony has already been in use for years, but to- day it allows even private customers the convenience famil- iar from conventional telephony, usually at significantly lower prices. Internet telephony has also made it considerably more con- venient to use applications like conference calls and an- swering machines in networks. -
Page 140: Bandwidth Management
Bandwidth Management Bandwidth Management The FRITZ!Box is equipped with integrated bandwidth man- agement. This function ensures that the speech quality dur- ing telephone calls over the Internet is not reduced by surf- ing activity. To do this, the FRITZ!Box adjusts all uploads and downloads to the currently available bandwidth. -
Page 141: Customer Service Guide
Customer Service Guide Customer Service Guide Help on All Important Service Topics AVM is there to help should any questions or problems arise. Here you will find the important information you need, in the form of manuals, up- dates and support. -
Page 142: Information In The Internet
The latest software is also available for download at the fol- lowing address: www.avm.de/en/download Experienced users can also download updates from the AVM FTP server. Click the “FTP Server” link in the download area, or enter the following address: ftp.avm.de FRITZ!Box Fon WLAN 7270... -
Page 143: Support From The Avm Service Team
Click the “Mail Form” link to open the e-mail support form. Fill out the form and send it to AVM by clicking the “Send” button. Our Support team will respond by e-mail as quickly as pos- sible. - Page 144 Support by Fax Support by Fax If necessary, you can reach AVM Support at the fax number: +49 (0)30 / 39 97 62 66 The following information should be included in your fax to the Support team: Your name and address.
-
Page 145: Glossary
Glossary Glossary ADSL abbreviation for Asymmetric Digital Subscriber Line Designates a fast kind of file transfer that works with stan- dard copper cables and transports signals in both direc- tions at different speeds (upstream at 640 Kbit/s and downstream at up to 9 Mbit/s). ADSL2 abbreviation for Asymmetric Digital Subscriber Line 2 ADSL 2 (G.992.3) is a further development of the ADSL norm... - Page 146 Glossary ADSL-Controller An ADSL-Controller is an electronic hardware assambly that allows a computer to access an ADSL line. ADSL-Controllers are stationary equipment, included on internal ADSL cards (for the PCI bus) or in external ADSL modems (with USB or Ethernet ports). Alias Alias means different, else and also known as.
- Page 147 Glossary abbreviation for Domain Name System Domain Name Service takes care of determining the IP ad- dress for a given domain name. Domain Name Service is running on every computer. It accepts the domain name en- tered by a user and inquires about the corresponding IP ad- dress at a DNS server known to the service.
- Page 148 Glossary It works by transmitting the current IP address to a special DDNS server each time the IP address changes. Except for the few seconds between the cancellation of the old IP ad- dress and the notification of the new IP address, the com- puter can always be reached at the selected domain name.
- Page 149 Glossary Especially effective firewalls go even further, analyzing and evaluating the contents of the packets and filtering them according to prescribed rules. Such techniques are includ- ed in a Stateful Packet Inspection Firewall, for instance. Firmware The firmware is saved in programmable components within a device.
- Page 150 Glossary If all packets that cannot be delivered in a local network al- ways are to be transmitted to their given recipients via the same gateway, for this purpose the address of the gateway must be saved as the default gateway in the network con- figuration of the computer.
- Page 151 Glossary IP addresses can be public or private, and also fixed or as- signed dynamically. See the corresponding entries in the glossary for more information. IP Addressing Addressing is one of the main functions of the Internet Pro- tocol (IP). Internet addresses can be written in decimal, oc- tal or hexadecimal notation.
- Page 152 Glossary IP Network A network in which data exchange takes place on the basis of the Internet Protocol is called an IP network. Port So that a single network connection on a connection can be used by multiple applications to exchange data with re- mote sites at the same time, a computer administers what are known as ports for the IP-based protocols TCP and UDP.
- Page 153 Glossary service for access to incoming data packets and thus keep it open permanently. The private IP address of the given computer must be saved as the destination address for all of the packets arriving at the port. Typical server applications which require port forwarding are FTP and Web servers.
- Page 154 Glossary Subnet Mask The subnet mask indicates which part of an IP address is the network address and which the address of the comput- er. The network address defines what is called the subnet. Example 1 IP address: 192.168.178.247 Subnet mask: 255.255.255.0 The assignment of the first three groups of numerals in the sub- net mask indicates that the first three groups of numerals in the...
- Page 155 Glossary Example 2 Network address of the subnet: 192.168.0.0 Address of the computer in the 192,168,178,247 subnet: IP address pool in the subnet: 192.168.0.0 - 192,168,255,255 The IP addresses 192.168.0.0 and 192.168.255.255 are re- served. This means that the ad- dresses from 192.168.0.1 to 192.168.255.254 are available for assignment to the comput-...
- Page 156 Glossary vider. The process of automatic configuration via TR-069 is initiated by the ADSL terminal device. First the user enters a security key and then the settings are retrieved from the Au- to Configuration Server and implemented in the ADSL ter- minal device without any further interaction with the user.
- Page 157 Glossary Update A more recent version of software or firmware is called an update. Updates are often free of charge, resolve minor programming errors, and sometimes also offer new func- tions. Upload This term designates the procedure of transmitting files from one’s own computer to another computer in the Inter- net.
- Page 158 Glossary ready existing analog telephones to be used even when the computer is switched off. Various Internet Service Providers and telephony carriers provide SIP fixed-line gateways for this purpose. Such a gateway is used to produce voice con- nections between the Internet and conventional telephone networks.
- Page 159 Glossary The application possibilities for wireless network communi- cation also overlap with Bluetooth technology. For mobile devices with very low power consumption Bluetooth is the more useful solution, however, as Bluetooth uses consider- ably less power than wireless LAN. What is more, Bluetooth technology is more flexible and thus offers a greater band- width of potential applications.
-
Page 160: Index
Index Index network hub/switch ... . 17 network port ....16 alarm ..... . 37 telephone . - Page 161 Index factory settings ....60 LEDs......114 firmware update .
- Page 162 Index Samba ......45 security......7 serial number.
Need help?
Do you have a question about the Fritz!Box 7270 and is the answer not in the manual?
Questions and answers