
Subscribe to Our Youtube Channel
Related Manuals for AVM FRITZ!Box Fon 5124


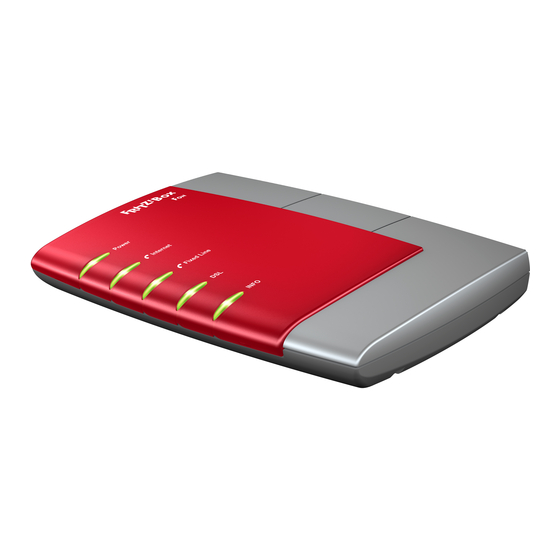
Summary of Contents for AVM FRITZ!Box Fon 5124
- Page 1 Installation, Installation, Configuration Configuration and Operation of and Operation of FRITZ!Box fon 5124 FRITZ!Box fon 5124...
- Page 2 AVM will not be liable for damages arising directly or indirectly from the use of the manual or the software, nor for incidental or consequential damages, except in case of intent or gross negligence. AVM...
-
Page 3: Table Of Contents
Contents This Is FRITZ!Box Fon 5124 Package Contents......... . 10 Operation Requirements . - Page 4 Updates ..........101 11.4 Support from the AVM Service Team......102 Product Details 12.1...
-
Page 5: Symbols And Highlighting
Information to be typed a:\setup in using the keyboard Gray italics Tips, instructions and ... for more informa- warnings tion, see... The Telephone Keypad Numeric keys Asterisk key Hold or Flash key Pound sign key FRITZ!Box Fon 5124 – Symbols and Highlighting... -
Page 6: Instructions For Operation At The Telephone
(Ext.) to which your calls are to be diverted. In the place of the abbreviation “XNo.”, enter the complete number of the external line. XNo. In the place of the abbreviation “XNo.”, enter the complete number of the external line. FRITZ!Box Fon 5124 – Symbols and Highlighting... -
Page 7: Safety Instructions
Disposal Instructions After use, please subject this product to orderly disposal as electronic scrap in accordance with the current EU disposal regulations. FRITZ!Box Fon 5124 – Safety Instructions... -
Page 8: This Is Fritz!Box Fon 5124
Possibilities for connecting FRITZ!Box Fon PBX for Internet and Fixed-Line Telephony FRITZ!Box Fon 5124 is a PBX for the connection of analog terminal devices. You can connect two analog telephones to FRITZ!Box Fon and make phone calls via the Internet, ISDN, or the analog fixed-line network. - Page 9 FRITZ!Box has a printer server. a USB hub You can connect either two USB mass storage devices and one USB printer, or three USB mass storage devices to the USB hub. FRITZ!Box Fon 5124 – 1 This Is FRITZ!Box Fon 5124...
-
Page 10: Package Contents
B, ITU G.992.5 Annex B If you would like to connect the FRITZ!Box Fon via the LAN port of the computer, you need a computer with a network adapter (standard Ethernet 10/100 Base-T). FRITZ!Box Fon 5124 – 1 This Is FRITZ!Box Fon 5124... - Page 11 – 300 MHz Pentium II processor with Windows XP, Windows 2000, Windows Me or Windows 98 and CD drive – 32 MB RAM – 20 MB free memory on the hard drive FRITZ!Box Fon 5124 – 1 This Is FRITZ!Box Fon 5124...
-
Page 12: Fritz!Box Fon 5124: Connecting
Follow the instructions in the Installation Help to prepare the FRITZ!Box Fon for operation. We recommend using the Installation Help on the FRITZ!Box Fon CD when launching operation of the FRITZ!Box Fon for the first time. FRITZ!Box Fon 5124 – 2 FRITZ!Box Fon 5124: Connecting... - Page 13 If you want to make telephone calls via the Internet and/or the fixed-line network using FRITZ!Box Fon: Connect analog terminal devices to the FRITZ!Box Fon. See the section “Connecting Telephone, Fax, Answering Machine” from page 22. FRITZ!Box Fon 5124 – 2 FRITZ!Box Fon 5124: Connecting...
-
Page 14: Mounting
2.2 Connecting to the Power Supply Connecting to the Power Supply Connect the FRITZ!Box Fon to the power supply as described below: Remove the power supply unit from the FRITZ!Box Fon package. FRITZ!Box Fon 5124 – 2 FRITZ!Box Fon 5124: Connecting... -
Page 15: Connecting To The Dsl Line
Connecting to the DSL splitter Cable The gray and black Y-shaped cable is for connecting to the DSL splitter. This cable is a combination of a DSL cable and a telephone cable. FRITZ!Box Fon 5124 – 2 FRITZ!Box Fon 5124: Connecting... -
Page 16: Connecting The Computer(S)
The way a computer is connected to the FRITZ!Box Fon is the same regardless of the operating system on the computer. All of the computers connected with the FRITZ!Box Fon constitute a network. FRITZ!Box Fon 5124 – 2 FRITZ!Box Fon 5124: Connecting... -
Page 17: Connecting To The Lan Port
Remove the network cable from the package. Switch on your computer. If you work with a Linux operating system, use YaST to configure your network card with the setting “DHCP”, if this setting is not already configured. FRITZ!Box Fon 5124 – 2 FRITZ!Box Fon 5124: Connecting... - Page 18 If you need to connect more than four computers using the LAN ports of FRITZ!Box Fon, you can connect a network hub or network switch to expand the number of ports. FRITZ!Box Fon 5124 – 2 FRITZ!Box Fon 5124: Connecting...
- Page 19 Connect the other end of the LAN cable to a socket on the FRITZ!Box Fon labeled “LAN 1”, “LAN 2”, “LAN 3” or “LAN 4”. Please see the instructions in the section “Opening the User Interface” on page 23. FRITZ!Box Fon 5124 – 2 FRITZ!Box Fon 5124: Connecting...
-
Page 20: Connecting To The Isdn Line
“DSL/TEL”, located at the far left of the back panel of the FRITZ!Box Fon. Insert the black end of the Y-branch of the cable into the socket of your ISDN NT. FRITZ!Box Fon 5124 – 2 FRITZ!Box Fon 5124: Connecting... -
Page 21: Connecting To The Analog Telephone Line
Connect the longer, gray end of the cable to the socket labeled “DSL/TEL”, located at the far left of the back panel of the FRITZ!Box Fon. Then insert the black plug into the appropriate jack of your DSL splitter. FRITZ!Box Fon 5124 – 2 FRITZ!Box Fon 5124: Connecting... -
Page 22: Connecting Telephone, Fax, Answering Machine
“FON 1” or “FON 2” socket on FRITZ!Box Fon. Connecting a Second Analog Device You can connect a second analog device at any time by the same method. FRITZ!Box Fon 5124 – 2 FRITZ!Box Fon 5124: Connecting... -
Page 23: Opening The User Interface
If the user interface does not open, see the instructions in the section “Errors Opening the User Interface” from page 53. See the section “Configuring Internet Connections” from page 24 for instructions on configuring Internet connections for FRITZ!Box Fon. FRITZ!Box Fon 5124 – 3 Opening the User Interface... -
Page 24: Configuring Internet Connections
Internet connection at the same time. It is not necessary to install any additional Internet access software on the oth- er connected computers. In this mode FRITZ!Box Fon works like a DSL router and uses the Internet Service Provider's account information. FRITZ!Box Fon 5124 – 4 Configuring Internet Connections... - Page 25 FRITZ!Box Fon and start surfing the Net. Make sure FRITZ!Box Fon automatically assigns IP addresses to all computers that are supposed to use this Internet connection. For instructions, see the section “IP Settings” from page 57. FRITZ!Box Fon 5124 – 4 Configuring Internet Connections...
-
Page 26: Fritz!Box Fon As A Dsl Modem
(router)”. Click the “Apply” button to transmit the setting to the FRITZ!Box Fon. Now the FRITZ!Box Fon can be used as a DSL modem by all of the computers connected to it. FRITZ!Box Fon 5124 – 4 Configuring Internet Connections... - Page 27 Use the Internet access software to establish a connection to your Internet Service Provider. As soon as the connection is established, you can start an Internet browser on your com- puter and surf the Internet. FRITZ!Box Fon 5124 – 4 Configuring Internet Connections...
-
Page 28: Usb Devices
USB port of the USB host controller. The end of the cable with the square plug goes into the USB port of your USB device. Connecting a USB cable to the USB host controller FRITZ!Box Fon 5124 – 5 USB Devices... -
Page 29: Usb Mass Storage Devices
“USB Devices / Mass Storage Device” menu on the user interface. The data saved on the USB mass storage devices are access- ed by means of FTP (File Transfer Protocol): FRITZ!Box Fon 5124 – 5 USB Devices... -
Page 30: Usb Printers
For multi-function devices (printers with additional functions like fax or scanning), only the printing func- tion is supported. If your printer is equipped with a status monitor, you may not be able to use this. FRITZ!Box Fon 5124 – 5 USB Devices... - Page 31 FRITZ!Box Fon is started. Click the “View CD Contents” button. Click the “Start Menu Entry” button. The printer port designated “AVM: (FRITZ!Box USB Print- er Port)” will be configured. Now you can install the printer drivers of the printer connect- ed to FRITZ!Box Fon for this printer port.
- Page 32 Click “Next”. In the “Select a Printer Port” window, select the option “Use the following port” and select “AVM: (FRITZ!Box USB Printer Port)” from the list field. Click “Next”. Select the manufacturer for the USB printer connected to the FRITZ!Box Fon from the “Manufacturers”...
- Page 33 “Have Disk...”. Click “Next”. From the list of “Available ports”, select the entry “AVM: (FRITZ!Box USB Printer Port)” and click “Next”. Continue by following the instructions on the screen and conclude the installation of the printer driver with ”Finish“.
- Page 34 FRITZ!Box Fon and use it as a network printer. The printer is then available to all computers connected with the FRITZ!Box Fon. Installing a Printer Under “Go / Utilities”, open the “Printer Setup Utility”. Click “Add”. Select “IP printer”. FRITZ!Box Fon 5124 – 5 USB Devices...
-
Page 35: Usb Hub
If more than one USB device without its own power supply is connected to the FRITZ!Box Fon, please note that, in accor- dance with the USB specification, the total current consump- tion may not exceed a value of 500 mA. FRITZ!Box Fon 5124 – 5 USB Devices... -
Page 36: Configuring Fritz!Box Fon For Telephone Connections
Enter the account information you received from your Internet telephony provider in the appropriate fields. Click the “Apply” button. The new number is added to the list of Internet numbers. FRITZ!Box Fon 5124 – 6 Configuring FRITZ!Box Fon for Telephone Connections... -
Page 37: Entering Numbers For Calls Over Fixed Lines
Internet. To do this, perform the following steps: Start a web browser. Enter “fritz.box” in the address field. Click the “Extensions” command in the “Telephony” menu. FRITZ!Box Fon 5124 – 6 Configuring FRITZ!Box Fon for Telephone Connections... -
Page 38: Dialing Rules For Internet And Fixed-Line Telephony
Click the “New Dialing Rule” button to define as many dialing rules as desired. Click the “Apply” button. FRITZ!Box Fon 5124 – 6 Configuring FRITZ!Box Fon for Telephone Connections... -
Page 39: Selecting The Type Of Connection Manually
For packet-oriented transmission in the Internet, the loss of packets cannot be ruled out completely. Under unfavorable conditions this can lead to speech quality in Internet tele- phony that is inferior to that in fixed-line telephony. FRITZ!Box Fon 5124 – 6 Configuring FRITZ!Box Fon for Telephone Connections... - Page 40 Internet data connections, unwel- come interference is largely avoided. However, this is also true for Internet telephony: once the conversation capacity has been reached, the remote site will receive a busy signal. FRITZ!Box Fon 5124 – 6 Configuring FRITZ!Box Fon for Telephone Connections...
-
Page 41: Network Settings
The address- es of the recipient and the sender in the data packets are given as IP addresses. FRITZ!Box Fon 5124 – 7 Network Settings... - Page 42 IP networks. Since many local IP networks are not connected to the Inter- net except via single computers or routers (gateway), certain address ranges are excluded from the publicly available IP FRITZ!Box Fon 5124 – 7 Network Settings...
- Page 43 IP address entries or unintentional double assignments. The DHCP service is responsible for as- signing unique dynamic IP addresses. FRITZ!Box Fon 5124 – 7 Network Settings...
- Page 44 255.255.0.0 The assignment of the first two groups of numerals in the subnet mask indicates that the first two groups of numerals in the IP address define the network. The following addresses result: FRITZ!Box Fon 5124 – 7 Network Settings...
-
Page 45: Example 2
DHCP server selects from a prescribed pool of IP addresses. The central administration of the TCP/IP operation parame- ters makes it possible to avoid address conflicts due to IP addresses accidentally assigned more than once. FRITZ!Box Fon 5124 – 7 Network Settings... -
Page 46: Ip Address
You want to connect the FRITZ!Box Fon to the subnet in order to make the FRITZ!Box Fon features available to all of the computers in the subnet. FRITZ!Box Fon 5124 – 7 Network Settings... -
Page 47: Reserved Ip Addresses
“Opening the User Interface” on page 23. Click “Expert Mode” in the “System” menu, enable the setting “Show expert settings” and confirm this setting by clicking “Apply”. Open the “System / Network Settings” menu. Click the “IP Addresses” button. FRITZ!Box Fon 5124 – 7 Network Settings... -
Page 48: Dhcp Server
The computers can receive their IP addresses from the DHCP server only if the setting “Obtain an IP address automatical- ly” is enabled in the their IP settings. For more information, see the section “IP Settings” from page 57. FRITZ!Box Fon 5124 – 7 Network Settings... -
Page 49: Disabling The Dhcp Server
In the case of the preset IP address of the FRITZ!Box Fon, the following IP addresses are available for assignment to the computers: 192.168.178.2 - 192.168.178.253 Each IP address can be assigned only once. FRITZ!Box Fon 5124 – 7 Network Settings... -
Page 50: Subnetwork
DHCP server. Address pool of the DHCP server 192.168.178.20 - 200 This means that all of the computers connected with the FRITZ!Box Fon are located in the same subnet. FRITZ!Box Fon 5124 – 7 Network Settings... - Page 51 Computers connected with the FRITZ!Box Fon via different in- terfaces are located in different subnets. Interface Network address of the subnet LAN 1 192.168. LAN 2 like LAN 1 LAN 3 like LAN 1 LAN 4 like LAN 1 FRITZ!Box Fon 5124 – 7 Network Settings...
- Page 52 Open the “System / Network Settings” menu. Click the “IP Addresses” button. The “IP Settings” page is opened. Here you can change the setting “All computers are located in the same IP network”. FRITZ!Box Fon 5124 – 7 Network Settings...
-
Page 53: Troubleshooting
In the Internet browser, enter the following IP address in place of “fritz.box”: 192.168.178.1 Obtaining an IP Address Automatically The IP addresses of the connected computers must be assigned automatically (see “IP Settings” from page 57). FRITZ!Box Fon 5124 – 8 Troubleshooting... - Page 54 Configure Internet Explorer 6 for Online Operation Open the “File” menu. If a checkmark is displayed in front of “Work Offline”, click this line. The checkmark will be removed and Internet Explorer will switch to online operation. FRITZ!Box Fon 5124 – 8 Troubleshooting...
- Page 55 Checking the Protection Software Protection software like firewalls and security software can block access to the FRITZ!Box Fon user interface. Set exceptions for the FRITZ!Box Fon in all active protection software. FRITZ!Box Fon 5124 – 8 Troubleshooting...
- Page 56 Once you have reached the FRITZ!Box Fon user interface again, you should check the FRITZ!Box Fon settings and correct them if necessary. Enter the settings you noted in the computer’s IP settings di- alog. FRITZ!Box Fon 5124 – 8 Troubleshooting...
-
Page 57: Ip Settings
Click the “Properties” button. Select “Internet Protocol (TCP/IP)” in the list of items used in this network connection and click “Properties”. Enable the options “Obtain an IP address automatical- ly” and “Obtain DNS server address automatically”. FRITZ!Box Fon 5124 – 8 Troubleshooting... - Page 58 Select “Start / Settings / Control Panel”. Double-click the “Network” entry to open it. In the list, double-click to select the binding designated with an arrow, “TCP/IP -> <network adapter bound to FRITZ!Box Fon 5124>”. FRITZ!Box Fon 5124 – 8 Troubleshooting...
- Page 59 The “Obtain an IP address automatically” option On the “DNS Configuration” settings page, enable the “Disable DNS” option. The “Disable DNS” option Confirm your selection by clicking “OK”. The computer now receives an IP address from FRITZ!Box Fon. FRITZ!Box Fon 5124 – 8 Troubleshooting...
- Page 60 Click the “Properties” button. Double-click to select “Internet Protocol (TCP/IP)” in the list of network components. Properties of the LAN connection of a network adapter Enable options “Obtain address automatically” and “Obtain DNS server address automatically”. FRITZ!Box Fon 5124 – 8 Troubleshooting...
- Page 61 In the “Network” window, select the “Built-in Ethernet” entry from the “Show:” drop-down menu. Switch to the “TCP/IP” settings page and select the “Using DHCP:” option from the “Configure” drop-down menu. Click “Apply Now”. FRITZ!Box Fon 5124 – 8 Troubleshooting...
-
Page 62: Removing The Fritz!Box Fon
Open “start / Control Panel / Add or Remove Pro- grams”. Make sure that the “Change or Remove Pro- grams” button is selected in the column at left. Select the “AVM FRITZ!Box” entry from the list of “Cur- rently installed programs”. Click the “Change/Remove” button. - Page 63 Proceed as follows to remove the “FRITZ!Box” program group: Open “Start / Settings / Control Panel / Add/Remove Programs”. Select the “AVM FRITZ!Box” entry from the list of “Cur- rently Installed Programs”. Click the “Add/Remove...” button. Rebooting the computer concludes the uninstallation of the program group.
-
Page 64: Removing Fritz!Dsl
Open “start / Control Panel / Add or Remove Pro- grams”. Make sure that the “Change or Remove Pro- grams” button is selected in the column at left. Select the “AVM FRITZ!DSL” entry from the list of “Cur- rently installed programs”. Click the “Change/Remove” button. -
Page 65: Windows 2000
Open “Start / Settings / Control Panel / Add/Remove Programs”. Make sure that the “Change or Remove Pro- grams” button is selected in the column at left. Select the “AVM FRITZ!DSL” entry from the list of “Cur- rently installed programs”. Click the “Change/Remove” button. -
Page 66: Uninstallation Of The Printer Port
Uninstallation of the Printer Port 9.4 Uninstallation of the Printer Port If the AVM FRITZ!Box printer port is installed on a computer and you would like to remove it, perform an uninstallation using the Windows Control Panel. Removing the Printer Port in Windows XP Proceed as follows to remove the “AVM FRITZ!Box Printer... -
Page 67: Configuration And Operation By Telephone
Functions and features that have no effect on the connection are not marked. An overview of all of the icons used in this manual is pre- sented in the section “Symbols and Highlighting” from page 5 of this manual. FRITZ!Box Fon 5124 – 10 Configuration and Operation by Telephone... -
Page 68: Operating Fritz!Box Fon 5124 By Phone
Then enable Do Not Disturb. Do Not Disturb will be switched on daily at the time entered in the “Start” field and switched off again at the time defined in the “End” field. FRITZ!Box Fon 5124 – 10 Configuration and Operation by Telephone... - Page 69 Enter the value 0700 as the <Time>. r881s <Time> <Ext.> defines for the extension “Ext.” the time at which the telephone should ring r91ss saves the settings in the FRITZ!Box Fon FRITZ!Box Fon 5124 – 10 Configuration and Operation by Telephone...
- Page 70 Establishing a Connection Using a Selected Internet Number By placing an Internet Number ID before the number you can specify which of your Internet numbers should be used to conduct a telephone call. FRITZ!Box Fon 5124 – 10 Configuration and Operation by Telephone...
- Page 71 Your call is con- nected with whichever extension answers first. Pick up the handset. Instead of an extension number, dial “9”. All extensions that are not busy ring. FRITZ!Box Fon 5124 – 10 Configuration and Operation by Telephone...
- Page 72 In this case the phone rings as soon as you hang up. Pick up the handset again to return to Call the last call that was on hold. FRITZ!Box Fon 5124 – 10 Configuration and Operation by Telephone...
-
Page 73: Transferring Calls
The party on hold does not hear the second conversation. Once you have fin- ished the consultation, you can return to the original connec- tion. FRITZ!Box Fon 5124 – 10 Configuration and Operation by Telephone... - Page 74 In this case, your phone rings as soon as you hang up. Pick up the handset to return to Call 1 again. Hang up the handset to end the connection. FRITZ!Box Fon 5124 – 10 Configuration and Operation by Telephone...
-
Page 75: Configuring Fritz!Box Fon By Phone
Hang up the handset. Permanent saving cannot be reversed. However, you can re- set the PBX to its factory settings or program it with different settings. FRITZ!Box Fon 5124 – 10 Configuration and Operation by Telephone... - Page 76 Pick up the handset. r2 Ext. s0s Dial the sequence shown at left. r91ss Save your settings if desired by dialing the sequence shown at left. Hang up the handset. FRITZ!Box Fon 5124 – 10 Configuration and Operation by Telephone...
- Page 77 When the telephone rings and you pick up the hand- set, you will be connected with the telephone on which you enabled the room monitoring function. It is preferable to use the speaker phone function. FRITZ!Box Fon 5124 – 10 Configuration and Operation by Telephone...
- Page 78 Dial the number of the extension to listen in at an extension with room monitoring activated. After initiating a room monitoring phone call, the PBX cannot generate a new call until at least one minute has lapsed. FRITZ!Box Fon 5124 – 10 Configuration and Operation by Telephone...
-
Page 79: Advanced Features
FRITZ!Box Fon. You can select one of six different options. Different settings may be saved for each extension. Note that only numerical Internet numbers can be entered for diversion to an Internet number. FRITZ!Box Fon 5124 – 10 Configuration and Operation by Telephone... - Page 80 Pick up the handset. r44 Ext. s XNo./Ext. Dial the sequence shown at left. r91ss Save your settings if desired by dialing the sequence shown at left. Hang up the handset. FRITZ!Box Fon 5124 – 10 Configuration and Operation by Telephone...
- Page 81 Pick up the handset. r40 Ext. ss Dial the sequence shown at left. r91ss Save your settings if desired by dialing the sequence shown at left. Hang up the handset. FRITZ!Box Fon 5124 – 10 Configuration and Operation by Telephone...
- Page 82 The connection that was active last before your initiated the three-party conference is now active again. The other call is on hold. You can alternate between the two connections by dialing the same sequence again. FRITZ!Box Fon 5124 – 10 Configuration and Operation by Telephone...
- Page 83 For call forwarding you may specify whether you want incom- ing calls to be forwarded unconditionally, after the fifth ring, or when busy. Different settings may be configured separate- ly for each number. FRITZ!Box Fon 5124 – 10 Configuration and Operation by Telephone...
- Page 84 Hang up the handset. Call Forwarding Immediately for All MSNs Pick up the handset. s21s XNo. sr Dial the sequence shown at left. Wait for the acknowledgement tone. Hang up the handset. FRITZ!Box Fon 5124 – 10 Configuration and Operation by Telephone...
- Page 85 FRITZ!Box Fon, or for all num- bers. All settings can be disabled at any time. FRITZ!Box Fon 5124 – 10 Configuration and Operation by Telephone...
- Page 86 Hang up the handset. Call Forwarding When Busy for Any MSN Pick up the handset. s67ss MSN r Dial the sequence shown at left. Wait for the acknowledgement tone. Hang up the handset. FRITZ!Box Fon 5124 – 10 Configuration and Operation by Telephone...
- Page 87 Hang up the handset. Call Forwarding Delayed for All MSNs Pick up the handset. s61s XNo. sr Dial the sequence shown at left. Wait for the acknowledgement tone. Hang up the handset. FRITZ!Box Fon 5124 – 10 Configuration and Operation by Telephone...
- Page 88 The CLIR function is disabled in the factory settings. You have the option of enabling this function permanently and then dis- abling it again. CLIR can also be used for individual connec- tions. FRITZ!Box Fon 5124 – 10 Configuration and Operation by Telephone...
- Page 89 Dial the sequence shown at left. Type in the number of the extension in the “Ext.” field. r91ss Save your settings if desired by dialing the sequence shown at left. Hang up the handset. FRITZ!Box Fon 5124 – 10 Configuration and Operation by Telephone...
- Page 90 Transmission of the connected line’s number can be switched on and off for each extension individually. Trans- mission of the connected line's number is permanently en- abled in the PBX factory settings. FRITZ!Box Fon 5124 – 10 Configuration and Operation by Telephone...
- Page 91 Type in the number of the extension in the “Ext.” field. r91ss Save your settings if desired by dialing the sequence shown at left. Hang up the handset. FRITZ!Box Fon 5124 – 10 Configuration and Operation by Telephone...
-
Page 92: Call Waiting
In this case the phone rings as soon as you have hung up. Pick up the handset again to accept the waiting call. To reject a waiting call, dial the sequence shown at left. FRITZ!Box Fon 5124 – 10 Configuration and Operation by Telephone... - Page 93 Dial the sequence shown at left. The connection on hold and the active connection are connected with each other. The external parties continue the call while you clear the connection. Hang up the handset. FRITZ!Box Fon 5124 – 10 Configuration and Operation by Telephone...
- Page 94 Dial the sequence shown at left. The connection on hold and the active connection are connected with each other. The external parties continue the call while you clear the connection. Hang up the handset. FRITZ!Box Fon 5124 – 10 Configuration and Operation by Telephone...
- Page 95 PBX. This means that both B channels on your ISDN line remain busy with this connection as long as the parties are connected to each other. FRITZ!Box Fon 5124 – 10 Configuration and Operation by Telephone...
- Page 96 When you pick up your handset, the number of the desired party is automatically di- aled again. This feature is supported for both external and internal con- nections. FRITZ!Box Fon 5124 – 10 Configuration and Operation by Telephone...
- Page 97 Dial the sequence shown at left. Type in the parked-call ID as “PC”. The parked-call ID can be any number between 0 and 99. You will need to enter this ID again when you resume the call. FRITZ!Box Fon 5124 – 10 Configuration and Operation by Telephone...
- Page 98 ISDN services and features that may not be supported by your ISDN terminal device. Ask your ISDN provider for the specific keypad messages to access ISDN features. FRITZ!Box Fon 5124 – 10 Configuration and Operation by Telephone...
- Page 99 Entering Keypad Messages on an Extension without Automatic Outside Dialing Pick up the handset. 0sr Seq Dial the sequence shown at left. “Seq” stands for the keypad sequence you received from your ISDN provider. FRITZ!Box Fon 5124 – 10 Configuration and Operation by Telephone...
-
Page 100: Customer Service Guide
The Readme file is included on the FRITZ!Box Fon CD. Help for FRITZ!Box Fon In the FRITZ!Box Fon user interface you can open the detailed Online Help by clicking the “Help” buttons. 100 FRITZ!Box Fon 5124 – 11 Customer Service Guide... -
Page 101: Information In The Internet
Go to the following URL to download the current driver soft- ware: www.avm.de/en/download Experienced users can also download updates from the AVM FTP server. Click the “FTP Server” link in the download area, or enter the following address: www.avm.de/ftp FRITZ!Box Fon 5124 – 11 Customer Service Guide... -
Page 102: Support From The Avm Service Team
Then select the product and the topic for which you need support from the Support area. You will receive a selection of FAQs. If you need more Help, click the “Support” button 102 FRITZ!Box Fon 5124 – 11 Customer Service Guide... - Page 103 Support by Fax to open the e-mail support form. Fill out the form and send it to AVM support by clicking the “Send” button. Our Sup- port team will respond by mail as quickly as possible. Support by Fax If necessary, you can reach AVM Support at the fax number:...
-
Page 104: Product Details
Internet telephony subscribers is active, the call is free of charge (this function must be supported by your Internet telephony provider) 104 FRITZ!Box Fon 5124 – 12 Product Details... -
Page 105: Audible Signals
Handset and ring patterns on FRITZ!Box Fon 12.3 Cables and Sockets See the information in the following section on the individual cables and sockets on the FRITZ!Box Fon 5124. DSL/Telephone Cable The DSL/telephone cable is a special combined cable 4.25m... -
Page 106: Network Cable
1:1) CAT5 Ethernet cable. To extend the cable you will also need a standard CAT5 double coupling link to RJ45. All components are available from specialized vendors. AVM recommends using a network cable no more than 100 meters long. 106 FRITZ!Box Fon 5124 – 12 Product Details... -
Page 107: Technical Specifications Of Fritz!Box Fon
230 V / 50 Hz Maximum power consumption: 12 W Average power consumption: 9 W DSL transmission rate: max. 8 Mbit/s (downstream), 1 Mbit/s (upstream) firmware can be updated Conform to CE standards FRITZ!Box Fon 5124 – 12 Product Details 107... -
Page 108: Index
Index ADSL2+ declaration of conformity alarm defining connection type alternating between calls DHCP server analog terminal equipment dialing dialing internal calls with automatic outside dialing configured baby monitor without automatic outside dialing bandwidth management configured busy on busy displaying the incoming caller ID busy on busy. - Page 109 restriction and presentation of number dialed (COLR/COLP) information in the Internet room monitoring installation help router installation prerequisites Internet account information Internet telephony IP address safety instructions dynamic selecting the outgoing number IP masquerading serial number service shortening the dialing procedure sockets keypad messages supply voltage...
-
Page 110: Declaration Of Ce Conformity
EN 55022/9.98 + A1/10.00 + A2/01.03 Class B EN 55024/9.98 + A1/10.01 + A2/01.03 The CE symbol confirms that this product conforms with the above mentioned norms and regulations.. Berlin, 01.10.2005 Peter Faxel, Technischer Direktor 110 FRITZ!Box Fon 5124 – Declaration of CE Conformity...
Need help?
Do you have a question about the FRITZ!Box Fon 5124 and is the answer not in the manual?
Questions and answers