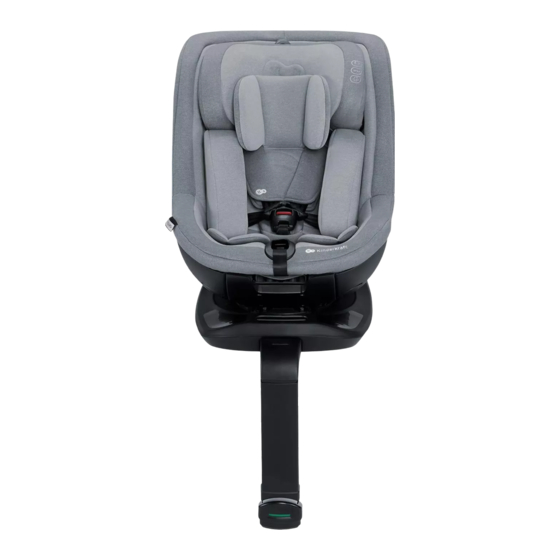
Summary of Contents for Kinderkraft I-GUARD
- Page 1 I-GUARD USER GUIDE MODEL: I-GUARD ECE R129.03 v.1.2 MODEL: I-GUARD ECE.R129.03 ver. 1.2...
- Page 2 ATTENTION! Product graphics are only illustrative. Please read this user manual carefully before using your child’s car seat for the first time. It is your responsibility to ensure your child's safety and failure to read this manual may affect it. 1.0 Car seat elements 1.
- Page 3 The car seat was designed, tested and approved according to the requirements of UN/ECE Regulation No. 129 concerning the approval of child restraint systems (UN/ECE R129/03). The I-GUARD car seat is designed for the transport of children between 40 and 105 cm (up to approximately 4 years old).
- Page 4 Seat mountings Seat orientation Seat position Size of the child 40cm–105cm ISOFIX + support leg rearward-facing 0 months – approx. 4 years 76cm–105cm ISOFIX + support leg forward-facing > 15months – approx. 4 years...
-
Page 5: Safety Instructions
3.0 Safety instructions Under no circumstances must the safety harness be twisted! • REMEMBER, THE CLOSER THE BELT IS TO THE CHILD'S BODY, THE GREATER THE LEVEL OF Please take a few minutes to read this user manual to ensure your child's safety. Many avoidable SAFETY. - Page 6 • The seat cannot be used without the cover. • Set a good example for your child and always wear a seat belt. An adult who is not wearing a • The infant insert serves to protect the baby and must be used until the baby reaches a height of seat belt can also pose a risk to a child.
-
Page 7: In-Vehicle Installation
4.0 In-vehicle installation In the event of sudden braking or an accident, persons not wearing seat belts may cause injury to other passengers. Always check that: • The seatbacks in the vehicle are locked (i.e. the rear seat folding backrest lock is engaged). •... - Page 8 A.5a A.5b • Place the seat without the cover (19) with the folded-out support leg on the vehicle seat. • Attach the ISOFIX guides (18) to the car seat connectors (A.4). • Slide the ISOFIX attachments (16) to their maximum length by unlocking and holding the sliding lever (12) (fig.
- Page 9 • Push the base with a left-right movement towards the backrest of the vehicle seat until it is completely aligned with the backrest of the anti-rotation frame (14) (fig. A.8) • When the seat is correctly installed with ISOFIX, position the seat rearward facing. Push the seat rotation lever (7) (fig.
- Page 10 A.11 • By holding down the leg height adjustment button (17), you will release the leg height lock and the leg should automatically extend. Adjust the leg height so that the foot meets resistance with the vehicle's ground; now you can release the button. If after the leg height lock the foot indicator (10) turns green, it means that the installation is correct (fig.
- Page 11 4.2 Forward-facing seat installation for children between • ATTENTION! The locking clips are only correctly fastened when both button markers are completely green. 76 and 105 cm using the ISOFIX attachment system with a • When the seat is correctly installed with ISOFIX, position the seat facing forward. Push the support leg.
- Page 12 • By holding down the leg height adjustment button (17), you will release the leg height lock and the leg should automatically extend. Adjust the leg height so that the foot meets resistance with the vehicle's ground; now you can release the button. If after the leg height lock the foot indicator (10) turns green, it means that the installation is correct (fig.
- Page 13 5.0 Height of headrest and shoulder straps To adjust the height of the headrest, proceed as follows: • At the same time, while holding down the 5-point harness adjustment button (4), loosen the harness to allow for more freedom in adjusting the height of the headrest. •...
-
Page 14: Rotating Mechanism
Rotating mechanism • The rotation mechanism is a function which helps to position the child in the seat or to remove it in a comfortable way. Correct positioning of the seat in the direction of travel (fig. A.14): a) from 40 to 105 cm rearward-facing, b) from 76 to 105 cm forward-facing. - Page 15 5.3 Securing the child with a 5-point seat harness • Loosen the harness completely by pressing the button (4) and pulling the harness. Do not pull on the shoulder cushions. • Release the buckle (3). Hook the 5-point harness on the harness holders (11), which are located at the sides of the seat (fig.
- Page 16 When your child reaches a height of 60 cm, the insert must be removed (fig B.6). Store the child insert in a safe place for future use. NOTE: Only use this original Kinderkraft I- GUARD insert. This insert is only intended for use with the I-GUARD seat.
- Page 17 6.0 Removing/fitting the cover • Removing the covers of the inner belts: undo the hook-and-loop fastener on the inside of the covers and remove the covers, which are hooked to the metal hooks (fig. C.1). • Removing the back and the seat cover: detach the four tensioning fasteners securing the cover to the back part of the seat backrest (fig.
- Page 18 The full text of the Terms and Conditions of the Warranty is available on the website WWW.KINDERKRAFT.COM...


Need help?
Do you have a question about the I-GUARD and is the answer not in the manual?
Questions and answers