
Related Manuals for Kinderkraft I-CARE i-Size


Summary of Contents for Kinderkraft I-CARE i-Size
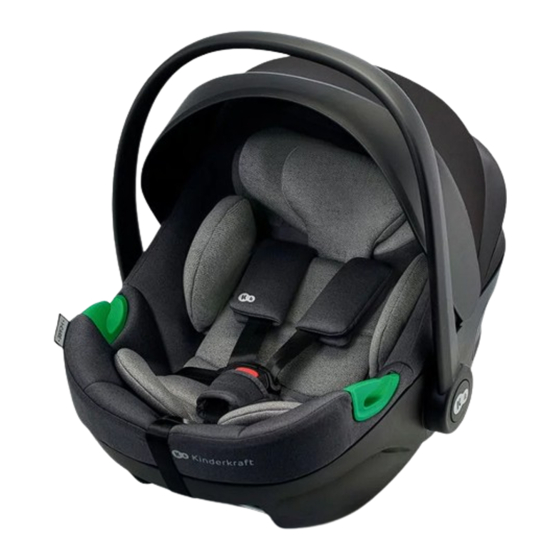
- Page 1 I-CARE i-Size USER GUIDE MODEL: I-CARE ECE R129.03 v.2.0 MODEL: I-GUARD ECE.R129.03 ver. 1.2...
- Page 2 1.0 Use CAUTION! The product image is for illustrative purposes only! The car seat has been designed, tested and approved in accordance with the requirements of UN/ECE Regulation No. 129 concerning the approval of improved child restraint systems (UN/ECE R129/03). •...
- Page 3 Child’s height Direction the car seat is facing Affixing the car seat ISOFIX + three-point seat belt 40–87 cm Three-point seat belt...
-
Page 4: Safety Instructions
2.0 Safety instructions Please take several minutes to read this instruction manual to ensure the child is adequately safe. • DO NOT install the car seat on the car’s seat if such a seat is facing rearwards or sideways to the direction of travel. - Page 5 Information on the suitability of the car seat for use with a child seat can be • Never leave a child unattended in a child seat. found in the vehicle's operating instructions. • Make sure that luggage and other objects are adequately secured, •...
- Page 6 • Do not use the seat if parts are damaged or loose. • On some car seats made of sensitive materials, the use of the car seat can • In an emergency, it is important to release the harness quickly. This means leave marks and/or cause discolouration.
- Page 7 3.0 Securing the child 3.1 Insert installation The additional insert is to be used until the child reaches 76 cm. 1. Open the safety harness 2. Slide the harness to the sides of the car seat 3. Place the insert in Safety harness Internal insert...
- Page 8 3.2 Adjusting the height of the headrest together with the internal safety harness 1. Loosen the safety harness straps completely by pressing the safety harness adjustment button and pulling on the harness straps Remember! Do not pull on the shoulder pads. 2.
- Page 9 Set the correct shoulder strap height so that the strap enters the car seat's backrest at the level of the child’s shoulders or slightly above. To correctly position the child's head, make sure that the bottom part of the headrest is in line with the child's chin.
- Page 10 3.3 Setting the position of the handle To set the car seat’s handle in the desired position, follow the steps below. 1. Press the car seat’s handle adjustment button on either side simultaneously – the handle will unlock. 2. Release the buttons and set the handle in one of four available positions.
-
Page 11: Handle Positions
3.3.1 Handle positions Position to place the child in the Position for a carrier and affixing car seat to a pushchair frame Position for installation using the Position for storing the car seat car's seat belt... -
Page 12: Using The Sun Shade
4.0 Using the sun shade The sun shade is used to prevent the direct action of sun rays on the child's face. 1. Pull the plastic shield away from you. 2. Release the shield in the desired position. To fold the sun shade, pull the cover in the other direction. Plastic shield... - Page 13 5.0 Installation in a vehicle 5.1 Installation of the car seat in the rearward facing position using the ISOFIX CARE FX base 5.1.1 Base assembly: 1. Unfold the base’s support leg 2. Place the base on the car's bench seat. Pressing the button that releases the ISOFIX connector, slide it out from the base as far as possible.
- Page 14 5. Press the leg adjustment button. The extension should slide out on its own until it reaches a point of resistance. 6. Check to make sure that the bottom installation indicator is green. Leg adjustment button Leg extension Bottom leg installation indicator...
- Page 15 • CAUTION! Never install the support leg on a compartment in the floor of the car, as the compartment may collapse in the event of an accident; if you are unsure, check the vehicle instruction manual. • CAUTION! The support leg must never hang in the air and no objects may be placed under it.
- Page 16 5.1.2 Installing on the ISOFIX CARE FX base: 1. Set the handle to the carrier position by pressing both handle adjustment buttons simultaneously – you should hear a distinctive click indicating that the handle is locked. 2. Position the seat so that it is rear-facing and insert it into the base – you should hear a distinctive click and the seat should lock into the base.
- Page 17 5.2 Removing the car seat from the ISOFIX base and removing the base 5.2.1 Removing the car seat: 1. Press the lever releasing the car seat’s lock. 2. Lift the car seat up. Lever releasing the car seat’s lock...
-
Page 18: Removing The Base
5.2.2 Removing the base: 1. Fold the support leg extension by holding both buttons on the sides of the leg extension, and slide it up, hiding it in the rest of the leg. 2. Press the ISOFIX release button and insert the arm into the base. Do this on both sides. - Page 19 5.3 Installing the car seat in the rearward facing position using the car’s seat belt CAUTION! Before starting the installation, make sure that the car's seat is equipped with a three-point seat belt. 1. Set the handle on the vertical position by pressing both handle adjustment buttons simultaneously –...
-
Page 20: Removing The Cover
6.0 Removing the cover 1. Loosen the safety harness straps completely by pressing the safety harness adjustment button and pulling on the harness straps Remember! Do not pull on the shoulder pads. 2. Remove the internal insert. 3. Remove the shoulder pads by unfastening the snaps, and then pull the ribbon connecting the pads through the holes in the headrest. -
Page 21: Replacing The Cover
7. Starting from the bottom of the car seat, carefully remove the cover. 8. Slide the material around the car’s seat belt guides. 9. Slide the entire material off, threading it through the top part of the car seat. 6.1 Replacing the cover To replace the cover, simply perform the above steps in reverse order. - Page 22 • The safety harness may be cleaned in lukewarm soapy water. CAUTION! The internal safety harness system may not be dismantled! Never dismantle individual parts of the inner safety harness. The full text of the Warranty Conditions is available on the website at WWW.KINDERKRAFT.COM...
- Page 23 8.0 Affixing the car seat to a pushchair frame CAUTION! Before affixing or removing the car seat from a pushchair frame, always engage the parking brake on the frame to prevent the pushchair from rolling away uncontrollably. 1. Set the car seat handle in the position for affixing to the pushchair frame by holding both handle adjustment buttons.
Need help?
Do you have a question about the I-CARE i-Size and is the answer not in the manual?
Questions and answers