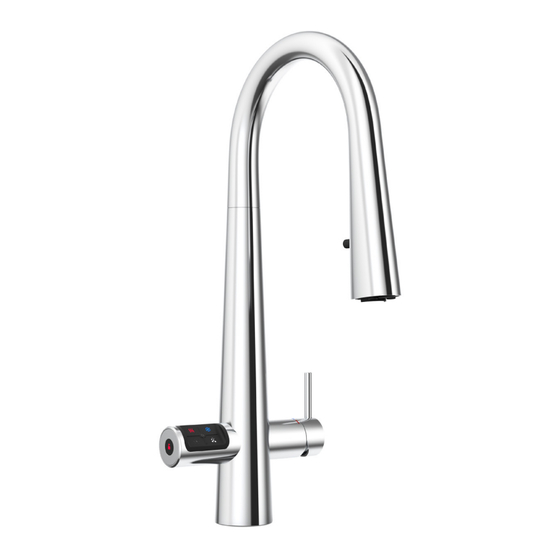
Zip HydroTap G5 Installation Instructions Manual
Hide thumbs
Also See for HydroTap G5:
- Quick start manual ,
- Quick start installation manual (48 pages) ,
- Installation instructions manual (44 pages)
Table of Contents
Advertisement
Quick Links
Advertisement
Table of Contents

Summary of Contents for Zip HydroTap G5
- Page 1 Installation instructions HydroTap G5 Celsius Plus All-In-One Pull-Out All models Pull-Out Sprayer and Mixer Australia Visit our website to download the manuals Quick Start Installation Guide 809806 v1.00 07.23 G5 Celsius Plus AIO Pull-Out Instructions...
-
Page 2: Table Of Contents
Table of contents Contents SECTION 1: Using these instructions ..............3 SECTION 2: Generic installation requirements ..........4 2.1 Tools needed for tap installation ..............4 2.2 Water supply pressure requirements ............4 SECTION 3: Installation - Celsius Plus AII-In-One (AIO) Pull-Out ..... 4 3.1 Position the tap .................... -
Page 3: Section 2: Generic Installation Requirements
SECTION 2: Generic installation requirements 2.1 Tools needed for tap installation In addition to normal tools, the following (or equivalent equipment) will be required not supplied). • 50mm diameter hole saw to suit bench top type. • Tube spanner (kit no. 93167) for fixing the tap assembly. •... -
Page 4: Position The Hose Management System, Cut The Tap Hole
SECTION 3: Installation - Celsius Plus AIO Pull-Out 3.2 Position the Hose Management System, cut the tap hole Ensure that the tap dispenses into the sink with clearance to dispense all water options. Ensure that taps are positioned to minimise the risks of scalding by dispensing boiling water while using the tap. -
Page 5: Align The Hose Management System
SECTION 3: Installation - Celsius Plus AIO Pull-Out For optimal performance of the pull-out hose, the Hose Management System must be installed so that the pull-out hose is in vertical alignment with the tap base. The Hose Management System can be installed at different heights below the tap hole. -
Page 6: Install The Hose Management System Bracket
SECTION 3: Installation - Celsius Plus AIO Pull-Out 3.4 Install the Hose Management System Bracket • Unscrew the bracket and the two • Complete fixing the bracket by butterfly screws. using remaining 3x screws. • Remove the mounting bracket from •... - Page 7 SECTION 3: Installation - Celsius Plus AIO Pull-Out Review section 3.5 to 3.7 to familiarise yourself with the tap assembly before making connection. 3.6 Hose Management 3.5 Mains water connections System connections • The hose colours match to the tap colour idents.
- Page 8 SECTION 3: Installation - Celsius Plus AIO Pull-Out 3.7 Tap connections Water connections USB connections • The silicone tubes connect to the Command • The tap USBs Centre via the 3 metal connecting tubes: are supplied connected together. • Connect the main tap USB to the Tube Command Centre...
-
Page 9: Mount And Secure The Tap & Connect Together
SECTION 3: Installation - Celsius Plus AIO Pull-Out 3.8 Mount and secure the tap & connect together Upper rubber washer Lower rubber Steel washer washer Brass nut Elbow Connect feed hose to elbow on the bottom of the tap. See 3.6 Quick Start Installation Guide 809806 v1.00 07.23 G5 Celsius Plus AIO Pull-Out Instructions... -
Page 10: Install The Pull-Out Hose
SECTION 3: Installation - Celsius Plus AIO Pull-Out 3.9 Install the Pull-Out hose • Feed the Pull-Out hose • Connect the Pull-Out hose to through the black flexible the spray nozzle. spiral ducting at the base of • Push in firmly until it clicks into the tap until the connector position. -
Page 11: Install The Hose Management System
SECTION 3: Installation - Celsius Plus AIO Pull-Out 3.10 Install the Hose Management System • Fix the Hose Management System in place by tightening the top and bottom butterfly screws. • The feed hose is supplied attached to the check valve. Check valve Feed hose Quick Start Installation Guide... -
Page 12: Connect The Water Supply
SECTION 3: Installation - Celsius Plus AIO Pull-Out 3.11 Connect the water supply All fittings are supplied apart from the isolation valve. Mains Water Requirements: Minimum water pressure (static) 250kPa Optimal water pressure (static) 350kPa Operating water temperature 60°C Maximum allowable water temperature 70°C Braided hose to Hot water isolation valve... -
Page 13: Be Careful With The Sparkling Pipework
Celsius Plus AIO & Pull-Out section on page 10. • If it does not turn off, the tap has been incorrectly configured or there is a fault with the safety interlock mechanism. Contact Zip on 1800 947 827 for a service check. Quick Start Installation Guide... -
Page 14: Section 4: Cleaning And Maintenance
SECTION 4: Cleaning and maintenance 4. 1 Cleaning • Wipe surfaces with a damp microfiber cloth and then wipe dry with a clean, dry microfiber cloth. IMPORTANT! • Do not use air-drying disinfectant sprays. • These could cause permanent malfunction and void warranty. Quick Start Installation Guide 809806 v1.00 07.23 G5 Celsius Plus AIO Pull-Out Instructions... - Page 15 NOTES Quick Start Installation Guide 809806 v1.00 07.23 G5 Celsius Plus AIO Pull-Out Instructions...
- Page 16 0345 6 005 005 sales@zipindustries.co.uk specify.zipwater.co.uk As Zip policy is one of continuous product improvement, changes to specifications may be made without prior notice. Images in this booklet have been modified and may not be true representations of the finished goods.


Need help?
Do you have a question about the HydroTap G5 and is the answer not in the manual?
Questions and answers