Nibe F110 Installation Manual
Hot water heat pump
Hide thumbs
Also See for F110:
- Installer manual (48 pages) ,
- Installation manual (44 pages) ,
- User manual (44 pages)
Table of Contents
Advertisement
Quick Links
Advertisement
Table of Contents

Subscribe to Our Youtube Channel
Related Manuals for Nibe F110


Summary of Contents for Nibe F110
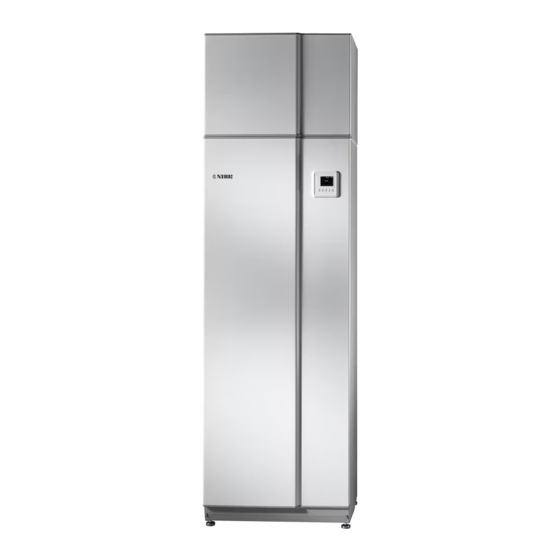
- Page 1 Installation manual Hot water heat pump NIBE F110 IHB EN 2344-1 731934...
- Page 2 Quick guide Navigation Ok button (confirm/select) Up/down buttons (move/increase/reduce) Back button (back/undo/exit) A detailed explanation of the button functions can be found on page 23. How to scroll through menus and make different settings is described on page 24. Increase hot water volume true To temporarily increase the amount of hot water, first press the down button to mark menu 2 (water droplet) and then press the OK button twice.
-
Page 3: Table Of Contents
6 Commissioning and adjusting Preparations Filling and venting Start-up and inspection 7 Control - Introduction Display unit Menu system 8 Control - Menus Menu 1 - ventilation Menu 2 - HOT WATER Menu 3 - INFO NIBE F110 Table of Contents... -
Page 4: Important Information
Explanation of symbols that may be present on the product’s label(s). ©NIBE 2023. Read the User Manual. Do not start F110 if there is a risk that the water in the system has frozen. Read the Installer Manual. Water may drip from the safety valve’s overflow pipe. -
Page 5: Serial Number
It must be disposed of at a special waste station or dealer who provides this type of service. Improper disposal of the product by the user results in ad- ministrative penalties in accordance with current legislation. NIBE F110 Chapter 1 | Important information... -
Page 6: Inspection Of The Installation
Exhaust air filter Ventilation, surrounding air or outdoor air (page 17) Pressure drop in the system Hot water System vented Electricity (page 20) Supply connected 230 V Circuit fuses Earth circuit-breaker Miscellaneous Type of installation Chapter 1 | Important information NIBE F110... -
Page 7: Delivery And Handling
It is recommended that a space of However, the F110 can be carefully laid on its back when at least 10 mm is left to reduce the risk of noise and of any being moved into the building. The centre of gravity is in the vibrations being propagated. -
Page 8: Supplied Components
The kit of supplied items is placed in the lower section of the product. Handling panels REMOVE THE AIR TREATMENT UNIT’S HATCH Loosen the screws for the securing plates above F110. Slide the hatch upwards. 3. Pull the hatch towards yourself. L E K... - Page 9 Air treatment section Undo the screws at the edge. L E K Twist the panel slightly outwards. 3. Move the panel outwards and backwards. 4. Assembly takes place in the reverse order. NIBE F110 Chapter 2 | Delivery and handling...
- Page 10 Water heater section 3. Move the panel outwards and backwards. Remove the screws from the upper and lower edges. Twist the panel slightly outwards. 4. Assembly takes place in the reverse order. Chapter 2 | Delivery and handling NIBE F110...
-
Page 11: The Heat Pump Design
The Heat pump design BT77 XL43 QM25 XL44 BT16 BT12 GQ10 QN20 EB10 BT13 BT76 GP12 FQ10 BT35 XL48 QM30 NIBE F110 Chapter 3 | The Heat pump design... -
Page 12: List Of Components
Vacuum valve (only F110 copper) GQ10 Compressor Mixer valve, hot water Drying filter GP12 Charge pump Expansion valve Venting screw (only F110 stainless steel) QN20 Solenoid valve, defrosting QM25 Vent valve, hot water VENTILATION QM30 Shut-off valve, hot water Connection area... -
Page 13: Pipe And Air Connections
Pipe installation must be carried out in accordance with Symbol Meaning current norms and directives. Circulation pump F110 is only designed for be installed vertically. The water Immersion heater heater is equipped with compression ring couplings for Expansion valve copper or plastic pipes. Internal support bushes must be fitted when a plastic pipe or annealed copper pipe is used. -
Page 14: Dimensions And Pipe Connections
Dimensions and pipe SYSTEM DIAGRAM F110 consists of a heat pump, water heater, immersion connections heater and control system. When the air passes through the evaporator, the refrigerant evaporates because of its low boiling point. In this way the energy in the air is transferred to the refrigerant. -
Page 15: Cold And Hot Water
Cold and hot water The settings for hot water are made in menu 5.1.1. CONNECTING COLD AND HOT WATER Install as follows: NIBE F110 Chapter 4 | Pipe and air connections... -
Page 16: Installation Alternative
The hot air is transferred from the rooms to the heat pump length. via the house ventilation system. • Attempt to find a location for F110 on the side of the house that faces the least sound sensitive neighbouring area. NOTE Install the enclosed air filter (HQ12) on the exhaust Caution air duct. - Page 17 This can lead to damp in the building. Caution Outgoing air from F110 is cold and can therefore cool the room when it is released. Take incoming air from one room and...
-
Page 18: General Ventilation Connections
Exhaust air duct (kitchen fan) must not be connected to air (XL44). F110. To prevent cooking odours from being led to the F110, the distance between the kitchen fan and the exhaust air valve must be taken into consideration. The distance must not be less than 1.5 m, but may vary between different installations. -
Page 19: Ventilation Flows (Exhaust Air)
Ventilation flows (exhaust air) Connect F110 so that all the exhaust air, except kitchen duct air (kitchen fan), passes through the evaporator (EP1) in the heat pump. The ventilation flow must comply with the applicable national standards. For optimum heat pump performance, the ventilation flow must not be less than 20 l/s (73 m³/h) at normal exhaust air... -
Page 20: Electrical Connections
Electrical installation and wiring must be carried out in SUPPLY accordance with national provisions. F110 is connected to a earthed single-phase wall socket or • Disconnect F110 before insulation testing the house wiring. a permanent installation. For permanent installations, F110 must be preceded by a circuit breaker with at least a 3 mm •... -
Page 21: Commissioning And Adjusting
Start F110 by connecting the supply cable. Filling and venting Follow the instructions in the display’s start guide. If the start guide does not start when you start the F110, you FILLING THE HOT WATER HEATER can start it manually in menu 5.7. - Page 22 Enter menu 5.1.5 - "fan sp. exhaust air" and reduce the fan speed to 0%. NOTE Select operating mode "auto" or "manual" when the heat pump is to run on recovery again. Chapter 6 | Commissioning and adjusting NIBE F110...
-
Page 23: Control - Introduction
Setting time, date, language, operating mode etc. See page Menu system MENU 5 - SERVICE When F110 is started you come to the information menu. Advanced settings. These settings are not available to the Basic information about the heat pump status is shown here. - Page 24 Mark the applicable option using the up or down button. the start guide. One of the options is pre-selected (white). Press the OK button to confirm the selected option. The selected option has a green tick. Chapter 7 | Control - Introduction NIBE F110...
-
Page 25: Control - Menus
If longer time changes are required use the holiday function. Caution The heat pump requires a minimum ventilation flow in order to work properly. An insufficient ventilation flow can result in an alarm and blocking of compressor operation. NIBE F110 Chapter 8 | Control - Menus... -
Page 26: Menu 2 - Hot Water
Status information displays “off" or what length of time of the temporary temperature increase re- When the time has run out F110 returns to the mode set in mains. menu 2.2. - Page 27 The length of time between increases can be selected here. The time can be set between 1 and 90 days. Factory setting is 14 days. Tick/untick "activated" to start/switch off the function. NIBE F110 Chapter 8 | Control - Menus...
-
Page 28: Menu 3 - Info
You can see information for the 10 most recent alarms. To view the run status in the event of an alarm, mark the alarm and press the OK button. Chapter 8 | Control - Menus NIBE F110... -
Page 29: Menu 4 - My System
Resetting all settings to factory default values. This menu is only available if an alarm has occurred. MENU 4.2 - OP. MODE Here you can reset any alarms that have occurred in F110. op. mode MENU 4.9 - ADVANCED Setting range: auto, add. heat only... -
Page 30: Menu 5 - Service
Here you set the start and stop temperature of the hot water for the different comfort options in menu 2.2 as well as the stop temperature for periodic increase in menu 2.9.1. Chapter 8 | Control - Menus NIBE F110... - Page 31 Setting range: -10 - 25 °C Factory setting outdoor air: -10 °C Factory setting surrounding air and exhaust air: 10 °C Set the min and max temperature of the incoming air to F110 here. MENU 5.1.16 - INSTALLATION installation...
-
Page 32: Service
5. Open a hot water tap to let air into the system. If this is not sufficient, loosen a pipe coupling marked HW on the mixer valve. For faster draining of F110 copper: Loosen the vacuum valve (FL6) a few turns. A small amount of water may run out at the valve. -
Page 33: Disturbances In Comfort
Disturbances in comfort BASIC ACTIONS In most cases, F110 notes a malfunction (a malfunction can lead to disruption in comfort) and indicates this with alarms, Start by checking the following items: and instructions for action, in the display. • That the feed cable is connected to F110. - Page 34 There is no hot water requirement. – The heat pump does not call on hot water. – The heat pump defrosts. • The heat pump defrosts. – The compressor starts, when defrosting is complete. Chapter 10 | Disturbances in comfort NIBE F110...
-
Page 35: Accessories
Part no. 624 922 F110 Part no. 624 923 Base extension EF 45 This accessory can be used to create a larger area under F110. Part no. 067 152 RSK no. 622 41 07 Top cabinet TOC 40 Top cabinet, which conceals any pipes/ventilation ducts. -
Page 36: Technical Data
Technical data Dimensions Chapter 12 | Technical data NIBE F110... -
Page 37: Technical Specifications
3 A20(12), luftflöde 50 l/s (180 m 4 The value varies with the fan speed selected. For more detailed sound data, including sound to ducts, visit nibe.eu. 5 The value can vary with the room’s damping capacity. These values apply at a damping of 4 dB. -
Page 38: Energy Labelling
Annual energy consumption water heating, cold cli- 1,452 2,037 1,283 mate, AEC Annual energy consumption water heating, warm 1,452 1,589 1,283 climate, AEC Daily electrical consumption, Q 6.60 8.08 5.83 elec Applied standards EN 16147 Chapter 12 | Technical data NIBE F110... -
Page 39: Electrical Circuit Diagram
ELECTRICAL CIRCUIT DIAGRAM NIBE F110 Chapter 12 | Technical data... -
Page 40: Item Register
The heat pump design, 11 Important information, 4 Transport, 7 Recovery, 5 Troubleshooting, 33 Safety information, 4 Inspection of the installation, 6 Installation area, 7 Manage alarm, 33 Marking, 4 Menu 1 - INDOOR CLIMATE, 25 Item register NIBE F110... -
Page 43: Contact Information
Tel: +48 (0)85 66 28 490 Hannabadsvägen 5, 285 21 Markaryd Tel. +41 (0)58 252 21 00 biawar.com.pl Tel: +46 (0)433-27 30 00 info@nibe.ch info@nibe.se nibe.ch nibe.se For countries not mentioned in this list, contact NIBE Sweden or check nibe.eu for more information. - Page 44 WS release date: 2023-10-31 18:02 Publish date: 2023-11-14 10:24 This is a publication from NIBE Energy Systems. All product illustrations, facts and data are based on the available information at the time of the publication’s approval. NIBE Energy Systems makes reservations for any factual or printing errors in this publication.
Need help?
Do you have a question about the F110 and is the answer not in the manual?
Questions and answers