Nibe F1155 Series Installation Manual
Ground source heat pump
Hide thumbs
Also See for F1155 Series:
- Service manual (108 pages) ,
- User manual (84 pages) ,
- Installer manual (84 pages)

Related Manuals for Nibe F1155 Series


Summary of Contents for Nibe F1155 Series
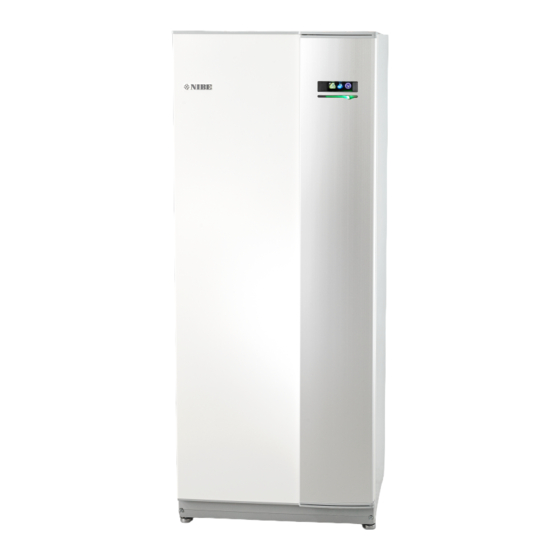
- Page 1 IHB EN 2008-5 INSTALLATION MANUAL 331379 Ground source heat pump NIBE F1155 UK 1x230V...
- Page 2 Quick guide Navigation Ok button (confirm/select) Back button (back/undo/exit) Control knob (move/increase/reduce) A detailed explanation of the button functions can be found on page How to scroll through menus and make different settings is described on page Set the indoor climate INDOOR CLIMATE HOT WATER HEAT PUMP...
-
Page 3: Table Of Contents
Heating medium side Electrical data Cold and hot water Technical specifications Docking alternatives Energy labelling 5 Electrical connections Item register General Connections Contact information Settings Optional connections Connecting accessories 6 Commissioning and adjusting Preparations Filling and venting NIBE F1155 Table of Contents... -
Page 4: Important Information
Rights to make any design or technical modifications are reserved. The CE mark is obligatory for most products sold in the EU, regardless of where they are made. ©NIBE 2020. IP21 Classification of enclosure of electro-technical equipment. Water may drip from the safety valve’s overflow pipe. -
Page 5: Serial Number
This unit contains a fluorinated greenhouse gas that is covered by the Kyoto agreement. The equipment contains R407C, a fluorinated green- house gas with a GWP value (Global Warming Potential) of 1,774. Do not release R407C into the atmosphere. NIBE F1155 Chapter 1 | Important information... -
Page 6: Country Specific Information
Scheme. Visit centralheating.co.uk information. Warranty and insurance information Thank you for installing a new NIBE heat pump in your home. NIBE heat pumps are manufactured in Sweden to the very highest standard so we are pleased to offer our customers a comprehensive guarantee. -
Page 7: Inspection Of The Installation
Shut off valves Circulation pump setting Electricity (page Connections Main voltage Phase voltage Fuses heat pump Fuses property Outside sensor Room sensor Safety breaker Earth circuit-breaker Setting of emergency mode thermostat Miscellaneous Warranty Benchmark checklist NIBE F1155 Chapter 1 | Important information... -
Page 8: Delivery And Handling
20-55 mm 30 - 50 mm * A normal installation needs 300 – 400 mm (any side) for connection equipment, valves and electrical equipment. Chapter 2 | Delivery and handling NIBE F1155... -
Page 9: Supplied Components
Assembly takes place in the reverse order. 1 x G3/4 12 kW 1 x G1 1 x G1 1/4 LOCATION The kit of supplied items is placed in packaging on top of the heat pump. NIBE F1155 Chapter 2 | Delivery and handling... -
Page 10: The Heat Pump Design
ELECTRICAL COMPONENTS Display unit EP14 AA4-XJ3 USB socket AA4-XJ4 Service outlet (No function) Immersion heater Switch W130 Network cable for NIBE Uplink MISCELLANEOUS EP14 Cooling section Rating plate Type plate, cooling section Cable gland, incoming electricity Cable gland Cable gland, rear side, sensor Designations according to standard EN 81346-2. -
Page 11: Distribution Boxes
Distribution boxes AA23 FQ10 ELECTRICAL COMPONENTS Immersion heater card Base card Input circuit board AA23 Communication board Miniature circuit-breaker FQ10 Temperature limiter/Emergency mode thermostat NIBE F1155 Chapter 3 | The heat pump design... -
Page 12: Cooling Section (Ep14)
Cooling section (EP14) 6 kW BT14 GQ10 QA40 BT12 BT10 BT17 XL20 AA100 BT15 XL21 BT11 EB10 12 kW 12 kW QA40 BT14 BT17 GQ10 BT12 BT10 XL21 AA100 XL20 BT15 BT11 EB10 Chapter 3 | The heat pump design NIBE F1155... - Page 13 Temperature sensor, fluid pipe BT17 Temperature sensor, suction gas ELECTRICAL COMPONENTS AA100 Joint card Capacitor EB10 Compressor heater QA40 Inverter Choke COOLING COMPONENTS Evaporator Condenser GQ10 Compressor Drying filter Expansion valve NIBE F1155 Chapter 3 | The heat pump design...
-
Page 14: Pipe Connections General
After flushing an inhibitor should be used for long-term anti-corrosion protection. NOTE NIBE Energy Systems Limited recommends water Water may drip from the safety valve’s over- treatments (supplied by e.g. Fernox and Sentinel) spe- flow pipe. The entire length of the overflow cifically designed for heat pumps. - Page 15 Ground collector Under floor heating systems Connection, heating medium flow Heat pump Connection, heating medium return Connection, brine in Cooling system Connection, brine out Connection, hot water heater Pool Radiator system Domestic hot water NIBE F1155 Chapter 4 | Pipe connections...
-
Page 16: Dimensions And Pipe Connections
(XL1)/(XL2) Heating medium (mm) is added. flow/return ext. Ø NIBE Energy Systems Limited recommends water (XL9) Connection water heater ext. (mm) treatments (supplied by e.g. Fernox and Sentinel) spe- Ø cifically designed for heat pumps. -
Page 17: Heating Medium Side
• Fit the enclosed filterball on the incoming brine. NIBE Energy Systems Limited recommends water treatments (supplied by e.g. Fernox and Sentinel) spe- cifically designed for heat pumps. If filling connection KB25/KB32 is used, the enclosed filterball does not need to be fitted. -
Page 18: Docking Alternatives
If F1155 is to work towards a water heater with fixed The installation can be supplemented with the exhaust condensing, you must connect external supply temper- air module NIBE FLM to provide ventilation recovery. ature sensor (BT25) according to the description on page •... - Page 19 With the POOL 40 accessory, you can heat the pool with your heat pump. During pool heating, the heating medium circulates between the F1155 and the pool exchanger using the heat pump’s internal circulation pump. -CL11 -CL11-AA25 -CL11-QN19 -CL11-EP5 -CL11-GP9 -CL11-BT51 -CL11-HQ4 NIBE F1155 Chapter 4 | Pipe connections...
-
Page 20: Electrical Connections
Cut the current with the circuit breaker before carrying out any servicing. Electrical installation and wiring must be carried out in accordance with the stipulations in force. Chapter 5 | Electrical connections NIBE F1155... - Page 21 The cover for the input card is opened without a tool. Removing the cover, input circuit board Unscrew the screws and angle out the cover. Unscrew the screws and angle out the cover. NIBE F1155 Chapter 5 | Electrical connections...
-
Page 22: Connections
If the voltage to the immersion heater and/or the com- pressor disappears during a certain period, there must also be blocking via the AUX-input, see "Connection options - Possible selection for AUX inputs" page. Chapter 5 | Electrical connections NIBE F1155... - Page 23 (menu 5.4, see page 26) on terminal block X6 on the input card (AA3) which is loc- BT50 ated behind the front cover and in a submerged tube on the water heater. NIBE F1155 Chapter 5 | Electrical connections...
-
Page 24: Settings
1x230V, F1155-6 Max electrical addition (kW) Max phase current L1(A) – 1x230V för F1155-12. 10.8 13.0 15.2 17.3 19.5 Chapter 5 | Electrical connections NIBE F1155... -
Page 25: Optional Connections
BT71 must be used. If BT71 is not connected, the product gives a sensor fault. Connect the communications cables as illustrated in series to the terminal block X4:15 (A), X4:14 (B) and X4:13 (GND) on the input card (AA3). NIBE F1155 Chapter 5 | Electrical connections... - Page 26 The example above uses the inputs AUX1 (X6:9-10) and AUX2 (X6:11- 12) on the input board (AA3). the desired value (energy per pulse) in menu 5.3.21. Selectable output NIBE UPLINK A selectable output is AA3-X7. Connect the network connected cable (straight, Cat.5e UTP) with RJ45-contact (male) to RJ45 contact (female) on the rear of the heat pump.
- Page 27 • pressure switch for climate system (NC). Caution External activation of functions In systems with both underfloor heating and radiators, NIBE ECS 40/41 should be used An external switch function can be connected to F1155 for optimum operation. to activate various functions. The function is activated during the time the switch is closed.
-
Page 28: Connecting Accessories
AA5, you should always read the When switch (SF1) is in the " " or “ ” position the relay instructions in the manual for the accessory that you is in the alarm position. are going to install. Chapter 5 | Electrical connections NIBE F1155... - Page 29 Because there can be different connections for accessor- ies with circuit boards AA9, you should always read the instructions in the manual for the accessory that you are going to install. F1155 Accessories AA3-X4 AA3-X4 AA9-X1 NIBE F1155 Chapter 5 | Electrical connections...
-
Page 30: Commissioning And Adjusting Preparations
Fill the climate system with water. Open the vent valve. When the water that exits the vent valve is not mixed with air, close the valve. After a while the pressure starts to rise. Chapter 6 | Commissioning and adjusting NIBE F1155... -
Page 31: Start-Up And Inspection
The start guide will appear at each restart of the installation, until it is deselected on the last page. For optimum operation when several heat pumps are installed in a multi-installation, all heat pumps should have the same compressor size. NIBE F1155 Chapter 6 | Commissioning and adjusting... - Page 32 “service info” and adjust the heating medium pump high brine flow. (GP1) speed until the temperature difference is attained. A high difference indicates a low heating medium supply and a low difference indicates a high heating medium supply. Chapter 6 | Commissioning and adjusting NIBE F1155...
-
Page 33: Setting The Heating Curve
Based on set minimum value the heating curve flattens out at these temperatures. NIBE F1155 Chapter 6 | Commissioning and adjusting... - Page 34 If you need to adjust "min. flow line temp." and/or "max flow line temperature", you do this in other menus. Settings for "min. flow line temp.” in menu 1.9.3. Settings for "max flow line temperature” in menu 5.1.2. Chapter 6 | Commissioning and adjusting NIBE F1155...
- Page 35 2 Under floor heating can be dimensioned very differently. The above example refers to a system where the supply temperature needs to be approximately 35 – 40 °C or 45 – 50 °C on the coldest day. NIBE F1155 Chapter 6 | Commissioning and adjusting...
-
Page 36: Control - Introduction
• confirm selections of sub menus/options/set values/page in the start guide. BACK BUTTON The back button is used to: • go back to the previous menu. • change a setting that has not been confirmed. Chapter 7 | Control - Introduction NIBE F1155... -
Page 37: Menu System
Display of temperature and other operating information and access to the alarm log. See information in the help menu or user manual. This menu is also set in the slave heat pump's limited menu system. NIBE F1155 Chapter 7 | Control - Introduction... - Page 38 This symbol indicates whether "holiday setting" is active in 4.7. This symbol indicates whether F1155 has contact with NIBE Uplink. This symbol indicates the actual speed of the fan if the speed has changed from the normal setting.
- Page 39 Back button. Mark the applicable option. One of the options is pre-selected (white). Press the OK button to confirm the selected option. The selected option has a green tick. NIBE F1155 Chapter 7 | Control - Introduction...
- Page 40 (at the page number) has been marked. Press the OK button to skip between the steps in the start guide. If the start guide is left on this page it closes automatically in 60 min Chapter 7 | Control - Introduction NIBE F1155...
-
Page 41: Control - Menus
Menu 2 - HOT WATER 2 - HOT WATER*, ** 2.1 - temporary lux 2.2 - comfort mode 2.3 - scheduling 2.9 - advanced 2.9.1 - periodic increase 2.9.2 - hot water recirc. * NIBE F1155 Chapter 8 | Control - Menus... -
Page 42: Menu 3 - Info
Menu 4 - HEAT PUMP 4 - HEAT PUMP 4.1 - plus functions 4.1.1 - pool * 4.1.3 - internet 4.1.3.1 - NIBE Uplink 4.1.3.8 - tcp/ip settings 4.1.3.9 - proxy settings 4.1.4 - sms * 4.1.5 - SG Ready 4.1.7 - smart home... -
Page 43: Menu 5 - Service
Manual start of the start guide which is run operating settings Operating settings for the heat the first time the heat pump is started. pump. quick start Quick starting the compressor. NIBE F1155 Chapter 8 | Control - Menus... - Page 44 If “addition” is selected and activated in menu 4.2 and For a higher charge output click the high output selec- the current supply temperature exceeds the calculated tion. temperature by the set value, the additional heat is forced to stop. Chapter 8 | Control - Menus NIBE F1155...
- Page 45 Setting range: intermittent, continuous, 10 days Setting range: 1 - 100 % continuous Factory setting: 30 % Default value: intermittent Set the operating mode of the brine pump here. NIBE F1155 Chapter 8 | Control - Menus...
- Page 46 "pool" (accessory required) means pool heating operating mode for the heating medium pump. Manual setting, heating "cooling" (accessory required) means operating mode cooling for the heating medium pump. Setting range: 1 - 100 % Default values: 70 % Chapter 8 | Control - Menus NIBE F1155...
- Page 47 This menu contains several sub-menus, one for each MENU 5.2.1 - MASTER/SLAVE MODE standard. Setting range: master, slave 1-8 Default value: master NIBE F1155 Chapter 8 | Control - Menus...
- Page 48 5.4. (docked for example to pool heating, hot water charging and heating the building). Chapter 8 | Control - Menus NIBE F1155...
- Page 49 Here, you can activate cooling via the exhaust air module. When the function has been activ- ated, the cooling settings are displayed in the menu system. NIBE F1155 Chapter 8 | Control - Menus...
- Page 50 Contr. pump GP10: Here, you can set the speed of the circulation pump manually. See the accessory installation instructions for function description. Chapter 8 | Control - Menus NIBE F1155...
- Page 51 (BT53) and the temperature of the brine entering the heat pump (BT10) is lower than this setting, the function is deactivated. See the accessory installation instructions for function description. NIBE F1155 Chapter 8 | Control - Menus...
- Page 52 Setting range: 10 – 2,000 DM address Factory setting: 400 DM Factory setting: address 1 hysteresis word swap Setting range: 10 – 2,000 DM Factory setting: not activated Factory setting: 100 DM Chapter 8 | Control - Menus NIBE F1155...
- Page 53 All settings can be reset (including settings available to Setting range: 1 – 10000 the user) to default values here. Factory setting: 500 Caution When resetting, the start guide is displayed the next time the heat pump is restarted. NIBE F1155 Chapter 8 | Control - Menus...
- Page 54 Set the function for under floor drying here. You can set up to seven period times with different calculated flow temperatures. If less than seven periods are to be used, set the remaining period times to 0 days. Chapter 8 | Control - Menus NIBE F1155...
-
Page 55: Service
Maintenance may only be carried out by per- Anti-freeze with suitable refractometer. sons with the necessary expertise. Expansion vessel. When replacing components on F1155 only replacement parts from NIBE may be used. System pressure. Flow and return temperature. The difference must NOTE be 2 - 5 °C If an electrical connection has been disconnec- Correct any fault before continuing. - Page 56 Air must get into the system for the remaining liquid to run out. To allow air in, unscrew the bleed screw on the highest radiator in the house. When the climate system is empty, the required service can be carried out. Chapter 9 | Service NIBE F1155...
- Page 57 Insert a screwdriver and turn the pump motor 0.779 0.469 around. 0.672 0.414 Screw in the venting screw (QM5). Start F1155 by setting the switch (SF1) to "" and check that the circulation pump is working. NIBE F1155 Chapter 9 | Service...
- Page 58 Disconnect the switch (D) from the joint board (AA100). QM31 QM33 Carefully pull out the cooling module. F1255 QM34 QM32 Pull off the lock catches. Disconnect the pipe connection under the shut-off valve (QM31). Chapter 9 | Service NIBE F1155...
- Page 59 NOTE For the following functions to work the USB memory must contain files with software for F1155 from NIBE. The fact box at the top of the display shows information (always in English) of the most probable update that the update software has selected form the USB memory.
- Page 60 OK button you will return to the previous page (menu 7.1) where you can choose to start the up- date. Menu 7.2 - logging logging7.2 activated interval Setting range: 1 s – 60 min Factory setting range: 5 s Chapter 9 | Service NIBE F1155...
- Page 61 USB memory. Via "recover settings" you reset all menu settings from the USB memory. Caution Reset of the menu settings from the USB memory cannot be undone. NIBE F1155 Chapter 9 | Service...
-
Page 62: Disturbances In Comfort
If the red light is still on, – If mode "manual" is selected, select "addition". and a menu called “alarm” is visible in the display, the • Large hot water consumption. problem causing the alarm still remains. Chapter 10 | Disturbances in comfort NIBE F1155... - Page 63 – Set the thermostats to max. in as many rooms as – Open the valves. possible. Adjust the heating curve via menu 1.1, in- stead of choking the thermostats. HIGH ROOM TEMPERATURE • Too high set value on the automatic heating control. NIBE F1155 Chapter 10 | Disturbances in comfort...
- Page 64 – Adjust the flow distribution between the radiators. GURGLING SOUND This part of the troubleshooting chapter only applies if the NIBE FLM accessory is installed. • Not enough water in the water seal. – Refill the water seal with water.
-
Page 65: Accessories
Part no. 067 314 under F1155. EXHAUST AIR MODULE NIBE FLM Part no. 067 152 NIBE FLM is an exhaust air module designed to combine BUFFER VESSEL UKV recovery of mechanical exhaust air with ground source heating. UKV is an accumulator tank that is suitable for connection... - Page 66 Part no 067 064 Valve kit for filling brine in the collector hose. Includes particle filter and insulation. SOLAR PACKAGE NIBE PV KB 32 (max. 30 kW) Solar panel package, 3 – 24 kW (10 – 80 panels), which Part no 089 971 is used to produce your own electricity.
-
Page 67: Technical Data
Dimensions and setting-out coordinates * This dimension applies at 90° angle on the brine pipes (side connection). The dimension can vary approx. ±100 mm vertically as the brine pipes consist in part of flexible pipes. NIBE F1155 Chapter 12 | Technical data... -
Page 68: Electrical Data
Max operating current including 0 – 1 kW immersion heater (Recommended fuse rating). 26(32) Max operating current including 2 – 4 kW immersion heater (Recommended fuse rating). 39(40) Max operating current including 5 – 7 kW immersion heater (Recommended fuse rating). 52(63) Additional power 1/2/3/4/5/6/7 Chapter 12 | Technical data NIBE F1155... -
Page 69: Technical Specifications
Connection, hot water heater ext diam Compressor oil Oil type Volume 0.68 Dimensions and weight Width Depth Height 1,500 Required ceiling height 1,670 Weight complete heat pump Weight only cooling module Part number, 1x230V 065 227 065 412 NIBE F1155 Chapter 12 | Technical data... - Page 70 Returledning Return pipe Caution For operation of F1155-6 above 75% com- pressor speed, unlock in menu 5.1.24. This can produce a louder noise level than the value stated in the technical specifications. Chapter 12 | Technical data NIBE F1155...
- Page 71 °C Köldbärare in, temperatur Incoming brine temp, °C Framledningstemp. Värmebärare 50 °C för F1155-1255 -12 kW 230V. F1155-12 Avgiven kyleffekt Specified cooling output, kW 100% °C Köldbärare in, temperatur Incoming brine temp, °C NIBE F1155 Chapter 12 | Technical data...
-
Page 72: Energy Labelling
Energy labelling INFORMATION SHEET Supplier NIBE AB Model F1155-6 1x230V F1155-12 1x230V Model hot water heater VPB 300 VPB 300 Temperature application °C 35 / 55 35 / 55 Declared load profile for water heating Seasonal space heating energy efficiency class, aver-... - Page 73 Daily energy consumption 7.73 Daily fuel consumption elec fuel Annual energy consumption 1,697 Annual fuel consumption Contact information NIBE Energy Systems – Box 14 – Hannabadsvägen 5 – 285 21 Markaryd – Sweden NIBE F1155 Chapter 12 | Technical data...
- Page 74 Daily energy consumption 9.62 Daily fuel consumption elec fuel Annual energy consumption 2,112 Annual fuel consumption Contact information NIBE Energy Systems – Box 14 – Hannabadsvägen 5 – 285 21 Markaryd – Sweden Chapter 12 | Technical data NIBE F1155...
-
Page 75: Item Register
Cooling mode indication, 28 General, 20 Cooling section, 12 Master/Slave, 25 Country specific information, 6 Miniature circuit-breaker, 20 NIBE Uplink, 26 Data for energy efficiency of the system, 72 Optional connections, 25 Delivery and handling, 8 Outdoor sensor, 23 Assembly, 8... - Page 76 Selecting menu, 39 Use the virtual keyboard, 40 Selecting options, 39 Miniature circuit-breaker, 20 Serial number, 5 Service, 55 NIBE Uplink, 26 Service actions, 55 Service actions, 55 Draining the climate system, 56 OK button, 36 Drawing out the cooling module, 58...
- Page 77 Component location cooling section, 12 Component location electrical cabinets, 11 Component locations, 10 List of components, 10 Transport, 8 Troubleshooting, 62 USB service outlet, 59 Use the virtual keyboard, 40 Warranty information, 6 Working range heat pump, 70 NIBE F1155 Item register...
- Page 78 GROUND SOURCE HEAT PUMP COMMISSIONING CHECKLIST This Commissioning Checklist is to be completed in full by the competent person who commissioned the heat pump and associated equipment as a means of demonstrating compliance with the appropriate Building Regulations and then handed to the customer to keep for future reference. Failure to install and commission this equipment to the manufacturer’s instructions may invalidate the warranty but does not affect statutory rights Customer Name Address...
- Page 79 MAINS PRESSURE HOT WATER STORAGE SYSTEM COMMISSIONING CHECKLIST This Commissioning Checklist is to be completed in full by the competent person who commissioned the storage system as a means of demonstrating compliance with the appropriate Building Regulations and then handed to the customer to keep for future reference. Failure to install and commission this equipment to the manufacturer’s instructions may invalidate the warranty but does not affect statutory rights.
- Page 80 Service Record It is recommended that your heating system is serviced regularly and that the appropriate Service Interval Record is completed. Service Provider Before completing the appropriate Service Interval Record below, please ensure you have carried out the service as described in the manufacturer’s instructions.
- Page 84 WS release date: 2020-03-02 10:13 Publish date: 2020-04-14 09:52 This manual is a publication from NIBE Energy Systems. All product illustrations, facts and data are based on the available information at the time of the publication’s approval. NIBE Energy Systems makes reservations for any factual or printing errors in this manual.
Need help?
Do you have a question about the F1155 Series and is the answer not in the manual?
Questions and answers