Table of Contents
Advertisement
Quick Links
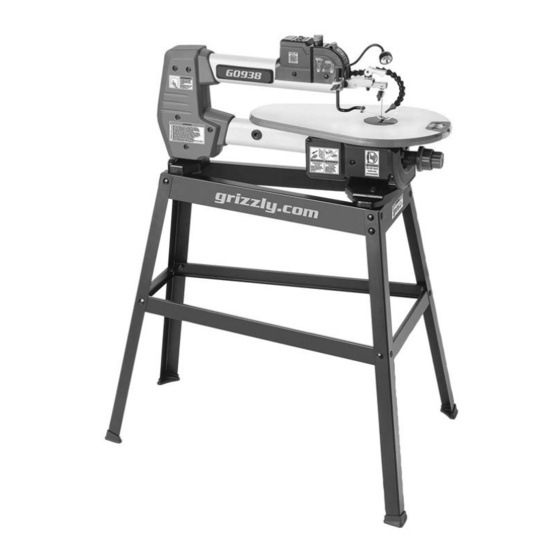
MODEL G0938
18" SCROLL SAW w/STAND
OWNER'S MANUAL
(For models manufactured since 03/21)
174315
COPYRIGHT © MAY, 2023 BY GRIZZLY INDUSTRIAL, INC.
WARNING: NO PORTION OF THIS MANUAL MAY BE REPRODUCED IN ANY SHAPE
OR FORM WITHOUT THE WRITTEN APPROVAL OF GRIZZLY INDUSTRIAL, INC.
#JM22349 PRINTED IN CHINA
V1.05.23
***Keep for Future Reference***
Advertisement
Table of Contents

Related Manuals for Grizzly G0938


Summary of Contents for Grizzly G0938
- Page 1 174315 COPYRIGHT © MAY, 2023 BY GRIZZLY INDUSTRIAL, INC. WARNING: NO PORTION OF THIS MANUAL MAY BE REPRODUCED IN ANY SHAPE OR FORM WITHOUT THE WRITTEN APPROVAL OF GRIZZLY INDUSTRIAL, INC. #JM22349 PRINTED IN CHINA V1.05.23 ***Keep for Future Reference***...
- Page 2 This manual provides critical safety instructions on the proper setup, operation, maintenance, and service of this machine/tool. Save this document, refer to it often, and use it to instruct other operators. Failure to read, understand and follow the instructions in this manual may result in fire or serious personal injury—including amputation, electrocution, or death.
-
Page 3: Table Of Contents
Table of Contents INTRODUCTION ..........2 SECTION 5: ACCESSORIES ......29 Contact Info............ 2 SECTION 6: MAINTENANCE ......30 Manual Accuracy ........... 2 Schedule ............30 Identification ........... 3 Cleaning & Protecting ........30 Controls & Components ......... 4 Lubrication ........... 30 Machine Data Sheet ........ -
Page 4: Introduction
Always consider safety first, as it applies to your individual working conditions. Use this and other machinery with caution and respect. Failure to do so could result in serious personal injury, damage to equip- ment, or poor work results. Model G0938 (Mfd. Since 03/21) -
Page 5: Identification
G. Blade Tension Lever P. Dust Port H. LED Work Light Q. Table Lock Knob ON/OFF Switch R. Table Tilt Knob To reduce your risk of serious injury, read this entire manual BEFORE using machine. Model G0938 (Mfd. Since 03/21) -
Page 6: Controls & Components
Figure 1. Main controls & components. Q. Table Lock Knob: Locks table at desired angle. A. Hold-Down Shoe Lock Knob: Locks hold- down shoe in position. R. Table Tilt Knob: Adjusts table to desired angle for bevel cutting. Model G0938 (Mfd. Since 03/21) -
Page 7: Machine Data Sheet
Depth of Throat ................................18 in. Maximum Cutting Height ............................2-1/4 in. Maximum Cutting Height at 45 Degrees ......................1-1/8 in. Maximum Cutting Height at 15 Degrees ......................2-1/4 in. Maximum Cutting Depth ............................18 in. Model G0938 (Mfd. Since 03/21) Model G0959 Page 1 of 2... - Page 8 Tool-Less Blade Holder Accepts Pin-End & Plain-End Blades Variable Blade Speed Machine Stand Flexible Sawdust Blower & LED Worklight Hold-Down Fork Dust Port 1-1/2" (OD) Accessories: Pin-End Blade 5" Plain-End Blade 5" Hex Wrench 3mm Model G0938 (Mfd. Since 03/21) Model G0938 Page 2 of 2...
-
Page 9: Section 1: Safety
Never operate under the influence of drugs or injury or blindness from flying particles. Everyday alcohol, when tired, or when distracted. eyeglasses are NOT approved safety glasses. Model G0938 (Mfd. Since 03/21) - Page 10 Make sure they are properly installed, you experience difficulties performing the intend- undamaged, and working correctly BEFORE ed operation, stop using the machine! Contact our operating machine. Technical Support at (570) 546-9663. Model G0938 (Mfd. Since 03/21)
-
Page 11: Additional Safety For Scroll Saws
Model G0938 (Mfd. Since 03/21) -
Page 12: Section 2: Power Supply
-10- Model G0938 (Mfd. Since 03/21) - Page 13 Two-prong outlets do not meet the grounding requirements for this machine. Do not modify or use an adapter on the plug provided—if it will not fit the outlet, have a qualified electrician install the proper outlet with a verified ground. -11- Model G0938 (Mfd. Since 03/21)
-
Page 14: Section 3: Setup
IMPORTANT: Save all packaging materials until you are completely satisfied with the machine and have resolved any issues between Grizzly or the shipping agent. You MUST have the original pack- aging to file a freight claim. It is also extremely helpful if you need to return your machine later. -
Page 15: Inventory
N. Carriage Bolts M8-1.25 x 12 ..... 20 O. Flange Nuts M8-1.25 ........ 24 G0938 18" Scroll Saw (Figure 3) Spacers 9 x 14 x 20mm ......2 A. G0938 18" Scroll Saw .........1 Q. -
Page 16: Hardware Recognition Chart
Hardware Recognition Chart USE THIS CHART TO MATCH UP HARDWARE DURING THE INVENTORY AND ASSEMBLY PROCESS. Flat Head Screw -14- Model G0938 (Mfd. Since 03/21) -
Page 17: Site Considerations
Shadows, glare, or strobe effects that may distract access restricted location. or impede the operator must be eliminated. Wall Leave Room for Maintenance Keep Workpiece 24" 15" Loading Area Unobstructed 35" = Electrical Connection Figure 6. Minimum working clearances. -15- Model G0938 (Mfd. Since 03/21) -
Page 18: Assembly
(3) carriage bolts and (3) flange nuts (see Figure 8). Note: Rear legs are marked with an "R". Attach lower rear bracket to (2) rear stand legs using (2) carriage bolts and (2) flange nuts (see Figure 8). -16- Model G0938 (Mfd. Since 03/21) - Page 19 13. Pinch blade and move it side to side with light pressure to verify it is tensioned enough that it will not come off during operation. Refer to Figure 11. Installing foot pads. Adjusting Blade Tension on Page 21. -17- Model G0938 (Mfd. Since 03/21)
-
Page 20: Dust Collection
OFF. Motor should run smoothly and without unusual problems or noises. Dust Port w/Dust Hose Attached Congratulations! The Test Run is complete. Figure 13. Dust port and dust hose attached to dust port. -18- Model G0938 (Mfd. Since 03/21) -
Page 21: Section 4: Operations
Read books/magazines or get formal training before beginning any proj- ects. Regardless of the content in this sec- tion, Grizzly Industrial will not be held liable for accidents caused by lack of training. -19- Model G0938 (Mfd. Since 03/21) -
Page 22: Basic Cutting Tips
• Scroll saw blades can drift. This is compen- severe injury. sated for by adjusting feed direction. -20- Model G0938 (Mfd. Since 03/21) -
Page 23: Adjusting Hold-Down Shoe
Release blade tension lever only during blade changing operations. If blade is too tight, lever will be difficult to lower and could result in damage to blade holder or arm assembly. -21- Model G0938 (Mfd. Since 03/21) -
Page 24: Tilting Table
The positive stop (see Figure 17) allows you to quickly return the table to 0° from a left-tilt set- ting. The positive stop is adjustable, allowing for calibration, or if desired, minor deviations from 0°. -22- Model G0938 (Mfd. Since 03/21) - Page 25 Note: Table tilt scale should now read 0°. If scale does not read 0°, refer to Calibrating Table Tilt on Page 32. Positive Stop Rest Figure 19. Stop rest positioned for full right tilt. -23- Model G0938 (Mfd. Since 03/21)
-
Page 26: Blade Selection
Scroll saw blades are classified as either "pin-end" (mounting pins in the ends of the blade) or "plain end" (no pins), as shown in Figure 21. The Model G0938 comes with one pin-end blade and one plain-end blade, but the scroll saw is designed to accept any 5" (124mm) blade for cutting a wide variety of materials. - Page 27 Tilt table to 45° to reveal lower blade holder, upper arm. and loosen lower blade holder lock knob (see Figure 25) to release blade. Adjust blade tension (refer to Adjusting Blade Tension on Page 21). Install table insert. -25- Model G0938 (Mfd. Since 03/21)
-
Page 28: Removing/Installing Pin-End Blade
(see Figure 23 on Page 25). Seat Pins in Indents of Mounting Arm 10. Return table tilt to 0° and install table insert. Figure 26. Pin-end blade installation. -26- Model G0938 (Mfd. Since 03/21) -
Page 29: Adjusting Blade Speed
See Figures 28–31 for examples of standard Variable- scroll cutting. Speed Knob Figure 27. Location of variable-speed knob. Figure 28. Making a straight cut. Figure 29. Making a curved cut. -27- Model G0938 (Mfd. Since 03/21) -
Page 30: Making Inside Cuts
Turn saw OFF and wait until all motion has power, then perform cut. stopped before removing waste near blade. When finished, disconnect saw from power, remove blade and workpiece, then re-install blade on saw. -28- Model G0938 (Mfd. Since 03/21) -
Page 31: Section 5: Accessories
Size Width cause machine to malfunction, resulting in H9024 0.042" serious personal injury or machine damage. To reduce this risk, only install accessories H9025 0.046" recommended for this machine by Grizzly. H9026 0.052" H9027 0.060" NOTICE H9028 0.066" H9029 0.075"... -
Page 32: Section 6: Maintenance
To reduce risk of shock or accidental startup, always disconnect machine from power before adjustments, Cleaning the Model G0938 is relatively easy. maintenance, or service. Vacuum excess wood chips and sawdust, and wipe off the remaining dust with a dry cloth. If any... -
Page 33: Section 7: Service
3. Wrong blade for operation. 3. Refer to Blade Selection Chart, and use correct blade for operation (Page 24). 4. Too much pressure on blade. 4. Reduce pressure on workpiece as it passes through blade. -31- Model G0938 (Mfd. Since 03/21) -
Page 34: Checking/Replacing Motor Brushes
The table tilt knob and tilt scale are used to posi- tion the table for performing bevel cuts. Over the The motor on the Model G0938 is equipped with life of the machine, the components may loosen two long-life carbon brushes—one on each side or stretch, at which point it will be necessary to of the motor. -
Page 35: Aligning Blade Holders
Figure 37. Squaring blade to table. — If blade is square to table no further adjust- ments need to be made. — If blade is not square to table proceed to Step 6. -33- Model G0938 (Mfd. Since 03/21) -
Page 36: Replacing Led Work Light
Panel Tighten button head cap screws loosened in LED Work Step 5. Light Connector LED Work Circuit Light Wire Board Figure 39. Control panel access and connections. -34- Model G0938 (Mfd. Since 03/21) - Page 37 To install new LED work light, thread wire harness into side panel and tighten inside nut (see Figure 41). — If light does not function, check connec- tions and retry lighting. Contact Grizzly Tech if problem persists. -35- Model G0938 (Mfd. Since 03/21)
-
Page 38: Section 8: Wiring
Technical Support at (570) 546-9663. The photos and diagrams included in this section are best viewed in color. You can view these pages in color at www.grizzly.com. -36- Model G0938 (Mfd. Since 03/21) -
Page 39: Wiring Diagram
5-15 Plug Ground 120V MOTOR ROCKER SWITCH CIRCUIT TTC TR01 10A BOARD XK94V-0 PAD2 22uF/16 PAD2 PAD3 PAD4 POTENTIOMETER B10K ON/OFF SWITCH KEDU HY17 8A 120V LED LIGHT READ ELECTRICAL SAFETY -37- Model G0938 (Mfd. Since 03/21) ON PAGE 36! -
Page 40: Electrical Components
Motor Figure 42. Scroll saw motor. Figure 43. LED light. On/Off Potentiometer Switch LED Light Switch Air Nozzle Diaphragm To Motor Circuit Board Terminal Figure 44. Control panel. READ ELECTRICAL SAFETY -38- Model G0938 (Mfd. Since 03/21) ON PAGE 36! -
Page 41: Section 9: Parts
SECTION 9: PARTS We do our best to stock replacement parts when possible, but we cannot guarantee that all parts shown are available for purchase. Call (800) 523-4777 or visit www.grizzly.com/parts to check for availability. Main 100-2 100-1 100-3 100-4 BUY PARTS ONLINE AT GRIZZLY.COM! - Page 42 TENSION SPACER 6 X 18 X 1 P0938052 BRACKET STOP PLATE P0938101 LED LAMP 120V 10W P0938053 ACORN NUT M6-1 P0938102 CIRCUIT BOARD XK94V-0 BUY PARTS ONLINE AT GRIZZLY.COM! -40- Model G0938 (Mfd. Since 03/21) Scan QR code to visit our Parts Store.
- Page 43 TORSION SPRING 1.4 X 33 X 28 P0938108 BEARING SEAT ASSEMBLY P0938115 COVER, LEFT P0938109 ROLL PIN 6 X 23 P0938116 COVER, RIGHT BUY PARTS ONLINE AT GRIZZLY.COM! -41- Model G0938 (Mfd. Since 03/21) Scan QR code to visit our Parts Store.
-
Page 44: Stand
P0938124 FOOT, FRONT P0938132 FOOT, REAR P0938125 SUPPORT BRACKET, UPPER (SIDE) P0938133 SUPPORT BRACKET, UPPER (FRONT) P0938126 SUPPORT BRACKET, LOWER (FRONT) BUY PARTS ONLINE AT GRIZZLY.COM! -42- Model G0938 (Mfd. Since 03/21) Scan QR code to visit our Parts Store. -
Page 45: Labels & Cosmetics
ELECTRICITY LABEL P0938205 BEVEL ANGLE LABEL P0938213 TOUCH-UP PAINT, GRIZZLY GREEN P0938206 TABLE LOCK LABEL P0938214 CSA LABEL P0938207 STAND WARNING LABEL BUY PARTS ONLINE AT GRIZZLY.COM! -43- Model G0938 (Mfd. Since 03/21) Scan QR code to visit our Parts Store. -
Page 47: Warranty & Returns
WARRANTY & RETURNS Grizzly Industrial, Inc. warrants every product it sells for a period of 1 year to the original purchaser from the date of purchase. This warranty does not apply to defects due directly or indirectly to misuse, abuse, negligence, accidents, repairs or alterations or lack of maintenance.
Need help?
Do you have a question about the G0938 and is the answer not in the manual?
Questions and answers