Table of Contents
Advertisement
Quick Links
Advertisement
Table of Contents

Related Manuals for Solid State Logic UF8


Summary of Contents for Solid State Logic UF8
- Page 1 SSL UF8 User Guide SSL UF8...
- Page 2 As research and development is a continual process, Solid State Logic reserves the right to change the features and specifications described herein without notice or obligation. Solid State Logic cannot be held responsible for any loss or damage arising directly or indirectly from any error or omission in this manual.
-
Page 3: Table Of Contents
SSL 360° Software Overview Overview & Home Page UF8 Page DAW Communication SSL V-MIDI Ports DAW Protocols Pro Tools with UF8 - Tutorial SSL 360° Setup Pro Tools Setup LCD Layout Tutorial Logic with UF8 - Tutorial SSL 360° Setup... - Page 4 Contents Tutorial Studio One with UF8 - Tutorial SSL 360° Setup Studio One Setup LCD Layout Tutorial Plug-in Mixer - Tutorial SSL 360° Setup Plug-in Mixer Setup Tutorial Accessing Channel Strip Mode, Bus Compressor Mode, Metering LCD Layout - Channel Strip Mode...
-
Page 5: Overview
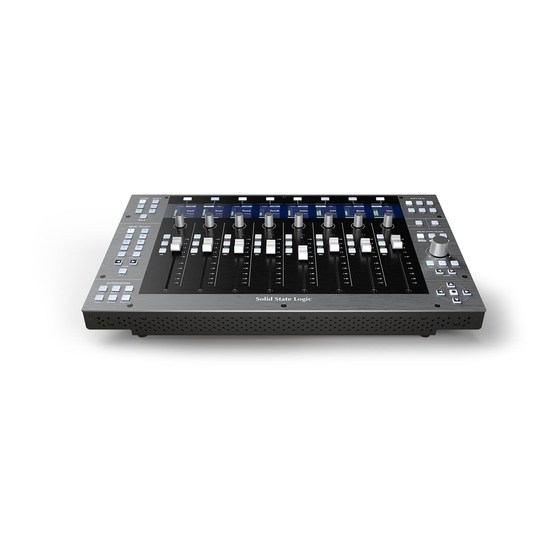
What is SSL UF8? SSL UF8 is a scalable hardware control surface offering the essential DAW control you need, with room to add USB keyboard shortcut sequences to suit your own workflow. UF8 features 8 high-quality, motorised touch-sensitive faders accompanied by 8 endless rotary encoders and 8 high-quality colour LCD TFTs for clear visual feedback at all times. -
Page 6: Get-Started
Get-Started Get-Started Unpacking The unit has been carefully packed and inside the box you will find the following items in addition to your UF8 control surface: 2 x Stands 1.5 m C to C USB Cable 1.5 m C to A USB Cable... -
Page 7: Rack Mount Kit
Get-Started Rack Mount Kit A 19" in rack mount kit is available for purchase separately should you wish to rack mount your UF8. When rack-mounted, UF8 occupies 6U of space. Attaching the rack mount ears The kit contains a set of metal racking ears and 12 screws, which should be secured to the chassis using the lower 3 screw holes at the top and bottom of each side (6 in total per side), as pictured below. -
Page 8: Connecting Your Uf8 Hardware
USB Cables Please use one of the provided USB cables ('C' to 'C' or 'C' to 'A') to connect UF8 to your computer. The type of USB port you have available on your computer will determine which of the two included cables you should use. Newer computers may have 'C' ports, whereas older computers may have 'A'. -
Page 9: Downloading Ssl 360° Software
Downloading SSL 360° Software UF8 requires the SSL 360° software to be installed on your computer in order to function. SSL 360° is the brains behind your UF8 control surface. Once you have connected your UF8 hardware to your computer as described on the previous page, please download SSL 360°... -
Page 10: Keyboard Identify (Mac Only)
SSL 360° software and this is covered later in this User Guide. When you first plug in your UF8, Mac OS will present the above 'Keyboard Setup Assistant' window because Mac OS wants you to identfy which region (Europe, America or Japan) this, as yet unidentified, keyboard is from. If you connected your UF8 to your computer before installing SSL 360°... -
Page 11: Registering Your Uf8
Get-Started Registering Your UF8 Register your UF8 for the best possible experience and to gain access to any additional software in your SSL user account. To register your product, head to www.solidstatelogic.com/get-started and follow the on-screen instructions. During the registration process, you’ll need to input the serial number of your unit. This can be found on the label on the base of your unit. -
Page 12: Uf8 Hardware Layout
4 - 8 x Soft Keys A line of 8 soft keys allow access to various V-POT parameters or, up to 40 user-assignable keys per UF8. The label for the function of each key is displayed in the top section of the LCD below. - Page 13 FOCUS Mode - This mode turns the operation of the large encoder into a mouse wheel scroll emulation and is great for controlling plug-ins. Simply hover your computer mouse over the desired control and turn the encoder. The sensitivity of this mode will be determined by your computer's mouse scroll sensitivity settings. SSL UF8 User Guide...
- Page 14 18 - BANK < > Keys These keys allow you to bank through the tracks in your DAW, bringing them onto your UF8 control surface(s). Banking works in groups of 8/16/24/32, depending on the DAW and the number of UF8s you have connected.
-
Page 15: Connector Panel
The recessed section hosts UF8's connectors. USB - 'C' Type Connector Connect one of the included USB cables from your computer to the USB port on UF8. This handles all of the communication between your DAW and UF8, via the SSL 360° software application. -
Page 16: Ssl 360° Software Overview
SSL 360° Software Overview Overview & Home Page SSL 360° software is not only the 'brains' behind the UF8 control surface, it is also the command centre from which new versions of software and firmware can be downloaded for your 360° compatible device. - Page 17 5 - EXPORT REPORT Should you encounter any issues with your UF8 or SSL 360° software, you may be asked by a support agent to use the EXPORT REPORT feature. This feature generates a text file containing the essential information about your computer system and UF8(s), alongside technical log files relating to SSL 360°...
-
Page 18: Uf8 Page
UF8 Page The UF8 page can be selected from the menu toolbar on the left-hand side and is where you configure UF8 to work with your DAW(s). It is also the place where you can customise any of the user-assignable keys. Customised DAW profiles can then be saved and loaded as .xml files should you need to work on another computer with SSL 360°... - Page 19 Product Overview & Features 6 - Short Label Using your computer keyboard, you can type the label that you wish to appear on the UF8 LCD just below the User Key. 7 - Profile Name and SAVE/LOAD/SAVE AS Buttons Allows you to save your customised DAW profiles as an .xml file to your computer or any connected hard-drives. The name of the currently active profile is shown above these buttons.
- Page 20 DAW metering on the LCD at all times. If TRIM is engaged, the indication will flash between TRIM and READ or TRIM and WRITE. "I wish I was blank, I wish I was blank, I wish I could thank, I wish I was blank" - Blank, The Smashing Pumpkins. SSL UF8 User Guide...
-
Page 21: Daw Communication
UF8. The HUI (Human User Interface) protocol is the way in which Pro Tools communicates with UF8. In addition to the HUI protocol, we have added a number of features such as CHANNEL and PLUGIN mode, which provide an enhanced workflow for those using UF8 with Pro Tools. -
Page 22: Pro Tools With Uf8 - Tutorial
Open Pro Tools. Go to the Setup Menu > MIDI > MIDI Input Devices..In this list, ensure that any SSL V-MIDI Ports you need are ticked. e.g. If you have 1 UF8, just tick SSL V-MIDI Port 1 Source. If you have 2 UF8s, tick SSL V-MIDI Port 1 Source and SSL V-MIDI Port 2 Source etc. -
Page 23: Lcd Layout
Track Metering Power Tip: The F1 command, available in the DAW commands list SSL 360° will clear clips on the track metering. You can assign this command to any of the Quick Keys or User keys on UF8. Alternatively, you'll find this command pre-assigned to the 6th Soft Key in User Bank 3. -
Page 24: Tutorial
Pro Tools. In Use: When solo'ing tracks, expect the CUT keys of UF8 to flash on all tracks that are not solo'd. Double-pressing a SEL key will open up the Pro Tools re-name track window on your computer screen. - Page 25 Channel Encoder By default, the CHANNEL encoder is used to move your DAW tracks across the UF8 surface, in increments of one channel at a time. If you find yourself in NAV, NUDGE or FOCUS modes, simply push the CHANNEL encoder to return to CHANNEL mode.
- Page 26 Automation You can select the automation mode for each track directly from UF8. To do this, you will first need to put the surface into AUTO (Automation) SELECTION MODE. Then, select a track you want to change the automation state of using the SEL key(s). Finally, press the desired automation state from the AUTOMATION keys in the lower-left corner of UF8.
- Page 27 Pre/Post Sends can be toggled between their pre/post state using the Soft Keys on UF8. Ensure the Soft Keys are in V-Pot mode, by pressing the V-POT button in the SOFT KEYS selection area, then simply use the relevant Soft Key to toggle between post/pre states for each Send as desired.
- Page 28 Sends can be flipped to the faders using the FLIP key. This is useful for riding Send levels or creating headphone mixes using faders instead of V-Pots. In FLIP mode, the V-Pots control the Pan of the currently selected Send. SSL UF8 User Guide...
- Page 29 Pro Tools Tutorial Channel Mode Channel Mode allows you to access Sends A-E and the Pan of the selected track, all from one place. This is a unique UF8 control feature, that utilises the touch-sense encoders to automatically switch send selection.
- Page 30 The F5 command, available in the DAW commands list (also pre-assigned to the 7th Soft Key in User Bank 3) allows you to toggle the V-Pots between Fixed and Velocity-Sensitive modes, which apply to controlling plug-ins specifically. SSL UF8 User Guide...
- Page 31 • Although you cannot select Insert Slots F-J directly from UF8 (Pro Tools does not make them available), once you have selected a track and opened a plug-in in Slots A-E using the number keys, you can click with your mouse on-screen in Pro Tools on any Insert Slot in F-J and the UF8 surface will be able to control the parameters.
- Page 32 Kpad 5 Audition In Kpad 6 Audition Out Kpad 7 Audition Post Kpad 8 Kpad 9 Online Loop Quick Punch Forward Rewind Stop Play Record Next Marker Previous Marker Last Marker Reset Marker Edit Capture Edit Separate SSL UF8 User Guide...
-
Page 33: Logic With Uf8 - Tutorial
Logic with UF8 - Tutorial The following tutorial guides you through configuring and using the default Logic profile on LAYER 1 of UF8. If you wish to configure Logic on a different layer, please refer to the DAW Communication section of this User Guide to ensure your DAW is configured for the correct SSL V-MIDI ports. - Page 34 7. Go to Preferences > MIDI and select the Inputs tab. In this list, ensure that any SSL V-MIDI Ports you need are ticked. e.g. If you have 1 UF8, just tick SSL V-MIDI Port 1 Source. If you have 2 UF8s, tick SSL V-MIDI Port 1 Source and SSL V-MIDI Port 2 Source etc.
-
Page 35: Lcd Layout
LowLCD - Displays a label or value readout for the parameter currently assigned to the V-Pot. DAW Track Metering - 12-segment track metering + clip V-Pot Readout Bar - Displays the position of the currently assigned V-Pot (encoder) function. SSL UF8 User Guide... -
Page 36: Tutorial
Logic. In Use: When solo'ing tracks, expect the CUT keys of UF8 to flash on all tracks that are not solo'd if the Logic Control Surface preference 'Flash Mute and Solo Buttons' is ticked. In Logic MCP (Mackie Control Protocol), only one track can be selected using the SEL key at a time. - Page 37 Channel Encoder By default, the CHANNEL encoder is used to move your DAW tracks across the UF8 surface, in increments of 1 channel at a time. If you find yourself in NAV or FOCUS modes, simply push the CHANNEL encoder to return to CHANNEL mode.
- Page 38 Automation You can select the automation mode for each track directly from UF8. To do this, select a track you want to change the automation state of using the SEL key(s). Then, press the desired automation mode from the AUTOMATION keys in the lower-left corner of UF8.
- Page 39 V-Pot Assignment Modes UF8 offers direct access to the six main Mackie Control V-Pot assignment modes. These V-Pot assignment modes are accessed via the keys labelled below: 1. PAN, 2. SEND, 3. INSTRUMENT, 4. EQ, 5. TRACK and 6. PLUGIN. For an in-depth explanation of each V-Pot assignment mode, please refer to the Mackie Control section Logic Pro Control Surface Support document.
- Page 40 View' or 'Mixer View'. On a traditional Mackie Controller, this information would be displayed on the 2-digit Assignment, or 'Mode Display'. Mixer View In 'Mixer View' the currently selected slot number (e.g. Send Slot or Plug-in Slot), will light the corresponding number key. Channel View In 'Channel View' the CHANNEL key will light. SSL UF8 User Guide...
- Page 41 User Banks 1-5 allow you access to various DAW commands or keyboard shortcuts on the 8 soft keys along the top of UF8. These can of course be changed to any of the available DAW commands or your own keyboard shortcut sequences in the UF8 page of SSL 360°.
- Page 42 Logic Tutorial User Bank 3 User Bank 4 User Bank 5 "Oh, tell me now, where was my fault, in loving you with my whole heart?" - White Blank Page, Mumford & Sons. SSL UF8 User Guide...
- Page 43 Global Play Foot-switch Name/Value Record Foot-switch SMPTE/Beats MIDI Tracks Inputs Audio Tracks Audio Instruments Busses Outputs User Shift Option Control Read Write Touch Latch Trim Save Undo Group Cancel Enter Marker Nudge Cycle Drop Replace Click SSL UF8 User Guide...
-
Page 44: Cubase/Nuendo With Uf8 - Tutorial
Click the + symbol in the top-left of the window and select Mackie Control from the drop-down list. Set the MIDI Input to SSL V-MIDI Port 1 Source and set MIDI Output to SSL V-MIDI Port 1 Destination. Click Apply. If you only have one UF8, skip to step 10. - Page 45 Change the MIDI Input and MIDI Ouptut on the second Mackie Control to SSL V-MIDI Port 1 and click Apply. To make Cubase refresh the LCDs on UF8, press any of the Soft Keys in the V-POT bank such as FX Send or EQ.
-
Page 46: Lcd Layout
LowLCD - Displays name or value information for the V-Pots, depending on which mode or page is selected. DAW Track Metering - 12-segment track metering + clip V-Pot Readout Bar - Displays the position of the currently assigned V-Pot (encoder) function. SSL UF8 User Guide... -
Page 47: Tutorial
'Remote Control Devices' document shown below For complete, in-depth coverage of all the functions and features you can control in Cubase using UF8, please refer to the Mackie MCU Pro section of Steinberg's Remote Control Devices PDF document, available via the Cubase/Nuendo Help menu. - Page 48 Bank Keys The BANK < > keys allow you to move tracks across your UF8 control surface(s) in multiples of 8, depending on how many UF8s are connected. e.g. 8 for one UF8, 16 for 2 UF8s etc.
- Page 49 Automation You can select the automation mode for each track directly from UF8. To do this, select a track you want to change the automation mode of using the SEL key. Then, press the desired automation mode from the AUTOMATION keys in the lower-left corner of UF8.
- Page 50 UF8's LCDs. Important UF8's PAGE < > are actioning the same MCU commands that are referred to in Cubase's MCU implementation document as CHANNEL < >. The action is the same but on UF8, we chose to label the keys differently.
- Page 51 V-Pot Assignment Modes UF8 offers direct access to the main modes of Cubase's Mackie Control implementation. For an in-depth explanation of how to use each V-Pot assignment mode, please refer to the Mackie MCU Pro section of Steinberg's Remote Control Devices document.
- Page 52 Press the FX SEND key. This mode allows you to control all the Send parameters for the currently selected track using the V-Pots - e.g. all the Send levels on the selected track. • Use the PAGE keys to move between parameter pages. SSL UF8 User Guide...
- Page 53 Send Settings - Global Alternatively, Global mode provides you with access to the advanced send settings for the tracks currently on the UF8 surface. For example, you can control a send parameter (e.g. level), of FX Send 1 across multiple tracks at once using the V-Pots.
- Page 54 User Banks 1-5 allow you access to various DAW commands or keyboard shortcuts on the 8 soft keys along the top of UF8. These can of course be changed to any of the available DAW commands or your own keyboard shortcut sequences in the UF8 page of SSL 360°.
- Page 55 Fader Bank 5 Fader Bank 6 Fader Bank 7 Fader Bank 8 Undo Redo Save Revert Read Write Project Mixer Sends (FX IFX 1st Insert) Instruments (VSTs) Master (Insert) Motors Solo Defeat Shift Left Right Cycle Punch Previous SSL UF8 User Guide...
-
Page 56: Ableton Live With Uf8 - Tutorial
Ableton Live with UF8 - Tutorial The following tutorial guides you through configuring and using the default Live profile on LAYER 1 of UF8. If you wish to configure Live on a different layer, please refer to the DAW Communication section of this User Guide to ensure your DAW is configured for the correct SSL V-MIDI ports. -
Page 57: Lcd Layout
LowLCD - Displays a label or value readout for the parameter currently assigned to the V-Pot, unless a fader is moved, in which case the fader dB value is shown. DAW Track Metering - 12-segment track metering + clip V-POT readout bar - Displays the position of the currently assigned V-Pot (encoder) function. SSL UF8 User Guide... -
Page 58: Tutorial
NORM - The SEL keys select a track in Live. REC - The SEL keys act as record-arm keys. AUTO - Disabled. This key only applies for Pro Tools profiles. The secondary labels CLEAR, ALL and ZERO do not apply for Live's UF8 integration. SSL UF8 User Guide... - Page 59 Cursor Keys and Mode Key (Launching Clips and Zooming) In the lower-right corner of UF8 are the Cursor keys with the Mode key in the centre. The function of these keys depends on the current view in Live.
- Page 60 The AUTOMATION keys in the bottom-left of UF8 do not apply for Live and are therefore disabled. Quick Keys The three QUICK keys located at the top-left of UF8 are user-assignable keys that are best used for access to your most frequent DAW commands or keyboard shortcuts. By default, they are assigned to the following commands but they can of course be changed in SSL 360°.
- Page 61 Assigns the Pan controls to the V-Pots on UF8. Pushing a V-Pot will default it to the centre position. 2 - SEND Assigns the Send controls for the currently selected track to the V-Pots on UF8. Pushing a V-Pot will default the Send to off. 3 - I/O Allows you to set the I/O settings for each track on the V-Pots.
- Page 62 User Banks 1-5 allow you access to various DAW commands or keyboard shortcuts on the 8 soft keys along the top of UF8. These can of course be changed to any of the available DAW commands or your own keyboard shortcut sequences in the UF8 page of SSL 360°.
- Page 63 Arr/SS (Arrangement/Session View Toggle) Track/Clip Browser Detail Undo BTA (Back To Arrangement) Draw Redo Add Locator Follow Previous Loc (Locator) Next Loc (Locator) Cycle Punch In Punch Out Start Rewind Forward Stop Play Record Launch Clip Launch Scene SSL UF8 User Guide...
-
Page 64: Studio One With Uf8 - Tutorial
If you have multiple UF8s, go back to the Add Device window and select Mackie Control Extender for subsequent UF8s, incrementing the SSL V-MIDI Port each time - e.g. the second UF8 would be set to SSL V-MIDI Port 2 for Receive From and Send To. - Page 65 Preferences > External Devices window and click and drag the Mackie Control and Mackie Control Extender images into Group STEP 7 : Go to Control Surface Placement setup and click and drag the Mackie Control and Mackie Control Extender(s) and move them up into Group 1. SSL UF8 User Guide...
-
Page 66: Lcd Layout
LowLCD - Displays a fader value or value readout for the parameter currently assigned to the V-Pot, depending on the current mode. DAW Track Metering - 12-segment track metering + clip. V-POT Readout Bar - Displays the position of the currently assigned V-Pot (encoder) function. SSL UF8 User Guide... -
Page 67: Tutorial
Before You Start... The information in this Studio One Tutorial sets out the key features of using UF8 with Studio One. Any aspect not covered in this guide can be found in the "Studio One - Mackie Control Support" document, available from the Presonus website. - Page 68 Channel Encoder By default, the CHANNEL encoder is used to move your DAW tracks across the UF8 surface, in increments of 1 channel at a time. If you find yourself in NAV or FOCUS modes, simply push the CHANNEL encoder to return to CHANNEL mode.
- Page 69 Automation You can select the automation mode for each track directly from UF8. To do this, select a track you want to change the automation mode of using a SEL key. Then, press the desired automation mode from the AUTOMATION keys in the lower-left corner of UF8.
- Page 70 V-Pot Assignment Modes UF8 offers direct access to Studio One's five main Mackie Control V-Pot assignment modes. These V-Pot assignment modes are accessed via the keys labelled below: 1. PAN, 2. SEND, 3. INSERT BYPASS, 4. TRACK and 5. PLUGIN.
- Page 71 Sets the V-Pots to 'Control Link' Mode. In Studio One, you customise which plug-in parameters are controlled on the V-Pots of UF8 for each and every plug-in you want to control. When you press the PLUGIN key for the first time, no plug-in parameters will be available because you need to configure whilst in 'Control Link' Mode.
- Page 72 Studio One Tutorial Setting Up Plug-In Control 1. Open up a plug-in you want to configure to be controlled by UF8's V-Pots and click the cog near the top-right. Click the cog 2. Click the small down arrow near the top-left and make sure 'Recently Touched' is ticked from the drop-down list.
- Page 73 6. Click down on the small hand symbol and drag it across to one of the blocks in the External Devices window. Click and drag from the small hand symbol into the External Devices window SSL UF8 User Guide...
- Page 74 Studio One Tutorial 7. The control has been successfully assigned to the first V-Pot. Repeat the process with other parameters and other plug-ins as you desire. Successfully assigned control to V-Pot 1 SSL UF8 User Guide...
- Page 75 User Banks 1-5 allow you access to various DAW commands or keyboard shortcuts on the 8 soft keys along the top of UF8. These can of course be changed to any of the available DAW commands or your own keyboard shortcut sequences in the UF8 page of SSL 360°.
- Page 76 SSL 360° using the Short Label text entry box, so the correct function names show on UF8's LCDs. Right-click on the button and click 'Assign Command...' to change the function of any of the F keys. SSL UF8 User Guide...
- Page 77 Audio Tracks Audio Instruments Aux (FX Channels) Busses Outputs User (Remote Banks) Shift Option Control Read/Off Write Touch Latch Save Undo Cancel Enter Marker Cycle Drop (Auto Punch) Click Solo (Clear) Forward Rewind Stop Play Record SSL UF8 User Guide...
-
Page 78: Plug-In Mixer - Tutorial
V-Pots will automatically change in response to the parameter being moved/actioned in the Plug-in Mixer, on UC1 or in the Plug-in itself. e.g. if you move the LMF Frequency control in any of these places, UF8's V-Pots will automatically switch to control that parameter. -
Page 79: Tutorial
This section guides you through using UF8 with the Plug-in Mixer. Before You Start... The concept behind the control of the Plug-in Mixer from UF8 is focused on extending the functionality of the UC1 controller, by allowing you to access multiple channels of the Plug-in Mixer at once. -
Page 80: Lcd Layout - Channel Strip Mode
Currently Selected Parameter across the V-Pots - Displays the name of the Channel Strip parameter currently assigned across the V-Pots. Value - Displays the value of the currently assigned plug-in parameter on that instance of Channel Strip. V-Pot Readout Bar - Displays the position of the currently assigned V-Pot (encoder) parameter. SSL UF8 User Guide... -
Page 81: Lcd Layout - Bus Compressor Mode
Currently Selected Parameter across the V-Pots - Displays the name of the Bus Compressor parameter currently assigned across the V-Pots. Value - Displays the value of the currently assigned plug-in parameter on that instance of the Bus Compressor. V-Pot Readout Bar - Displays the position of the currently assigned V-Pot (encoder) parameter. SSL UF8 User Guide... - Page 82 Channel Strip Cuts. DEFAULT PARAMETER ASSIGNED TO THE FADER - Press and hold the ZERO key and press any SEL key to default the parameter that is being controlled across the faders on that track. SSL UF8 User Guide...
- Page 83 1 channel at a time. Bank Keys The BANK < > keys allow you to move Channel Strips across your UF8 control surface(s) in multiples of 8, depending on how many UF8s are connected. Page Keys The Page keys provide an alternative way of changing the selected SOFT KEY bank.
- Page 84 All the parameters of the Channel Strip and Bus Compressor plug-ins that are assignable to the V-Pots, can be selected using the Soft Keys along the top of UF8. Use the SOFT KEY bank buttons (V-POT, 1, 2, 3, 4 and 5) to locate the bank that contains the parameter you want to control on the V-Pots and then press the corresponding soft key to assign it to the V-Pots.
- Page 85 Plug-in Mixer Tutorial Bank 4 Bank 5 SOFT KEY Bank Assignments - Bus Compressor Mode V-POT Bank Bank 1 SSL UF8 User Guide...
-
Page 86: Uf8 Lcd Messages
USB cable from your UF8 into your computer. 'Layer Set To None' If you see this message, you have not yet chosen a DAW profile for the UF8 Layer. Head to the UF8 page and select the DAW you are using from the drop-down list. -
Page 87: Ssl 360° Software Messages
'SSL 360° Connection Lost. Attemping to Reconnect' The LCD message above means that communication between SSL 360° and UF8 has been lost. If you experience this, then check that your USB cable connecting UF8 and 360° has not been removed. Re-connect if so. -
Page 88: Ssl Support - Faqs, Ask A Question And Compatibility
Troubleshooting & FAQs SSL Support - FAQs, Ask a Question and Compatibility Visit the Solid State Logic Help Centre to check compatibility with your system and find answers to your questions: www.solidstatelogic.com/support Thank you Don’t forget to register your UF8 for the best possible experience. -
Page 89: Safety Notices
• UF8 is supplied with an external 12 V DC desktop power supply with a 5.5 mm plug to connect to the unit. A standard IEC mains lead is provided to power the DC supply however if you decide to use a mains cable of your choice, bear in mind the following: 1) The adapter power cord should ALWAYS be earthed with the earth on the IEC socket. - Page 90 State Logic. Service or repair must be done by qualified service personnel only. CE Certification UF8 is CE compliant. Note that any cables supplied with SSL equipment may be fitted with ferrite rings at each end. This is to comply with the current regulations and these ferrites should not be removed.
- Page 91 WARNING: Operation of this equipment in a residential environment could causes radio interference. Environmental Temperature: Operating: +1 to 30 degrees Celsius. Storage: -20 to 50 degrees Celsius. Further information For additional information, install and user guides, knowledge base and technical support visit www.solidstatelogic.com SSL UF8 User Guide...
- Page 92 SSL UF8...
Need help?
Do you have a question about the UF8 and is the answer not in the manual?
Questions and answers