Table of Contents
Advertisement
Quick Links
Advertisement
Table of Contents

Subscribe to Our Youtube Channel
Related Manuals for VIVA FITNESS T245


Summary of Contents for VIVA FITNESS T245
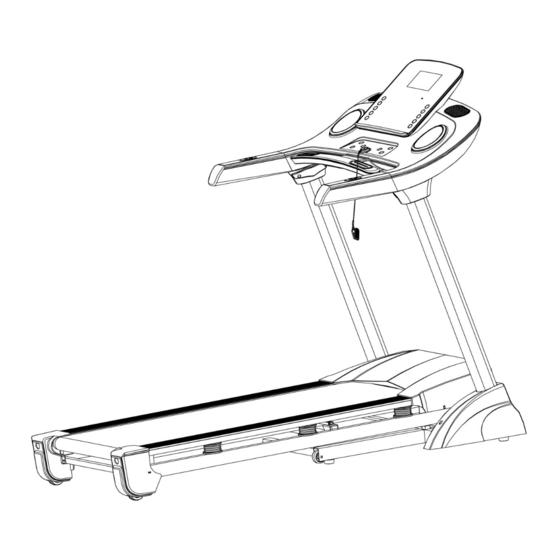
- Page 1 VIVA FITNESS MOTORIZED TREADMILL OWNER’S MANUAL ITEM NO. T245...
- Page 2 WARNING ----When using this treadmill, keep attaching the safety key rope to your clothes. ----When you are running, keep your hand swinging natural, stare frontward, never look adown at your feet. ----Increase the speed step by step when running. ----When emergency happens, take away the “safety key” immediately. ----Leave the treadmill after the running belt stop stably.
-
Page 3: Important Safety Precaution
12- Do not connect line to the middle of cable; do not lengthen cable or change the cable plug; do not put any heavy thing on cable or put the cable near the heat source; forbid using socket with several holes, these may cause fire or people may be hurt by the power. - Page 4 grasping the handlebar and jumping onto the two edgings, then get off the treadmill after it stops. 13. When the treadmill is not being used, the power cord should be unplugged and the safety key removed. 14. Put the safety key away from reach of the children. Minors must be accompanied by the adults when using the treadmill.
-
Page 5: Assembly Steps
ASSEMBLY STEPS Open the package, take out all parts and place the main frame on the flat ground. - 4 -... - Page 6 1. Connect the Sensor wire (80) with Extension wire (81) together; 2. Lock the Upright tubes (3L & 3R) on the Bottom frame (1) with the Allen bolts (51) and Washers (69). (Note: Please don’t lock them tightly till this Step.) - 5 -...
- Page 7 1. First, connect the Computer connecting wire (79) with the Extension wire (80) together, then lock the Computer frame (4) on the Upright tubes (3L & 3R) with the Allen bolts (51) and Washers (69) as shown; 2. Lock the Allen bolts (51) on the Upright tubes (3L & 3R) and Bottom frame (1) tightly; - 6 -...
- Page 8 1. Lock the Protective cover (18L & 18R ) tightly to the Bottom frame (1) with Cross tapping screw(64) and Cross Screw (61) 2. insert the A side of the Outside upright cover (16) and Inside upright cover (17) to the B side of the Computer frame (4) like the picture shown, then lock the Outside upright cover (16) and Inside upright cover (17) tightly to the Upright tube (3L &...
- Page 9 When you fold the machine: Put your hands on place , lift up the machine, then push it to the direction of the arrow shown, stop it when you hear the Clip sound from the Cylinder (9). - 8 -...
- Page 10 When you unfold the machine: Grasp the place by your hands, kick the place of Cylinder (9) by your right foot, push the running board to the level of place , then the running board will get down automatically. - 9 -...
-
Page 11: Grounding Methods
GROUNDING METHODS This product must be grounded. If it should malfunction or breakdown, grounding provides a path of least resistance for electric current to reduce the risk of electric shock. This product is equipped with a cord having an equipment-grounding conductor and a grounding plug. -
Page 12: Technical Parameter
DANGER – Improper connection of the equipment-grounding conductor can result in a risk of electric shock. Check with a qualified electrician or serviceman if you are in doubt as to whether the product is properly grounded. Do not modify the plug provided with the product – if it will not fit the outlet, have a proper outlet installed by a qualified electrician. -
Page 13: Function Specifications
1. Function specifications 1.1. Start Normal startup after 3s counting backwards. 1.2. Number of programs Manual modes, 9 Preset programs, FAT, 3 User setting programs. 1.3. Safe key function Remove the safety key in any modes could rapidly slow down the treadmill till stop. “---” will be instantly displayed on the window, the buzzer buzz “Bi, Bi”... -
Page 14: Key Function
Restore the safety key, the window will display for 2s and then get into standby state, wait for inputting commands. 1.4. Key function ① “START” is the star key. Press “START” when the treadmill is in stop state,the speed will be displayed as “1.0”, treadmill will be started.”STOP”... -
Page 15: Heart Rate Measurement Function
1.5.4. Calorie display Display the accumulated calorie under manual and programmed mode or the countdown calorie under mode running state. 1.5.5 Heart rate display Detect heat rate signals and display the pulse value. 1.5.6 Data display range of various parameters: TIME: 0:00 –... -
Page 16: Preset Programs
B. When the set time reduces to zero or when the set calorie reduces to zero, or the set distance reduces to zero, the speed will gradually reduce till the stop of the machine, the buzzer will make short alarm “Bi-Bi-Bi”, and the speed window will display END;... -
Page 17: Body Fat Test
press "mode" key to finish the first time period setting, and entering the next time period setting, until all 20 time period setting. The parameter will be kept permanently until resetting, and all parameter will not be lost when power off. 2. - Page 18 1.11. Others 1.11.1. When a countdown parameter run off, display "END", the alarm rings 0.5s every 2s, until the treadmill full stop, then return to manual mode. 1.11.2. In setting a parameter, it can be loop-setting, for example, time range is 5:00--99:00, when set at 99:00, press "+"...
- Page 19 1.12. Meanings of error message codes Error Possible reasons Test method solutions Check whether the connector If yes, change the Communicational failure between of the meter and the connector. the meter and the controller, and controller has broken down. the drive cannot receive signal from the meter.
- Page 20 Press the button of Lifting motor fails in learning controller seconds and relearn again. Over-current protection Check whether the controller Change the electric match with the standard of machine or controller electric engine. and retest. Check whether motor Re-plug motor interface of the drive is loose.
-
Page 21: Exercise Instructions
EXERCISE INSTRUCTIONS 1. The Warm Up Phase This stage helps get the blood flowing around the body and the muscles working properly. It will also reduce the risk of cramp and muscle injury. It is advisable to do a few stretching exercises as shown below. -
Page 22: Maintenance Instructions
MAINTENANCE INSTRUCTIONS WALKING BELT TENSION ADJUSTMENT AND CENTERING DO NOT OVERTIGHTEN the walking belt. This may cause reduced motor performance and excessive roller wear. TO CENTER WALKING BELT ● Place treadmill on a level surface ● Run treadmill at approximately 3.5 mph ●If the running belt is too far to the right side, use the supplied Allen wrench to turn the right tension bolt clockwise slowly, noticing the change of the deviating distance until the belt remains centered during use. - Page 23 CLEANING General cleaning or the unit will greatly prolong the treadmill. Keep treadmill clean by dusting regularly. Be sure to clean the exposed part of the deck on either side of the walking belt and also the side rails. This reduces the build up of foreign material underneath the walking belt. The top of the belt may be cleaned with a wet, soapy cloth.
-
Page 24: Exploded Drawing
EXPLODED DRAWING - 23 -... -
Page 25: Parts List
PARTS LIST Part Part Description Description Bottom frame Hex Bolt M8*35 Main frame Hex Bolt M8*55 3L/R Left & Right upright tube 1 pr Hex Bolt M8*80 Roller Tension Bolt M8*18 Computer frame Roller Tension Bolt M6*45 Incline support Roller Tension Bolt M6*55 Reinforced tube Roller Tension Bolt M6*10 Front roller... - Page 26 Square end cap 3 Flat washer D4 Shortcut key Spring washer D4 Motor belt Tapping Screw ST2.2*6 Square end cap 4 Choke (optional) Plastic pad EMC Filter (optional) Allen Bolt M10*55 MP3 Cable (optional) Allen Bolt M10*55 Amplifier board (optional) Allen Bolt M10*40 Audio socket (optional) Allen Bolt M8*40...
Need help?
Do you have a question about the T245 and is the answer not in the manual?
Questions and answers