Table of Contents
Advertisement
Quick Links
Advertisement
Table of Contents

Related Manuals for VIVA FITNESS T240


Summary of Contents for VIVA FITNESS T240
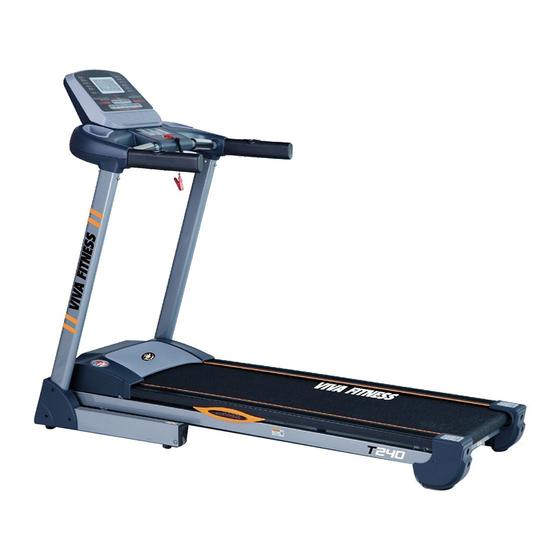
- Page 1 VIVA FITNESS TREADMILL OWNER’S MANUAL ITEM NO. T240...
- Page 2 WARNING Read all instruction carefully before use this product. Retain this owner’s manual for the future’s reference: ----When using this treadmill, keep attaching the safety pull pin rope to your clothes. ----When you are running, keep your hand swinging natural, stare frontward, never look adown at your feet.
- Page 3 IMPORTANT SAFETY PRECAUSTION 1. Plug the power cord of the treadmill directly into a dedicated grounded circuit.This product must be grounded. If it has breakdown, grounding provides a path of least resistance for electric current to reduce the risk of electric shock. 2.
-
Page 4: Assembly Steps
13. If the supply cord is damaged, it must be replaced by the manufacturer, its service agent or similarly qualified persons in order to avoid a hazard. 14. Put your feet on the side rail before using the treadmill, and always attach the safety pull pin rope to your clothing. - Page 5 ASSEMBLY STEP THREE: 1. First,connect the computer connecting wire(74) with extension wire(75) together,then lock the computer frame(60) on the upright tube(2,3) with screw(55) and washer(18),at last,lock the bottom frame(4) on the upright tube(2,3) with screw(55). 2. Lock the protective guard(56L/R) on the bottom frame(4) with screw(13).
- Page 6 ASSEMBLY STEP FOUR: When you fold the machine: put your hands on place A,lift up the machine,then push it to the direction of the arrow,stop it when you hear the sound from the cylinder(43).
-
Page 7: Grounding Methods
ASSEMBLY STEP FIVE: When you unfold the machine: grasp the place A by your hands,knick the place B of cylinder(43) by your right foot, push the running board to the level of place C,then the running board will get down automatically. -
Page 8: Technical Parameter
TECHNICAL PARAMETER 1670*750*1365 POWER AS ORDER ASSEMBLY SIZE(mm) MAX OUTPUT 1050*760*1500 AS ORDER FOLDABLE SIZE(mm) POWER RUNNING SURFACE 420*1280 AS ORDER INPUT CURRENT SIZE(mm) NET WEIGHT 60KG SPEED RANGE 1.0-16 KM/H 110KG 0-15% MAX WEIGHT INCLINE... - Page 9 Operation Instructions 1. LCD windows will display the following functions: A. Speed window: display speed data. B. Time/ heart rate window: display time/ heart rate data. Display heartbeat in the operation process first. C. Distance/ calorie/ incline windows: display distance/ calorie/ incline data. Display in turn in operation process.
- Page 10 G. INCLINE +: in setting state, press it to increase the set value. When the motor is running, press it to increase the incline. H. INCLINE -: in setting state, press it to decrease the set value. When the motor is running, press it to decrease the incline.
- Page 11 display range; in manual mode, the machine will stop when the time accumulates to be more than 99: 59 (100min). IV Fixed program mode: 1. The initial time is set to be 30min; only time can be set; setting range: 5:00- 99:00.
- Page 12 VI Parameters in fixed program mode (metric system) Time section Set time/ =running time for each section Program Speed Incline Speed Incline Speed Incline Speed Incline Speed Incline Speed Incline Speed Incline Speed Incline Speed Incline Speed Incline Speed Incline Speed Incline VII Parameters in fixed program mode (imperial system)
- Page 13 Speed Incline Speed Incline Speed Incline Speed Incline Speed Incline Speed Incline VIII Customized program: In addition to built-in programs, the treadmill also has customized programs to support the customized setting based on the user’s specific situation: U01, U02 and U03. 1、...
- Page 14 A. In standby state, continuous press PROGRAM to the required customized program (U01~ U03). After setting up the operation time, press START. B. In the customized program state and after the setting of operation time, press START to immediately start up the machine. 3、...
- Page 15 When the lifting is 0, the calorie consumption for each 1km of running is about 30kcal. Kindly reminder: Parameter aboved only for reference. Meanings of error message codes Problem Potential reasons Solutions 1. Place back the safe lock; Safe lock 2.
- Page 16 current when the load exceeds the rated value; restart the machine; 2. Some part of the treadmill is jammed so that the motor can not rotate, thus triggering the self-protection of the system against excessive current under excessive load; adjust the treadmill and restart it, or add lubricant. 3.
-
Page 17: Exercise Instructions
EXERCISE INSTRUCTIONS 1. The Warm Up Phase This stage helps get the blood flowing around the body and the muscles working properly. It will also reduce the risk of cramp and muscle injury. It is advisable to do a few stretching exercises as shown below. - Page 18 are also trying to improve your fitness you need to alter your training program. You should train as normal during the warm up and cool down phases, but towards the end of the exercise phase you should increase resistance, making your legs work harden than normal. You may have to reduce your speed to keep your heart rate in the target zone.
- Page 19 CLEANING General cleaning or the unit will greatly prolong the treadmill. Keep treadmill clean by dusting regularly. Be sure to clean the exposed part of the deck on either side of the walking belt and also the side rails. This reduces the build up of foreign material underneath the walking belt. The top of the belt may be cleaned with a wet, soapy cloth.
-
Page 20: Exploded Drawing
EXPLODED DRAWING... -
Page 21: Parts List
PARTS LIST Part Part Description Description Main frame Cylinder Left upright tube Screw M8*50 Right upright tube Nut M8 Bottom frame Moving roller Running belt End cap Running board Flat foot pad Screw M6*25 Screw M6*15 Screw M6*20 Square end cap Taping screw ST4*16 Screw M10*50 Edgings fixer... - Page 22 Motor cover Screw Screw M8*25...
Need help?
Do you have a question about the T240 and is the answer not in the manual?
Questions and answers