Table of Contents
Advertisement
Quick Links
Advertisement
Table of Contents

Related Manuals for VIVA FITNESS T910


Summary of Contents for VIVA FITNESS T910
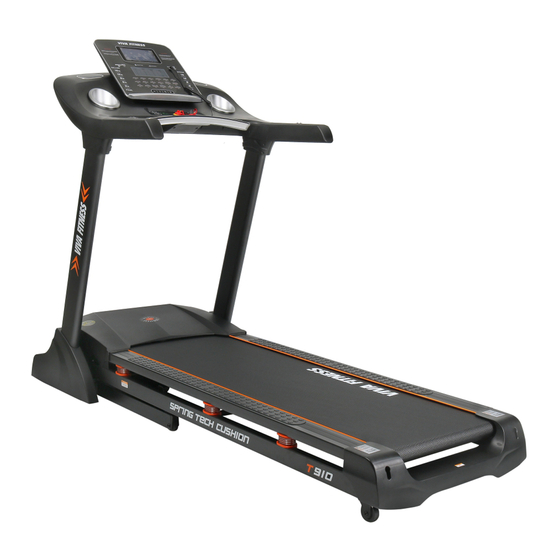
- Page 1 VIVA FITNESS MOTORIZED TREADMILL OWNER’S MANUAL ITEM NO. T910...
- Page 2 WARNING Read all instructions carefully before using this product. Retain this owner’s manual for future reference: ----When using this treadmill, keep attaching the safety pull pin rope to your clothes. ----When you are running, keep your hand swinging natural, stare frontward, never look adown at your feet.
- Page 3 15. Pulse monitor data may not be accurate, can not be used for medicine. Over-exercise may cause injury, even death. If you have a feeling of dizziness, sickness or other abnormal symptoms, please stop training and consult a doctor immediately. IMPORTANT SAFETY PRECAUSTION 1.
-
Page 4: Assembly Steps
16. If you observe any damage or wear on the mains plug or on any section of the mains lead then please have these replaced immediately by a qualified electrician – do not attempt to change or repair these yourself. 17. - Page 5 1. Connect the extension upper wire (95) and the extension lower wire (96) 2. Lock the computer frame (4) on the upright tube (3) with the hex socket screw (59) and Lock washer (84).Lock the hex socket screw (59) tightly which connect the bottom frame (1) and upright tube (3). ) tightly to the Bottom frame (1)...
- Page 6 cover (36) tightly to the Upright tube (3) with Cross tapping screw (79). When you fold the machine: Put your hands on place A, lift up the machine in the direction of the arrow until you hear the sound from the cylinder (10).
- Page 7 When you unfold the machine: Grasp the place A by one hand, kick the place B of cylinder (10) with your right foot, pull the running board to the level of place C, then the running board will get down automatically. - 6 -...
-
Page 8: Grounding Methods
GROUNDING METHODS This product must be grounded. If it should malfunction or breakdown, grounding provides a path of least resistance for electric current to reduce the risk of electric shock. This product is equipped with a cord having an equipment-grounding conductor and a grounding plug. - Page 9 MAX WEIGHT 150 KG INCLINE 0-15% OPERATION INSTRUCTIONS 1.1. Start Press for 3s with normal start. 1.2. Programs 18 Preset programs, 3 USER setting programs,4 exercise mode, Body fat Test programs. - 8 -...
- Page 10 1.3. Safe lock function Pull out the Safety lock, the treadmill will stop immediately and window will display “ ---” .Put the safety lock in the position and the window will display for 2s and all data will clear up, then get into standby state. 1.4.
- Page 11 INCLINE SPEED INCLINE SPEED INCLINE SPEED INCLINE SPEED INCLINE SPEED INCLINE SPEED INCLINE SPEED INCLINE SPEED INCLINE SPEED INCLINE SPEED INCLINE SPEED INCLINE SPEED INCLINE SPEED INCLINE SPEED INCLINE SPEED INCLINE SPEED INCLINE SPEED INCLINE 1.7. Body fat test In standby state, press MODE continuously to enter body fat test program. The window display “FAT”.
- Page 12 matches with your height. FAT is to measure the relevance between height and weight, not the body proportion. FAT is suitable for every man and woman, it provide the important grounds for adjusting the weight with other health indicators. The perfect FAT is between 20-25, which means if less than 19 is too thin, and if between 25-29 is overweight and if more than 30 is obesity.(The parameter is only for reference, not medical judgment)
- Page 13 completion of setting for all the 20 time sections. Set parameters will be permanently saved until the next time setting. These parameters will not be lost due to power disconnection. 1.10.2. Start of customized program: In standby state, continuously press PROGRAM to the required customized program (U01~ U03).
-
Page 14: Exercise Instructions
protection B. Transmission parts stuck or Adjust the transmission parts, or apply lubricating oil. block. C. The motor internal short Replace the motor. circuit. D. The inverter burn out. Replace the inverter. Over-load protection A. Overloaded System protection , reset the computer . B. -
Page 15: Maintenance Instructions
3. The Cool Down Phase This stage is to let your Cardio-vascular System and muscles wind down. This is a repeat of the warm up exercise e.g. reduce your tempo, continue for approximately 5 minutes. The stretching exercises should now be repeated, again remembering not to force or jerk your muscles into the stretch. - Page 16 Picture A: If the belt has drifted to the RIGHT Picture B:If the belt has drifted to the LEFT WARNING: ALWAYS UNPLUG THE TREADMILL FROM THE ELECTRICAL OUTLET BEFORE CLEANING OR SERVICING THE UNIT. CLEANING General cleaning or the unit will greatly prolong the treadmill. Keep treadmill clean by dusting regularly. Be sure to clean the exposed part of the deck on either side of the walking belt and also the side rails.
-
Page 17: Exploded Drawing
EXPLODED DRAWING - 16 -... -
Page 18: Parts List
PARTS LIST Part Part Description Description Bottom frame Hex socket screw M8*50 Main frame Hex socket screw M8*45 Upright tube Hex socket screw M8*40 Computer frame Hex screw M10*35 Incline frame Hex screw M8*35 Strengthen tube Hex screw M8*25 Transport wheel bracket Spring washerΦ10 Front roller Socket cap screw M6*45... - Page 19 Flat foot pad Optical detector support Wire plug Cross Screw M4*8 Power wire buckle Flat washer D4 Adjusting wheel Spring washer D4 Square end cap 1 Tapping Screw ST2.9*6 Shortcut key AC motor Wheel Incline motor Belt Switch Plastic pad Circuit breaker Φ10 Adjustable pad...
Need help?
Do you have a question about the T910 and is the answer not in the manual?
Questions and answers