Avonic CM-CON100 User Manual
Ptz camera controller
Hide thumbs
Also See for CM-CON100:
- User manual (16 pages) ,
- User manual (10 pages) ,
- User manual (11 pages)

Related Manuals for Avonic CM-CON100


Summary of Contents for Avonic CM-CON100
- Page 1 USER MANUAL PTZ Camera Controller CM-CON100 www.avonic.com • © August 2023 • Version 1.3.4...
-
Page 2: Disclaimer, Contact And Markings
“look and feel” and arrangement of such Content, contained in this Manual is owned, controlled or licensed by or to Avonic, and is protected by trade dress, copyright, patent and trademark laws, and various other intellectual property rights and unfair competition laws. -
Page 3: Ce Declaration Of Conformity
EN 55022: 2010 5. Standards EN 55024: 2010+A1: 2015 EN 61000-3-2: 2014 EN 61000-3-3: 2013 6. Signed for and on behalf of Avonic: Delfgauw, 25th of April, 2019 Martijn van Bodegom, Product Manager American Certification Look for American certification on the product/package for the FCC logo. -
Page 4: Important Information
IMPORTANT INFORMATION Liability Avonic will NOT be held responsible for any damage or injury caused by unqualified persons carrying out these tasks, or by not following the instructions in this Manual. Intended Use and Non-Intended Use Installation The following applies to the installation of the CON100: •... - Page 5 It is an extension of the RS-232 protocol and is designed to overcome the limitations of RS-232, such as limited range and susceptibility to noise. Stock Keeping Unit Stock keeping unit used by Avonic. Every camera has an unique SKU with AV-CM (Avonic Camera).
-
Page 6: Table Of Contents
Contents DISCLAIMER, CONTACT AND MARKINGS.................... ii CE DECLARATION OF CONFORMITY....................iii IMPORTANT INFORMATION........................iv Liability..............................iv Intended Use and Non-Intended Use....................iv Installation............................. iv Operation..............................iv Important Precautions......................... iv Symbols Used in This Manual......................iv Acronyms............................... v INTRODUCTION............................8 Purpose of This Manual........................8 Target Audience...........................8 Document Structure.......................... - Page 7 4. Backlight Setting..........................22 5. Sleep Setting........................... 22 6. PIN setting (and what to do if the PIN is lost)................22 7. Joystick Calibration........................23 8. Key Custom.............................23 9. Speed Setting..........................24 10. Default Setup..........................25 11. Information............................ 25 OSD Menu (Camera)......................... 26 Buttons to control the OSD menu of the camera................26 OSD menu instructions........................
-
Page 8: Introduction
The purpose of this manual is to provide safety instructions and guidelines for the proper unpacking, installation, operation, maintenance, and disposal of the Avonic CM-CON100. In this Manual, the Avonic CM-CON100 is referred to as the 'Product'. Target Audience This Manual is developed for installation technicians who install the Product at client sites, and for IT professionals who are responsible for operating the Product. -
Page 9: Safety Instructions
Product. Keep the Manual in a safe place for future reference or download it from www.avonic.com. Intended Use This Product is intended to control the Avonic PTZ cameras. See also section Intended Use and Non- Intended Use on page iv for details. -
Page 10: Repair
• Don’t open this Product and don’t attempt to repair it yourself. Disassembling the Product may damage it or may cause injury to you. • If this Product is damaged, malfunctioning, or if it comes into contact with liquid, contact Avonic or an Avonic Authorized Service Provider. -
Page 11: Product Overview
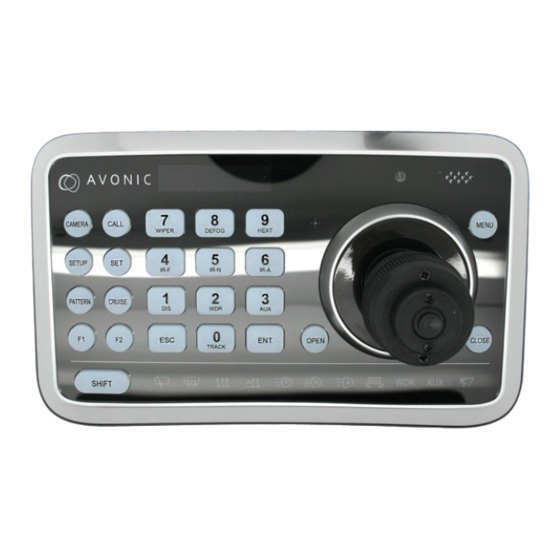
PRODUCT OVERVIEW Description The Avonic CM-CON100 is a compact PTZ camera controller. With this controller it is possible to control up to 255 camera’s and using up to 255 presets. The controller supports the Visca, Pelco-D and Pelco-P protocol and can be connected with RS232/485. The Avonic CM-CON100 is therefore compatible with the Avonic camera’s as well with other brands that supports these protocols. -
Page 12: Unpacking
1. Package Contents 2. Unpacking the Controller 3. Return Procedure Package Contents The following tables contains an overview of the package contents of the Product. Quantity Description Avonic SKU 1 pc PTZ Camera Controller CM-CON100 1 pc * Power Supply CM-CON100-PSU... -
Page 13: Unpacking The Controller
The CON100 should be in its protective foam as follows: Figure 5: Controller in Foam 3. Verify that the plastic bag is sealed. If this is NOT the case, contact Avonic and stop here. 4. Break the seal of the sealed bag. -
Page 14: Installation
INSTALLATION This chapter outlines the steps you have to perform to mount and install the Product in a correct and safe manner. The installation of the controller can be done in two ways: 1. Connecting a controller to a Camera 2. -
Page 15: Rs-485 Interface
Figure 6: RS-232 Interface (Mini Figure 7: RS-232 Cable and Interface DIN-8) Connection (Mini DIN-8 and Windows DB-9) RS-485 Interface Connect the controller to the + and - at the back of the camera via the RS-485 cables, as shown in the figure below. -
Page 16: Operation
OPERATION This chapter will explain the operation instructions for using the CON100. Connections Prior to the initial use of the CON100, an explanation of the buttons and their respective functions will be provided. See below: Name Functionality OLED Screen Displays status of current operation From top to bottom: CAMERA Switch camera’s... -
Page 17: Start
Start Once you have connected the cables to your camera as described in the previous chapter, the CON100 will start automatically. Upon the CON100 is started for the first time, the User PIN will be displayed on the screen. 1. Press to fill in the pin. The initial pin is “111111”. Pin Error: When “USER PIN: ERROR”... -
Page 18: Ptz Controls
Functionality Buttons Zoom wide, Focus Near Switch between Zoom and Focus Autofocus Manual Focus Iris Open Iris Close PTZ Controls Move the Joystick up, down, left and right (1) to control the camera. Turn the joystick clockwise to zoom in (2) and anti-clockwise to zoom out (3). -
Page 19: Delete Preset Position
Follow the instructions below to Call a Preset: 1. Press number 1 button (or another number button between 0 - 255). 2. Press the to call the preset. The camera moves automatically in the position of that preset number. It is important to be aware that the Preset/CALL functionality should not be confused with the process of setting up the camera's protocol address and ID number. -
Page 20: Buttons To Control The Camera (Setup Menu)
Buttons to control the camera (setup menu) The following buttons and button combinations can be used to control the camera in Setup Menu: Functionality Button Enter Setup Menu Enter Sub Menu Leave (Setup) Menu Leave/ Delete wrong insert Scroll through Menu or settings Switch between settings Confirm setting Special functions / Enter extra... -
Page 21: Time Setting
Follow instructions below: 1. Move the joystick to the right to enter the Camera Setting menu. The camera ID screen appears. This will set the Camera ID. Press 1 - 255 to set the ID and press the Enter to confirm. 2. -
Page 22: Backlight Setting
4. Backlight Setting The backlight setting will lighten the buttons of the CON100 to make the buttons visible in dark environments. 1. Move the Joystick up/down to change the backlight setting and press Enter to save the setting. 5. Sleep Setting The sleep setting will set the time before the CON100 will fall asleep. -
Page 23: Joystick Calibration
This will set the PIN. 1. Move the Joystick up/down to change between the USER or the ADMIN (administrator). 2. Press Enter to save. 3. The controller now asks for the old PIN. Type the old PIN by using the number buttons and press Enter to confirm. -
Page 24: Speed Setting
If you still wish to use this feature, please follow instructions below: 1. Move in NON-Setup Menu the joystick to set the camera in the desired position. 2. Move in Setup Menu to Key Custom and open the menu. Screen Menu preset shows up. 3. -
Page 25: Default Setup
10. Default Setup Restores the Keyboard setting to factory Default. Follow the instructions below: 1. Move the Joystick to the right to open the Default Setup. 2. Move the Joystick left and right to change between YES or NO. 3. Press Enter to save the setting. -
Page 26: Osd Menu (Camera)
You can download the camera manual on the Avonic website to read about the functionality of the OSD menu. If you are using a third party camera, please refer to the manual of that third party camera. -
Page 27: Maintenance
MAINTENANCE Maintenance Take the following actions to maintain the CON100: • If you will not use the CON100 for a long time, disconnect the AC powercord of the AC adaptor to the outlet. • Use a soft (dry) cloth or tissue to clean the camera cover. •... -
Page 28: Transport And Storage
Ensure also that the box is properly sealed. 2. Avonic's address and/or the address of the local distributor should be clearly visible on the package. 3. Keep the transportation vehicle dry and maintain the temperate and humidity when transporting the CON100. -
Page 29: Disposal And Recycling
See the symbol below that can be found on the product and package label: Avonic is NOT responsible for personal data left in the settings of the controller as far as this is possible (like user names, passwords etc.) Delete personal data BEFORE you send the controller back to Avonic! or your local distributor. -
Page 30: Troubleshooting
TROUBLESHOOTING General 1. Turn the CON100 off and on again and check if the problem persists. 2. If it does, restore to factory default. Power Issues No display and no button lights: 1. Check the net power. 2. Check the power supply. Serial functionality issues Cannot control the camera (controller is not responding): •... -
Page 31: Appendix A - Datasheet Specifications
PIN CODE; ADMIN & USER 20 X 12 X 10.3 CM Speed settings Weight product HIGH, MIDDLE, LOW 0.5 KG Adjustment functions Dimensions box WxHxD PAN/TILT, ZOOM, FOCUS 24 X 16.5 X 13.5 CM (mm) Weight box 0.5 KG Included CM-CON100, PSU... -
Page 32: Index
Index PELCO D PELCO P Backlight PIN 17, Baudrate Power Adapter Preset PTZ (PAN / TILT / Zoom 17, Call Button Call Preset 17, Camera Address RS232 14, Camera Button 16, RS485 14, Camera ID Cruise Set Button Set Preset 17, DC12V power adapter Setup Button Delete Preset 17,... - Page 33 PTZ Camera Controller CM-CON100 © August 2023 • Version 1.3.4 Exportweg 11a • 2645 ED Delfgauw • The Netherlands +31(0)15 7112 712 • info@avonic.com • www.avonic.com...
Need help?
Do you have a question about the CM-CON100 and is the answer not in the manual?
Questions and answers