Table of Contents
Advertisement
Quick Links
Advertisement
Table of Contents

Related Manuals for ShowPro ALLIGATOR


Summary of Contents for ShowPro ALLIGATOR
- Page 1 ALLIGATOR MANUAL LEDALL100...
-
Page 2: Table Of Contents
CONTENTS SAFETY - - - - - - - - - - - - - - - - - - - - - - - - - - - - - - - - - - - - - - - - - - - - - - - - - - - - - - - - - - - - - - - - - - 3 INTRODUCTION - - - - - - - - - - - - - - - - - - - - - - - - - - - - - - - - - - - - - - - - - - - - - - - - - - - - - - - - - - - - 4 SPECIFICATIONS - - - - - - - - - - - - - - - - - - - - - - - - - - - - - - - - - - - - - - - - - - - - - - - - - - - - - - - - - - - 5 PHOTOMETRICS - - - - - - - - - - - - - - - - - - - - - - - - - - - - - - - - - - - - - - - - - - - - - - - - - - - - - - - - - - - 6... -
Page 3: Safety
SAFETY WARNING! Before carrying out any operations with the unit, carefully read this instruction manual and keep it with care for future reference, it contains important information about the installation, user and maintenance of the unit. General instructions - The products referred to in this manual conform to the European Community Directives and are therefore marked with CE. -
Page 4: Introduction
Warnings and installation precautions - If this device is operated in any way different to the way described in this manual, it may suffer damage and the warranty becomes void. Any unauthorized operation may lead to dangers like short circuit, burns, electric shock, etc. - Before starting any maintenance work or cleaning the fixture, cut off power from the main supply. -
Page 5: Specifications
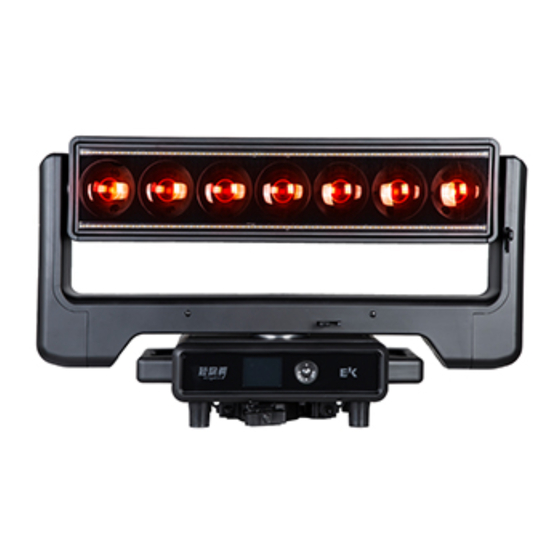
SPECIFICATIONS Light Source: Front panel: 7 x 60W RGBW 4-in-1 + 280W WW&CW Back panel: 700W RGBW Lumen Output: Front panel: up to 9600lm Back panel: 18000lm Lux Output: Front panel: 52000lux @ 3M Back panel: 800lux @ 3M Color Temperature: 2800~8000K CRI: Ra ≥... -
Page 6: Photometrics
PHOTOMETRICS... -
Page 7: Dimensions
DIMENSIONS... -
Page 8: Overview
OVERVIEW Fixture Illustration 1. Control Panel 6. Fuse 2/3. RJ45 for Art-Net 7. PowerCon Input 4. 3 or 5 Pin XLR Input for DMX 8. Clamp 5. 3 or 5 Pin XLR Output for DMX Control Panel If the panel is password-protected, go to the Advanced menu, in the Menu locking submenu, and enter the unlock code using the navigation buttons: 1234 If you want to flip the display, hold UP + DOWN buttons for 3seconds to set display orientation. -
Page 9: Installation
4. Make sure that the structure to which you are hanging the fixture can support the weight. Alligator may be set up on a solid and even surface. The unit can also be mounted upside down to a cross arm. For mounting, stable mounting clamps are required. The mounting place must be of sufficient stability and be able to support a weight of 10 times the unit’s... -
Page 10: Connection
CONNECTION Power Connection Using Power Con In power cable Attention: due to power rating, one power cable can connect 1 unit maximum Do not connect more than 1 unit in series with one power cable. Do not use with damaged power cable. Power off the fixture when not in use. - Page 11 Ethernet Connection DMX Connection...
- Page 12 DMX Connection • Depending on the length of the DMX cable run, or other factors, it may be advisable to install a terminator at the last fixture in the run. • The illustration below shows the correct placement of a 120Ω 0.25W resistor in a terminator, as well as the standard DMX signal pin connections Example of DMX Addressing The below table shows an example of starting addresses for four fixtures assuming a first...
-
Page 13: Menu
MENU Main Menu Menu Level 1 Menu Level 2 Menu Level 3 Menu Level 4 Default DMX Address 1-512 26CH 50CH DMX Channel 26CH 84CH 98CH Protocol ArtNet SETUP DMX + ArtNet ArtNet for color mixing only Universe 0-255 Start Channel 1-512 Custom IP Address 2.xxx.xxx.xxx... - Page 14 Main Menu Menu Level 1 Menu Level 2 Menu Level 3 Menu Level 4 Default Pan/Tilt Color AUTO Zoom Pan Rotation 0-255 0-255 Pan Fine 0-255 Tilt Rotation 0-255 Tilt 0-255 Tilt Fine 0-255 Zoom 0-255 Strobe 0-255 Dimmer 0-255 White Strobe 0-255 White Dimmer...
-
Page 15: Dmx Chart
DMX CHART 26CH Mode DMX/NET DMX+NET Function Value Setting 000-003 Indexing Pan Rotation 004-129 Fast to Slow (Forward Spin) 130-255 Slow to Fast (Reverse Spin) 000-255 Positioning from 0-540 Degrees (Indexing) Pan Fine 000-255 000-003 Indexing Tilt Rotation 004-129 Fast to Slow (Forward Spin) 130-255 Slow to Fast (Reverse Spin) Tilt... - Page 16 50CH Mode DMX/NET DMX+NET Function Value Setting 000-003 Indexing Pan Rotation 004-129 Fast to Slow (Forward Spin) 130-255 Slow to Fast (Reverse Spin) 000-255 Positioning from 0-540 Degrees (Indexing) Pan Fine 000-255 000-003 Indexing Tilt Rotation 004-129 Fast to Slow (Forward Spin) 130-255 Slow to Fast (Reverse Spin) Tilt...
- Page 17 50CH Mode DMX/NET DMX/NET DMX/NET DMX/NET DMX/NET 000-005 No Function 006-015 Effect 1 016-023 Effect 2 024-031 Effect 3 032-038 Effect 4 039-046 Effect 5 047-054 Effect 6 055-062 Effect 7 063-069 Effect 8 070-077 Effect 9 078-085 Effect 10 086-093 Effect 11 094-100...
- Page 18 50CH Mode DMX/NET DMX/NET DMX/NET DMX/NET DMX/NET 218-224 Effect 28 225-232 Effect 29 Panel Effects 233-240 Effect 30 241-248 Effect 31 249-255 Effect 32 000-124 Normal Panel Effects Speed 125-130 Static 131-255 Dynamic 000-025 No Function 026-076 Head Reset (Hold 5s) 077-127 Pan/Tilt Reset (Hold 5s) 128-178...
- Page 19 84CH Mode DMX/NET DMX+NET Function Value Setting 226-238 Random Medium Strobe White Strobe 239-251 Random Fast Strobe 252-255 Open White Dimmer 000-255 0~100% 000-003 004-103 Strobe Slow (1Hz) to Fast (25Hz) 104-107 Open 108-207 Pulse from Slow (1Hz) to Fast (25Hz) Panel Strobe 208-212 Open...
- Page 20 84CH Mode DMX/NET DMX+NET Function Value Setting Panel Blue 3 000-255 0~100% Panel White 3 000-255 0~100% Panel Red 4 000-255 0~100% Panel Green 4 000-255 0~100% Panel Blue 4 000-255 0~100% Panel White 4 000-255 0~100% Panel Red 5 000-255 0~100% Panel Green 5...
- Page 21 98CH Mode DMX/NET DMX+NET Function Value Setting Red 2 000-255 0~100% Green 2 000-255 0~100% Blue 2 000-255 0~100% White 2 000-255 0~100% Red 3 000-255 0~100% Green 3 000-255 0~100% Blue 3 000-255 0~100% White 3 000-255 0~100% Red 4 000-255 0~100% Green 4...
-
Page 22: Pixel Mapping
98CH Mode DMX/NET DMX+NET Function Value Setting Panel Red 7 000-255 0~100% Panel Green 7 000-255 0~100% Panel Blue 7 000-255 0~100% Panel White 7 000-255 0~100% PIXEL MAPPING... -
Page 23: Maintenance
MAINTENANCE Maintenance and Cleaning the Unit - Make sure there are no persons standing below the unit when taking down/setting up. - Switch off the unit, unplug the main cable and wait till the unit has cooled down. - All screws used for installing the device and any of its parts should be tightly fastened and should not be corroded.
Need help?
Do you have a question about the ALLIGATOR and is the answer not in the manual?
Questions and answers