
Related Manuals for H3C RA5300


Summary of Contents for H3C RA5300
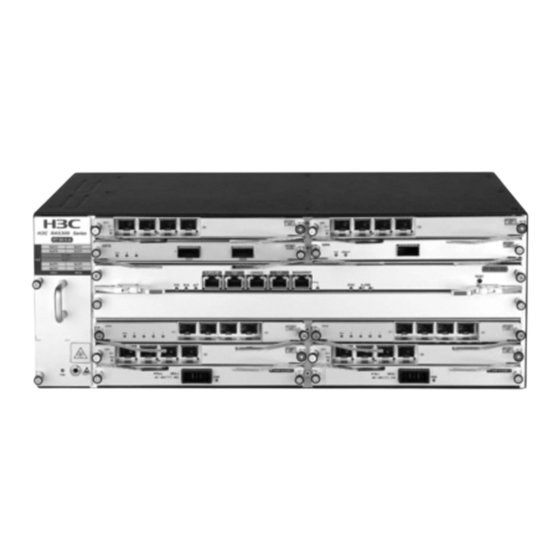
- Page 1 H3C RA5300 Router Installation Guide New H3C Technologies Co., Ltd. http://www.h3c.com Document version: 6W100-20230916...
- Page 2 The information in this document is subject to change without notice. All contents in this document, including statements, information, and recommendations, are believed to be accurate, but they are presented without warranty of any kind, express or implied. H3C shall not be liable for technical or editorial errors or omissions contained herein.
- Page 3 Preface This document guides you through the installation of the H3C RA5300 router. It provides instructions on preparing the site for installation, installing the router, and troubleshooting the router. This preface includes the following topics about the documentation: • Audience.
- Page 4 Symbols Convention Description An alert that calls attention to important information that if not understood or followed WARNING! can result in personal injury. An alert that calls attention to important information that if not understood or followed CAUTION: can result in data loss, data corruption, or damage to hardware or software. An alert that calls attention to essential information.
- Page 5 Documentation feedback You can e-mail your comments about product documentation to info@h3c.com. We appreciate your comments.
-
Page 6: Table Of Contents
Contents 1 Preparing for installation ·········································································· 1-1 Safety recommendations ································································································································ 1-1 Safety symbols ········································································································································ 1-1 General safety recommendations ··········································································································· 1-1 Electricity safety ······································································································································ 1-1 Laser safety ············································································································································· 1-1 Examining the installation site ························································································································· 1-2 Temperature and humidity ······················································································································ 1-2 Cleanliness ·············································································································································· 1-2 Cooling system ········································································································································... - Page 7 Displaying memory usage information ············································································································ 4-4 Displaying the fan tray operating status ·········································································································· 4-5 Displaying the power supply operating status ································································································· 4-6 Displaying router temperature information ······································································································ 4-6 Displaying transceiver module information ····································································································· 4-7 Diagnosing transceiver modules ····················································································································· 4-7 Saving the running configuration ···················································································································· 4-7 Rebooting the router or a module ···················································································································...
-
Page 8: Preparing For Installation
Preparing for installation Safety recommendations To avoid bodily injury and damage to the router, read all safety recommendations carefully before installation. Note that the recommendations do not cover every possible hazardous condition. Safety symbols When reading this document, note the following symbols: WARNING means an alert that calls attention to important information that if not understood or followed can result in personal injury. -
Page 9: Examining The Installation Site
0°C to 70°C (32°F to 158°F). For information about the models of the 50G or 100G transceiver modules, see H3C RA5300 Router Interface Module Manual. To ensure correct operation and long lifespan of the router, make sure the temperature and humidity in the equipment room meet the requirements as described in Table1-1. -
Page 10: Cooling System
The equipment room must also meet limits on salts, acids, and sulfides to eliminate corrosion and premature aging of components, as shown in Table1-3. Table1-3 Harmful gas limits in the equipment room Max. (mg/m Cooling system The router uses left-to-right airflow for heat dissipation, as shown in Figure1-1. For adequate cooling of the router, follow these guidelines: •... -
Page 11: Emi
Make sure the power supply system at the installation site is stable and meets the requirements of the power supplies, including the rated input voltage and input current. For more information about available power supplies, see H3C RA5300 Router Hardware Information and Specifications. -
Page 12: Installation Tools
Installation tools No installation tools are provided with the router. Prepare them yourself as required. Figure1-2 Installation tools Installation accessories Figure1-3 Installation accessories Pre-installation checklist Table1-4 Pre-installation checklist Item Requirements Result • A minimum clearance of 100 mm (3.94 in) is reserved around the air inlet and outlet vents. - Page 13 Item Requirements Result Operating –20°C to +60°C (–4°F to +140°F) temperature Operating 5% RH to 95% RH (noncondensing). humidity • Dust concentration ≤ 3 × 10⁴ particles/m3. Cleanliness • No visible dust on desk within three days. • The grounding specifications for the equipment room comply with national and industry standards.
- Page 14 Item Requirements Result • The workbench is sturdy and stable. Workbench • The workbench is reliably grounded. • The rack has a good ventilation system. • The rack is sturdy and can support the router and its accessories. • The rack has a size that can accommodate the Rack router.
-
Page 15: Installing The Router
• Keep the tamper-proof seal on a mounting screw on the chassis cover intact, and if you want to open the chassis, contact H3C for permission. Otherwise, H3C shall not be liable for any consequence. -
Page 16: Mounting The Router In A Rack
Figure2-1 Installation flowchart Start Determine the installation position Mount the router on Mount the router in a a workbench rack Ground the router Install RSUs Install interface modules Install power supplies Connect interface cables Connect power cords Verify the installation Operating Troubleshoot the correctly ? -
Page 17: Installing The Router In A 19-Inch Rack
Installing the router in a 19-inch rack Use a 19-inch rack mounting bracket to mark the cage nut installation holes in the front rack posts and install cage nuts. Figure2-2 Installing cage nuts Use M4 mounting bracket screws to attach the 19-inch rack mounting brackets to both sides of the router. -
Page 18: Installing The Router In An Etsi Rack
Figure2-4 Securing the router to the 19-inch rack Installing the router in an ETSI rack Attach the 19-inch rack mounting brackets to both sides of the router. For more information, "Installing the router in a 19-inch rack." Use M6 rack screws to attach the ETSI rack mounting brackets to the 19-inch rack mounting brackets. -
Page 19: Mounting The Router On A Workbench
Figure2-6 Securing the router to the ETSI rack Mounting the router on a workbench IMPORTANT: To mount the router on a workbench, follow these guidelines: • Make sure the workbench is clean, stable, and reliably grounded. • Enable a minimum clearance of 100 mm (3.94 in) around the chassis for heat dissipation. •... -
Page 20: Grounding The Router
Grounding the router CAUTION: • Correctly connecting the grounding cable is crucial to lightning protection and EMI protection. Before using the router, make sure the router is reliably grounded. • Connect the grounding cable to the grounding system in the equipment room. Do not connect it to a fire main or lightning rod. -
Page 21: Grounding The Router Through The Grounding Point On The Chassis
Figure2-8 Grounding the router through the grounding point on the left mounting bracket Grounding the router through the grounding point on the chassis Remove the grounding screw from the grounding point on the router chassis. Use the grounding screw to attach the ring terminal (M6) of the grounding cable to the grounding point and then fasten the M6 screw. -
Page 22: Installing Routing And Switching Units
Figure2-9 Grounding the router through the grounding point on the chassis Installing routing and switching units The routing and switching units (RSUs) are hot swappable. To install an RSU: Wear an ESD wrist strap. Make sure the wrist strap makes good skin contact and is reliably grounded. -
Page 23: Installing Interface Modules
Figure2-11 Installing an RSU Installing interface modules CAUTION: The HRIC modules are hot swappable. You can remove an HRIC module only when its RUN LED is steady on. To install an interface module: Wear an ESD wrist strap. Make sure the wrist strap makes good skin contact and is reliably grounded. -
Page 24: Installing Power Supplies
Simultaneously open the two ejector levers on the interface module fully. Slide the interface module slowly along the guide rails into the slot until the interface module seats in the slot. Close the ejector levers. Make sure they are firmly against the front panel of the interface module. -
Page 25: Connecting Interface Cables
The copper ports on the router are MDI/MDIX autosensing. Examine the port LED on the router to verify that the cable is connected correctly. For more information about the LEDs, see H3C RA5300 Router Hardware Information and Specifications. Connecting an optical fiber to a fiber port WARNING! Disconnected optical fibers or transceiver modules might emit invisible laser light. - Page 26 CAUTION: • Never bend or curve a fiber excessively. The bend radius of a fiber must be not less than 100 mm (3.94 in). • Keep the fiber end clean. • Before connecting an optical fiber to a fiber port, make sure the fiber connector matches the transceiver module in the fiber port.
-
Page 27: Connecting Power Cords
Figure2-16 Installing a transceiver module and optical fiber (MPO port) Connecting a QSFP28/SFP28 copper cable For a short-distance connection between two ports, you can use copper cables. To connect a QSFP28/SFP28 copper cable: Wear an ESD wrist strap. Make sure the wrist strap makes good skin contact and is reliably grounded. -
Page 28: Verifying The Installation
Figure2-18 Connecting the DC power cord Verifying the installation After you complete the installation, verify the following requirements are met: • There is enough space for heat dissipation around the router. • The router is installed securely. • All screws are fastened tightly. •... -
Page 29: Powering On The Router
To power on the router: Power on the router. Verify the following items: The LEDs on the front panel are normal. For the LED description, see H3C RA5300 Router Hardware Information and Specifications. The configuration terminal displays information normally. -
Page 30: Configuring Basic Settings
Done. Image file flash:/ra5300rsu3xx-cmw710-boot-e0801.bin is self-decompressing....Done. System image is starting... Cryptographic algorithms tests passed. Line con0 is available. Press ENTER to get started. (Press Enter.) <sysname> (The router is ready for configuration.) Configuring basic settings After powering on the router for the first time, configure basic settings for the router. For more information about how to configure the router, see the relevant configuration guide and command references. -
Page 31: Replacement Procedure
• Keep the tamper-proof seal on a mounting screw on the chassis cover intact, and if you want to open the chassis, contact H3C for permission. Otherwise, H3C shall not be liable for any consequence. -
Page 32: Replacing The Fan Tray
Replacing the fan tray WARNING! • To avoid bodily injury, do not touch the fan tray when it is operating. • The fan tray is hot swappable. Ensure electricity safety when you hot swap the fan tray. CAUTION: To prevent dust from entering the router, keep the old fan tray installed in the chassis until a new fan tray is ready to be installed. -
Page 33: Replacing An Interface Module
Put the removed power supply on an antistatic mat. Install a new RSU. For the installation procedure, see "Installing routing and switching units." If you are not to install a new RSU after removing the original one, install a filler panel in the slot to prevent dust and ensure good ventilation in the router. -
Page 34: Replacing A Transceiver Module
Figure3-4 Removing an interface module Replacing a transceiver module WARNING! Disconnected optical fibers or transceiver modules might emit invisible laser light. Do not stare into beams or view directly with optical instruments when the router is operating. CAUTION: Do not touch the golden plating on a transceiver module. Replacing a transceiver module and optical fiber To replace a transceiver module and optical fiber: Wear an ESD wrist strap. -
Page 35: Replacing A Qsfp28/Sfp28 Copper Cable
Figure3-5 Removing a transceiver module and optical fiber (LC ports) Figure3-6 Removing a transceiver module and optical fiber (MPO port) Replacing a QSFP28/SFP28 copper cable Wear an ESD wrist strap. Make sure the wrist strap makes good skin contact and is reliably grounded. - Page 36 If you are not to install a new QSFP28/SFP28 copper cable in the port, insert the dust plug into the fiber port. Figure3-7 Removing a QSFP28/SFP28 copper cable...
-
Page 37: Hardware Management And Maintenance
Hardware management and maintenance The command lines and outputs vary by software version. For more information about the command lines and their outputs, see the command references for the specific software version. Displaying software and hardware version information for the router Use the command to display software and hardware version information for display version... -
Page 38: Displaying Detailed Information About The Router
Save successfully. Displaying detailed information about the router Use the command to display detailed information about the router display device verbose and the modules. <Sysname>display device verbose Device Name: H3C RA5300 Slot No. Board Type Status Primary SubSlots --------------------------------------------------------------------------- RSU-300... -
Page 39: Displaying Electrical Label Information For The Router
<Sysname> display device manuinfo Slot 1 CPU 0: DEVICE_NAME : NONE DEVICE_SERIAL_NUMBER : NONE MAC_ADDRESS : NONE MANUFACTURING_DATE : NONE VENDOR_NAME : NONE Slot 2: Subslot 0: DEVICE_NAME : RT-HRIC-GP8 DEVICE_SERIAL_NUMBER : 210231AC4G0197000001 MAC_ADDRESS : NONE MANUFACTURING_DATE : 2019-07-13 VENDOR_NAME : H3C... -
Page 40: Displaying Cpu Usage Information
Subslot 0: DEVICE_NAME : RT-HRIC-CLGQ2 DEVICE_SERIAL_NUMBER : 210231AC430197000001 MAC_ADDRESS : NONE MANUFACTURING_DATE : 2019-07-16 VENDOR_NAME : H3C PRODUCT ID : RT-HRIC-CLGQ2 Table4-2 Command output Field Description DEVICE_NAME Name of the router or module. DEVICE_SERIAL_NUMBER Serial number of the router or module. -
Page 41: Displaying The Fan Tray Operating Status
Slot 1: Total Used Free Shared Buffers Cached FreeRatio Mem: 7987844 3409380 4578464 7492 255844 57.4% -/+ Buffers/Cache: 3146044 4841800 Swap: Table4-4 Command output Field Description Memory usage information. Total size of the physical memory space that can be allocated. The memory space is virtually divided into two parts. -
Page 42: Displaying The Power Supply Operating Status
Field Description • Abnormal—The fan tray is faulty. • FanDirectionFault—The actual airflow direction of the fan tray is inconsistent with the desired airflow direction. Speedlevel Speed level of the fan tray. Displaying the power supply operating status Use the command to the power supply operating status. display power-supply <Sysname>... -
Page 43: Displaying Transceiver Module Information
Field Description Alarming temperature threshold. If the router does not support this field, AlarmLimit this field displays NA. Displaying transceiver module information Use the command to display the key parameters of display transceiver interface transceiver modules, including the transceiver module type, connector type, central wavelength of the transmit laser, signal transmission distance, and vendor name. -
Page 44: Rebooting The Router Or A Module
• Safe mode—Use the command with the keyword. Safe mode is slower than save safely fast mode, but more secure. In safe mode, the system saves the configuration in a temporary file and starts overwriting the target next-startup configuration file after the save operation is complete. - Page 45 Task Command Remarks schedule reboot at hh:mm By default, no reboot date or time or reboot delay time is specified. [ date ] • Available in user view. Schedule a reboot to occur after a delay: schedule reboot delay { hh:mm | mm }...
-
Page 46: Troubleshooting
• Keep the tamper-proof seal on a mounting screw on the chassis cover intact, and if you want to open the chassis, contact H3C for permission. Otherwise, H3C shall not be liable for any consequence. -
Page 47: No Terminal Display
Stop bits—1 Flow control—none Verify that the console cable is in good condition. If the issue persists, contact H3C Support. Garbled terminal display Symptom The configuration terminal displays garbled output when the router is powered on. Solution Verify that the Data bits field is set to 8 for the configuration terminal. If the Data bits field is set to 5 or 6, the configuration terminal displays garbled characters. -
Page 48: Solution
Verify that the interface module is installed in the compatible router slot. Verify that a correct cable is used. Verify that the cable is correctly connected. If the issue persists, contact H3C Support. System failure during operation Symptom A system failure occurs during operation.
Need help?
Do you have a question about the RA5300 and is the answer not in the manual?
Questions and answers