Table of Contents
Advertisement
Available languages
Available languages
Quick Links
Advertisement
Table of Contents

Subscribe to Our Youtube Channel
Related Manuals for FAR KJ 70-A


Summary of Contents for FAR KJ 70-A
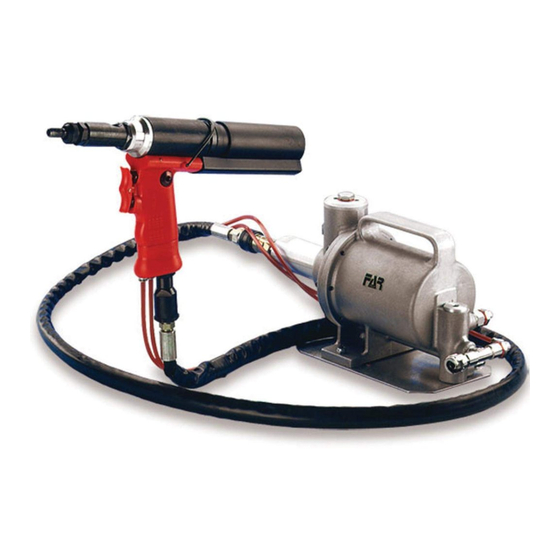
- Page 1 KJ 70-A - ISTRUZIONI ORIGINALI RIVETTATRICE OLEOPNEUMATICA PER INSERTI 6-32 ÷ 1/2"-13 ISTRUZIONI D’USO - PARTI DI RICAMBIO - TRANSLATION OF ORIGINAL INSTRUCTIONS HYDROPNEUMATIC RIVETING TOOL FOR INSERTS 6-32 ÷ 1/2"-13 INSTRUCTIONS FOR USE - SPARE PARTS...
- Page 2 D. Lgs. 17/2010 di recepimento della Direttiva Macchine 2006/42/CE e successive modificazioni ed integrazioni. La persona autorizzata a costituire il fascicolo tecnico risponde al nome di Massimo Generali, presso la Far S.r.l., con sede in Quarto Inferiore (BO) alla via Giovanni XXIII n° 2.
- Page 3 KJ 70-A ISTRUZIONI D’USO..........4 INSTRUCTIONS FOR USE ........9 PARTI DI RICAMBIO ..........14 SPARE PARTS ............16...
- Page 4 • Leggere attentamente le istruzioni prima dell’uso. • Per le operazioni di manutenzione e/o riparazione affidarsi a centri di assistenza autorizzati dalla FAR s.r.l. e fare uso esclusivo di pezzi di ricambio originali. La FAR s.r.l. declina ogni responsabilità per danni da particolari difettosi, che si dovessero verificare per inadempienza di quanto sopra (Direttiva CEE 85/374).
-
Page 5: Identificazione Della Rivettatrice
KJ 70-A PARTI PRINCIPALI IDENTIFICAZIONE DELLA RIVETTATRICE Ghiera bloccaggio testina A) ..........La rivettatrice KJ 70-A è identificata da una marcatura indicante Foro inserimento spina sbloccaggio innesto B) ....ragione sociale e indirizzo, designazione della macchina , Attacco bilanciatore C) ............ -
Page 6: Posa In Opera Dell'inserto
KJ 70-A POSA IN OPERA DELL’INSERTO Verificare che la coppia tirante-testina montata sulla rivettatrice sia adeguata alla misura dell’inserto che si vuole serrare; in caso contrario procedere al cambio di formato. Solitamente la coppia tirante-testina montata sulla rivettatrice in confezione corrisponde ad una filettatura di 3/8-16. -
Page 7: Cambio Di Formato
KJ 70-A CAMBIO DI FORMATO Al variare della filettatura degli inserti da serrare, occorre eseguire la sostituzione della coppia Tirante/testina, pertanto procedere come segue: FIG. 1. Allentare la ghiera con una chiave commerciale di mm 22 e rimuovere la testina. -
Page 8: Smaltimento Della Rivettatrice
KJ 70-A RABBOCCO OLIO CIRCUITO OLEODINAMICO Verificare periodicamente che il livello dell’olio non scenda mai al di sotto dei 3/4 indicati dall’apposito segnalatore (B). Nel caso si rendesse necessario un rabbocco togliere il tappo (A) servendosi di una chiave di mm 17, quindi immettere olio idraulico HLP 32 cSt finché questo non raggiunge il bordo del foro filettato. -
Page 9: Guarantee And Technical Assistance
FAR riveting tools are covered by a 12-month warranty. The • Do not carry the connected tool by pulling the hose. The hole tool warranty period starts on the date of delivery to the must be far from any heating sources or from cutting parts. buyer, as specified in the relevant document. The warranty • Keep the tools in good conditions; do not remove either safety covers the user/buyer provided that the tool is purchased parts or silencers. -
Page 10: Tool Identification
MAIN COMPONENTS TOOL IDENTIFICATION A) ............. Ring nut clamping head The riveting tool KJ 70-A is identified from a marking that shows B) ........ Insertion Pin Hole Dechucking clutch company name and address of manufacturer, designation of C) ............Balancer connection the tool, CE. -
Page 11: Placing Of The Insert
KJ 70-A PLACING OF THE INSERT Make sure that the couple tie-rod/head mounted on your riveting tool is suitable for the insert to clamp; otherwise, change size accordingly. Usually the riveting tool is supplied with the couple tie-rod/head corresponding to a 3/8-16 thread. Before using the riveting tool and after any change of size, perform the following operations according to the size and thickness of the part to clamp. -
Page 12: Change Of Size
KJ 70-A CHANGE OF SIZE Depending on insert thread, it is necessary to replace the couple “tie-rod/head” as follows: PICTURE 1. Loosen the ring nut by means of a 22-mm standard spanner and remove the riveting tool head. PICTURE 2. Make the pin supplied pass through the pertinent service hole located on the cone carrying head and apply a light pressure on the head inwards, in order to dechuck the tie rod clutch., at the same time, unscrew the tie rod and extract it. -
Page 13: Disposal Of The Riveting Tool
KJ 70-A TOPPING UP THE OIL-DYNAMIC CIRCUIT Verify periodically that the oil level does not go below 3/4 of the limit indicated by the proper indicator (B). Whether you need to top up the circuit, remove the plug (A) by means of a 17-mm wrench, then pour hydraulic oil, HLP 32 cSt, until it reaches the border of the threaded hole. -
Page 14: Parti Di Ricambio
KJ 70-A PARTI DI RICAMBIO Tav. 1/3 Tav. 1/3 N° COD. DESCRIZIONE N° COD. DESCRIZIONE 712151 Guarnizione B-141110 / NEO 711106 Testina 10-24 UNC 10-32 UNF 710833 Pistone oleodinamico 711107 Testina 1/4"-20 UNC 1/4-28 UNF 710883 Innesto femmina 711108 Testina 5/16"-18 UNC 5/16"-24 UNF... - Page 15 KJ 70-A PARTI DI RICAMBIO Tav. 2/3 Tav. 2/3 N° COD. DESCRIZIONE 711824 1 Raccordo NV 1/4" NPT-M N° COD. DESCRIZIONE 711823 1 Raccordo NV 1/4" NPT-F KITC 741065 Kit Guarnizioni 711825 1 Raccordo NPT 1300 711662 1 Livello olio HFE.9...
-
Page 16: Spare Parts
KJ 70-A SPARE PARTS Tab. 1/3 Tab. 1/3 CODE Q.ty DESCRIPTION CODE Q.ty DESCRIPTION 712151 Gasket B-141110 / NEO 711106 Head 10-24 UNC 10-32 UNF 710833 Oil-dynamic piston 711107 Head 1/4"-20 UNC 1/4-28 UNF 710883 Female clutch 711108 Head 5/16"-18 UNC 5/16-24 UNF... - Page 17 KJ 70-A SPARE PARTS Tab. 2/3 Tab. 2/3 CODE Q.ty DESCRIPTION 711824 1 Connector NV 1/4" NPT-M CODE Q.ty DESCRIPTION 711823 1 Connector NV 1/4" NPT-F 711825 1 Connector NPT 1300 KITC 741065 Gasket Kit 711662 1 Oil level HFE.9...
-
Page 18: Parti Di Ricambio • Spare Parts
KJ 70-A Tav. 1/3 • Tab. 1/3 PARTI DI RICAMBIO • SPARE PARTS 22 A 23 20 A 21 A 30 31 38 B 39 B 30 31 KIT A 22A(x1) 20A(x1) mt 1,8 21A(x1) KIT B 38B(x1) 39B(x1) TAV. 2 Date 04-2017 Revisione - 00... - Page 19 KJ 70-A Tav. 2/3 • Tab. 2/3 PARTI DI RICAMBIO • SPARE PARTS TAV. 1 37 F 36 F 35 F 36 F 35 F 36 F 35 F 34 F 18 C 17 C 16 C 26 D 24 D 31 E 22 D...
- Page 20 KJ 70-A Tav. 3/3 • Tab. 3/3 PARTI DI RICAMBIO • SPARE PARTS Date 04-2017 Revisione - 00...
- Page 22 KJ 70-A...
- Page 24 The list of the service centres is available on our website http://www.far.bo.it ( Organization ) La liste des centres d’assistance est disponible sur notre site internet http://www.far.bo.it ( Organisation ) Die Liste der Reparaturservices ist verfügbar unter unserer Webseite http://www.far.bo.it ( Organisation ) La lista de los servicios postventa es disponible en nuestro sitio web http://www.far.bo.it ( Organización )
Need help?
Do you have a question about the KJ 70-A and is the answer not in the manual?
Questions and answers