
Related Manuals for Yetter MAX SEALER PLUS 2920 Series


Summary of Contents for Yetter MAX SEALER PLUS 2920 Series
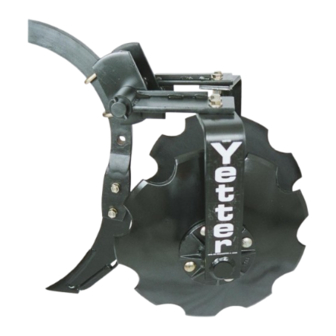
- Page 1 2920 SERIES MAX SEALER PLUS™ OPERATOR’S MANUAL PARTS IDENTIFICATION 2565-727_REV_C • 09/2023 YETTER MANUFACTURING CO. FOUNDED 1930 Colchester, IL 62326-0358 Toll free: 800/447-5777 309/776-3222 (Fax) Website: www.yetterco.com E-mail: info@yetterco.com...
-
Page 2: Warranty
WARRANTY Yetter Manufacturing warrants all products manufactured and sold by it against defects in material. This warranty being expressly limited to replacement at the factory of such parts or products as shall appear to be defective after inspection. - Page 3 SAFETY PRECAUTIONS You can make your farm a safer place to live and work if you observe the safety precautions given. Study these precautions carefully and insist those working with you and for you follow the precautions. Finally, remember this an accident is usually caused by someone’s carelessness, neglect or oversight. A brief description of signal words that may be used in this manual: CAUTION: Used as a general reminder of good safety practices or to direct attention to unsafe practices.
- Page 4 2920-054 – 13” SHARKTOOTH BLADE 2920-055 – 18” NOTCHED BLADE 2920-056 – 18” SMOOTH BLADE Applications include: YETTER MAVERICK II YETTER AVENGER DIETRICH SLURRY INJECTOR The 2920 MAX SEALER PLUS™ will not work with shanks that use “clamp on” style knife plates and 1”...
-
Page 5: General Information
GENERAL INFORMATION Note: Right Hand and Left Hand designations are based on sitting in the tractor and facing forward. BOLT TORQUE READ THESE INSTRUCTIONS FIRST: 1. Improperly tightened bolts will result in damage, breakage, expense, and down time. 2. Always replace bolts with the specified grade and type. 3. - Page 6 ASSEMBLY STEP 1. Attach the 2920-115 swing arm assembly to the shank/bracket using the appropriate u-bolts, flat washers, lock washers and hex nuts or the ½” bolts and lock nuts. STEP 2. Attach the 2920-117 Arm Hub Assembly to the 2920-115 Swing Arm using the ½”...
- Page 7 ASSEMBLY STEP 3. Attach the blade to the 2920-117 Sealer Arm Hub Assembly using the 4) ½” x 1- 1/2” carriage bolts, lock washers and hex nuts. Curved blades can be used with the cup “in” toward the knife for the most aggressive adjustment or with the cup “out” away from the knife for a less aggressive adjustment.
-
Page 8: Maintenance
MAINTENANCE Lubrication: Use #2 multi-purpose lithium grease. To insure longevity and reliability of the MAX SEALER PLUS™ the recommended lubrication schedule should be followed. BEARING ADJUSTMENT Tighten the slotted nut to 10 to 15 ft/lbs. or until a definite drag is felt when the blade is turned by hand. Tighten the nut one slot position to align the slot with the hole in the spindle shaft. - Page 9 PARTS IDENTIFICATION...
- Page 10 PARTS IDENTIFICATION...
- Page 11 PARTS IDENTIFICATION...
- Page 12 PARTS IDENTIFICATION...
- Page 13 PARTS IDENTIFICATION...
- Page 14 PARTS IDENTIFICATION...
-
Page 15: Troubleshooting
TROUBLESHOOTING Problem Cause Solution Poor overall performance. Toolbar not adjusted correctly Adjust the toolbar so that during operation it is level. Max Sealer Plus not creating Speed too slow. Operate at 5mph min. a mound or too small of a mound. - Page 16 2565-727_REV_C 09/2023...
Need help?
Do you have a question about the MAX SEALER PLUS 2920 Series and is the answer not in the manual?
Questions and answers