Clean Water Systems Pro-OX 2510 Installation And Startup Manual
Iron filter
Hide thumbs
Also See for Pro-OX 2510:
- Installation & starting manual (20 pages) ,
- Installation & start?up manual (11 pages)
Table of Contents
Advertisement
Quick Links
Pro‐OX 2510 Iron Filter Installa on & Start‐
Up Guide
Thank you for purchasing a Clean Water System! With proper installa on and a
li le rou ne maintenance your system will be providing iron free water for many
years.
Please review this start-up guide en rely before beginning to install your system,
and follow the steps outlined for best results.
USE PAPER MASK AND VENTILATE AREA TO AVOID BREATHING DUST DURING
Ques ons?
Call us toll-free: 1-888-600-5426 or 1-831-462-8500
Email us:
support@cleanwaterstore.com
See more informa on on our website:
PRO-OX MEDIA CONTAINS DUST.
INSTALLATION
www.cleanwaterstore.com/resources
Clean Water Made Easy
h p://www.cleanwaterstore.com
Advertisement
Table of Contents

Related Manuals for Clean Water Systems Pro-OX 2510


Summary of Contents for Clean Water Systems Pro-OX 2510
- Page 1 Clean Water Made Easy h p://www.cleanwaterstore.com Pro‐OX 2510 Iron Filter Installa on & Start‐ Up Guide Thank you for purchasing a Clean Water System! With proper installa on and a li le rou ne maintenance your system will be providing iron free water for many years.
-
Page 2: Table Of Contents
Pro‐OX 2510 Iron Filter Installa on & Startup Guide Table of Contents Packing List ..............................3 Pre-Installa on ............................4 Best Prac ces for Piping & Drain Installa on ....................4 How Your Pro-OX Iron Filter Works ......................5 Fig. 1—Pro-OX Iron Filter Water Flow Diagram ................5 Fig. -
Page 3: Packing List
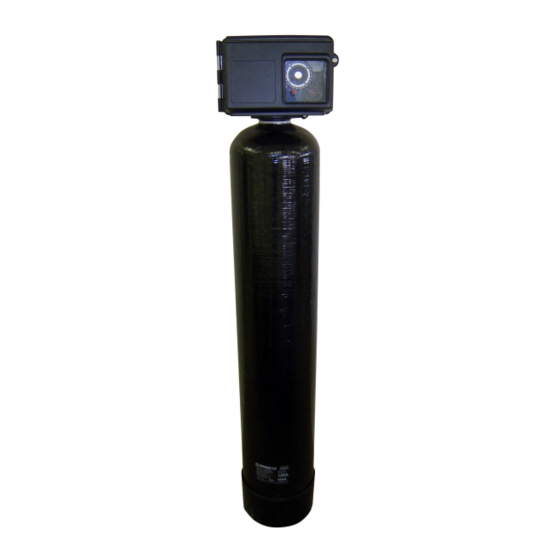
Pro‐OX 2510 Iron Filter Installa on & Startup Guide Packing List Each system comes with the following: Fleck 2510 control valve with pipe connector kit (either 1”or ¾”) Fleck 2510 bypass valve Enpress filter tank with distributor tube installed Media funnel In addi on, each system comes with the following, depending on the model ordered: 1.0 Cubic Foot Pro‐OX: Quan ty... -
Page 4: Pre-Installa On
Pro‐OX 2510 Iron Filter Installa on & Startup Guide Pre‐Installa on Review your packing list and make sure you have received all the parts before beginning installa on. If you are going to be turning off the water to the house and you have an electric water heater, shut off the power to the water heater before beginning installa on in case water heater is accidentally drained. -
Page 5: How Your Pro-Ox Iron Filter Works
Pro‐OX 2510 Iron Filter Installa on & Startup Guide How Your Pro‐OX Iron Filter Works See Fig. 1. Water enters the top of the filter tank and flows down through the media and up the distribu- tor tube. During backwash, the water flow is reversed and water flows down the distributor tube and up through the media, li ing and expanding the Pro-OX media and washing out rust and sediment to drain. - Page 6 Pro‐OX 2510 Iron Filter Installa on & Startup Guide Fig. 2—Typical Pro‐OX Iron Filter Installa on www.cleanwaterstore.com Rev 032114 Page 6...
-
Page 7: Assembly And Installa On Instruc Ons
Pro‐OX 2510 Iron Filter Installa on & Startup Guide Assembly and Installa on Instruc ons 1. Unscrew by hand the en re Fleck 2510 control valve from top of tank if it was shipped screwed on. Place distributor tube in tank if not already inside tank. If not already done, make sure blue cap is on top of distributor tube, or wrap the top of distributor tube with electrical or duct tape. - Page 8 Pro‐OX 2510 Iron Filter Installa on & Startup Guide 11. Plug in your Fleck 2510 control valve to an outlet. Your Fleck 2510 control valve is already pre- programmed. Adjust the days of the week to backwash every 2 to 3 days for best results. 12.
-
Page 9: Maintaining Your 2510 Pro-Ox Iron Filter System
Pro‐OX 2510 Iron Filter Installa on & Startup Guide although you do not want to see a large amount of media coming out, which would mean you have very high water pressure, or the drain flow for the Fleck 2510 is missing. 21. - Page 10 Pro‐OX 2510 Iron Filter Installa on & Startup Guide Tighten with hands, there is no need for a pipe wrench or other wrench. The control valve is sealed with the o-ring on the base of the control valve. Once you hand- ghten it so the o-ring has sealed against the top of the tank, con nue to ghten for approximately another ¼...
Need help?
Do you have a question about the Pro-OX 2510 and is the answer not in the manual?
Questions and answers