Table of Contents
Advertisement
Clean Water Made Easy
www.cleanwaterstore.com
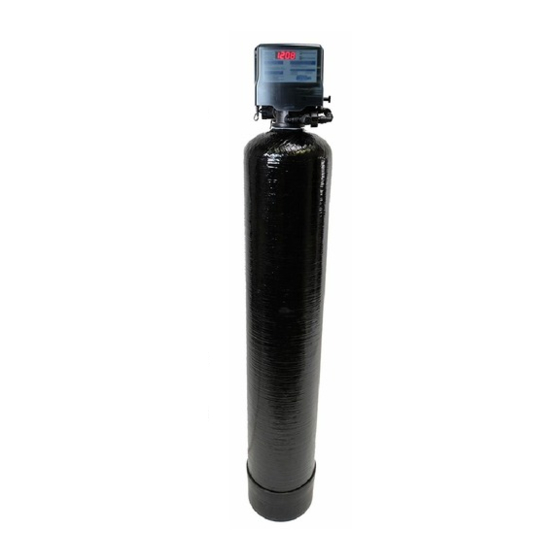
Pro-Ox 5900-BT-AIR Installation & Maintenance Guide
Thank you for purchasing a Clean Water System! With proper installation and a
little routine maintenance your system will be providing iron free water for many
years.
Please review this start-up guide entirely before beginning to install your system
and follow the steps outlined for best results.
The Pro-OX 5900-BT-AIR Iron Filter media must be activated with a 1 cup of un-
scented liquid chlorine bleach when first installing it. Read instructions for more
information. It is easy to do, but a critical step.
The Pro-OX media produces very small particles (fines) when the system is first
installed. Bring the water pressure up VERY slowly during the initial backwash by
opening inlet valve slowly to avoid pushing the media up into the control head.
Performing multiple backwashes at start-up is an important step. It is also
recommended that the air draw or chemical draw functions be disabled during the
start-up period to ensure all the smaller particles have been flushed out.
You should also not bring any other systems online (i.e. softeners, filters, etc.) until
the Pro-Ox system is fully flushed. Depending on the water quality, this may take
several backwashes and a week or two of normal water use.
The Pro-OX media contains dust. Use paper mask and ventilate area to avoid
breathing dust when first pouring the media into the tank.
Minimum 30 PSI required. Maximum pressure 90 PSI.
For indoor installation. Protect from sunlight, rain, and freezing.
Watch These How-to Videos:
https://youtu.be/05mJy573Y6E
For assistance call: 1-831-462-8500 M-F 8AM to 4PM PST
Email us:
office@cleanwaterstore.com
More information online:
www.cleanwaterstore.com
Advertisement
Table of Contents

Related Manuals for Clean Water Systems Pro-Ox 5900-BT-AIR Series


Summary of Contents for Clean Water Systems Pro-Ox 5900-BT-AIR Series
- Page 1 Clean Water Made Easy www.cleanwaterstore.com Pro-Ox 5900-BT-AIR Installation & Maintenance Guide Thank you for purchasing a Clean Water System! With proper installation and a little routine maintenance your system will be providing iron free water for many years. Please review this start-up guide entirely before beginning to install your system and follow the steps outlined for best results.
-
Page 2: Table Of Contents
Table of Contents: Packing Lists ............................. 3 How Your Pro Ox 5900-BT-AIR Works ..................... 4 Note About Aeration ........................4 System Install Steps Overview ......................5 Pre-Installation ..........................5 Best Practices for Piping & Drain Installation .................. 6 Fig 2. Diagram of a Typical Installation ................... 7 Add Filter Media and Install 5900-BT Backwash Valve on Tank ............ -
Page 3: Packing Lists
Pro Ox 5900-BT-AIR Installation & Maintenance Guide Packing Lists Pro-Ox 5900-BT-AIR 844 Pro-Ox 5900-BT-AIR control valve w/ bypass assembly with 1” pipe connectors 8” x 44” standard filter tank with distributor tube and bottom basket Plastic media funnel for adding Pro-OX media 55 lbs. -
Page 4: How Your Pro Ox 5900-Bt-Air Works
Pro Ox 5900-BT-AIR Installation & Startup Guide How Your Pro Ox 5900-BT-AIR Works The Pro Ox 5900-BT-AIR, when properly applied, is an efficient and cost effective system for the removal of iron and odor. The Pro Ox 5900-BT-AIR control valve maintains a compressed “air pocket”... -
Page 5: System Install Steps Overview
Pro Ox 5900-BT-AIR Installation & Startup Guide System Install Steps Overview 1. Put gravel in first, then Pro-OX media, then Turbidex media. Add 1 cup of liquid bleach non-scented and allow to soak for at least 1 hour, but up to 24 hours is OK. 2. -
Page 6: Best Practices For Piping & Drain Installation
Pro Ox 5900-BT-AIR Installation & Startup Guide Best Practices for Piping & Drain Installation 1. See typical installation (Fig 2). The Pro-OX-AIR filter is installed after the pressure tank. 2. Install on a level floor or surface. 3. Filter system must be installed at least 10 feet ahead of inlet to water heater to prevent damage due to back-up hot water or use a check valve to prevent hot water back-up. -
Page 7: Fig 2. Diagram Of A Typical Installation
Pro Ox 5900-BT-AIR Installation & Startup Guide Diagram of a Typical Installation Page 7 www.cleanwaterstore.com Rev. 02-26-2020... -
Page 8: Add Filter Media And Install 5900-Bt Backwash Valve On Tank
Pro Ox 5900-BT-AIR Installation & Startup Guide Installation of Your System into Copper or Metal Piping Systems If your new filter system is to be installed in a metal (conductive) plumbing system, i.e. copper or galvanized steel pipe, the plastic components (bypass and connectors) will interrupt the electrical continuity of the plumbing system. - Page 9 Pro Ox 5900-BT-AIR Installation & Startup Guide 6. Add the filter gravel that came with your order. The gravel should cover the bottom distributor screen before adding the Pro-OX filter media. 7. Next, add the Pro-OX Filter media, then the Turbidex Media. 8.
-
Page 10: Attach The Bypass
Pro Ox 5900-BT-AIR Installation & Startup Guide Attach the Bypass Make sure there is lubricant on all three sets of O-rings and insert and screw bypass onto end connectors (O-rings are already on valve, with the Inlet Air Check Valve on the left, Inlet side). Screw the Elbow fittings onto the end of the bypass and attach to In and Out service pipe. -
Page 11: Piping Installation
Pro Ox 5900-BT-AIR Installation & Startup Guide Piping Installation 1. Using Teflon tape on pipe threads, make sure to connect the IN pipe to inlet and OUT pipe to the outlet. As you face the 5900-BT control from the front, the water enters on the right and exits on the left. -
Page 12: Program Time Of Day And Days Between Backwashes
Pro Ox 5900-BT-AIR Installation & Startup Guide External Drain Line Flow Control (“DLFC”) If you bought a 1.5 or 2.0 cubic foot Pro-OX 5900-BT Filter you will get an external Drain Line Flow control with your order. This is made up of three pieces: a 1” x ¾” Adapter, the DLFC, and two hose barb fittings. -
Page 13: Program Your Valve: Master Programming Mode
Pro Ox 5900-BT-AIR Installation & Startup Guide 11. The recommended initial setting for a Pro-OX 5900-BT-AIR filter is every 3 to 4 days 12. To Set the Number of Days between Air-Draw Cycles, Press the Set/Change Button 13. Set to 1 day, to regenerate the system with new air daily (recommended) d - 01 14. -
Page 14: See Historical Data And Real Time Flow Rate
Pro Ox 5900-BT-AIR Installation & Startup Guide 6 minutes. Not Programmable. This is the Air Release cycle. [ Not Displayed] 2 10 minutes. This is the Backwash cycle. [ 2 - 10] 5 minutes. This is a rest cycle. [ 3 - 05] minutes. - Page 15 Pro Ox 5900-BT-AIR Installation & Startup Guide 4. MAKE SURE TO CLOSE THE BALL VALVE OR GATE VALVE AFTER THE FILTER SO NO WATER CAN ENTER THE HOME DURING THIS INITIAL BACKWASH. 5. If you have any filters or softeners installed after filter system, put them on by-pass mode. 6.
-
Page 16: Using The Optional Chlorine Side Tank System
Pro Ox 5900-BT-AIR Installation & Startup Guide Using the Optional Chlorine Side Tank System The chlorine side tank feature allows bleach to be drawn during Air Draw cycle. In the Legacy View App this is referred to as “Pulse Chlorine Setting” Chlorine has a very good effect on the Pro-OX media, cleaning and restoring the Pro-OX. -
Page 17: Installing And Using The Optional Blue Tooth Legacy View App
Pro Ox 5900-BT-AIR Installation & Startup Guide Installing and Using the Optional Blue Tooth Legacy View App For simplified set up and control, please install the Legacy View on a compatible Bluetooth 4.0+ enabled smart phone or tablet. Note that times and settings EXCEPT the Air Draw minutes can be set or adjusted. - Page 18 Pro Ox 5900-BT-AIR Installation & Startup Guide Legacy Phone App Dashboard From the Dashboard, all items in ORANGE be changed (except Air Draw, do that directly on the control valve, see Page 13 – 14), while blue fields are informational only. If you are unsure about the function of the field, click the Info icon for more information Change Time of day (Press “set”...
- Page 19 Pro Ox 5900-BT-AIR Installation & Startup Guide 3. Set Regeneration Time. Example: For 2am, just type 2 and press OK. Legacy App Advanced Settings From the Advanced Settings, all items in ORANGE with a “set” button can be changed. Touch any table to explode a detailed list of the last 60 days. Page 19 www.cleanwaterstore.com Rev.
- Page 20 Pro Ox 5900-BT-AIR Installation & Startup Guide Status and History Using Legacy View App From the Status and History, all items in ORANGE can be reset. Start a regeneration or backwash cycle Option 1: Click on “Regenerate Unit Now.” If you would like to force the unit into the next cycle step, Click “Go to next Regeneration Step.”...
-
Page 21: How To Start A Manual Backwash
Pro Ox 5900-BT-AIR Installation & Startup Guide Filter System Normal Operation • Normal display alternates between time of day and days until regeneration. • Days remaining until the next regeneration will count down from the regeneration day override value to 1 day remaining. Once count reaches 1, a regeneration will be initiated at next scheduled regen time. -
Page 22: How To Remove Media Accidentally Stuck In Control Head
Pro Ox 5900-BT-AIR Installation & Startup Guide How to Remove Media Accidentally Stuck in Control Head Sometimes, when doing the Initial Backwash and Start-Up only, the media can get lifted into the control head. You can tell this has happened because you will have little or no flow, either going out to drain while in the backwash position, or when in the service position. -
Page 23: Troubleshooting Chart
Pro Ox 5900-BT-AIR Installation & Startup Guide Troubleshooting Chart Page 23 www.cleanwaterstore.com Rev. 02-26-2020... - Page 24 Pro Ox 5900-BT-AIR Installation & Startup Guide Troubleshooting Chart (cont.) SYMPTOM POSSIBLE CAUSE SOLUTION Water filling chemical tank Piston / seal interface leaking Perform piston/seal kit inspection and replacement if required during regeneration Chemical Valve stuck open Cycle valve open and closed to verify correct operation.
-
Page 25: Error Codes
Pro Ox 5900-BT-AIR Installation & Startup Guide Error Codes Control Valve Error Code Diagnosis Under normal operating conditions, when your control valve is in the “in service” position, the display should alternate between the current time of day and the number of days remaining (for filters and time clock softeners) or gallons remaining (for metered softeners) until the next regeneration. -
Page 26: Pressure Loss From Inadequate Backwash Flow Rate
Pro Ox 5900-BT-AIR Installation & Startup Guide Error 4 - Unable to find homing slot 1. Check encoder wheel for debris. 2. Cycle power. Valve should either find home or go to a different error code. If error 4 returns, replace powerhead assembly. Error 5 - Motor overload. -
Page 27: Problems With Pressure Loss Or Reduced Flow
Pro Ox 5900-BT-AIR Installation & Startup Guide Problems with Pressure Loss or Reduced Flow 1. First make sure that the problem is the 5900-BT Filter and not another cause. Check the flow rate out of a faucet, with the 5900-BT control valve on by-pass. 2. -
Page 28: How To Replace Piston Assembly
Pro Ox 5900-BT-AIR Installation & Startup Guide B6. The entire powerhead assembly will now lift off easily. B7. Put new powerhead on top of the valve. Be sure the drive pin on main gear engages slot in drive yoke (wide side of drive yoke upright must face to the left away from the motor). B8. -
Page 29: How To Replace Seals And Spacers
Pro Ox 5900-BT-AIR Installation & Startup Guide How to Replace Seals and Spacers D1. Follow steps A1 - A3. D2. Disconnect the meter signal wire from the circuit board. D3. Remove screw and washer at piston drive yoke. Remove powerhead mounting screws. The entire powerhead assembly will now lift off easily. -
Page 30: How To Replace The Pro-Ox Filter Media
Pro Ox 5900-BT-AIR Installation & Startup Guide How to Replace the Pro-OX Filter Media 1. Typically, after 3 to 5 years the Pro-OX media will start to allow a small amount of free- chlorine to flow through the Pro-OX media. To accomplish this: 2. -
Page 31: Control Valve Powerhead Assembly Exploded View
Pro Ox 5900-BT-AIR Installation & Startup Guide Control Valve Powerhead Assembly Exploded View Page 31 www.cleanwaterstore.com Rev. 02-26-2020... - Page 32 Pro Ox 5900-BT-AIR Installation & Startup Guide Page 32 www.cleanwaterstore.com Rev. 02-26-2020...
-
Page 33: Valve Body Assembly Exploded View
Pro Ox 5900-BT-AIR Installation & Startup Guide Valve Body Assembly Exploded View Page 33 www.cleanwaterstore.com Rev. 02-26-2020... - Page 34 Pro Ox 5900-BT-AIR Installation & Startup Guide Page 34 www.cleanwaterstore.com Rev. 02-26-2020...
-
Page 35: Limited Warranty
Pro Ox 5900-BT-AIR Installation & Startup Guide Limited Warranty We warrant this water filter/ softener/ conditioner, when installed according to factory recommendations, to be free from defects in materials and workmanship as follows: ----------Limited Warranty---------- This water conditioner unit is comprised of the finest industry components available. Each individual component used in the assembly of our equipment is covered by the original equipment manufacturer’s warranty.
Need help?
Do you have a question about the Pro-Ox 5900-BT-AIR Series and is the answer not in the manual?
Questions and answers