Table of Contents
Advertisement
Quick Links
Advertisement
Table of Contents

Related Manuals for PR Lighting LS150 TREE


Summary of Contents for PR Lighting LS150 TREE
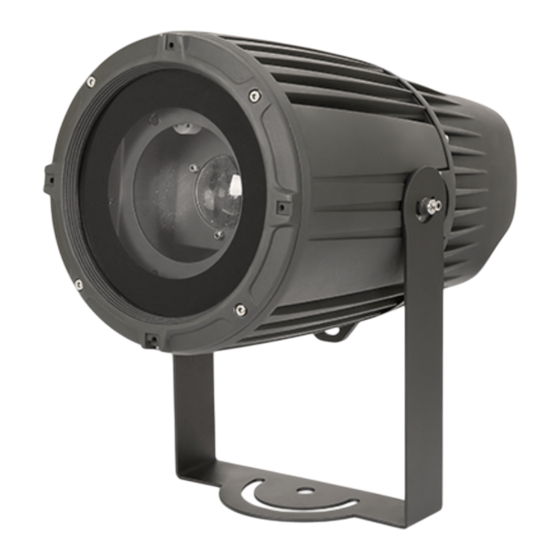
- Page 1 LS150 TREE PR-6821 The user manual contains important information about the safe installation and use of a projector. Please read and follow these instructions carefully and keep the manual in a safe place for future reference. PR LIGHTING LTD. http://www.pr-lighting.com...
- Page 2 Any future technical change in the user manual won’t be with any further notice. Note: For the products made by Guangzhou PR lighting Ltd, the warranty for the whole product is one year starting from the delivery date but the light source is not within the warranty.
-
Page 3: Safety And Warnings
1. SAFETY AND WARNINGS NOTE Before a projector’s installation, power-on, operation and maintenance, please carefully read the safety information hereinafter! The following safety signs are used in the user manual. User Electrical Protective High Warning Flames Goggles Manual shock Gloves Temperature ●... - Page 4 ●There are safety cord holes at the bottom of the base of a projector. In view of safety, please run the safety cord supplied through the safety cord holes for safety support. ●Before any installation, maintenance and cleaning work, please ensure the projector is disconnected from power mains.
-
Page 5: Installation
3. APPEARANCE body INSTALLATION Safety Clamp Warning For safety, please run the safety cord through the safety cord hole and ensure it is tightened . ●RIGGING Take 1 clamp and 1 safety cord out from the package and tighten the clamp with the arm, and then mount the whole unit on the truss, tighten the clamp’s retainers to keep the unit stable. - Page 6 functioning. Always ensure that the structure that you are going to mount the unit to is secure and strong enough to support the weight of the unit Loosen the big knob and adjust the head’s angle for the effect desired and the tighten it. The installation is completed. (if the unit is wit wireless control, while being hung, the antenna should face down) ●PLACE A UNIT ON A FLAT SURFACE Before placing a unit on a flat surface, loosen the small knob with the support and make the angle between the arm and the support...
-
Page 7: Setup And Configuration
DMX OUT DMX IN DMX OUT DMX IN Teminator Controller ● DMX TERMINATOR In the Controller mode, at the last fixture in the chain, the DMX output has to be connected with a DMX terminator. This prevents electrical noise from disturbing and corrupting the DMX control signals. The DMX terminator is simply an XLR connector with a 120... -
Page 8: Master/Slave Mode
address is the channel number from which the projector starts to “listen” to the digital control information being sent out from the controller. The Unit has 1 DMX mode. It has 7 channels, so set the No. 1 projector’s address 001, No. 2 projector’s address 008, No. 3 projector’s address 015, No. -
Page 9: Dmx Protocol
Display Invert Factory Setting PRM Transmit clean Progra Color -128-127 Moto offset Focus -128-127 Moto Reset Yes/No LED Temperature Information Fixture use Time XXXX Software Version X.X.X Auto Test Dimmer 000 - 255 LED brightness Test Mode Color 000 - 255 Motor position 000 - 255 Motor position... -
Page 10: Technical Data
Magenta – Orange 030-039 040-049 Orange 050-059 Orange - Yellow 060-069 Yellow 070-079 Yellow- Blue 080-089 Blue 090-099 Blue– Cyan 100-109 Cyan 110-119 Cyan - White 120-127 White 128-191 Clockwise rotation from slow to fast 192-255 Anti-clockwise rotation from slow to fast 000-001 Clockwise rotation from slow to fast Effect Wheel... - Page 11 Power Consumption 150W LED White Manufacturers Rated Lamp Life 50000hours Color temperature: 7500K COLORS 1pc color wheel(5colors+Open), continual rotation, magnet sensor positioning Function 1 effect wheel , independently and bi-directionally continually rotating 1pc fixed gobo DIMMER Linear Dimmer from 0-100% STROBE Electronic Strobe 0-25FP.S.
-
Page 12: Circuit Diagram And Pcb Connections
RIGGING FIGURE LIGHT OUTPUT FOR WHITE: 1324 DISTANCE (m) 12.5 DIAMETER (m) 2.42 4.85 12.12 7.27 9. CIRCUIT DIAGRAM AND PCB CONNECTIONS... - Page 13 ● CIRCUIT DIAGRAM...
- Page 14 ●PCB CONNECTIONS Master Board Name Thermal Sensor Reserved PWM signal interface Reserved Power Reserved 485 signal interface DMX signal interface 10 Reserved Diver board Name Power LED Driver...
-
Page 15: Component Order Codes
10. COMPONENT ORDER CODES Name Code No. Remarks 6230010129 SWITCHING POWER SUPPLY 100-240VAC 24V/12.5A 6150000004 TX-3636W150FC120-NUVENG LED LIGHT SOURCE 150W -A01 TIANXIN 60300400100 24BYJ48-51 STEPPER MOTOR LED CONSTANT CURRENT 6230000005 SUPPLY OF PR-6810 030040235A 25PM30005-04N 42X37X73, 4 COILS, 500MM IN LENGTH, STEPPER MOTOR RUIBAO... - Page 16 1582 Xingye Avenue, Nancun Panyu Guangzhou, 511442 China TEL: +86-20-3995 2888 PR lighting will try its best to offer accurate and overall information about a product’s technical data. Any changes won’t be notified if necessary. Patented Products. Counterfeiting Will be Prosecuted! P/N: 6320000112A...
Need help?
Do you have a question about the LS150 TREE and is the answer not in the manual?
Questions and answers