Table of Contents
Advertisement
Quick Links
Advertisement
Table of Contents

Related Manuals for PR Lighting PR-8120


Summary of Contents for PR Lighting PR-8120
- Page 1 XLED 1037 PR-8120 This product manual contains important information about the safe installation and use of this projector. Please read and follow these instructions carefully and keep this manual in a safe place for future reference. PR LIGHTING LTD. http://www.pr-lighting.com...
-
Page 2: Table Of Contents
INDEX SAFE USAGE OF THE PROJECTOR……………………………………………………………………………..INSTALLING THE PROJECTOR…………………………………………………………………………………... POWER SUPPLY – MAINS………………………………………………………………………………………… CONTROL CONNECTIONS……………………………………………………………………………………….. DMX TERMINATOR………………………………………………………………………………………………. SETUP OPTIONS-PROJECTOR CONFIGURATION……………………………………………………………… TO SET THE DMX START ADDRESS…………………………………………………………………………….. OPERATION MENU………………………………………………………………………………………………... DMX PROTOCOL………………………………………………………………………………………………….. INDICATION OF LED DIGITAL TUBE……………………………………………………………………………. MAINTENANCE……………………………………………………………………………………………………. KEEPING THE PROJECTOR CLEAN……………………………………………………………………………… TROUBLESHOOTING………………………………………………………………………………………………... -
Page 3: Safe Usage Of The Projector
SAFE USAGE OF THE PROJECTOR When unpacking and before disposing of the carton check there is no transportation damage before using the projector. Should there be any damage caused by transportation, consult your dealer and do not use the apparatus. The projector is for indoor use only, IP20. -
Page 4: Installing The Projector
INSTALL THE PROJECTOR Take 2 clamps and 1 safety cord out from the package and mount 2 clamps on the underside of fixture with 4 retainers attached to each clamp. Hang the fixture on the structure and fasten the screws attached to each clamp. (See the WARNING on the underside of the base as shown above) Always ensure that the projector is firmly anchored to avoid vibration and slipping whilst functioning. -
Page 5: Control Connections
CONTROL CONNECTION Connection between controller and projector and between one projector and another must be made with a 2 core-screened cable, with each core having at least a 0.5mm diameter. Connection to and from the projector is via cannon 5 pin (which are included with the projector) or 3 pin XLR plugs and sockets. -
Page 6: Setup Options-Projector Configuration
DMX TERMINATOR CONNECTION Connect a 120 (OHM) resistor across pins 2 and 3 in an XLR plug and insert into the DMX out socket on the last unit in the chain. PIN 2 PIN 3 SETUP OPTIONS-PROJECTOR CONFIGURATION Projector configuration can be set conveniently via press button switch and LCD display. To browse or change its setup options, Press button ENTER more than 3 seconds to unlock panel. -
Page 7: Operation Menu
OPERATION MENU level level level level DMX Address (DMX address:1~496) Reset Are You Sure Standard 17 DMX ChannelMode (Default:Standard) Extended 26 Pan Tilt Swap (Default:OFF) Pan&Tilt Invert (Default:OFF) XLR First XLR Only DMX Mode Wireless Only (Default:XLR First) Wireless First Config Settings WirelessTo XLR Unlink Wireless... - Page 8 Green Blue LED Lamp White Color 1 Color 2 Color 3 Color 4 ZOOM 0-255 Pan Positons 0-255 Tilt Positions 0-255 DMX Operation Preset Memory User ‘s Memory 000-015(No Stroble) CH1 Strobe 016-127(Pulse) 128-255(Strobe) CH2 Red 0-255 Operation Mode CH3 Green 0-255 CH4 Blue 0-255...
-
Page 9: Dmx Protocol
DMX PROTOCOL Standard Extended Functions Descriptions 000-015 NO Strobe Strobe 016-127 Pulse from slow to fast 128-255 Strobe from slow to fast Dimmer 000-255 Linear Dimming from dark to Bright Dimmer in 16 bit 000-255 Dimming in 16 bit precision Color Temp 001-255 Linear Color Temp adjustment from low to high... -
Page 10: Indication Of Led Digital Tube
INDICATION OF LED DIGITAL TUBE LED Indications: DMX Signal OK Green Indication NO DMX Signal Wireless DMX Signal available Blue Indication Not linked to any transmitter Flash Lose link with a transmitter or being linked with one Explanations for logo on top-right of the LCD display: Slave Master DMX512 Mode... -
Page 11: Troubleshooting
TROUBLESHOOTING PROBLEM ACTION Power Cable not connected well Power supply damaged or not connected well, a qualified Technician The projector can’t be started should be required Control board not connected well and a qualified Technician should be required. The lamp can be started, but LED lamps are off LED boards not connected properly, a qualified technician is needed and not controlled A projector’s lamps are on but it doesn’t respond... -
Page 12: Technical Data
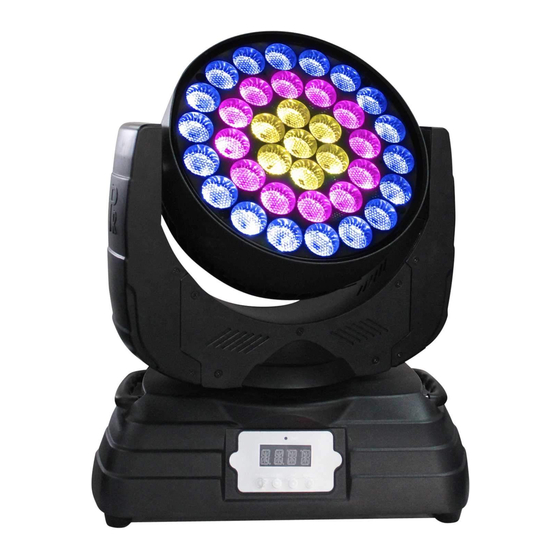
TECHNICAL DATA VOLTAGES: 100V~240V AC,50/60Hz POWER CONSUMPTION: 450W@220V LED: Model CREE (MCE4CT) Power consumption 10W(RGBW) Quantity 37pcs Manufacturers Rated LED Life 50000 Hours COLOURS: RGBW linear color mixing with Macro COLOR TEMPERATURE CORRECTION Linear color temperature correction from 2700K to 10000K DIMMER: 0-100% linearly adjustable STROBE:... - Page 13 DMX512 Channel Value Display Menu Invert Function HOUSING: High temperature ABS +die-casting aluminum, IP20 WORK ENVIRONMENT TEMPERATURE: -20°C~40°C WEIGHT: Net weight :12.85Kg Gross Weight: 16.9 Kg SIZE: LIGHT OUTPUT: 70°LUX PR-8120(WASH) 27°LUX 3500 DISTANCE(m) 2.42 4.84 7.27 9.69 12.11 14.53 27°DIAMETER(m) 70°DIAMETER(m) 6.18...
-
Page 14: Electrical Diagram
14/16... -
Page 15: Component Order Codes
COMPONENT ORDER CODES NAME PART NO. QUANTITY REMARK Wireless Antenna W006503 A40501 360*360 Wireless Receiver W006502 A40901G4 Fuse(VDE Certificate ) 270041037 Magnet Couple Board on the Right(with sockets) 230020113 Belt 290151352 HTD447-3M, 8MM Wide Belt 290151353 HTD342-3M ,8MM Wide First Lens 070070052 Second Lens 070070053... - Page 16 PR LIGHTING LTD. 1582 Xingye Avenue, Nancun Panyu Guangzhou, 511442 China TEL: +86-20-3995 2888 FAX: +86-20-3995 2330 P/N: 320020108A Version: 20140108 16/16...
Need help?
Do you have a question about the PR-8120 and is the answer not in the manual?
Questions and answers