Advertisement
Quick Links
Advertisement

Subscribe to Our Youtube Channel
Related Manuals for Gooxi RMC4136-670-HSE


Summary of Contents for Gooxi RMC4136-670-HSE
- Page 1 RMC4136-670-HSE User’s Manual Version 1.0...
- Page 2 Manual Structure: Contents Foreword Chapter 1 Chassis Overview Chapter 2 Easy Installation Instruction Chapter 3 Chassis Parameters Shenzhen Gooxi Information Security Co., Ltd.
- Page 3 CONTENTS FOREWORD ............................1 Chapter 1 Chassis Overview .......................2 Chapter 2 Easy Installation Instruction ....................9 Chapter 3 Chassis Parameters ......................23 Shenzhen Gooxi Information Security Co., Ltd.
-
Page 4: Foreword
Internet cafe, database server, VOD storage server, HPC server, and so on. The server chassis is different from ordinary desktop chassis that pays more attention to appearance design, as it focuses on the quality and content. Gooxi RMC4236-670-HSE server chassis uses imported first-class SGCC galvanized steel,... -
Page 5: Chapter 1 Chassis Overview
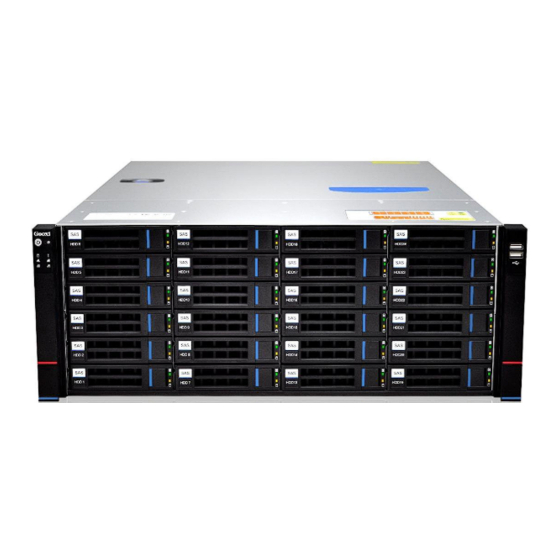
Chapter 1 Chassis Overview Chassis Structure (1) Top cover (2) Rear window (3) Ventilation wall (4) Backplane (5) Hard disk module (6) Base (7) Hard disk box (8) Left-side ear (9) Right-side ear Shenzhen Gooxi Information Security Co., Ltd. - Page 6 16 pieces of #6-32*6mm cross recessed pan head screws are used for fastening the motherboard and power supply. 0~35 SAS - label. One 100 * 120 * 0.045mm PE valve bag. 1.4 Chassis View Front view: Shenzhen Gooxi Information Security Co., Ltd.
- Page 7 The device is on The green LED is on The device is on ② The button is used to reset Reset ③ the server The green LED The system is running ④ flashes normally Shenzhen Gooxi Information Security Co., Ltd.
- Page 8 Hard disk in place Hard disk Flash 4Hz/s activity Hard disk Flash 4Hz/s positioning Hard disk error RAID rebuilt Flash 1Hz/s 1.7 Introduction to Backplane The standard configuration of Gooxi backplane models are RMC4124-BPE-12G and Shenzhen Gooxi Information Security Co., Ltd.
- Page 9 Interface / jumper / slot site slot site 1, 2, 3 3 ATX power input PMC PM8043 Expander chip 4, 5, 6, 7 4 Sockets of 4PIN SFF-8643 12Gb SAS input temperature 8, 9, 10 interface controlled fan Shenzhen Gooxi Information Security Co., Ltd.
- Page 10 1.8 Introduction to the Output Interface of Backplane Hard Disk Front-built 24-bay Expander backplane order: Back-built 12-bay Expander backplane order: 1.9 Internal Expander Backplane Connection Diagram of Chassis Shenzhen Gooxi Information Security Co., Ltd.
- Page 11 Shenzhen Gooxi Information Security Co., Ltd.
-
Page 12: Chapter 2 Easy Installation Instruction
Chapter 2 Easy Installation Instruction 2.1 Introduction to the Disassemble Steps of Gooxi4136 Chassis Upper Cover ⑴ Unscrew the upper cover screws ⑵ Press the button of chassis back cover ⑶ Push the back cover Shenzhen Gooxi Information Security Co., Ltd. - Page 13 2.2 Introduction to the Installation Steps of Gooxi4136 Chassis Fan Module ⑴ Install the shock-proof soft nails into the fan. ⑴ Install four 8038 fans in the fan module brackets respectively. ⑵ Figure of the finished installed fans Shenzhen Gooxi Information Security Co., Ltd.
- Page 14 ⑶ Install the two fan modules in the chassis respectively. ⑷ Figure of the finished installed fan modules. Shenzhen Gooxi Information Security Co., Ltd.
- Page 15 2.3 Introduction to the Insert and Plug Steps of Gooxi4136 Chassis Hard Disk ⑴ Press the button to pull out the hard disk from the hard disk bay. Shenzhen Gooxi Information Security Co., Ltd.
- Page 16 (3) The installed hard disk is shown in the following figure: (4) Insert hard disk to the chassis, and close the switch. As shown in the following figure. Shenzhen Gooxi Information Security Co., Ltd.
- Page 17 (1) Place the power supply case to the chassis according to the hole site, as shown in the figure below. (2) Fix the power supply bracket, and screw on the screws at the position marked in the figure below. Shenzhen Gooxi Information Security Co., Ltd.
- Page 18 (3) Push the whole base (including rear window and power supply case) into the chassis and fix the screws. Shenzhen Gooxi Information Security Co., Ltd.
- Page 19 (4) Figure of the installed power supply case. (5)Insert the hot-swap power modules PSU1 and PSU2 respectively Shenzhen Gooxi Information Security Co., Ltd.
- Page 20 (1) Open the chassis, and place insulation pad based on the correct orientation, based on the hole of motherboard screw, motherboard active studs (8mm height) installed at the corresponding position on the insulation pad. As shown in the figure below: Install Shenzhen Gooxi Information Security Co., Ltd.
- Page 21 Gooxi G1DE-4B dual-socket motherboard corresponding to the base hole sites. (2) After the motherboard active studs (8mm height) installed, place the motherboard into the chassis and fasten motherboard screws at the hole sites. As shown in the figure below: Shenzhen Gooxi Information Security Co., Ltd.
- Page 22 2.5 module. (dummy module) (2) 2.5-inch hot-swap hard drive module is installed and locked to the chassis base with screws, as shown in the figure below: (3) Figure of 2.5-inch hot-swap hard disk module locked screws Shenzhen Gooxi Information Security Co., Ltd.
- Page 23 (4) Push the entire base (including 2.5-inch hard drive module) into the chassis, and fix the base and rear window screw. (5) Figure of finished installation of 2.5-inch hot-swap hard drive module Shenzhen Gooxi Information Security Co., Ltd.
- Page 24 (6) Install two 2.5-inch hard drives on the hard disk case respectively (7) Insert two 2.5-inch hard drives into the rear hard disk module respectively Shenzhen Gooxi Information Security Co., Ltd.
- Page 25 (8) The completed installation figure is as follows: Note: If the Customer selects two optional 2.5-inch hot-swap hard drives, then Gooxi-selected CRPS power must be equipped with. Shenzhen Gooxi Information Security Co., Ltd.
-
Page 26: Chapter 3 Chassis Parameters
885*585*323mm(Depth * Width * Height) Overall gross weight 23kg Safety certification CE, FCC, RoHS Note: This manual is a general instruction of RMC4136-670-HSE series. Specific parameters of each type please refer to the chassis detailed parameters. Shenzhen Gooxi Information Security Co., Ltd.
Need help?
Do you have a question about the RMC4136-670-HSE and is the answer not in the manual?
Questions and answers