Advertisement
Quick Links
Advertisement

Subscribe to Our Youtube Channel
Related Manuals for Glow Bricks Lego Eiffel Tower 10307


Summary of Contents for Glow Bricks Lego Eiffel Tower 10307
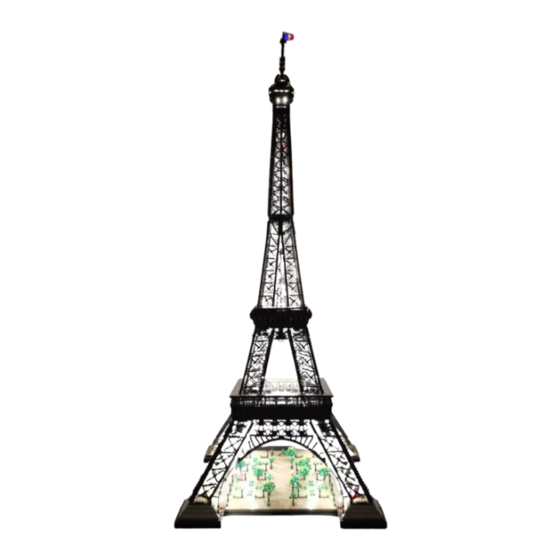
- Page 1 Eiffel Tower ����...
- Page 2 First of all, the lighting sets are separated by 2 bags, we’ll define them as A and B parts Split the tower as shown and part A would be for the the bottom half...
- Page 3 Take the lighting part with USB plug for the most bottom part of the tower To make it looks clear, I would remove the top to do the demonstration But this step is not necessary, you may just assemble the lights rightaway...
- Page 4 Start assembling the lighting plates next to the USB plug, assembling from the bottom would be easier Then cross the lights to the next corner, do the same thing to assemble the lights and leave the connector to the top...
- Page 5 Now cross the remain lights to the other side and do the same thing to assemble them Then restore the whole base if you have removed the top before And remember to leave the connect up to the top The wire connecting the plug is better to be clipped in between the fences as shown Otherwise it might not long enough...
- Page 6 Now it’s turn for the 2 level, same as previous step start assembling from the side with connector attached...
- Page 7 Then assemble the lights on the closers side And move the remain lights to the opposite side to assemble them...
- Page 8 Now you may combine the 1 and 2 level of the tower Remember to connect the plugs in between two levels, then these two level would be light up by this USB cable...
- Page 9 Now for part B, split the upper tower as shown and they would be matched up by the corresponding lighting parts Start from the bottom one, detach the shown layer first...
- Page 10 Start assembling from the lighting plates with connector attached Assemble them at the shown spot Then assemble the lights to the other side Leave the connector out of the tower then restore the outer layer...
- Page 11 For the upper level, it’s very simple just unlock the shown three layers then assemble the lights on it Then restore the layers, put out the connectors for both of the top and bottom ends...
- Page 12 Combine the tower, connect the plugs and hide it inside the tower Detach the top part of the tower before assembling...
- Page 13 Start from removing the clear plates and replace them by the lighting plates Split the part and assemble the 1x4 lighting plates as shown...
- Page 14 Restore the tower and leave the connector out from the middle Restore the layers and assemble the lighting round plates at the shown corners...
- Page 15 Then assemble the remain lighting round plates At last, lift the lighting flag to the top to replace it...
- Page 16 Connect the plug in between two levels then combine them Finally, reunion the whole tower then you can light up by the USB cables...
Need help?
Do you have a question about the Lego Eiffel Tower 10307 and is the answer not in the manual?
Questions and answers