ESAB Aristo U82 Instruction Manual
Hide thumbs
Also See for Aristo U82:
- Instruction manual (96 pages) ,
- Installation instruction (2 pages) ,
- Instruction manual (84 pages)

Subscribe to Our Youtube Channel
Related Manuals for ESAB Aristo U82


Summary of Contents for ESAB Aristo U82
- Page 1 Aristo® Instruction manual Valid for: from program version 1.30A 0460 896 601 US 20190904...
-
Page 3: Table Of Contents
TABLE OF CONTENTS SAFETY ....................... INTRODUCTION ..................Control panel Aristo U82 ............... 2.1.1 Keys and knobs ..................Location....................USB connection..................2.3.1 Program update using USB memory............ 2.3.2 File transfer using USB memory ............First step – choose the language ............ - Page 4 Delay time craterfill active ..............9.3.9 Weld Start Arc Off Delay Time.............. 9.3.10 Display Amperage Estimate ..............MMA defaults ..................Fast mode soft keys ................Double start sources................Panel remote enable ................WF supervision..................0460 896 601 © ESAB AB 2019...
- Page 5 Create your own wire/gas alternative ........... 10.9 Calendar ....................10.10 User accounts..................10.11 Unit information..................ORDERING SPARE PARTS ................ WIRE AND GAS DIMENSIONS................87 ORDERING NUMBERS ..................93 ACCESSORIES ....................94 Rights reserved to alter specifications without notice. 0460 896 601 © ESAB AB 2019...
-
Page 6: Safety
SAFETY NOTE! The unit is tested by ESAB in a general set-up. The responsibility for the safety and function of the specific set-up lies with the integrator. Users of ESAB equipment have the ultimate responsibility for ensuring that anyone who works on or near the equipment observes all the relevant safety precautions. - Page 7 As the person responsible for the equipment, it is your responsibility to obtain information on approved collection stations. For further information contact the nearest ESAB dealer. 0460 896 601 - 7 - © ESAB AB 2019...
-
Page 8: Introduction
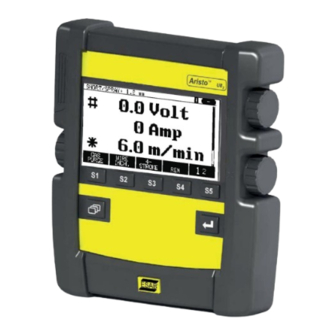
There may be differences in the way the panel functions, depending on the product in which it is installed. Control panel Aristo U82 The control panel is supplied with a mounting bracket with screws and an English instruction manual. A 1.2 m cable is mounted onto the panel. USB memory and an extension cable are available as accessories;... -
Page 9: Keys And Knobs
The stand also acts as a mounting device, allowing you to hang the control panel on the wire feed unit. 0460 896 601 - 9 - © ESAB AB 2019... -
Page 10: Usb Connection
Some USB memories may not work with this equipment. We recommend using USB memories from a reputable supplier. ESAB assumes no responsibility for any damage caused as a consequence of the incorrect use of a USB memory. NOTE! - Page 11 MEASURE MEMORY FAST MODE Press ENTER Position the cursor on the LANGUAGE row. Press ENTER to bring up a list of the languages that are available in the control panel. 0460 896 601 - 11 - © ESAB AB 2019...
-
Page 12: Display
The control panel's cursor is presented as a shaded field around the text, with the selected text turning white. The selection is displayed in the instruction manual in bold text. 0460 896 601 - 12 - © ESAB AB 2019... -
Page 13: Symbols In The Display
"Icon for VRD and error indication" section. Recalled memory position number Select the plus/minus knob marked # to increase or decrease a parameter value. Measured motor current 0460 896 601 - 13 - © ESAB AB 2019... -
Page 14: Icon For Vrd And Error Indication
When setting a numerical value, one of the two plus/minus knobs is used to increase or decrease a given value. A number of values can also be changed using the remote control unit. 0460 896 601 - 14 - © ESAB AB 2019... -
Page 15: Setting With Given Alternatives
Press QUIT to move back to the previous menu or screen. Changes are automatically saved when set. key is called ENTER in this manual. • Press ENTER to execute a selected choice in a menu or a list. 0460 896 601 - 15 - © ESAB AB 2019... -
Page 16: Menus
SHIELDING GAS Ar+8%CO2 WIRE DIAMETER 1.2 mm CONFIGURATION► TOOLS► MEASURE MEMORY FAST MODE 3.1.1 Configuration menu In the CONFIGURATIONmenu you can change language, alter other basic settings, unit of measurement etc. 0460 896 601 - 16 - © ESAB AB 2019... -
Page 17: Tools Menu
Press SET to move to WELD DATA SETTING. In the WELD DATA SETTING menu you can alter various welding parameters. This menu appears differently depending on which welding process is selected. The example shows MIG/MAG welding with short-/sprayarc. 0460 896 601 - 17 - © ESAB AB 2019... -
Page 18: Measure
When pulsing, you can select whether the voltage value is to be displayed as an average value or a peak value. This setting can be adjusted under MIG/MAG defaults; see the "MIG/MAG defaults" section. 0460 896 601 - 18 - © ESAB AB 2019... -
Page 19: Weld Data Memory
These settings are carried out in theCONFIGURATION menu. The number of the selected memory position is displayed in the upper-right corner. For further information, see the “Fast mode soft keys” section. 0460 896 601 - 19 - © ESAB AB 2019... -
Page 20: Mig/Mag Welding
(0.8 - 30.0 m) Inductance 0 - 100% 1 - 12, 17 Control type OFF or ON Synergic mode Start data » Gas pre-flow 0.1 - 25 s 0.1 s 0460 896 601 - 20 - © ESAB AB 2019... - Page 21 The setting range is dependent on the wire feed unit used. The synergic line on delivery: solid wire (Fe ER70S), shielding gas CO2 with wire 1.2 mm. 0-16 A is applicable for 5000 series power sources. 0460 896 601 - 21 - © ESAB AB 2019...
-
Page 22: Mig/Mag Welding With Pulsing
10 - 16 A (0 - 16 A) 100 - 650 A Hot start pulse current Hot start background 4 - 300 A current Hot start pulse frequency 16 - 312 Hz 2 Hz 0460 896 601 - 22 - © ESAB AB 2019... - Page 23 SYNERGIC, the SCT value (ON or OFF) is picked from the synergic line. It is not possible to select spot welding (ON) if gun trigger mode is 4-stroke. Visible depending on setting. 0460 896 601 - 23 - © ESAB AB 2019...
-
Page 24: Mig/Mag Welding With Superpulse, Primary/Secondary
Complete wire feed 0.33 ft./min (0.1 range Hot start voltage -14 to +27 V 100 - 650 A Hot start pulse current Hot start background 4 - 300 A current 0460 896 601 - 24 - © ESAB AB 2019... -
Page 25: Function Explanations For Settings
OFF, the saved Burnback time value is used. When SCT is configured to SYNERGIC, the SCT value (ON or OFF) is picked from the synergic line. Visible depending on setting. Visible depending on connected equipment. Function explanations for settings Voltage 0460 896 601 - 25 - © ESAB AB 2019... - Page 26 The lower of the two current values in the case of pulsed current. Background current is set in the WELD DATA SETTING menu with the synergy function switched off. Only applies to MIG/MAG welding with pulsing. 0460 896 601 - 26 - © ESAB AB 2019...
- Page 27 (arc length) automatically "conforms" to the selected pre-programmed synergic line, which makes it much easier to find the correct welding parameters quickly. The link between wire feed speed and other parameters is known as the synergic line. 0460 896 601 - 27 - © ESAB AB 2019...
- Page 28 For wire and gas combinations, see the "WIRE AND GAS DIMENSIONS" appendix at the end of this manual. It is possible to order different packages of synergic lines, although an authorized ESAB service engineer must install them. To create your own synergic lines, see the "User defined synergic data" section.
- Page 29 11.5 ft./min (3.5 m). The final wire feed speed is also lowered to 11.5 ft./min (3.5 m). The final wire speed remains at 11.5 ft./min (3.5 m) even when the wire feed speed is increased again. 0460 896 601 - 29 - © ESAB AB 2019...
- Page 30 Limits are activated in the WELD DATA SETTING menu. Spot-welding Spot-welding is welding with short repeated occasions at a preset time. Spot welding is used when you want to spot weld thin plates together. 0460 896 601 - 30 - © ESAB AB 2019...
-
Page 31: Qset
The QSet value is set in the Weld Data Setting menu for the MIG/MAG process and SHORT/SPRAY method. 4.2.2 Synergy group It is possible to choose between the three synergy groups for mechanized welding: • STANDARD • ROBOT • 0460 896 601 - 31 - © ESAB AB 2019... -
Page 32: Superpulse
Crater filling is always based on secondary data. When a stop command has been activated during the 0460 896 601 - 32 - © ESAB AB 2019... -
Page 33: Wire And Gas Combinations
When using SuperPulse, there is a considerable load on the wire feed unit. To avoid endangering the functional safety of the wire feed unit, follow the limit values in the following diagram. 0460 896 601 - 33 - © ESAB AB 2019... - Page 34 0.1 s 0.1 s Primary and secondary phase times are 0.1 s + 0.1 s = 0.2 s. The difference in wire feed speed is 41 ft./min (15.0 m) - 29.5 ft./min (11.0 m) = 11.5 ft./min (4 m). 0460 896 601 - 34 - © ESAB AB 2019...
- Page 35 0.15 s 0.15 s Primary and secondary phase times are 0.15 s + 0.15 s = 0.3 s. The difference in wire feed speed is 41 ft./min (12.5 m) - 29.5 ft./min (9.0 m) = 11.5 ft./min (3.5 m). 0460 896 601 - 35 - © ESAB AB 2019...
-
Page 36: Mma Welding
A higher current produces a wider weld pool, with better penetration into the workpiece. The current is set in the Measure screen and Weld Data Setting or Fast Mode menus. 0460 896 601 - 36 - © ESAB AB 2019... - Page 37 In limits, a limit number is selected. For settings, see the “Setting limit editor” and “Measure limit editor” sections in the "TOOLS" chapter. Limits are activated in the Weld Data Setting menu. 0460 896 601 - 37 - © ESAB AB 2019...
-
Page 38: Tig Welding
0 - 25 s 0.1 s Gas post-flow OFF or ON HF automatic start pulse 4 - 500 A HF start pulse Setting limits 0 - 50 Measure limits 0 - 50 0460 896 601 - 38 - © ESAB AB 2019... -
Page 39: Tig Welding With Pulsing
Function explanations for settings HF start The HF start function strikes the arc, using a spark from the electrode to the workpiece, as the electrode is brought closer to the workpiece. 0460 896 601 - 39 - © ESAB AB 2019... - Page 40 Gas postflow follows, if it is in operation. 2-stroke is activated in the MAIN MENU » TRIGGER MODE or in the measure screen. 0460 896 601 - 40 - © ESAB AB 2019...
- Page 41 Time for background current, which, along with the time for pulse current, gives the pulse period. Background time is set in the WELD DATA SETTING menu. Only applies to TIG welding with pulsing. 0460 896 601 - 41 - © ESAB AB 2019...
- Page 42 This function is used to achieve a stable arc rapidly. Spot-welding Spot-welding is welding with short repeated occasions at a preset time. Spot welding is used when you want to spot weld thin plates together. 0460 896 601 - 42 - © ESAB AB 2019...
- Page 43 Gas purging takes place for as long as the button is held depressed and takes place without voltage or wire feed starting. Gas purging is activated in the MEASURE screen. 0460 896 601 - 43 - © ESAB AB 2019...
-
Page 44: Arc Air Gouging
A higher voltage produces a wider weld pool, with better penetration into the workpiece. The voltage is set in the Measure screen and Weld Data Setting or Fast Mode menus. 0460 896 601 - 44 - © ESAB AB 2019... -
Page 45: Memory Management
We are now going to store a set of weld data. It will be given memory position 5. Press STORE. Position 1 is displayed. Turn one of the setting knobs until you reach position 5. PressSTORE. 0460 896 601 - 45 - © ESAB AB 2019... -
Page 46: Recall
Select the row using one of the knobs. PressRECALL. WELD DATA MEMORY 5 - (TIG) TIG HF-START 100 AMP STORE RECALL DELETE QUIT Press YES to confirm that you want to recall data set number 5. 0460 896 601 - 46 - © ESAB AB 2019... -
Page 47: Delete
Select the data set. Press DELETE. WELD DATA MEMORY 5 - (TIG) TIG HF-START 100 AMP STORE RECALL DELETE QUIT Press YES to confirm that you want to delete. 0460 896 601 - 47 - © ESAB AB 2019... -
Page 48: Copy
We are now going to copy the content of memory position 5 to position 50. Use one of the knobs to step to the selected memory position, in this case position 50. Press YES. 0460 896 601 - 48 - © ESAB AB 2019... -
Page 49: Edit
TIG HF-START 100 AMP QUIT Press SET to move toWeld data setting. Select the values you want to edit and adjust with the plus/minus knobs. End with QUIT. 0460 896 601 - 49 - © ESAB AB 2019... -
Page 50: Name
Press ENTER. Enter a complete character string, with a maximum of 40 characters. • Press DONE to store. The alternative you have named can now be seen in the list. 0460 896 601 - 50 - © ESAB AB 2019... - Page 51 If the requested schedule has a description, this is shown in the MEMORY,MEASURE and REMOTE menu screens instead of the welding data parameters, which are otherwise displayed. 0460 896 601 - 51 - © ESAB AB 2019...
-
Page 52: Configuration
If no lock code is stored and you try to activate the code lock, the keyboard is displayed for entering a new lock code. 0460 896 601 - 52 - © ESAB AB 2019... -
Page 53: Specify/Edit Lock Code
After connection, activate the remote control unit in the MEASURE screen with the soft key REMOTE. 9.2.1 Forget override Place the cursor on the REMOTE CONTROLS row. Press ENTER to bring up a list of alternatives. 0460 896 601 - 53 - © ESAB AB 2019... -
Page 54: Configuration For Digital Remote Control Unit
If you position the cursor on the ANALOG 1 row and press ENTER, a list appears. NONE WIRE SPEED If you position the cursor on the ANALOG 1 row and press ENTER, a list appears. 0460 896 601 - 54 - © ESAB AB 2019... -
Page 55: Scale On Inputs
Volt. measure in pulsed • AVC feeder • Release pulse • Voltage regulator flat static • Delay time craterfill active • Weld start arc off delay time • Display Amperage Estimate 0460 896 601 - 55 - © ESAB AB 2019... -
Page 56: Gun Trigger Mode (2-Stroke/4-Stroke)
4-stroke is activated in the Measure screen or Configuration menu or with a soft key in the Measure screen. It is not possible to select gun trigger mode (4-stroke), if spot welding is ARC ON. 0460 896 601 - 56 - © ESAB AB 2019... -
Page 57: 4-Stroke Configuration
D = Crater filling Press the trigger switch (3); crater filling commences and expires. If the trigger switch is released (4) within the crater filling time (crater filling time shortened), welding is interrupted. 0460 896 601 - 57 - © ESAB AB 2019... -
Page 58: Soft Key Configuration
The panel has five soft keys. By pressing the "1 2"(2ND FUNCT) key you obtain a further five soft keys. When you allocate functions to these keys, they are numbered from the left as follows: 0460 896 601 - 58 - © ESAB AB 2019... -
Page 59: Voltage Measurement In Pulsing
Weld Start Arc Off Delay Time This delay time defines a time period that starts at weld start and ends at (weld start + WELD START ARC OFF DELAY TIME). 0460 896 601 - 59 - © ESAB AB 2019... -
Page 60: Display Amperage Estimate
Estimated amperage is never presented when welding using ROBOT or SAT synergy groups, even though Display Amperage Estimate is set to ARC ON. MMA defaults MAIN MENU » CONFIGURATION » STICK DEFAULTS Droplet welding 0460 896 601 - 60 - © ESAB AB 2019... -
Page 61: Fast Mode Soft Keys
WF SUPERVISION shall normally be activated (ARC ON). This function is used for customer-specific solutions. The function checks if contact between the WDU and the wire feeder is lost, and sets an error in this case. 0460 896 601 - 61 - © ESAB AB 2019... -
Page 62: Auto Save Mode
9 CONFIGURATION NOTE! When using a non-ESAB wire feeder with an ESAB power source, the supervision needs to be deactivated. Auto save mode MAIN MENU » CONFIGURATION » MEMORY AUTO SAVE Default set to OFF. The weld data sets are saved in memory positions in the weld data memory. - Page 63 MIG/MAG SHORT/SPRAY SYNERGIC MODE ON Fe ER70S, CO2, 1.2 mm + 3.5 VOLT, 7.6M/MIN QUIT Choice of weld data from memory Position the cursor on the ADD/DELETE WELD DATA row. 0460 896 601 - 63 - © ESAB AB 2019...
-
Page 64: Multiple Wire Feeders
MULTIPLE WIRE FEEDERS CURRENT ID NUMBER SELECT A NEW ID NUMBER CONNECTED WIRE FEEDERS ID: QUIT On the top row, the figure for the ID number changes to the desired number. 0460 896 601 - 64 - © ESAB AB 2019... -
Page 65: Weld Data Memory Concept For M1 10P Remote Controls
Maximum, minimum and average current during welding • Maximum, minimum and average voltage during welding • Maximum, minimum and average output during welding Read more about the quality function in the "TOOLS, Quality functions" section. 0460 896 601 - 65 - © ESAB AB 2019... -
Page 66: Store Quality Function Log
When the interval has been passed, fault code 54 is displayed in the error log. Reset by pressing the RESET soft key. When TOTAL RUNNING TIME LIMIT is selected instead of the number of starts, an authorised ESAB service technician is contacted. SERVICE MAINTENANCE INTERVAL... -
Page 67: Register Key
For access to these functions, you must contact ESAB. When you indicate the serial number of the unit you will get a key code, which is to be entered in the menu REGISTER KEY. -
Page 68: Tools
Error time • Unit in which the error occurred • The error code • Additional data depending on the error code, for example the unit that created the error code 0460 896 601 - 68 - © ESAB AB 2019... -
Page 69: Error Code Descriptions
The power unit is stopped, and cannot be restarted. Action: Turn off the power supply to reset the unit. If the error persists, send for a service technician. 0460 896 601 - 69 - © ESAB AB 2019... - Page 70 If it is not replaced, the entire contents of the battery-backed memory will be lost at power off. Action: Contact an authorized ESAB service technician. Power supply 2 Error code from external source Action: Check manual for connected units.
- Page 71 Action: Review the handling of welding programs during welding. If the error persists, send for a service technician. No more wire detected Out of wire / Hardware trap error Error code from external source Action: Check manual for connected units. 0460 896 601 - 71 - © ESAB AB 2019...
- Page 72 Power measurement value limit passed The power measurement values have exceeded their limits. Action: Check that the power limit is correctly set as well as the quality of the joint. 0460 896 601 - 72 - © ESAB AB 2019...
-
Page 73: Export/Import
Insert the USB memory. See the "USB connection" section for a description of how to insert the USB memory. Select the row with the information to transfer. PressEXPORT or IMPORT, depending on whether the information is to be exported or imported. 0460 896 601 - 73 - © ESAB AB 2019... -
Page 74: File Manager
If you have selected a file, the options RENAME, COPY or PASTE will be added if you have previously copied a file. Select a folder or file and press ALT. 0460 896 601 - 74 - © ESAB AB 2019... -
Page 75: Deleting A File/Folder
Select the character/function that is to be used and press ENTER. 10.3.3 Creating new folder Select where you want to put the new folder, then press ALT. Select NEW FOLDER and press ENTER. 0460 896 601 - 75 - © ESAB AB 2019... -
Page 76: Copying And Pasting Files
There are 50 storage points. Select the row for an empty storage point and press ENTER. Select process (MIG/MAG, MMA, TIG) and press ENTER. For MIG/MAG, the maximum and minimum values for voltage and wire feed speed can be selected. 0460 896 601 - 76 - © ESAB AB 2019... -
Page 77: Measure Limit Editor
• current: time (0-10 s), min., max., min. average, max. average • Output: min., max., min. average, max. average • Wire feed unit current: min., max., min. average, max. average 0460 896 601 - 77 - © ESAB AB 2019... -
Page 78: Production Statistics
However, material consumption and time are included in the total material consumption and time. 0460 896 601 - 78 - © ESAB AB 2019... -
Page 79: Quality Functions
Welding must last for longer than one second to be registered. The most recently noted weld appears in the display, although it is also possible to browse between other noted welds. All logs are deleted when pressing RESET. 0460 896 601 - 79 - © ESAB AB 2019... -
Page 80: User-Defined Synergic Data
Short-/sprayarc • Bring up the main menu and select the MIG method SHORT/SPRAY. • Key in the desired values for voltage and wire feed speed for the first coordinate. 0460 896 601 - 80 - © ESAB AB 2019... -
Page 81: Specify Valid Wire/Gas Combination
SHIELDING GAS and press ENTER. MAKE CUSTOMIZED SYNERGIC LINES » WIRE Fe ER70S Ss ER316LSi Duplex ER2209 AIMg ER5356 AISi ER4043 Fe E70 MCW Select an alternative displayed in the list, then press ENTER. 0460 896 601 - 81 - © ESAB AB 2019... -
Page 82: Create Your Own Wire/Gas Alternative
ENTER, you gain access to a keyboard that enables you to enter your own alternatives. Select the row and press ENTER Ar15%CO2 Ar8%O2 Ar30%He Ar30%He2%H2 Ar30%HeO5%CO2 The keyboard of the control panel is used as follows: 0460 896 601 - 82 - © ESAB AB 2019... -
Page 83: Calendar
TIME ZONE. Set the correct value using one of the right-hand knobs. Press SET. DATE & TIME YEAR 2018 MONTH HOUR MINUTES SECONDS UTC TIME ZONE +0.0 20180207 12:20:50 QUIT 10.10 User accounts MAIN MENU » TOOLS » USER ACCOUNTS 0460 896 601 - 83 - © ESAB AB 2019... - Page 84 When USER ACCOUNTS is ARC ON, this menu is visible. It makes it possible to change user. Enter a password for a user and log in or choose QUIT to return to the TOOLSmenu. 0460 896 601 - 84 - © ESAB AB 2019...
-
Page 85: Unit Information
2 = power source 3 = wire feed 8 = control panel • Software Version UNIT INFORMATION Machine ID Node ID Software Version 1.00A 2.00A 1.18A WELD DATA UNIT QUIT 0460 896 601 - 85 - © ESAB AB 2019... -
Page 86: Ordering Spare Parts
Spare parts and wear parts can be ordered through your nearest ESAB dealer, see the back cover of this document. When ordering, please state product type, serial number, designation and spare part number in accordance with the spare parts list. -
Page 87: Wire And Gas Dimensions
1.0 1.2 1.4* 1.6* (Fe E70 MCW) 1.0 1.2 1.4* 1.6* Ar + 8% CO Rutile flux cored wire 1.2 1.4* 1.6* (Fe E70 RFCW) Ar + 18% CO 1.2 1.4* 1.6* 0460 896 601 - 87 - © ESAB AB 2019... - Page 88 Almg ER5087 1.0 1.2 1.6 Copper and aluminium wire 1.0 1.2 (ERCuAl-A1) Ar + 1% O 1.0 1.2 Rutile flux cored wire (Fe RCW Dual-S) *) Only for power sources above 400 V 0460 896 601 - 88 - © ESAB AB 2019...
- Page 89 (AlMg ER5183) Silicon-alloyed aluminium wire 0.9 1.0 1.2 1.6* (AlSi ER4043) Ar + 50% He 0.9 1.0 1.2 1.6* Ar + 30% He 0.9 1.0 1.2 Silicon-alloyed aluminium wire 1.2 1.6 (AlSi ER4047) 0460 896 601 - 89 - © ESAB AB 2019...
- Page 90 Wire diameter (mm) AlMg ER5356 1.2, 1.6 AlSi ER4043 1.2, 1.6 ERCuSi-A 0.8, 1.0 ERCuAl-A1 ERCuSi-A Ar + 1% CO 0.8, 1.0 Fe ER70S Ar + 18% CO 0.8, 0.9, 1.0, 1.2 0460 896 601 - 90 - © ESAB AB 2019...
- Page 91 17 - 29 Fe ER70S Ar + 8% CO 19 - 29 Fe ER70S Ar + 18% CO 19 - 29 Ss 307 Ar + 2% CO 20 - 26 0460 896 601 - 91 - © ESAB AB 2019...
- Page 92 Ar + 2% CO 14.2 - 27.5 Ss ER308LSi Ar + 2% CO 15-27.5 Ss ER308LSi Ar + 2% CO 16 - 28 Ss ER308LSi Ar + 2% CO 18 - 29.5 0460 896 601 - 92 - © ESAB AB 2019...
-
Page 93: Ordering Numbers
0460 820 883 Control panel Aristo® U8 Plus I/O 255* 0459 839 037 Spare parts list * For functional differences, see the "Functional differences" section. Technical documentation is available on the Internet at: www.esab.com 0460 896 601 - 93 - © ESAB AB 2019... -
Page 94: Accessories
Adapter set 230 V AC / 12 V DC, for control box (for training with the control box disconnected from the machine). 0462 062 001 USB Memory stick 0349 312 604 Display protection U8 0460 896 601 - 94 - © ESAB AB 2019... - Page 95 ACCESSORIES 0460 896 601 - 95 - © ESAB AB 2019...
- Page 96 For contact information visit esab.com ESAB AB, Lindholmsallén 9, Box 8004, 402 77 Gothenburg, Sweden, Phone +46 (0) 31 50 90 00 http://manuals.esab.com...
Need help?
Do you have a question about the Aristo U82 and is the answer not in the manual?
Questions and answers